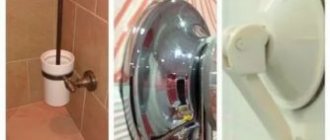
During use, scratches may appear on the reflective smooth surface. Such defects spoil the entire impression of the mirror and require elimination.
We will tell you in the article whether and how to remove scratches from a mirror.
Is it possible to remove the damage?
At its core, a mirror is a smooth surface whose main purpose is to reflect light . Despite the strength and thickness of the material, the mirror is fragile. If handled carelessly, scratches can easily remain on the surface.
To carry out restoration work, it is better to remove the mirror and place it on a horizontal surface. For convenience, it is better to remove the frame.
You can eliminate minor damage and add shine at home using folk or special means. But you won’t be able to deal with serious damage on your own.
Home Recipes
You can smooth out microcracks and make them less noticeable using simple home recipes. To do this, you will need simple tools that you already have in your household.
Silicone sealant
To carry out the work you will need:
- glass cleaner;
- silicone colorless sealant;
- toothpick;
- stationery knife;
- lint-free cloth or rag.
Procedure:
- Apply glass and mirror cleaner to the surface of the mirror.
- Rub the liquid in with a lint-free cloth until the surface is clean and dry.
- Using a toothpick, carefully apply the sealant precisely along the cracks.
- Let the product dry.
- Carefully remove any remaining sealant protruding onto the surface with a knife.
- Treat with glass cleaner.
Walnuts
Walnut kernels will help camouflage the defect. For treatment, you can use a piece of the nucleolus to rub the area with the crack.
But the best result is achieved when the kernels are ground into flour . Enough to work a small quantity. Just a little olive oil is added to the resulting powder so that the composition becomes paste-like. And the resulting paste is rubbed into the mirror.
Vegetable oil
To rub a mirror with cracks, any available vegetable oil can be used. Just a few drops are enough to treat a scratch.
The oil must be rubbed into the affected surface using a soft, lint-free cloth.
Vinegar and mustard
To work, you will need table vinegar and mustard powder. Both ingredients are taken in equal proportions and rubbed into the mirror surface. Polishing completes the treatment.
Toothpaste
To polish the mirror, white toothpaste without colored inclusions can be used. A small amount of paste is squeezed out of the tube onto a sponge and rubbed into the surface that requires restoration. The rubbing movements should be clockwise.
Nail polish
Use clear nail polish to disguise scratches. To hide the defect, varnish must be carefully applied to the damage and rubbed in.
Foil
If the surface damage has affected the back of the glass, a different approach will be needed to repair the defect and restore the reflectivity of the mirror.
For restoration work, ordinary foil can be used . When preparing the surface for work, it must be cleaned, and the mirror itself must be removed from the frame and free access to the back side.
You will need a small piece of foil - a little larger than the scratch itself, which requires masking. The mirror is turned over with its back side up and wiped. Using tape, secure the foil to the area where there is a scratch on the front side. The piece of foil must be absolutely even.
How to restore a mirror yourself
Experts note that any mirror must be carefully looked after, then its restoration will not be a problem for you. In a high-humidity room like a bathroom, you should purchase special reflective glass designed for use in such conditions so that it does not become stained over time. You can make amalgam more wear-resistant yourself using folk recipes. To do this, it is treated with melted wax and turpentine in a ratio of 1:2. In addition, you need to properly clean the mirror surface so that it does not lose its attractive appearance:
- remove dust with a soft, dry cloth;
- Having gotten rid of dust, the mirror is treated with a special glass cleaner;
- At the end, the product is polished with newspapers, removing stains.
If, despite observing all the conditions, small defects still appear, try to eliminate them using available means. The choice of materials and working methods will depend on the specific situation - large areas are restored with foil and glue, and for small scratches, silicone sealant is used. To carry out the procedure, you should prepare a workplace and the necessary tools in advance.
Required materials and tools
To carry out repairs you may need:
- special glue designed for glass and metal;
- brush with stiff bristles;
- foam sponge;
- soft napkins or cloth;
- glass cleaner;
- composition for degreasing surfaces (gasoline or alcohol-containing product);
- foil;
- scissors;
- brush;
- silicone sealant.
REFERENCE! Small restorations can be easily done at home. Even if it is not possible to completely eliminate minor damage, they will at least become less noticeable.
Instructions for mirror restoration
When the workplace and all the necessary materials are ready, begin the repair. If there is visible damage to the amalgam, first you need to carefully remove the product from the frame and place it on a table, which is best covered with a soft cloth. Next, you should adhere to a certain algorithm of actions:
- clean the damaged area with a brush with stiff bristles;
- Next, you need to wash the mirror with glass cleaner and dry everything;
- degrease the surface with an alcohol-containing product and wipe everything thoroughly, let the product dry again;
- cut out a piece of foil of the required size with scissors (it should be slightly larger than the damaged area);
- we apply special glue, apply the cut-out foil to the mirror with the glossy side down and press it properly (some craftsmen use transparent tape instead of glue);
- carefully level the foil with a clean, dry cloth or napkins and wipe off excess glue;
- When the glue has completely dried after a few hours, the restored mirror can be inserted into the frame.
ATTENTION! If the described method does not help remove visible defects, this may mean that the damaged area is too large. In this case, it is unlikely that anything will be fixed.
If desired, the gluing area can be coated with a thin layer of colorless varnish for greater reliability, but this is not necessary.
How to restore a mirror if there are scratches and chips
A sealant is used to repair small scratches and chips on fragile amalgam. To do this, we also first clean and degrease the damaged area, wipe it dry with soft napkins. Next, carefully fill the existing cracks with silicone; for convenience, you can use simple toothpicks. Then let the product dry well and remove all excess.
Special means
To perform work to improve the condition of the mirror surface, special preparations can be used.
Paste GOI
GOI paste is a special composition for grinding work . The main component is chromium oxide. The paste is used very widely - not only for caring for mirror surfaces, but also for polishing:
- glass,
- ceramics,
- metal alloys, etc.
How to use:
- grind the substance into powder;
- using a cotton swab, apply the drug to the damaged areas in a thin layer;
- rub and polish each area for at least a quarter of an hour.
Polishing with GOI paste must last for 15 minutes for there to be a visible effect; the exposure time cannot be shortened. The price for 20 grams is on average 50 rubles.
Cerium oxide
Cerium oxide is a chemical compound that can be purchased in powder form . This substance is used in ceramics, for processing jewelry stones, removing scratches on mirrors, etc. The product is available in packaging of various weights.
To repair a mirror and eliminate defects, cerium oxide is diluted to form a paste. The surface requiring treatment is moistened and the prepared composition is applied.
Periodically moistening the surface, polish with a felt cloth. Adding water helps prevent premature hardening of the mass. If necessary, add “gruel” and continue rubbing. Price for 0.1 kg is about 500 rubles.
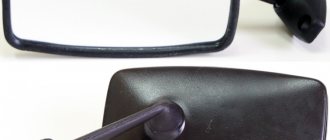
How to glue a rear view mirror
Having considered the basic requirements for an adhesive substance for a rear-view mirror, we can conclude that epoxy resin will best cope with the task of attaching the element to the windshield. In car stores you can find many options for epoxy resin based adhesive; we will highlight the most successful options for attaching a rear view mirror:
- DoneDeal, variations of DD6587 and DD6588. Perhaps the most budget-friendly and common option for attaching a rear-view mirror to the windshield. These sets differ from each other only in the number of components; in the DD6587 the buyer receives one set of activator and adhesive, and in the DD6588 version two such sets. Each bottle is 3 ml;
- ZM 08752. Another inexpensive set for attaching a mirror, consisting of an adhesive and an activator;
- Permatex 81840. A set in the mid-price category, which is interesting because the activator does not come in a separate bottle, but applied to a napkin. That is, the windshield is wiped with a napkin, then the adhesive is applied to the mirror mount, and it is attached;
- Loctite 319. Quite expensive, but high-quality kit for mounting a rear-view mirror on the windshield. The kit includes a special gasket on which the activator is applied. When attached, it becomes a layer between the glass itself and the mirror, which allows it to compensate for the thermal effects on the adhesive base.
It is important to remember that before gluing the rear view mirror to the windshield, be sure to degrease the surface. After completing the work, it is advisable not to use the car for 10-15 hours so that the adhesive base “sets” properly.
( 422 votes, average: 4.64 out of 5)
Tips for novice car enthusiasts: how not to ruin your new car
Engine oil starvation: causes and consequences
Related Posts
If deep damage
More difficult work awaits if the scratches on the glass are deep. Simple rubbing in this case will be ineffective. A recipe using GOI paste and epoxy glue will come to the rescue.
Work order:
- Clean the mirror using glass cleaner. This will degrease the surface and prepare it for further processing.
- Dry the mirror.
- Fill the cracks with epoxy glue. When filling cracks, the epoxy should be distributed evenly, without air bubbles or unfilled cavities.
- Excess filler should be removed with a cotton swab or carefully cut off with a utility knife.
- Leave for 4 days.
- Polish the surface using GOI paste.
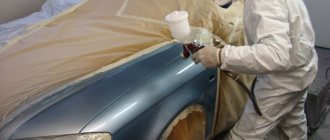
If the surface damage is very serious and you cannot fix it yourself, you can contact a specialized workshop.
Restoration process
To repair a mirror you will need to stock up on the following:
- Transparent adhesive for metal and glass.
- Brush.
- Hard brush.
- Napkins.
- Alcohol-containing degreasing agent.
- Scissors.
- Foam sponge.
- Glass cleaner.
The sequence of actions for restoring a mirror at home is as follows:
- When starting to restore a mirror, first of all, carefully remove it from the frame and inspect the areas of damage. From above, lightly clean this area with a stiff brush to remove amalgam particles and any existing debris.
- Once the surface is thoroughly cleaned, wash it with glass cleaner and wipe dry.
- Now you need to degrease the cleaned and washed surface. To do this, moisten a sponge with any alcohol-containing product, wipe the surface with it and leave to dry.
- Let's move on to gluing. Cut a piece of foil that is larger in size than the damaged area. Apply a thin layer to the mirror at the damage site with a slight overlap around it. Place the cut out piece of foil on top with the glossy side down and press firmly.
- Very carefully level the foil with a cloth, while trying to remove excess glue.
Important! All movements should go from the center to the edges. And all excess glue is removed using a foam sponge.
- Once the foil has been glued and aligned and any excess glue has been removed, leave the mirror to dry for several hours.
- For reliability, the gluing area can be covered with a layer of colorless varnish, but this procedure is not mandatory.
- Finally, place the mirror back into the frame.
Ready!
Important! If you were unable to hide defects using this method, then this means... that their area is too large. In such a situation, there is hardly anything that can be done, and there is nothing left to do but simply buy a new product.
Prevention measures
Caring for a mirror surface should include the following points:
Carrying out regular cleaning using special products or homemade compounds;- exclude exposure to abrasive or other surfaces, including the hard sides of sponges;
- It is advisable to have complex damage and chips repaired by a specialist;
- mirrors do not tolerate constant moisture well, so mirror surfaces that fog up in the bathroom must be wiped dry regularly;
- Rubbing the mirror with shaving foam will help prevent the mirror from fogging.
Any dirt that gets on the mirror must be removed immediately.