Removing the fuel rail (step by step)
Fuel rail
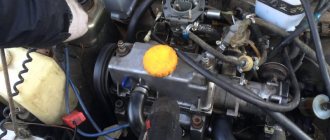
Car injectors on the VAZ 2109 are located on the fuel rail. There are four of them here, this is due to the fact that a separate nozzle sprays fuel onto a separate cylinder. And since the nine has four cylinders, we can conclude that the number of injectors is logical.
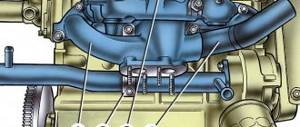
The fuel rail is the bar where the injectors are installed. It is fixed to the inlet pipe using bolts. To the left of it is a fuel pressure control fitting. It is worth noting that removing the fuel rail is the most problematic step in cleaning or replacing injectors.
Removing the fuel rail
- First of all, you need to remove the fuel rail.
- Then place it on a flat surface, and then disconnect the wiring harness from the damaged injector. To dismantle it, compress the spring mounting bracket and disconnect the block.
- Using a screwdriver, slide the metal retainer toward the fuel rail. It is designed to fix the fuel sprayer. For some reason, many car enthusiasts completely remove the lock. However, there is no need for this. Just move it a little to the side.
- Take the nozzle in your hand and swing it to the sides. This way it will come out of the fuel rail without any problems.
Disconnect the wire block.
To remove the fuel rail you need:
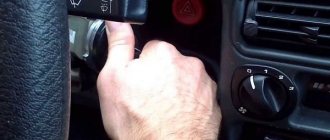
- Disconnect the negative terminal from the battery.
- Relieve pressure in the fuel line.
- Remove the air filter and disconnect the intake pipe hose. Then we dismantle the vacuum hose of the pressure regulator.
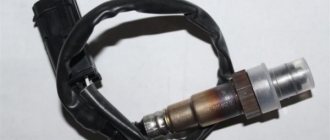
- Disconnect the supply wire block from the XX sensor. To do this, simply press out the plastic pad retainer.
- Disconnect the block with the wires that come from the injectors.
- Disconnect the supply and drain hoses from the fuel pipes.
- We unscrew the mounting bolts that secure the fuel rail to the intake pipe.
- Remove the holder holding the fuel pipes. To do this, unscrew one mounting screw.
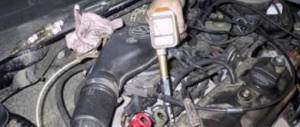
- Remove the fuel rail by sliding it along the axis of the fuel nozzles.
- We perform assembly in reverse order.
- It is worth noting that under the fuel rail mounting bolts there are washers that must be returned to their place during reassembly or replaced with new ones.
How to Clean Injectors on a VAZ 21099 Injector
How to remove and clean the injectors on a VAZ 2109 (injector)?
It is often necessary to remove injectors on a VAZ 2109 from an injection machine. Of course, contact the car service where our client stayed to do it for your money, or take up the craft, gaining invaluable experience and saving an impressive part of your own budget. Make a choice for yourself.
Appearance of devices
Residence
You can't start annotating to remove attachments without first talking about the location of the object you want.
VAZ 2109 car injectors are installed on fuel. They are all 4. This is justified by the fact that any injector sprays fuel onto one very large cylinder. Since nine have four cylinders, we conclude that the number of nozzles is logical.
When Changes Are Needed
There are several signs that indicate the need to remove and check the condition of the fuel injectors. Then a decision is made to clean or replace parts.
Look at the behavior of your car and the engine itself. They will tell you if there is something wrong with the attachments. This can be done as follows:
- The engine produces the least power, the previous acceleration efficiency is not felt;
- In case of poor engine performance or lack of energy, fuel consumption increases in any case;
- Bad start. not a rare sign of nozzle failure;
- If the engine won't idle, sprayers are usually needed;
- The amount of toxic components increases in exhaust gases;
- The idle speed increases.
READ Do-It-Yourself Modification of the VAZ 2110
Delete and change
Now we will directly tell you how to properly remove and replace old injectors that have lost their suitability for new units.
The process for removing all 4 injectors is the same, so there will be no difference in the process.
Perhaps the more problematic step in changing the injector cleaning process is removing the fuel rail. Therefore, we will separately explain how to remove such a node.
Fuel rail
Fuel rail. This is the rod where the injectors are needed. It is secured with a pair of bolts on the intake pipe. To the left of the ramp is the fuel pressure control fitting. To remove it you need to:
Real injector cleaning!
Do you want to know in detail what to remove?
fuel
injection
nozzles VAZ
2108-
VAZ 21099
? Our client remains.
Cleaning nozzles VAZ 2108 21099 2109
cleaning injector
2108
21099 2109 ! The installation is not cleaned Vase injector
2108
21099
2109! In this case, the video is me.
- Disconnect the negative terminal from the battery. No short circuits are required;
- Turn off fuel pressure;
- Remove the air filter and disconnect the intake hose, then remove the vacuum regulator hose;
- Disconnect the power cable from the idle speed sensor. To do this, the lock of the plastic lining is simply squeezed out;
- Disconnect the block from the wires coming from the injectors;
- Disconnect the drains and hoses from the fuel pipes;
- Remove the pair of mounting bolts that secure the fuel rail to the intake pipe;
- The fuel pipes are held in place by a special holder that requires the removal of one mounting screw;
- Remove the fuel rail by pressing it along the axis of the fuel injector. This will leave their seating position on the intake pipe;
- Reverse assembly.
READ How to Remove Europanel VAZ 2112
Removing a ramp
Please note that under the fuel rail bolts there are washers that must be replaced during reassembly, as it is called, exchange for similar new ones.
- Start by removing the fuel rail from your vehicle.
- The ramp is then laid on a flat surface, after which the mounting block is detached from the curved attachment. To remove it, you need to compress the spring retaining bracket and then detach the unit.
- Using a screwdriver, slide the iron lock towards the fuel rail. Used to repair fuel injector. Maybe they're lifting the block completely on something. It is not necessary. Just push it slightly to the side.
- Take the nozzle in your hand and spread it slightly. Therefore, she should get off the fuel rail without any hassle.
- Be sure to check the current condition of the seals on the fuel injector body.
- The injector injector O-ring is checked in the same way. To do this, remove both rings using a screwdriver and see if they are worn.
- If there is a nozzle port, the seals should not be replaced when replacing the sprayers themselves if they are in good working order. Only if you intend to reuse them, be sure to lubricate the rings before installation. Motor, obviously.
- When the nozzle is removed and the rings are replaced (the old ones remain the same), of course, begin installing the new devices. The procedure is performed in reverse order.
- Insert the nozzle into the fuel hole and secure it with the latch.
- Rotate the electrical wiring block into place, install the fuel rail in its place.
READ How to Open the Trunk Using a Starline A61 Key Fob
Disconnect the wire block
Rarely, when changing injectors, this is the only and optimal way to restore the performance of fuel injectors. Try cleaning them. It's not a complicated business, but the savings are impressive. .
cleaning
Help spray
Source
Signs of malfunction of VAZ 2109 fuel injectors
There are a number of signs that indicate the need to at least remove and inspect the fuel nozzles. After this, a decision is made to replace or clean the components. Pay attention to how the vehicle and specifically the power unit behaves. They will point you to problems with the injectors. This can manifest itself like this:
- The motor produces less power, and the previous acceleration efficiency is not felt.
- With poor engine performance and lack of power, fuel consumption continues to increase.
- Poor starting is not a rare symptom of injector failure.
- If the power unit does not hold idle speed well, this may also indicate problems with the injectors.
- Increased amount of toxic elements in exhaust gases.
- Increasing idle speed.
The main causes of injector contamination.
The main, but far from the only reason for clogging of injection engine nozzles, is undoubtedly the quality of the fuel. In Western Europe, almost no one cleans injectors; manufacturers only recommend changing them after 120-150 thousand kilometers.
But the injectors of cars that are operated in the territory of the former USSR have to be cleaned every 15 - 30 thousand kilometers. There is only one reason for the poor quality of fuel - the desire to receive excess profits from the sale of fuel and lubricants. As a result:
- Insufficient capacity for the production of A-92 and A-95 gasoline, but A-98 at domestic gas stations is in most cases a myth and a cunning marketing ploy - nothing more;
- Violation of fuel storage conditions. Often, the same tanks are used to store gasoline A-76, A-80, A-92, A-95, A-98, in which various tar deposits accumulate over the years of operation, dissolved by fuel with a higher octane number. As a result, tar deposits are washed into the tanks of our cars, leading to failure of the fuel system;
- The use of manganese-containing additives in the production of fuel, which increase anti-knock resistance. These are so-called anti-knock agents, which allow you to turn low-octane gasoline into high-octane gasoline with a slight movement of the hand. For example, an A-80 can “by magic” become an A-95, and there will be no detonation and its consequences as such. The additives, in turn, cause increased wear of the spark plugs and accelerated contamination of the fuel filter with fine brick-colored particles.
All these reasons lead to the need to replace spark plugs, clean the injector, and in some cases even overhaul the engine.
Welcome! Do you want to know how to check whether a fuel injector is working or not? Then this is the place for you. In the article, the injector will be checked on injection vehicles of the Samara family.
Summary:
When to check the performance of injectors?
They are subject to verification if:
- You've started to notice more toxic substances coming out of your car's tailpipe;
- the engine's idle speed is disrupted, it operates unstably, the idle speed fluctuates (decreases or, on the contrary, increases for no known reason);
- the car drives worse, has lost throttle response;
- poor engine starting and increased fuel consumption.
Methods for cleaning VAZ 2109 injectors (step by step)
There are two methods for cleaning fuel nozzles, each of which has its own nuances.
First way. You will need: a spare o-ring, carburetor cleaner (spray), injector cleaner.
Features:
- We remove each nozzle.
Injector torches - Take any container and pour injector cleaner into it.
- Place the sprayer in the container and let them sour for a while.
- At the same time, clean the idle speed control using carburetor cleaner.
- There is carbon deposits around the injector nozzles - coke. Its consistency is similar to resin. You'll have to pick it out and tinker a little with the dirt. This is how external cleaning is done.
- As for internal cleaning, you will need a pump with a pressure gauge (foot) and a voltage source of 3-12 Volts.
- In the pump, remove the end of the hose and pour injection cleaner inside, then put the hose on the nozzle.
- We pump it up to six atmospheres and apply a voltage of three volts. Add power if the injector does not click.
- It is necessary to supply electricity periodically, for a short time, while pumping it up with a pump. In the same way we pump all the fuel nozzles.
Second way. You will need: O-ring, pressure gauge, pump, carburetor cleaner (spray).
- We change the injector cleaner to a spray.
- We repeat the above steps, only with carburetor cleaner.
- Then we make sure to clean the outside of the devices to remove carbon deposits.
- To do this, apply the spray to a clean cloth and treat the fuel units with it.
- Thanks to the product, the coke will soften and be cleaned off without any problems. You can help yourself with toothpicks or a screwdriver.
- Before installing the sprayer in place, be sure to lubricate the O-rings with a solution of water and soap.
Pro tips: how to choose new good quality injectors
All four injectors are removed and installed identically, so we will consider replacing only one injector. The dismantling of the injectors was described in detail above, so we move on to the next stage - replacement.
- First of all, we check the condition of the sealing rings of the fuel atomizer housing.
- Likewise, check the O-ring of the injector spray component. To do this, pry up both rings with a screwdriver and inspect them for wear.
- When it comes to fuel injectors, there is no need to change the O-rings when replacing the injectors if they are in good condition. But if you are going to reuse them, lubricate them with engine oil before installation.
- When the nozzle is removed and the rings are replaced (or the old ones are left), you can begin installing new devices. The procedure is performed in reverse order.
- Then we insert the sprayer into the hole located on the fuel rail and secure it with a clamp.
- We return the block with the wires to its place, after which we install the fuel rail in place.
To select high-quality injectors, give preference to original parts. It is necessary to select injectors for the VAZ 2109 by catalog number, since they come in different sizes and performance.
