During the process of installing a new speaker system, the owner may have the following problem: how to connect tweeters (tweeters) so that they work efficiently and without problems?
The essence of the issue is the complexity of modern stereo systems. For this reason, in practice there are often cases when installed tweeters either work with distortion or do not work at all. By following the installation rules, you can avoid possible difficulties - the procedure will be as quick and simple as possible.
In what places is it recommended to install tweeters?
Manufacturers recommend many places to place tweeters, most commonly at ear level. In other words, aim them as high as possible at the listener. But not everyone agrees with this opinion. This installation is not always convenient. It depends on the specific circumstances. And the number of installation options is quite large.
- Corners of mirrors. During the trip they will not cause additional discomfort. Moreover, they will fit beautifully into the interior of the vehicle;
- Dashboard. Installation can even be done using double-sided tape;
- Podiums. There are two options here. The first is to install the tweeters in a standard podium (which comes with the tweeter), the second is to make the podium yourself. The latter case is more complicated, but it guarantees a better result.
Where is the best place to point tweeters?
When designing car audio, you can choose one of two options:
- each tweeter is directed at the listener. That is, the right tweeter is directed at the driver, the left one is also aimed at him;
- Diagonal installation. In other words, the tweeter on the right is routed to the left seat, while the speaker on the left is routed to the right.
The choice of one option or another depends on the individual preferences of the owner. To begin with, you can point the HF speakers towards yourself, and then try the diagonal method. After testing, the owner himself will decide whether to choose the first method or give preference to the second.
Possible locations for connecting tweeters
An affordable way to harmoniously complement the beauty of your car interior;
If desired, installation can be limited to ordinary double-sided tape;
In this case, two options are possible: placing the tweeters in a standard podium (included), or making them yourself. The last option turns out to be noticeably more complicated, but if executed correctly it can significantly improve the quality of the result.
Connection features
A tweeter is an element of a stereo system whose task is to reproduce sound with a frequency from 3000 to 20,000 hertz. The radio tape recorder produces a full spectrum of frequencies, ranging from five hertz to 25,000 hertz.
The tweeter can only reproduce high-quality car audio with a frequency of at least two thousand hertz. If a lower-frequency signal is applied to it, it will not be reproduced, and if the power for which the mid- and low-frequency speakers are designed is high enough, the tweeter may fail. At the same time, there can be no question of any quality of playback. For long-lasting and reliable operation of the tweeter, you should get rid of the low-frequency components that are present in the general spectrum. That is, make sure that only the recommended range of operating frequencies falls on it.
The first and simplest way to cut off the low-frequency component is to install a capacitor in series. It passes well the high-frequency frequency band, starting from two thousand hertz and more. And does not pass frequencies below 2000 Hz. In fact, this is a simple filter, the capabilities of which are limited.
As a rule, the capacitor is already present in the speaker system, so there is no need for additional purchase. You should think about buying it if the owner decided to acquire a used radio and did not find a capacitor in the tweeter kit. It may look like this:
- A special box to which a signal is sent and then transmitted directly to the tweeters.
- The capacitor is mounted on the wire.
- The capacitor is built directly into the tweeter itself.
If you do not see any of the options listed, you should purchase the capacitor separately and install it yourself. In radio stores their range is large and varied.
The range of filtered frequencies depends on the type of capacitor installed. For example, the owner can install a capacitor that will limit the range of frequencies supplied to the speakers at three or four thousand hertz.
Note! The higher the frequency of the signal supplied to the tweeter, the more detailed the sound can be achieved.
If you have a two-way system, you can choose a cutoff from two to four and a half thousand hertz.
How to connect
The tweeter reproduces sound from 3000 to 20,000 hertz and is one of the main elements of a stereo system. The radio has a larger frequency range from 5 to 25,000 hertz. When a tweeter is supplied with a low-frequency signal for which it is not designed, it may stop functioning correctly or break completely.
To increase durability and reliability, tweeters are removed from low-frequency sounds and modified so that only the desired range of sound frequencies is delivered to it.
The simplest way to implement the idea is to install it through a capacitor. It passes low-frequency signals less than 2000 Hz and is a kind of filter, but with limited capabilities. The condenser in the speaker system is often already available and does not need to be purchased.
Exceptions are those cases when the car owner bought a used radio without a capacitor. The capacitor looks like a small box to which the signal is sent, or it is mounted on a wire or built into the tweeter itself. The frequency range depends on the type of capacitor and when purchasing, you need to make sure that you are purchasing the right one.
The main thing is to correctly connect the tweeter directly to the speaker located in the door. Connect the positive side of the tweeter to the positive side of the speaker through a capacitor, and connect the negative side to the negative side. The horns are connected in the same way. Another option is to use crossovers for the tweeters.
Other Features
Today, the most common tweeter option is the electrodynamic system. Structurally, it consists of a housing, a magnet, a coil with a winding, a diaphragm with a membrane, and power wires with terminals. When a signal is applied, current flows in the coil and an electromagnetic field is formed. It interacts with the magnet, mechanical vibrations occur, which are transmitted to the diaphragm. The latter creates acoustic waves, and sound is heard. To increase the efficiency of sound reproduction, the membrane has a specific dome shape.
Car tweeters typically use silk membranes. To obtain additional rigidity, the membrane is impregnated with a special compound. Silk is characterized by its ability to more effectively cope with high loads, temperature changes and dampness.
In the most expensive tweeters, the membrane is made of thin aluminum or titanium. This can only be found on very prestigious speaker systems. They are found quite rarely in a typical car audio system. The cheapest option is a paper membrane.
In addition to the fact that the sound is worse than in the two previous cases, such equipment has an extremely short service life. And this is not surprising, since paper cannot ensure high-quality tweeter performance in conditions of low temperature, high humidity and high load. When the car increases engine speed, an unusual sound may be felt.
Don't forget that you can also set up the tweeter using the radio. Even the cheapest models have the ability to adjust the high frequencies. In particular, mid-price models have a built-in equalizer, which greatly simplifies the task.
After installing the tweeter, you need to configure the audio system, and how to do this, read the article “How to configure a radio.”
Features of connecting high-frequency speakers
Tweeters are designed to reproduce frequencies in the range of 3000-20,000 Hz. On average, a car radio is focused on the range of 5000-25,000 Hz.
The tweeter is capable of handling high-quality sound reproduction with a frequency of at least 2000 Hz. If you work with a lower-frequency signal, you cannot count on its reproduction.
And if the power supplied is too high, for which the low- and mid-frequency speakers are designed, there is a real threat of the tweeter breaking.
And in this case we are not talking about the quality of playback at all.
To ensure the stable and correct functioning of the tweeters, in any case, you need to exclude low-frequency components from the overall spectrum. Consequently, it is necessary to achieve only the recommended range of operating frequencies.
The simplest option for cutting off low frequencies is to connect tweeters in series through a capacitor. It allows you to effectively pass HF frequencies from 2000 Hertz and above. Frequencies below will simply be cut off. However, the capabilities of such a simple filter are quite limited.
Usually the speaker system already has a capacitor. Therefore, no additional costs will be required.
If you plan to connect tweeters through a capacitor using a used radio and if there is no such filter included with the tweeter, it must be purchased separately.
Various types of capacitor are possible:
- Installed on a wire;
- In the form of a special box to which a signal will be sent and then sent to the tweeters;
- Built-in automotive capacitor in the tweeter.
If the specified capacitor options are not available, you should purchase it separately and install it yourself.
Please pay attention! With a higher signal frequency for the tweeter, the overall detail of the sound also increases.
Video on how to install tweeters
Car audio systems rarely use only one full-range speaker. This scheme is used only in exceptional cases, since one loudspeaker gives a satisfactory sound picture, where there are mainly mid frequencies, and the low and high ranges are weak and inexpressive. Component acoustics with two or more acoustic emitters require a crossover.
Typically this is a passive filter using capacitors and inductors that suppresses a certain frequency band. The tweeter limiter attenuates or nearly attenuates all frequencies below 2500 Hz and allows high-frequency content to pass through. The filter, designed to connect the low-frequency head, cuts off frequencies above 150-200 Hz. Thus, the range of reproduced frequencies is divided into two bands designed to work with a specific speaker.
How to connect crossovers to car speakers
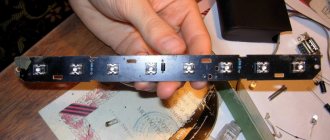
A passive separation module is a small board with radio elements. A regular block has 6 pair terminals:
- ULF output
- Twitter connection
- Connecting a subwoofer
Connecting the crossover to the speakers is not difficult. Some models allow you to clamp the wire under a screw, and some are equipped with a terminal block. The terminals where the amplifier output is connected are labeled “Input” or “Amplifier”, the terminals intended for the high-frequency “tweeter” are marked “Tweeter”, and the subwoofer is included in the terminals "Woofer." More complex devices have an additional pair of contacts for the midrange speaker. Thus, the filter divides the audio range into three bands. The diagram for connecting the crossover to the speakers includes the correct wiring inside the car.
How to connect tweeters to a car - the main stage of work
The tweeter is connected directly to the speaker in the door. The minus is connected to the minus, and the plus to the plus of the speaker. The capacitor must be connected to the positive side.
An alternative is to connect tweeters using a crossover. In some speaker systems it is supplied directly in the kit. Otherwise, additional purchases are possible.
"AutoAudioCenter" brings together a team of connoisseurs of high-quality sound. Therefore, we offer not only to buy a subwoofer for your car, choose acoustics or components, but also carry out an individual calculation of the audio system for personal tasks and budget. Our installation centers in Kyiv, Kharkov, Dnepr and other cities of Ukraine carry out the correct connection of tweeters and manufacture suitable podiums to save space and ideal sound direction.
Connecting speakers via crossover
To correctly connect crossovers to speakers, you need to observe the polarity, which is indicated for each pair of terminals. To do this, you need to use special cables for speaker systems. Since the wire is clamped under a screw, a stranded copper wire in polyvinyl chloride insulation is used between the limiter and the speaker. Quality cables have polypropylene foam insulation, and the best separator and speaker cables have Teflon insulation.
How crossovers for speakers are connected. Often on forums you can read about oxygen-free or monocrystalline copper, the use of which in speaker cables improves the sound and makes it richer. This is purely a marketing ploy. All differences between ordinary copper and these “prestigious” grades lie beyond human perception and do not have any effect on the sound quality. It is useless to use silver plated copper cables.
Connecting speakers via crossover
The cross-section of the conductor is very important when driving speakers through a band-pass filter. It directly depends on the power of the speaker system and the resistance of the dynamic head. If we omit all the calculations, it turns out that for a speaker with a power of 100 watts and a resistance of 4 Ohms, you need a cable with a minimum cross-section of 2.0 mm2. The lower the acoustic resistance, the greater the current will flow in the circuit. When connecting loudspeakers, it is recommended to take a 20% margin over the cable cross-section.
Connecting the crossover to the speakers should only be done with real copper wire. Particularly dangerous when connecting elements of a sound system is the use of cheap cables from some Chinese manufacturers. Instead of copper, they use copper alloy or copper-plated steel. Both are strictly contraindicated in car acoustics. In addition to poor sound quality, there will be uncontrolled heating of the connecting wires, which can lead to dangerous consequences.
How to connect tweeters to speakers
The connection process will not take you much time and will not require special skills. For the first time, we recommend using step-by-step instructions that describe the sequence of actions:
- Connect the main speaker wires of the speaker system and check their operation.
- After this, connect the Twitter, having previously chosen a place to install it.
- The process of connecting wires in series consists of gradually connecting them to the main part.
- Connect the positive and negative charges to the corresponding signs on the squeaker. The plus must connect to the plus, and the minus to the minus.
- The capacitor, which limits the entry of low frequencies, is connected to the positive.
This method is universal for any system. If desired, you can use the crossover that comes with the kit. If you don’t have the device, you can purchase it in a store or online.
Connecting a crossover to speakers without an amplifier
You can connect speakers via a crossover not only from the output of a low-frequency amplifier, but also from the output of a music center or car radio. It should be taken into account that passive separation systems are made of discrete elements, which is why the sound level will be lower than when working with a low-frequency amplifier. In this case, much will depend on the speakers used. Some models allow high-quality work only as part of a powerful system with good ULF.
How to install crossovers for speakers
To avoid problems with how to connect a crossover for speakers, you need to follow the installation rules. Do not lay power and speaker cables together. This may cause low-frequency interference in the speakers. The same effect is caused by crossing cables. The band limiter is not a device whose operation requires any intervention, so the blocks can be placed in any convenient location. The main thing is that no dust, dirt gets in there and there is no elevated temperature. The blocks do not have a sealed housing, so negative external factors can lead to disruption of internal soldering and failure of the speaker system. It is advisable to tin the ends of the copper cable with a thin layer of solder before clamping it with a screw. This will reduce copper oxidation and the formation of an oxide film. Broken contact between the speaker and the amplifier is especially dangerous. Lack of load leads to breakdown of the output transistors.
Some crossover modifications consist of two first-order filters in series. Such models have a signal attenuation switch on the front side. When connecting a first order filter, the attenuation of unnecessary frequency band is 6 dB per octave. The crossover design allows you to connect a second link and get an attenuation of 12 dB. When connecting a crossover to speakers, it is desirable that the filter controls be accessible.
Leave a request and we will call you back within 48 hours!
A tweeter is a type of speaker that reproduces the upper frequency range (2000 Hz - 20000 Hz). The quality of its sound directly depends on the angle at which it is located towards the listener. Installation of tweeters in cars can be done either with the help of specialists or on your own.
How to remove magnets from clothes without damaging the item
Before you study all sorts of ways to get rid of store beepers, you need to remember that all of them can only be used if you forgot to remove the magnet from your clothes in the store. And doing this directly in the shopping center itself with the aim of stealing goods is considered a criminal offense.
Before removing magnets from clothes at home, using one of the many tips, you should think about whether it would be easier to return to the store with the goods and a receipt and have the seller do this using a special device. Undoubtedly, time will be wasted, perhaps money on travel, but nerves will be saved, and the thing will definitely remain unharmed.
Regardless of how you remove magnets from clothes, you should act as carefully as possible. Firstly, if you do this with ordinary pliers, simply trying to break it, there is a high probability of damaging the thing itself. Secondly, some “squeakers” contain special paint inside, so that if they are roughly opened, it will simply stain both the thing itself and the person who tried to get rid of the “evidence”.
This is another argument in favor of going back to the store and removing the magnet there using a special device. There are, of course, situations when this is technically impossible to do. In this case, you will undoubtedly need information on how to remove the magnet using improvised means.
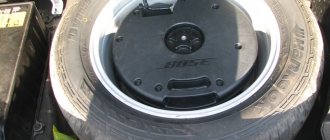
Oddly enough, the easiest option for getting rid of a store-beeper is hidden in almost every entrance. The door, equipped with an intercom, holds a fairly powerful magnet, with which you can try to get rid of the “alarm” on your clothes. The result will largely depend on the quality of workmanship and the design features of the tweeter. You need to lean it against the intercom magnet with its outer side, trying to pull out the connecting pin from the inside out. In most cases, success is guaranteed. In this case, the device will not even be damaged, since in stores they are pulled out in almost the same way.
If the intercom didn’t help (or you couldn’t use it), you can try looking for another magnet. It is important to remember that it must be powerful enough, so that ordinary decorative pictures from a refrigerator or a speaker from an old tape recorder will not help. An old computer hard drive may be useful. True, before removing magnets from clothes, it will need to be disassembled (or even broken) in order to get the treasured device. If the “tweeter” is of sufficient quality and reliable, one hard drive may not be enough, but you can still try to tightly press its magnet to the outer convex part of the “alarm”, while pulling the opposite one. If the “magnetic guard” fails, you should turn it over to the other side and try again (sometimes polarity matters).
When all methods have been exhausted, and the thing is still in captivity of the hated “squeaker”, the time comes to use brute physical force in the form of pliers or other tools. Using them, you can simply break the plastic and gradually disassemble the device piece by piece. But before you remove magnets from clothes in such a “barbaric” way, you still need to think about whether it’s worth the pain and whether it’s not easier to return to the store with a request to rid the item of the “squeaker”?
Selecting a mounting height
It is the tweeters that are a headache, even for experienced installers. These little speakers not only need to be placed in the right place, but also at the right angle in order for the scene to form correctly. Larger low-frequency speakers are always installed in one place - these are doors. Even component speaker manufacturers can't determine exactly where the tweeter will play best. Therefore, several types of fasteners are included in the kit. A popular option is the "cup". It is designed for installing a tweeter in a car either on a rack or on a dashboard. The kit may also include a housing for installation on a surface. The most expensive tweeter options can rotate inside the housing for more precise directionality.
The main reason why so much attention is paid to installation in a car is its purpose. The fact is that tweeters are one of the most important components for creating high-quality sound in a car. This is especially important if the system consists of two components. In this case, the setting of the sound stage directly depends on the HF. As for three-way systems, there are even more big problems here, because a midrange link is added. It is much larger and requires a closed volume.
No technician will be able to tell you where exactly in your case you need to install the beepers. Therefore, you need to look for a place for installation from scratch. To determine the correct location, you need to use high-quality recordings on which a monotonous voice is recorded. Most often in practice, a test disk is used for testing. It contains special entries that allow you to select the correct location for tweeters.
Installing tweeters in doors
The nuances of installing a tweeter in a door
Let's first figure out why it is necessary to install it in the corners of mirrors. The features of high-frequency sound waves and the design of tweeters play a role here, namely:
- HF waves should not encounter any significant obstacles on their path, reflecting from which they change their quality indicators. Ideally, there should be free space between the listener's ears and the speaker. It will be much more difficult to adjust the sound of the system taking into account the reflected signals.
- All tweeters, especially horn speakers, have a narrow polar pattern. Therefore, a turn of even ten degrees will lead to the listener perceiving a different sound picture. It is believed that the optimal location for tweeters will be at the level of the driver's head.
Installing tweeters in the corners of the mirrors creates acceptable conditions for the speaker to operate. Of course, they will be far from optimal. But installation of doors in other areas will be even less effective. Therefore, if it is not possible to install them in the A-pillar trims, we recommend installing tweeters on/in the corners of the mirrors.
Installing a beeper on the door for the lazy
For those who do not want to change the appearance of the interior, there are several options for installing tweeters in car doors. The main difficulty will be finding suitable speakers. In practice, the problem is solved in the following ways:
- This option is suitable for cars in which the automaker, as part of the audio preparation, has already routed the wiring for the tweeter into the corners of the mirrors and installed the appropriate decorative grilles. All that remains is to select a speaker of the appropriate diameter with a suitable mounting depth. You can use standard devices that are recommended by the manufacturer, but there is a possibility of selecting more advanced models. To install, you just need to secure and connect the tweeter to the speaker wiring.
- If there is no standard audio preparation, look for tweeters that include special glasses for installation. In fact, this is a separate small speaker, which is equipped with only one tweeter. Such a device is attached directly to the triangle overlay with self-tapping screws or double-sided tape.
If you do not require audiophile sound quality, then this installation option has the right to life. But you shouldn’t count on a unique result; this is the simplest way to solve the problem. And such an installation looks far from ideal.
Installing buzzers in doors - a solution of medium complexity
The previously described method of installing tweeters can be improved. At the same time, you don’t have to look for other speakers; tweeters in housings or models equipped with mounting cups are quite suitable. But the appearance and reliability of fastening will be much better.
To get a normal result, you will need to do the following:
- The speaker housing is attached to the mirror triangle trim in the usual way. But we recommend that you play around with the direction a little and immediately choose one that will make the tweeter sound more pleasant to the ear. You will not be able to make adjustments later. You don’t have to worry that with such a turn the design will look clumsy. This defect is corrected during subsequent finishing.
- To achieve a smooth transition from the speaker housing to the trim on the corner of the mirror, use the technology of manufacturing fiberglass tuning parts. The blank is covered with nylon, which will become the basis of the body of this simple podium. Using glass mat and polyester or epoxy resin, the walls of the improved overlay are formed. It will take 3-4 layers of material to obtain a structure with sufficient strength.
- After the fiberglass has hardened, the surface is thoroughly cleaned, and the remaining defects are covered with polyester putty. With the proper quality of surface finishing, the part is painted to look like plastic or covered with leather or fabric, which is used in interior decoration.
This installation allows you to get a full-fledged podium for installing tweeters with minimal time. Of course, the ability to rotate the speaker in the optimal direction is limited by the design of the housing, but the result will be better than installing a mirror in a standard triangle. And this tweeter looks quite professional.
Installing beepers in doors wisely
Our service technicians choose a more complex, but more correct option for making podiums for installing a high-frequency speaker in the mirror trim. It has the following advantages:
- There is no need to look for tweeters in the housing or select factory cups for them.
- It is used for installing tweeters of any type, including horn ones.
- Used for simultaneous installation of an HF/MF link in this door area.
The technology is also based on the use of fiberglass, but differs from the method described earlier.
The standard list of installation work includes the following steps:
- An individual support ring is made for each speaker. The material used is plywood or MDF with a thickness of 10 mm. The inner diameter of the ring must correspond to the tweeter mounting size.
- Mounting holes are cut out in the mirror triangle trim. They will be needed to deepen the squeaker. Thanks to this, the issue of maintaining visibility of the side mirrors is resolved.
- The frame of the future podium cover is made from wire, metal brackets, and hangers. Due to this, the support ring is attached to the existing plastic base.
- By changing the configuration of the frame, the speaker is positioned in such a way that it is directed exactly to the design point of the cabin.
- Before manufacturing the case, you need to connect the tweeters and make sure the music is of the proper sound quality. Please note that the direction of the right and left speakers may be slightly different, so do not copy the support structure. Do it separately for each door.
- The technology for forming the podium body is standard - layer-by-layer formation using fiberglass and resins. The method of decorative processing also depends on the existing interior of the cabin.
Manufacturing custom designs for installing tweeters in doors ensures more precise directionality of the speakers. Thanks to this, it is possible to obtain sound with a professional level of quality. You will not find standard solutions in any of the acoustic systems exhibited at car audio competitions.
A few words about connecting tweeters in doors
Unlike subwoofers, midbass and midrange speakers, tweeters are very sensitive to the sound range supplied to them. Operating at a frequency that is close to resonant, the speaker will begin to produce sound with significant distortion. And in the worst cases it will simply burn out. Therefore, when installing tweeters, make sure that they are equipped with high-pass filters. In the simplest case, it is a capacitor of a certain capacity, which depends on the impedance of the speaker and the threshold for cutting off unwanted frequencies. Without such a device, the tweeter will not work for a long time.
Yes, when connecting to a multi-channel amplifier, you can get by with the filter built into the equipment. But most often tweeters are connected in parallel to the mid-frequency section or midbass, in which case the presence of a capacitor or a full-fledged crossover is mandatory.
One more point that should not be forgotten. To connect the tweeter, you will need to install speaker wires with the appropriate characteristics. This entails the need to disassemble the door trim. If you doubt your abilities, it is better to entrust this work to a specialist. In this case, you will receive a guarantee that all parts of the door card will remain intact and prevent the possibility of short circuiting the conductors. But such a malfunction will lead to failure of the amplification equipment or radio.
Service technicians perform all work on installing tweeters in car doors. You can also order the separate production of a podium-overlay, selection of components, and laying of acoustic wires. But the best solution would be a comprehensive installation. In this case, you will receive a comprehensive installation guarantee.
To agree on a convenient time for you to visit the service, leave a request by filling out the form provided, or request a call back.
Width selection
We’ve decided on the height of the stage, but what does the width depend on? The width of the stage depends on the angle of the tweeter. Just like with height, here you need to try all the options. The most popular version is when both speakers are facing each other.
Selecting the tweeter direction angle:
- to the salon;
- on reflection from the windshield.
The choice of radiation angle is one of the most important factors, since the matching of the HF and LF/MF speakers depends on it. The most favorable orientation when installing the tweeter height is the listener's mouth. If the angle of the tweeter is changed slightly, or the installation height is chosen, the stage will be disrupted and the sound quality will decrease.
It is important that when installing a tweeter in a car with your own hands, choose a location such that there are no reflective objects near it, within approximately a radius of 5 cm. This will make it possible to achieve a strong reduction in the number of standing waves in the RF path.
In the second case, achieving the correct scene will be much easier, since the physical location of the tweeters relative to the glass will be closer. The vast majority of tweeters play too harshly when directed into the cabin.
Installation
Let's move on to installing tweeters in cars. For installation we will need:
- HF speakers;
- mounting brackets;
- first order filter (capacitor);
- wires.
First, you need to decide how you will connect the tweeters. There are several options, the cheapest and most popular is a parallel connection to the woofers via a capacitor. A more professional option is a channel-by-channel connection to an amplifier or to a processor, or a processor radio.
When connecting in parallel to the “midbass”, we take a two-core cable with a cross-section of at least 1.5 mm and solder “plus” to “plus”, and “minus”, respectively, to the “minus” of the cable going to the woofer.
According to the car's operating instructions, we disassemble the dashboard and remove the struts. We carefully route the wires, thereby making a hidden installation. After this you need to connect the capacitor. It should be recalled that the capacitor acts as a first-order filter and cuts off unnecessary frequencies with a cutoff slope of 6 dB per octave. Our passive crossover is soldered onto the positive wire that goes to the tweeter. If this is not done, the speaker will simply burn out. If you intend to connect a tweeter to an amplifier, it is important to remember that you need to turn on the high-pass filter and select a filter frequency of 4 kHz. In the future, it will need to be adjusted, depending on what frequency range the woofer plays in a two-way system, or the midrange speaker in a three-way system.
On the dashboard, the tweeter is attached in a cup with double-sided tape. In most cases, it comes with speakers. If it is not included in the package, you can buy adhesive tape at any hardware store.
As for rack installation, installation here also takes place using double-sided tape. But in this case, it will not be possible to send him to the salon. To do this, you need to contact professionals to cut a special hole into your rack. In this case, everything will look most aesthetically pleasing. The tweeter can also be embedded into the door card. To do this, a round hole is cut out in the door, and after that, using the installation kit, the tweeter is installed. It is important to remember that if you install the tweeter speaker with double-sided tape, you can always change the direction of the membrane radiation. But if you set it statically, you won't be able to change the direction.
Professional installers recommend trying all design options before final installation; only in this case will it be possible to create the correct scene. As stated earlier, proper installation of tweeters in a car may require serious intervention in the design of the A-pillars or door panels. If the tweeters are installed in the dashboard, then large holes will need to be made. In most cases, this operation is irreversible. So the old saying comes to mind: “Measure twice, cut once.”
What are tweeters or tweeters?
If you have not used speakers before or made do with the classic versions, then most likely you are not familiar with the equipment called Twitter. Before buying it and installing it, you should understand the main purpose, advantages when listening to music and the operating features of this system.
From the name itself it is clear that during operation the equipment reproduces characteristic sounds of a certain frequency, similar to squeaking. This is achieved by incorporating high-frequency sound vibrations into the work. Since standard models have a wide range of usable frequencies, they make the music sound monotonous and desaturated. Therefore, special variations have been developed that can be used to emphasize high-frequency sounds, providing volume and expressiveness to audio recordings.
Twitter is a small speaker that is installed together with the main speaker system in order to improve the parameters and characteristics of the audio recordings being played.
ATTENTION! Depending on your preferences, you can install the desired number of such devices. For comparison, you can try listening to music through different speaker options to choose the best sound configuration.