Do-it-yourself installation of EUR from Priora on a VAZ 2110
Not every owner of a VAZ of the tenth family knows that this car can be equipped with Electric Power Steering from Lada Priora.
In this article you can get a detailed course on installing the ESD on your car of the tenth family. Today, there are two types of power steering, these are power steering (hydraulic power steering) and electric power steering (electric power steering). The electric booster has much greater advantages than its counterpart, the hydraulic booster. The first and, probably, main advantage is that the EUR requires much less attention to itself, since it does not have consumables such as oil or other liquid. which is poured into the power steering. The EUR is much simpler than the power steering. Power steering is a combination of complex mechanisms. So, let's start the installation. For work we will need the following materials and tools: 1. Directly EUR
2. Flush shaft 3. Plate 4. Wires 5. Steering wheel and viburnum casing.
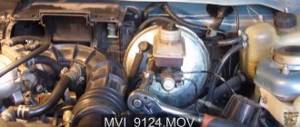
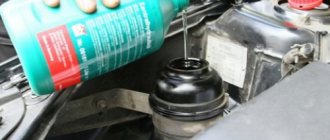
The approximate price of the issue is 15,000 rubles, by our Moscow standards this is quite a bit. But how much pleasure I received in return for the money spent. In my case, all the necessary parts were ordered from the car factory directly, everything was much cheaper. The photo shows the pads. Here we see that there is no need to do any twists, everything is fine as it is. I removed the standard terminal from the block and transferred it to the block located on the harness. Next, I installed the free terminal coming from the harness in the place where the standard wire coming from the standard block was powered. There has been some kind of exchange of wires, just the standard wire will now pass through the harnesses. The wire from the blocks has a rating of 50A.
Now we remove the steering shaft housing, all the switches, as well as the ignition switch. Then unscrew the bolt that holds the steering rack, and then remove the rack itself.
Let's compare the shaft from the tens with the Priorovsky shaft. We adjust the plate to its location.
We put the amplifier in its future place and realize that the shaft is a little small, so it fits about one millimeter on the rail. You'll have to work and adjust everything to the right size. The stock decimal shaft is hollow, so you will have to remake the plate and shaft from the Priora.
The shaft from the priory was changed in this place. We drill the plate. This is done so that the EUR can be inserted a little deeper. We install the amplifier and see what happens. The shaft climbed onto the rack, but did not do it completely, so now the rack fastening bolt cannot be inserted. We clamp everything tightly using a smaller bolt.
We install the switches in place and begin working with the wiring.
We pull two wires through the fuse block. These wires will conduct electricity directly from the battery, so there is no need to carry out any unnecessary procedures.
Now we connect the EUR wiring. We connect it and try to turn it. In my case, the EUR did not work. I started to swear, but then I remembered that the battery was disconnected. I connected the terminals, got into the car, turned it, eureka, the steering wheel turns with one finger.
Still, I am so proud of myself. Everything is ready, all that remains is to put everything in place. We collect all the switches, put in place the casing that hides the steering shaft and have a good ride. As I already said, the price is about 15,000 rubles, but now I don’t regret that I made this device on my machine. Good luck with all the improvements, goodbye.
What is needed for installation
Before you begin installation, you need to assemble all the necessary equipment. What does a motorist need in this case:
- Electric booster.
- Control block.
- Promval.
- Wiring.
Amplifier control unit
Electric amplifier installation process
Now that everything is ready, you can proceed directly to the process of installing the electric power steering on the car. Before starting the procedure, it is worth noting that the steering column wiring needs to be replaced. In this case, there will be no wire cutting or twisting. Everything connects to standard terminals.
We insert the free terminal of the harness exactly into the place where the standard wire was. You don't need a special harness for this. We connect two wires with a cross-section of 4 squares to the battery. It is imperative to install a 50A fuse. The “weak current” will connect to the tachometer, ground, K-line and wiring to the control lamp.
Don't forget to check the presence of speedometer and tachometer signals.
So, everything has been prepared, and now you can proceed directly to the process of installing the EUR. Let's look at the step-by-step installation instructions:
- We remove the negative terminal with.
Remove the “-” terminal from the battery - Remove the steering wheel.
- We dismantle the steering column trim casing.
- Having disconnected the wires, we remove the switches and the ignition switch.
The process of dismantling the switches on the steering wheel - Having unscrewed the fasteners, we dismantle the steering shaft.
- Now you need to install the shaft on the electric booster.
- The next step is setting up the wiring, which is not as difficult as it seems at first glance.
- We pull 2 wires from the passenger compartment to the battery.
Many people recommend doing this inside the left wing. For greater convenience, it is recommended to remove the following elements: windshield washer reservoir, battery and battery shelf. Connecting power supply wires - We make fastenings for the electric power steering.
Installing mounts for electric amplifier - We install the part into the seat and fix it with nuts.
Installing the electric power steering on the seat - The final stage of installation is connecting the EUR electronics.
There is a red connector under the instrument panel with an orange wire in it. It is to this that you need to connect the electric amplifier. Exactly with the previous step, you need to connect to the gray wire. We find the necessary wires and connect to them - Now, in order for the electric amplifier to work, you need to connect to the plus and minus.
- The installation procedure for the EUR is complete and if everything is done correctly and accurately, then everything will work.
- The rest of the assembly is carried out in the reverse order and according to the technical diagrams.
Steering wheel adjustment
Also, if after installation the position of the steering wheel is inconvenient and the electric power steering is too low or high, then this inconvenience can be slightly corrected by adjustment. This can be done by grinding off the edges of the shaft or by additionally installing gaskets and bushings.
It is worth remembering that, unlike the hydraulic booster, the automatic electric booster will turn off when the speed becomes over 50 km/h.
But don’t despair and get upset because at this speed you can’t feel in the controls whether this function is on or off.
Product selection
Comparison of the standard steering column and with electric power steering
2172-3450008
– original catalog number of the electric power steering, which is intended for installation on the VAZ-2114.
So, this is the most suitable option in this case. The average cost is about 20,000
rubles.
Advantages and disadvantages of installing EUR on a car
All issues of selection and installation have been considered, but I would also like to tell you about the advantages of an electric amplifier over a power steering:
- Maintenance takes less time and has much lower requirements. So, there is no need to monitor the oil and connections.
- Unlike power steering, the electric booster does not need to be heated in winter, in cold weather.
- Installing an EUR is much easier and cheaper than a hydraulic booster.
- High level of reliability.
- Product cost. EUR is several times cheaper than power steering.
The principle of installing electric power steering on a VAZ 2110
The presence of an electric booster on a VAZ 2110 car allows you to improve the quality of response to changes in the angle of rotation of the steering wheel, improve maneuverability and controllability. The practice of drivers proves that with an electric booster they feel more confident.
An important advantage is that with electric assistance you have to apply less force to enter a turn and make a maneuver. This has a positive effect on a person’s condition during long trips.
Technical inspection after installing the EUR on a VAZ 2107
Installing an electric booster is formally considered to be making changes to the design of the car and is an obstacle to undergoing maintenance without the appropriate certificates of conformity. It will not be possible to hide the fact that an ESD is installed on a VAZ 2107 - the device clearly manifests itself when checking the steering wheel play. This may become a basis for refusing to issue a document confirming the completion of a mandatory technical inspection.
To pass a technical inspection in accordance with the law, you need to find an official letter from the manufacturer about the compliance of this EUR model with the requirements for installation on a VAZ 2107. This letter (copy) must be taken with you when undergoing vehicle inspection.
Also, for maintenance, a document is required confirming the installation of the EUR at a VAZ-certified car service center.
If these two documents are available, the inspection station employees do not have the right to refuse to issue a certificate. In a conflict situation, you should request a written refusal indicating the reasons.
A little history
Only 12 years later, in 2002, domestic engineers from Novosibirsk University began developing a Russian electric amplifier. After the completion of the project, the unit was refined and tested for several years at the AvtoVAZ plant.
New device
The engineers' task was to create a worthy analogue to foreign amplifiers, to provide the unit with the necessary advantages, durability and reliability. At the same time, unlike imported analogues, our electric amplifiers were much cheaper.
Today, these devices are produced by the Berdsk Electromechanical Plant, located in Russia and a subsidiary of AvtoVAZ.
Main advantages of the first ES
The electric amplifier would not be so in demand and popular without the obvious advantages that it brought along with its appearance. The strengths of this steering system include:
- The unit operates even when the power unit is turned off;
- The unit allows partial fuel savings, which has a positive effect on fuel consumption;
- Handling is improved in all components;
- Reliability of maneuvers at the highest level;
- Excellent safety record with regular use.
Operating principle
The ECU is a modular design built into the steering column. The module itself includes two main components:
- Electrical unit of synchronous nature;
- Controller.
It is important for VAZ 2110 owners to install such a system if they want to use wide wheels that differ from the factory ones by several sizes. And in general, if you want to feel real comfort and enjoy driving, and not turn the steering wheel with all your might, install an electric booster. He will react to even the slightest touch.
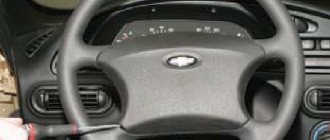
Complete with steering wheel
Although this is against the rules, now you no longer have to hold the steering rim with both hands. The car will become more than obedient and controllable when moving with one hand.
Numerous tests have shown that cars with powertrain are safer on the roads.
Technical specifications
When installing the EU on your VAZ 2110, it is important to take into account its technical characteristics. The node has certain requirements in this regard. Therefore, for the “ten” you should choose a device that corresponds to the parameters specified in the table.
Parameter
Index
Maximum torque compensation
Amount of current consumed (at Mmax 35 Nm and steering wheel rotation speed of 360 degrees in 1 sec)
Operating temperature range
from -40 to +85 degrees Celsius
Electronically controlled motor
With three passes
Made from 40X steel
Made from carbon fiber grade UPA 6/30-2
After familiarizing yourself with the specified parameters, you can choose the electric booster that suits your car. Do not forget that this is an electrical unit, so you should work with it very carefully.
Installation benefits
If you decide to install a modern electric booster on your VAZ 2110, you need to find out in advance what benefits you will receive from such manipulation. This will further convince you of the correctness of the decision.
- Installation does not require extensive experience or knowledge. Do it yourself in a few hours of work.
- The unit requires a small amount of electricity to operate. This will not negatively affect the condition of the battery or other components of the car.
- EU has no negative impact on the environmental friendliness of exhaust.
- Positively affects parametric indicators.
- Does not require complex and regular maintenance during operation. Install it and enjoy the comfort.
- Under low-temperature conditions, the electric booster works better than the hydraulic booster.
Some people believe that the operation of the electric booster is slightly weaker compared to the hydraulic booster. But in practice and on our roads you will not feel this. Therefore, this only drawback is more than controversial.
The choice between electric and hydraulic boosters
Compelled by the realities of road practice and the vagaries of automotive fashion, owners of used cars followed the buyers of new cars. It is for them that the question of which controls to choose is especially relevant. The owner of a used “Nine” must take into account everything – from the price of the device and the cost of maintenance to the possibility of installing the unit yourself. Recently, statistics on the choice of owners of used cars has noticeably shifted towards an electric unit. The advantages are obvious:
- Electric power steering is much more compact than hydraulic power steering (power steering). It takes up virtually no space in the engine compartment.
- It is much easier to install. No hoses or belts required. The EUR is integrated into the steering column and is powered by a battery.
- The electric booster is more economical. It only works when it helps turn the steering wheel, while the hydraulic booster constantly pumps fluid.
- EUR is cheaper than power steering. This says almost everything for the owner of a used Nine. Together with the possibility of installing a power steering wheel for a VAZ 2109 with your own hands, this makes the choice almost no alternative.
When the fundamental choice is made, the eyes of many VAZ 2109 owners turn to Ladas. The temptation is strong to use something from the arsenal of “close relatives”. And this is quite possible. It turns out that the EUR from the Lada Priora fits the VAZ 2109 almost without adaptation.
Preparation for installation
Alas, not every “ten” has a native electric amplifier. But this is not a problem, since the unit can be installed with your own hands. The work is not very difficult, because if you follow the instructions, you can do everything yourself perfectly.
At the preparation stage, you should purchase and prepare tools and materials in advance:
- New electric booster;
- Plate;
- Wiring kit;
- Promval;
- Cover and steering wheel;
- Set of different screwdrivers;
- Drill;
- Ruler.
Since we are talking about an electrical device, all kinds of oils and lubricants are not required here.
Installation
When everything is ready and you are ready to work, you can begin installing the power supply.
- Remove the standard terminal from the block and insert it into the block on the harness.
- Now the free terminal, which comes off the harness, is placed in place of the standard drive adjacent to the block. This will allow you to pass the standard wire between the two harnesses. The wire coming from the blocks has a rating of 50 Amps.
- Next, disconnect the shaft casing, and then remove the ignition switch. Be sure to separate the switches. This stage is carried out carefully and slowly so that the casing does not crack.
- Unscrew the steering rack mounting bolt and remove it.
- Measure the length of the hole. If necessary, use a trim plate. We recommend recording the received parameters.
- An electric amplifier must now be installed in the vacated area.
- Please select the correct size shaft as it will not fit on the steering rack. To adjust the shaft, you will need a plate and a regrind for the shaft from Priora. By the way, when installing power units, elements from the Priora model are excellent. Take note of this.
Disassembling the unit
- After adjusting the plate, drill a larger recess than there is now. The shaft is a hollow structure, so any metal drill can easily cope with the task.
- The plate is placed on the amplifier and the resulting depth indicator is checked. If everything fits, secure the structure with a small bolt.
- Put all the switches back in place and start working on the wiring.
- It is necessary to remove two wires from the interior that go directly to the battery. This is done through the left wing.
- Remove the washer fluid reservoir and take a piece of wire. It will be needed to secure the wires leading to the battery. They are attached to the end of the opposite one, passed and pulled through both at once.
- Remove the instrument panel and remove the red colored block. Carefully tighten the wiring into the under-panel space.
- Now he removes the orange wire from the red box.
Visual amplifier
- The red block is attached to this wiring and combined with the wiring from your electric amplifier. Don’t forget to place the end of the wiring with the “bare” terminal from the amplifier onto the free standard wire located in the red block.
- The operation is performed in a similar way with the gray wiring, which is also located in the red block. It is pulled into its regular place and secured with terminals.
- Next, we move to the battery, securely fix the black negative wire to the pink positive wire.
- All that remains is to connect all the wiring from the power unit and start it up.
- At this point, the installation is almost complete. You should definitely assemble all the components, return the components to their original positions - switches, casing, steering wheel, etc.
Working with wiring
Customizing the EU
Fitting includes the following activities:
- Steering wheel alignment;
- Elimination of all gaps formed between parts;
- Reducing the length of the power cable;
- Checking the installation of LED diagnostic sensors for the EU;
- Replacement of worn or damaged elements if necessary and available.
Fitting
After completing the work, sit behind the wheel and carefully inspect the front of the operations performed. Start the car and test the new steering wheel in action. Be sure to put the panel and steering wheel in order and clean the surfaces. After this, you can begin direct operation.
How to install the EUR on a VAZ 2110: step-by-step photo repair
So, when everything is ready, you can start installation.
1)
Take the purchased wires and remove the standard terminal from the block, then install it into the block on the harness.
2)
The terminal that comes off the harness is installed where the wire was adjacent to the block (standard). All these manipulations are needed so that the standard wire can be passed between the harnesses. By the way, the wire from the blocks is 50A, and the fuse must correspond to this power (you can take it from a Chevrolet Niva).
4)
Unscrew the bolt securing the steering rack and remove it.
5)
Compare the length of the old and new intermediate shafts. Depending on the results obtained, it will be necessary to adjust the plate and shaft. This is where a ruler comes in handy. It is better to write down the dimensions.
6)
The shaft is adjusted by turning it; this must be done on a special machine, so you will have to contact specialists.
7)
The plate is adjusted by re-drilling some holes to a greater depth. This is not difficult to do, fortunately the shaft is hollow inside. You will also probably need to trim the corners of the plate with a grinder and put spacers between it and the body.

Try installing the EUR assembly with the plate and steering rack. It is likely that the standard rack bolt will not fit and will have to be replaced with a smaller one. This will entail the need to install a homemade limiter to keep the shaft stationary.
9)
Install the switches (or rather, their central part).
10)
The next step is to draw 2 wires from the passenger compartment to the battery through the left fender. Remove the washer reservoir and locate the long copper wire. Open the fuse box and look for the wires going under the hood. Insert the wire there (carefully, do not damage the wires!). She will exit through the hole in the left wing. Attach the wires to the end of the wire, which is in the cabin, and then pull the wire all the way into the engine compartment.
11)
Remove the dashboard and locate the red pad. Then drag the wiring from the EUR into the space under the panel.
12)
Disconnect the orange wire from the red block and install the block from the power steering wiring kit onto it. Connect it to the orange wire from the EUR (1st leg in its block, 12V). Insert the remaining end with the terminal in place of the standard wire into the red block.
13)
The same manipulation must be carried out with the gray wire (it is also from the red block).
14)
The wires pulled out under the hood must be connected like this: black to “–”, and pink to “+”. That's all, all that remains is to put back the casing and steering wheel.
Adjustment after installation
After reassembly, it may turn out that some defects remain. Perhaps they will be completely indifferent to you, but if you decide to do everything perfectly, the following additional work may be required:
- Align the steering wheel if it is crooked after installation;
- Remove all excessively large gaps between the steering column casing and the front panel;
- Install the EUR diagnostic sensor;
- Replace the cracked steering column casing with a new one if necessary.
In addition, it is important that you will have to slightly adjust your driving style - at first it may seem that the steering wheel turns very easily. It’s also not worth “putting” the car into a turn, since the force on the steering wheel with an electric steering system is weaker than with power steering, or even more so without it.
Is the electric power steering repairable and what is the price?
If suddenly the electric power steering fails for some reason, it is useless to contact the service center, since this part is non-repairable and therefore can only be replaced as an assembly. So, self-repair of the EUR is carried out strictly at your own peril and risk, because any unqualified intervention in its design can easily lead to an accident with a probability of death.
Now let's talk about the price of the issue. Installing an EUR, let's face it, will cost a considerable amount. Judge for yourself:
- A new EUR, depending on the region of delivery, will cost about 13,000 - 18,000 rubles. It can be ordered either through online stores, with subsequent delivery by mail to any city, or directly from the factory;
- You can save money by purchasing a used part, costing around 2000 - 6000 rubles. Look for advertisements on the Internet, newspapers, etc., but remember that you are buying a pig in a poke.
If we talk about other parts, without which it is impossible to install, they are also not cheap:
- Intermediate steering shaft, adapted for installation of electric power steering - from 2000 rubles. and more;
- Bracket for installation - approximately 1,000 rubles;
- Wiring for the electric amplifier - approximately 1,500 rubles;
- If the car has a carburetor, then you will also need a speed sensor simulator - this will cost around 1,500 rubles.
What conclusion can be drawn from all of the above? On the one hand, installing an electric power steering system on a VAZ-2110 has many positive aspects, the main one of which is much more comfortable handling, which is especially noticeable if your car did not have any power steering at all. You will be less tired while driving, and when you hit a large hole, the steering wheel will not tear out of your hands as if it were alive, which increases traffic safety. In addition, you will not need to regularly monitor the fluid level and worry about leaks, as is the case with power steering.
On the other hand, an electric amplifier is a very expensive pleasure, especially in current times of crisis. Yes, and installing it is quite difficult, not counting the fact that it takes a lot of time.
In addition, the power steering is completely irreparable, and if it breaks, then the car is laid up, while with a leaking power steering you can drive for a while until a new one is purchased. Whether it’s worth putting an EUR in your top ten is up to you to decide. That's all for today. See you again!
Many have probably heard that you can install electric power steering from Priora on a VAZ 2110
. How difficult is it to do this work yourself? What is the price of the EUR Priora and where can I order it? I tried to answer all these questions in this article.
There are two types of mechanisms that make steering easier: power steering (hydraulic power steering) and electric power steering (electric power steering).
Pros of EUR
:
Cons of EUR
:
Approximate price of EUR for VAZ 2110
per set:
Total: 15000 rub.
Where to buy a Priora EUR kit
?Can be ordered in Kaluga from the factory directly. In the online store 'Everything for Auto'
Is it worth installing ESD on our dozens?
?A question without a clear answer. It is impossible to say that this is a waste of money. Since the effect of installing the EUR is very good. Rotating the steering wheel really becomes easy. But it cannot be said that there are no negative aspects. For example, the price of an EUR kit from Priora is about 15 thousand rubles. not many people will like it. In addition, the kit also needs to be installed, and this is a separate, not easy story with sawing, drilling and swearing all day long. After installation, not everything will be smooth with cracks, steering wheel height adjustment, etc. In general, look at how others independently install the EUR on a VAZ 2110 and you will understand everything yourself: Installing an EUR from Priora in a VAZ 2110. Photo report from Realmatroskin The implementation of the installation belongs to Realmatroskin' u.
During disassembly I purchased a Viburnum steering wheel with a small bonus
I bought an EUR, here it is in a box, a control unit, markings of the EUR itself
The pads are the same as on the 10th EUR. Electric booster instructions included.
Then I bought a drain from Priora with a tricky mechanism
I measured the length of the shafts. The difference was 4 cm with an error on the larger side. The length was 25.5 cm in the most expanded form. So, taking into account the experience of the installers, that the drain shaft needs to be shortened by 3 cm, nothing needs to be lengthened, it seems
Then the ordered wiring arrived. This is what the blocks look like, that is, no twists will be needed, I removed the terminal from the block, inserted it onto the block in the harness and inserted the free terminal of the harness into the place from which I removed the standard wire, the pre is already at 50A.
EUR connectors and harness blocks in them
As for the wiring too - you can do without a special harness - all you need to do is run two power wires from the battery with a cross-section of 4 squares, a 50 A fuse from Shnivy, the rest is all low current - to the tachometer, to the speed sensor, + 12V after the 3Z, ground, to -line and wire to the control lamp.
But since there was not enough adapter plate and it is unknown when it will arrive, I decided to cut it out myself. We take the workpiece, mark it and cut it out with a jigsaw. Thickness approximately 4mm.
We remove the casing, switches, ignition switch.
We adjust the plate in place (photo 1-2). We put the shaft on the EUR, we put the EUR in place and we see that the shaft is too small. It fits literally 1 mm onto the rail, I had to take it off and think about it. It was not possible to distort the drain shaft, since it was hollow and had to be chemically mixed with the plate and priorol. Prioral has undergone changes in this part (photo 3-4)
Well, I had to re-drill the plate in order to drive the EUR deeper, this did not give much benefit, I put spacers between the plate and the body. So the EUR was installed, the shaft more or less climbed onto the rack, but not all the way, the bolt is not inserted. I had to take a smaller bolt and clamp it to death and sculpt a limiter onto the shaft so that the cardan could not slide back in any way.
The next step is wiring. You need to stretch two wires to the battery from the passenger compartment; you need to pull them through the left fender; to do this, open the fuse box and look for the bundle of wires going under the hood.
Bottom photos show:
We remove the instrument panel, pull out the red block, drag the wiring into the under-panel space and remove the orange wire from the red block.
We attach the block that came with the wires to it. We connect it to the EUR wiring, with the orange wire (this is the 1st leg in the EUR block, +12V power supply) And we stick the end with the bare terminal of the EUR wiring in place of the standard one in the red block.
We do the same with the gray wire of the red block. The gray end (this is the 3rd leg of the EUR control block, the signal from the speed sensor) and with the brown-red white block (this is the 2nd leg of the EUR signal block, the low-voltage signal from the tachometer)
Well, everything seems to be ready, attempt No. 1
Start. We turn the steering wheel and see - never mind. I swear at the manufacturer and myself for a long time, then we calm down and remember that the power ends are not connected. We go to the battery and connect the pink one to PLUS and the black one to MINUS.
Attempt number 2 - my pants are full of joy. Spins with one finger.
The position of the steering wheel is comfortable for me.
You have to get used to the EUR, don’t lean into corners out of old habit, but you get used to the good stuff quickly.
Well, finally a good plate has arrived. I welded the wash shaft to the required length using the stock shaft as a donor and bought a casing. Here's what happened: The length of the wash shaft is 27.8 cm. The joint of the two shafts (prior inserted into the drain and welded)
It was necessary to make some modifications in order to maintain the height adjustment, we had to grind down the edges
I placed spacers between the plate and the body, resulting in a distance from the steering wheel of the floor 51 cm to the seat of 21 cm
Having completed it, we put it in place and close it with covers. After installation it turned out like this: in the upper position (photo 1-2), in the lower position (photo 3-4)
Then I tied the wires, don’t pay attention.
There is a gap, we need to think about something.
This is what remains from the old management
The casing is defective; there was a tape recorder control.
A steering wheel with a dozen of a new sample and a casing for it, a stock shaft for the 10th rack, a guarantor.
On-board computers. Ukraine Multitronics from the official representative office: sales, service, warranty, delivery. Address and telephone number multitronics.com.ua
Installation time 4-5 hours. Installation of the EUR from Priora in a VAZ 2110. Photo report from McLaren_ The implementation of the installation belongs to McLaren_.
I took off everything old. There were difficulties with the column bolts, one just didn’t want to come off.
I started adjusting the plate to the EUR:
Then I screwed on the sharpened plate and tried on the EUR. Doesn’t fit: it warps. The whole difficulty is that the EUR itself is heavy, and when it’s also inconvenient, it’s generally heavy. And it still needs to be put on the steering shaft and on the studs. ?I adjusted the covers, they are on my VAZ 2112
Well, that's it, I collected the rest.
CONCLUSIONS:
Nothing fits! There is no steering wheel height adjustment at all! Even at 5mm! It goes somewhere around 1mm. The steering wheel is always at the very bottom, like in a trolleybus! There are gaps all over the steering wheel casing and panel! The steering shaft is positioned close to the bottom, near the EURA, there is no way to install a coupling bolt on the shaft, it does not fit because The shaft does not sit correctly. Even judging by the holes in the plate and the EUR, it is not positioned correctly. IMHO the problem is in the steering shaft, it should be shorter by about 2 centimeters then everything will fall into place and everything will be fine.
In general, everything needs to be redone, it’s no good! Another bonus is that the steering column and signal contact group have been filled with lithol, and now they’ve started switching so softly that it’s just some kind of holiday. Well, we don’t have pads for the viburnum signal anywhere. Now I'm driving without a signal.
Installation of the EUR from Priora in a VAZ 2110. Photo report by Elorn The implementation of the installation belongs to Elorn.
Today on the market there are mainly amplifiers from Kaluga Autoelectronics.
The minimum required kit consists of:
If it's good, then you need:
I went with the minimal program. Everything is removed: covers, switches, steering wheel, lock...
Next is the column itself: unscrew the bolt and nut number 13, which secure the splined connection between the industrial shaft and the steering wheel. We unscrew another 2 13 nuts from the studs on which the speakers hang and... 2 shear bolts, again, and even on the growers. We suffer, but we unscrew it. We take out the column, all that remains is to unscrew one more bolt in the area of the floor in order to remove the stock industrial shaft. There is no point in installing it on it. If the EUR then sits on the plate, which is quite unlikely, it will stick out too far. Plus, the existing rubber connection (I don’t know what to call it correctly) embedded in the section of the stock shaft will now receive a greater load, since the angle of the steering shaft will change, and the shaft will have to bend in this particular “rubber” joint, which can quickly damage it . It's better not to take risks.
Well, it’s also worth adding that the length of the EUR shaft is about 3 cm longer than the stock one. From here it’s worth dancing, choosing an industrial one. shaft: it must be at least 1 cm shorter so that the steering column fits on the studs without problems. Well, there is a 2cm margin for selecting the shaft according to the length of the arms. Personally, I find it more convenient when the steering wheel is closer, the stock position was a bit far away.
Everything is assembled easily and naturally, compared to the previous process. As they say: breaking is not building. You need to be able to do this. We install the industrial shaft and attach the adapter plate. Next, we set up the EUR, checking the strength of our hands.
We stretch the necessary wires ('+' with a 50A fuse and '-' to the battery and three information wires (12V, speed from the ECU, speed sensor) to the tidy). We install the lock, install the steering column connector, the steering wheel, and connect everything.
Unfortunately, a couple of years ago I was in a hurry when I purchased a Kalino-rudder 'under ten'. It was necessary to take a pure viburnum one with a new lever connector and a prioro casing. Having received technical satisfaction from the work, I realized that aesthetically I had completely failed. Why? Yes here it is:
Therefore, a new casing is needed, and now it is not at all clear how it will fit on this creation.
An important aspect of comfort is vibration load. It touches the steering wheel in exactly the same way. Here, vibrations (especially horizontal) of the steering column from entering large holes, which sometimes reached incredible values and responded with a knock (many people treat it by squeezing balls or balls into the cardan), have disappeared. This applies to bad roads or dirt/gravel roads. Virtually no vibrations, knocks, nothing except information on the steering wheel that the wheels are actually driving on a bad road. In this case, apparently, it is due to a different industrial shaft (without a coupling, but with a second cardan on the rack side), which does not transmit lateral vibrations further due to the additional. degrees of freedom.
Well, the EUR itself plays a role, or rather its weight, because we remember that its mass is more than 9 kilos, while a regular rack weighs no more than 2 and has a bunch of flimsy joints.
The test drive ended with our arrival in Moscow at three o'clock in the morning, so this morning was greeted with no joy at all, with pain in the back and arms, a desire to sleep more, and not go to work or do anything at all...
As practice has shown, using the steering wheel 1118 'Kalina' under a VAZ-2110 is associated with great difficulties in terms of installing the steering column cover. The most optimal set when installing EMURU (this in this case applies to the Kaluga-made amplifier, as with others - I don’t know) is :
- Steering wheel 11183-34020xx (the latest numbers in the catalogs vary, you need to make sure that the steering wheel is specifically for Kalina, and not dozens);
- Switch connector 2123-3709320 (well, the switches themselves from Kalina/Shnivy and the like, if you don’t already have them);
- The steering column cover is either 2112, or Kalina, or Priora.
'Either' because either of them will require some file work. 2112, for example, which I used, required cutting of plastic in the upper part in the area where the plate was attached and in the lower part, where it rested on the electric motor housing.
In this case, this casing will be short for two reasons:
Here's how it all worked out for me after a number of the above modifications:
The aesthetic marathet will be continued... but not very soon, due to lack of time and rational ideas.
I spent a whole day installing the EUR.
Installation of electric power steering from Priora on a VAZ 2110. Photo report by Killer Speed The implementation of the installation belongs to Killer Speed.
I bought an adapter plate and decided to paint it the color of the car. As it turned out later, it would have been better to paint it black; after installation, it sticks out a little from under the dashboard. I have an idea on how to hide it all beautifully - but I need to get to a truck parts store.
Removing the steering column is quite simple and is described in the tutorial. The only advice is that in order for the shaft to be easily removed from the steering rack, after unscrewing the bolt, use a chisel to slightly move the clamp ears apart. Oh, and shear bolts are a hassle, but it’s not that complicated. We removed it, now we compare our column and the Priora column with the EUR. On top is the column with the EUR and the adapter plate. It can be seen that the shaft sticks out more into the interior.
We unscrew the intermediate shaft from the column with the EUR and screw on the original (long) one. Screw on the adapter plate. Instead of shear bolts, I installed regular M6 bolts - what the heck, all these shear bolts are just protection from honest people. Let's try on a steering column with an EUR
EPS or electric power steering is installed on many modern cars today. This device allows for more comfortable and convenient driving. Accordingly, many car owners whose cars are not equipped with this system decide to install the unit themselves. From this material you will learn how to install it on a VAZ 2107 and what is the average cost of such a system.
[Hide]
Electric amplifier for VAZ 2110 and its technical features
Electric power steering VAZ 2110
The steering wheel of a car is the main means of control for a motorist. Driving skill depends on the ability to turn the steering wheel. Today, the automobile market is filled with many different models of different classes: from minivans to heavy trucks. Maybe this is what led to the creation of the EUR. It is noteworthy that the electric power steering on the VAZ 2110 can significantly increase the convenience and efficiency of the steering wheel. Installing electric power steering on a VAZ 2110 is a topical and in-demand issue lately.
Functional and technical summary of electric power steering
VAZ 2110 electric power steering
From a practical point of view, electric power steering is an element of increasing the convenience and efficiency of driving. Electric power steering was first effectively introduced in 1990 by the Japanese automobile concern Toyota. And already in the first years of its practical use, the electric power steering proved its high degree of practical efficiency compared to the hydraulic booster, in particular:
- it is able to function even when the engine is turned off;
- there is a significant saving in fuel consumption;
- better controllability is noticeable due to increased speed;
- high level of driving reliability;
- high safety for everyday use.
VAZ 2110 electric power steering
Let us now get acquainted with the main technical features of the structure and functioning of the electric power steering:
- the device is represented by one integral block;
- located directly under the hood;
- represented by a gear pump in combination with an electric motor;
Note. A gear pump, unlike a vane pump, does not operate at the expense of the car’s fuel engine, but thanks to its own electronic motor. This in turn allows you to significantly save on gasoline consumption.
- equipped with a high-tech control unit;
- it also contains a power cylinder;
- has a liquid reservoir and an electronic valve, etc.
VAZ 2110 electric amplifier circuit
Difference from power steering
In general, the operation of electric and hydraulic power steering is almost similar, however, it has several significant differences. In particular, the electric amplifier additionally contains an electronic component, which is represented by a valve and electronic unit. This system functions from a practical point of view as follows:
- built-in motion sensors monitor the speed of the car, and also track its trajectory and proper functioning;
- after collection, the data is transferred for processing to a specialized electronic control unit;
- after which, the artificial intelligence of the car system automatically sets the necessary parameters and oil pressure level in the master cylinder;
- oil pressure is regulated solely by the position of the valve, which can be closed or open;
- the higher the vehicle speed, the more intensively the valve opens;
- With increasing speed, the severity of the steering will simultaneously increase, which in turn will significantly increase the degree of stability in driving.
How does electric power steering work?
Although the reader has already roughly imagined how and under what conditions the electric power steering operates, nevertheless, we would like to convey to him the features of the operation of the electric power steering. The moment the driver begins to turn the steering wheel, the position sensor and steering wheel speed sensor transmit signals to the control module. There is also a torque sensor on the steering wheel. All this information is supplied to the electric power steering control unit. In addition, when controlling the electric motor, vehicle speed and wheel steering force data are also taken into account. After receiving all this data, the control module supplies power to the engine. The engine rotates and helps move the steering wheel in one direction. When steering, the position of the steering wheel is constantly monitored, while the auxiliary force changes.
On many GM vehicles, the power steering motor is mounted on the steering column. The engine and control module are one assembly in the steering column, and in the event of a breakdown, the engine and the control module are replaced. In most modern Toyota vehicles, the electric motor can be replaced separately. Electric motors installed in the steering rack, usually for GM and Honda cars, change together with the rack. It is worth noting that electric power steering is a rather expensive unit on foreign cars; its cost can range from $600 or more, depending on the car. Thus, it must be said that accurate diagnostics of the electric power steering is necessary; it will avoid replacing expensive but serviceable components. After repairing the electric power steering, it is necessary to use a diagnostic tool to calibrate the center position of the steering wheel position sensor. Otherwise, you will have feedback from the electric motor when moving in a straight line. As a rule, when the steering protection system breaks down or is activated, a warning light on the instrument cluster lights up. The lamp may indicate a malfunction or shutdown of the electric amplifier due to protection activation. Thermal protection can trip when the motor winding overheats, usually when operating in extreme steering positions. One of the most common breakdowns is a knocking sound in the steering column when driving over bumps. The result of this may be feedback from the electric motor due to incorrect operation of the control module. In extreme cases, the electric power steering can even steer the car. Checking for mechanical and electrical faults is simple. Remove the electric amplifier power fuse from the mounting block, while forcibly turning it off. Take a test drive, be careful as the steering force will be significant. If the knocking noises disappear, then the control module was to blame; if not, then you have a mechanical problem in the steering column. It is worth noting once again that in case of any electronic malfunction of the amplifier or its shutdown, the car will be controlled, but the steering torque on the steering wheel will be much higher.
Practical description of electric booster installation
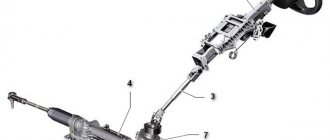
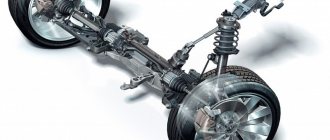
Electric power steering consists of:
- power unit, which is a synchronous type electric machine;
- control controller;
- steering shaft;
- control unit;
- steering column mechanism with lever and gearbox;
- cardan type intermediate shaft;
- a set of wires intended for an individual amplifier;
- diagnostic block;
- LED, which indicates that the electric power steering is functioning properly;
- clamps and various types of fastening elements.
Note. When purchasing an electric motor, it is very important to make sure that all the necessary components are present.
The installation algorithm itself
- First you need to put the car on the handbrake and turn off the ignition system;
- disconnect power from the battery;
- using a workbench, you need to connect the cardan-type intermediate shaft to the electric booster;
Installation of electric amplifier VAZ 2110
Note. It is necessary to connect the cardan and electric booster very carefully, otherwise the joint may be damaged.
- after which, the connections must be tightened through the grower;
- so, first you need to remove the steering wheel plug;
- then unscrew the steering wheel mounting nut, and then remove the steering wheel itself;
- now it’s time to unscrew the screws of the steering shaft casings, after which the casing itself must be removed;
- disconnect the panels and harness connectors from the double lever switch;
- remove the switch itself;
- Unscrew the bolt securing the intermediate end of the lower steering shaft;
- Unscrew the two nuts securing the steering block and the steering bracket;
- after which, it is necessary to remove the block with the intermediate shaft assembly;
Note. During assembly, the factory mounting caps must be cut off. For this purpose, you can use a chisel and a hammer.
- release the shaft from the steering rack along with their splined connection.
Note. To facilitate the process, you can use a chisel and a hammer to loosen the intermediate shaft rod.
- after which, you need to remove the steering column with a slight movement of your hand.
Note. Before proceeding with the installation of the electric power steering, it is necessary to remove the standard ignition switch.
- First of all, it is necessary to put the cardan-type intermediate shaft on the splined part of the rack worm shaft;
- there is a groove on the worms with which the intermediate shaft must be mated;
- tighten the coupling bolt;
- drill two holes in the steering column at the location where the electric power steering is mounted;
- then you need to insert a nut from the inside and tighten each bolt alternately through the screw and nut;
Notes. For a more reliable fastening, it is imperative to use a grower.
- firmly tighten all fasteners;
- carry out the wiring after removing the washer reservoir to increase the degree of convenience;
- open the fuse box and pass the power cables through the technological hole;
- then the power cables need to be brought out into the engine compartment and connected to the battery terminals;
Note. The pink wire is the positive contact, the beige wire is the neutral one and is connected to the total ground of the car.
- the individual fuse must be placed in a special fuse block;
- connect the LED wire to the amplifier plug;
Classic electric power steering
Note. The main thing is not just to study the instructions very carefully, but to understand all the nuances in general.
- then the wiring should be pulled from the electric amplifier to the instrument cluster;
- Next, you need to turn the steering wheel, making two or three full turns in different directions, and if there is no buzzing sound, perform assembly in the reverse order of disassembly.
The instructions for installing an electric amplifier with your own hands are very complex, so you need to read it as carefully as possible and be sure to document the process itself visually using video and photo materials. The cost of installing an electric amplifier with your own hands is insignificant, however, the procedure itself is very complicated, and therefore it is recommended to use the services of a car service center.
We install the EUR and power steering on a VAZ 2110 with our own hands
Depending on the year of manufacture, the “ten” can be equipped with a hydraulic booster (power steering) or an electric booster (electric power steering). Of course, the second option is preferable, since it makes driving the car easier and more comfortable. If your power steering is worn out or you just want to replace it, then it is recommended to choose the power steering for the VAZ 2110 as an alternative.
This material contains two instructions:
- Installation of power steering.
- Installation of an electric power steering VAZ 2110 instead of a standard power steering.
Before installation, you need to understand the structure of these units, and also find out how they differ from each other.
Analysis of the steering rack of a VAZ 2110 car.
Alternator and power steering belt
Generator on a VAZ 2110 car with power steering
What, does the owner of a VAZ 21103 have a hydraulic booster? As you know, if a VAZ 2110 is equipped with power steering, which, it is worth noting, completely eliminates vibrations typical of front-wheel drive cars, replacing the alternator belt is carried out completely differently than is customary. As a rule, the alternator belt is replaced after 45-60 thousand kilometers, and cracks on it are a direct sign of replacement. A normal replacement of this part takes no more than 10 minutes, but on cars with power steering it takes more time, and the belt cannot be found in its usual place. In this place, if power steering is installed, the pump described above is placed. The generator itself is located higher.
The difficulty of replacement in this case is characterized by the fact that the belt rotates around the left motor support, which forces you to unscrew the support, lift the engine and only then remove the belt. Specificity is also observed in the case of alternator belt tension. In particular, the angle of the alternator pulley belt in the case of power steering is quite small and the usually accepted tension of 1 cm up and down does not work here. The belt begins to slip. This means that the power steering belt tension must be stronger.
Note. If, after tensioning the belt, the alternator begins to howl while the vehicle is running in, the belt should be loosened slightly.
As you can see, power steering also means unnecessary troubles associated with repairs. But if you learn to do everything yourself, problems can be avoided. In addition, you can save a lot on repairs, the price of which increases every time at the service station. The instructions presented above are an introductory version for owners of a VAZ 2110 with power steering. A complete step-by-step manual for replacing the power steering, repairing it, etc. can be found in other articles, through video or photo materials.
We install EUR and power steering on a VAZ 2110 on our own
Based on the year of manufacture, the “ten” can be equipped with a hydraulic booster (power steering), also called an electric power steering (EPS). They are appreciated by women; the second option is preferable, because it is easier and more comfortable to drive a car with a child. If your power steering has worn out differently and you just want to change it, then it is recommended to choose the power steering for the VAZ 2110 as a candidate.
This material contains two annotations:
- Installation of power steering.
- Installing electric power steering on a VAZ 2110 instead of the standard power steering.
Well before installation, you need to understand the structure of these units and also find out how they are different.
Differences between EUR and power steering
These are completely different units. To understand the main differences, it is enough to study the hydraulic booster. Its main component is a pump driven by the crankshaft, it is integrated with other parts. The operating principle of the hydraulic booster is based on hydraulics.
As for the electric power steering, it is driven by an electric motor. Its design also includes an electronic control unit, a steering shaft with a torsion element and sensors. The EUR works according to a different scheme:
- When the steering wheel rotates, the torsion shaft twists;
- Special sensors record changes in the position of the shaft and send data to the electronic control unit;
- After analyzing the information, the unit sends commands to the electric motor;
- As a result, the unit creates the necessary force or facilitates turning the steering wheel.
The design of the electric power steering wheel
Car enthusiasts often argue which option is preferable for the “ten”. In fact, power steering is an obsolete unit that is being actively removed from modern passenger cars. The electric booster works even when the engine is turned off and weighs less than the power steering. The main advantage over “hydraulics” is reliability - the electric unit requires virtually no maintenance. There is less load on the engine, and as a result, less fuel is also needed. The EUR is also good for our conditions because it functions well at low temperatures.
But the electric booster also has its drawbacks. Its design is more complex than that of “hydraulics”, hence the high price. Sometimes the electronic control unit sends incorrect commands, this was especially felt by the owners of the first generation Kalina. If you drive for a long time on a poor-quality road surface (or lack thereof), the EUR may turn off for several minutes due to overheating.
Installation of EUR
Required Tools
Let's say you purchased an EUR kit - it could be from a VAZ 2110 or from another model, for example, from a Priora. Prepare the following tools:
- Drill together with a metal drill.
- Set of screwdrivers, grinder.
- Long ruler.
All is ready? Let's move on to installation.
Step-by-step instruction
- You need to remove the standard terminal from the block and place it in the block on the harness. We find the standard drive, which is attached to the block. A free terminal must be installed in its place. Now the wire can be placed between the fasteners.
We take out the standard terminal and place the terminal from the EUR kit there. Now we take a screwdriver in our hands and carefully remove the steering column housing, and then remove the lock and switches. We need to remove the steering rack; to do this, unscrew the bolt that holds it.
Installation
No oils or other substances are required, since the work is done with electricity and not with mechanical components. After all components are prepared, you should proceed to direct installation, which will take place in the following sequence:
- It is necessary to remove the standard terminal from the block and move it to the block located on the harness;
- After this, the free terminal extending from the harness moves to the place where the standard wire was located, adjacent to the block. This will make it possible to pass a standard type wire between the harnesses. The wire coming from the blocks has a rating of 50 A;
- Now you need to slowly separate the steering shaft housing, then remove the ignition switch and separate the switches. This must be done slowly to prevent cracking of the casing;
- Carefully unscrew the bolt that holds the steering rack and then remove the rack itself;
- It is necessary to measure the length of the shafts and if you need to adjust the plate, for this you need to use a ruler and perhaps even write down the indicators;
- The electric amplifier is installed in the free space; to do this, you need to select the required shaft size, since it does not fit on the rail. To adjust the shaft to the required size, the plate and shaft are ground to fit the Priora shafts. It is the parts from the VAZ Priora that are best suited for this;
- After the shaft is adjusted, it is necessary to drill the plate deeper than it already is. This is not difficult to do, since the shaft is a hollow structure;
- The plate is installed on the amplifier and thereby the resulting depth is checked. If everything is fine, then you need to firmly clamp the entire structure using a smaller bolt;
- Now you should install the switches in their places and proceed to the wiring. To do this, you need to lead two wires directly to the battery from the passenger compartment, through the left fender;
- Next you need to remove and take the wire. With its help you need to attach the two wires that were brought out. They need to be attached to the end of the opposite wire and pulled through both;
- It is necessary to remove the dashboard and take out the red block from there, slowly tighten the wiring into the space under the panel. Then remove the orange wire from the red box;
- You need to attach a red box to this wire and combine it with the electrical amplifier wiring. In this case, the end with the exposed terminal of the amplifier wiring is placed on the free standard wire in the red block;
We connect the orange wire to the EUR wiring, put the “bare” end of the wire in place of the standard one in the red block
- You also need to do the same with the gray wire, which also comes out of the red block. It must also be pulled into the place of its regular counterpart and secured with a terminal;
- After which you need to move to the battery and securely fasten the black wire, that is, MINUS, to the pink wire, that is, PLUS;
- After this, you need to connect all the electric power steering wiring and start it or just turn it by hand.
The installation of the electric amplifier is complete, all that remains is to carefully install all the components in their places.
To do this, you need to put back all the switches and fit in place the casing and steering wheel, which will cover the steering shaft.
This material will help make dismantling the steering rack easier:
Installing power steering - step by step instructions
This instruction is intended for VAZ 2110 cars, which do not have power steering at all. Such models were produced a long time ago, but they can still be found on the road today. In this case, the car can be upgraded with your own hands.
You can install the power steering yourself; for this you will need a power steering kit - today it can be purchased for about 20 thousand. From the tools, prepare a set of keys and screwdrivers; you should also take care of the amplifier fluid in advance.
- We dismantle the timing case and install the bracket on three bolts. There are already holes in the interior, so there is no need to drill new ones. Now we install the pin on which the roller will later be installed. There are no holes for it, so we make new ones. Let's put on a video.
Install the bracket and secure it. The generator and both fastenings under it should be removed, and then do the same operation with the column. The steering shaft should be shortened by approximately 35 mm. If you have a welding machine and an angle grinder, then you can do this job yourself.
Fasteners that need to be removed
Here you can see the fastenings that need to be removed. The photo below shows in detail what needs to be sawed off. After this, securely fix the pump on the bracket and cover it with a pillow. The assembled unit should be placed on the engine, or rather, in the place where the generator was mounted.
Draw a line with a marker and carefully saw off the excess part. Find the adsorber and place the tank mount under it. To do this, you need to unscrew the bolt that holds the motor mount and lift the unit. We place the power steering belt in this hole, do not forget to fix it on the roller.
Here you can see where the pillow nut is located. All that remains is to replace the standard rail with a new one from the amplifier.
Remove six bolts and complete assembly
You should undertake such work only if you already have experience in servicing the electrical and power plant of the VAZ 2110. Power steering is directly related to safety, so if you lack experience, it is better to turn to the experts.
What is power steering VAZ 2109
On the first models of VAZ 2109 cars, power steering was not installed. The driver has to mount the unit additionally. It consists of two parts:
- The source of energy, its role is played by a hydraulic pump.
- The execution mechanism, which is usually combined with . The general view of the device is shown in the photo.
Before mass use of the device, manufacturers tested the car, which showed:
- When moving the car with numerous turns in a limited space, it rotated easily; it was necessary to turn it at a smaller angle than in a car without power steering.
- When driving around the city, after a little skill, the driver only gets pleasure from driving the car.
Tip: When turning the steering wheel at a larger angle than the driver expects, the power steering allows the steering wheel to be turned to the desired angle, the car will easily fit into a smaller radius.
- When driving on a free area, the number of steering wheel turns is three and a half from one stop to the other, with the hydraulic booster three and one third are enough.
- A change in the steering gear ratio led to more precise vehicle control.
- The steering works well at very low speeds in parking mode. Very little effort is applied to the steering wheel.
- Excellent results were obtained when moving at extreme conditions. Increasing speed resulted in a slight increase in steering effort, but feedback was good.
How to install power steering on a VAZ 2109
Instructions on how to install power steering on a VAZ 2109 indicate what is needed:
- Purchase a power steering kit, with all the components: a pump, a special steering gear, a pulley, a hydraulic cylinder, an expansion tank and hoses that can withstand high pressure.
- The pump fixation bracket is installed on the BC head. When installing it, the product needs to be modified: it is unscrewed, the ears for its fastening are sawed off, the far right mount is sawed off so that it does not interfere.
- Instead of the generator, the pump itself is mounted on a bracket.
- The crankshaft pulley is being replaced; the pump will be driven through it.
Advice: It is necessary to take into account that the drive should not go through the chain, but only through the belt.
- The steering gearbox is being replaced.
Tip: When installing a new gearbox, you will need to modify the place where it will be mounted. To do this: a hole is cut in the front end shield and the bipod is modified.
- A location is selected for the expansion tank so that it does not interfere with other parts of the engine.
- The hydraulic cylinder is installed according to the instructions included in the power steering kit. Each device manufacturer has its own installation features.
- The entire system is connected by high-pressure hoses and is well fixed.
Tip: It is necessary to ensure that the hoses cannot rub against other elements located under the hood.
- A special one is poured into the expansion tank.
- The system is being pumped. In this case, the steering wheel turns all the way left and right; if necessary, you need to add oil to the expansion tank.
- When the liquid stops leaving, you need to replenish the oil level to the top mark of the tank.
- On a VAZ 2109 car, the installation of the hydraulic booster ends with bleeding the system.
The advantages of the VAZ 2109 with hydraulic booster can be seen in the video.