Only a few drivers know how to check a diode bridge with a multimeter, and this knowledge can be very useful. This element plays an important role in the operation of the generator, and because of it the battery is charged correctly. Often, if any breakdown occurs, drivers immediately take their car to a service station. But often it is enough to simply check the diode bridge with a multimeter, after which you can solve the problem yourself, leaving behind the money that you would have to pay for repairs. Let's take a closer look at what this generator element is and why it is needed in general.
What is a diode bridge? Its working principle
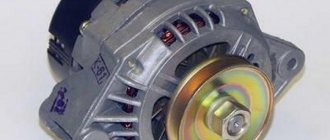
This device plays the role of a rectifier in the charging element. To convert current, 4 to 6 diodes are installed in the generator, and they are all combined into a single circuit called a diode bridge. It is located directly in the generator itself.
The principle of operation of this element is simple: it passes the current generated by the generator to the battery and does not pass it in the opposite direction - from the battery to the generator. In this case, a resistance of a certain magnitude is created in one direction, and in the opposite direction the resistance tends to infinity. If any malfunction occurs with the bridge, the vehicle's electronics will malfunction. Or rather, the battery will fail, and without it the car simply won’t start, since the starter itself receives power from the battery.
What causes a diode bridge to burn out?
Checking the generator diode bridge with a multimeter also involves finding out the reasons why the diode bridge fails. The most common reason is water accumulating inside. Often, after washing a car or driving through puddles, the bridge may burn out.
The second reason is polarity reversal at the battery terminals. This happens when lighting a cigarette inappropriately or when connecting the charger to the battery. Of course, there may be more complex reasons for a bridge burnout, but most often it happens for one of these two reasons. Therefore, try to avoid driving through deep puddles and charge the battery properly.
Diode bridge: concept and principle of operation
Since a car engine is a key mechanism of every vehicle, timely checking of diodes will help to avoid many problems with the performance of the car’s electrical system.
The diode bridge of the generator provides voltage to the electrical circuit, battery, compressor winding and the overall functioning of power quality. If it malfunctions, the car may not start, since electricity will flow through the engine windings, which is absolutely not suitable for stable operation of the on-board network.
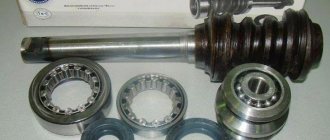
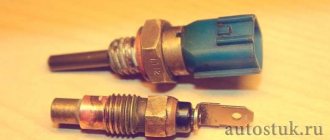
The design of diodes is quite extensive: they are produced in the form of a whole module, tablets and flat plates. The diode bridge is pressed tightly against the radiators or inserted into the niches located in them. These parts are fastened by soldering and fixing with bolts, followed by insulating the diodes.
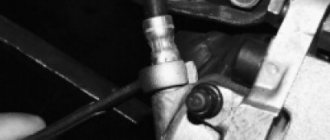
The rectifier consists of two plates with a positive and negative charge. On the “positive” plate there is a special bolt that goes into the outer part of the generator.
What is the effect of a burnt diode bridge?
If any problems arise with the battery, then first of all you should check the diode bridge with a multimeter. The battery is directly connected to this bridge. If it breaks down, there are 2 options: the current does not flow to the battery at all, or it flows, but it is very high. This may cause the electrolyte to boil.
Therefore, if a problem arises with the bridge, it must be solved very quickly. Otherwise, you will have to buy a new battery, which is not cheap. Therefore, it is better to have an idea of how to check the diode bridge with a multimeter on the 2110 and other VAZ models. There are at least 2 ways to check: using a multimeter or a regular light bulb. Let's consider both methods.
Checking with a light bulb
First, remove the diode bridge from the generator. However, in the case of a light bulb, you can do without this. We take the assembled bridge and touch it to the battery terminal. Be sure to ensure that the contact is constant and strong. Now we take the light bulb and touch its contact (plus) to the positive of the battery.
Now we alternately touch the other contacts of the lamp to the contacts of the diodes, then to the contacts for connecting the starter winding. If the light is on, it means that the bridge is “broken” and, therefore, it is not working. Now, if you connect the circuit through one diode in stages, you can identify the faulty element and replace it with a new one.
If there is a need to check the bridge for an open circuit, then we “throw” the minus of the bridge onto the plus of the battery. Then we connect the lamp plus to the battery positive. Now we connect the free contact of the lamp to the elements, as described above. In this case, the lamp should be on. If it does not light up at all or lights up with a dim light, then there is an open circuit in the diode circuit.
Checking the diode bridge with a multimeter
As in the previous method of checking with a light bulb, in this case it is also necessary to remove the bridge from the generator. When checking a diode bridge with a multimeter, each diode is checked separately. First you need to turn the multimeter into the “Ringing” mode, but if there is no such mode, then simply set the resistance to 1 kOhm. In this mode, when two contacts are closed, it will ring.
The bridge is divided into two parts: auxiliary and power diodes. Checking the diode bridge with a VAZ-2114 and other brands multimeter is done in the same way for both parts. The principle is as follows: a working diode in the direction of the battery will show a resistance equal to several hundred Ohms, in the opposite direction the resistance will tend to infinity.
We connect the multimeter probes to each contact of the diodes. And if the device shows a value that differs from the value after changing the probes, then this indicates that the diode has burned out. This operation must be carried out for each diode.
Verification methods
Checking the diode bridge of the generator can be carried out in two of the most popular ways. One of them does not require complex equipment and the car enthusiast will only need a lamp designed for a voltage of 12 V. In addition, it is possible to check the diode bridge with a multimeter.
Using a light bulb
Since this is the simplest method, it’s worth starting with it. First of all, you have to assemble a simple electrical circuit consisting of a battery and a light bulb. The ends of the conductors located in the circuit break should be cleaned; they will serve as probes. When they are connected to the diode in the same polarity, the lamp should light up, but in a situation with opposite connection, no reaction will follow. In this case, the semiconductor device should be considered serviceable.
There is also a second way to check the diode bridge using these improvised means. In this case, there is no need to disassemble the generator, and all work is performed in four stages:
- Improvised probes are connected to the output contact “30” and the negative terminal. If the light comes on, then there is a short circuit in the circuit.
- The negative terminal of the battery is connected to the bridge body, and the positive terminal is connected through a light bulb to the bridge mounting bolt. Any reaction from the light bulb indicates a problem.
- The positive terminal of the battery is connected to point “30”, and the negative terminal is connected to the mounting bolt. If the lamp does not light up, then the bridge is working.
- The negative contact of the battery remains in the same place, and the positive contact is connected to point “61”. If the light starts to glow, then there is a fault in the circuit.
Checking with a multimeter
This device allows you to conduct a high-quality check of the bridge, but for this you have to remove the generator. The cause of a unit malfunction may lie not only in the diode bridge, but also in other elements, for example, windings or a voltage regulator. Since the process of dismantling the generator may differ depending on the car model, there is no point in focusing on this now.
Once the assembly has been removed and disassembled, the diode bridge should also be removed. In order not to confuse the orientation of the bridge during assembly of the device, marks should be applied to it and the generator using paint. Before starting the test, the multimeter must be switched to resistance changing mode with sound signals. Then you should connect the probes to the contacts of the semiconductor device.
It is necessary to check each diode and to do this, one probe should be connected to the central plate, and the second one should be connected in turn to the terminals of the semiconductor device. If the multimeter beeps whenever connected, the diode should be considered faulty. After completing the inspection, it is necessary to replace all failed elements.
If the resistance is very low
The second option, when checking the diode bridge of a VAZ-2109 generator and other models with a multimeter, involves displaying zero values. This indicates that there is an open circuit in the circuit. If the readings are close to zero (very low resistance), this means that the diode is broken. A multimeter as a testing device allows you to accurately indicate which diode has failed and determine the nature of the failure. When using a light bulb, everything is approximately the same, but with a weak charging current it is more difficult to detect correct operation. Therefore, using a multimeter is recommended, but if you don’t have one, you can try to find the problem using a regular light bulb.
However, the only advantage of checking with a light bulb is the fact that it is not necessary to remove the diode bridge from the generator. But without removing the generator, it is impossible to check the diode bridge with a multimeter. This cannot be done without removing the generator. There you have to work with individual parts, but this gives a more accurate result.
If a non-working diode is detected, it is replaced with a new one. This is easy to do with a soldering iron. The diode itself costs a penny and is sold in any auto parts store. Replacing it is also not difficult, and you can do it yourself.
Why did the generator diode bridge burn out?
Home » Electrical » Why did the generator diode bridge burn out?
426
Let's figure out why the diode bridge in a car generator burns
The main component in the electrical system of any vehicle is the generator. Without this unit, a serviceable car, even with a new, fully charged battery, will not drive for long. Therefore, this unit must be in working order at all times, that is, fully operational.
In this case, initial diagnostics of the car can be carried out without leaving the driver’s seat. However, repairs or detailed inspections require dismantling the DC source and then disassembling it to gain access to the diodes. But before this, the motorist must know the basic ways to check the diode bridge.
How to determine the health of the generator
Information about the operating status of the main unit responsible for generating electrical energy in the car is displayed on the dashboard for the convenience of motorists. The icon on the instrument panel that resembles a battery should go out after starting the vehicle’s power unit. This means that the power to the main electrical components has been switched from the battery to the generator. If the indicator does not go out, this indicates a breakdown in the electrical circuit. Problems may also be indicated by insufficient battery charge due to the lack of normal current rating.
Main signs indicating a faulty diode bridge
A normally operating diode conducts current in only one direction. In the event of a breakdown, a current leak appears, which flows from the on-board network to the starter windings. Today, several types of diode bridges are installed on cars:
- diode bridge without additional cooling;
- diode bridge with passive cooling due to special radiators.
In addition, there are different types of connecting windings and connecting bridge platforms: using welding or soldering. The first sign that the generator is operating unstably due to a broken diode bridge is the rapid and frequent discharge of the battery. There are other reasons why you can indirectly determine the combustion of diodes in a rectifier:
- insufficient spark on the spark plugs;
- headlights with dim light during operation of the power unit;
- interruptions in the sound system;
- significant reduction in cooling fan power;
- poor operation of the air conditioning system.
If any of the above-mentioned signs are noticed, there is no need to panic, but it is better to find out why the diodes burned out, for which you should seek help from the service station specialists.
We prepare the diode bridge for self-diagnosis
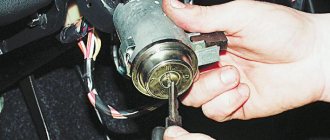
You can check the functionality of the generator bridge on your own if you understand how the diodes are connected. But before you start diagnosing, you need to carry out preparatory measures. To do this, you need to the generator to gain access to the diodes:
- The fasteners (bolts) holding the front and back covers are unscrewed.
- The next step is to disconnect the housing from the starter winding.
- If the bridge structure is collapsible, then the assembly is unscrewed.
- The positive terminal is disconnected from the generator.
- The method of attaching the minus is checked. If the terminal is independent, it is disconnected.
- After removing the front wall, the bridge is disconnected from the windings. For this purpose, a soldering iron is used to heat the leads until the solder boils, after which they are carefully moved to the side using a screwdriver.
After completing the preparatory work, you need to figure out the question of how to properly check that the diode bridge has burned out ?
Signs of diode failure
The main problem in a rectifier bridge is the diodes. You should start checking the unit that generates electricity in the car only after identifying the following indirect problems:
- the voltage at the generator output terminals is below 13.5 Volts;
- the indicator on the instrument panel inside the car continues to light after starting the power unit;
- the arrow on the voltmeter shifts to the red zone when readings are taken;
- The battery indicator does not light up after turning on the ignition.
Similar symptoms are detected when the voltage regulator breaks down; therefore, its serviceability is checked first. There are various reasons why a rectifier bridge fails, which requires its repair or complete replacement.
Why does the diode bridge burn out?
There are many situations that can lead to diode failure. However, the most common breakdowns include the following:
- the board was flooded with water;
- dirt, together with engine oil, penetrated inside the bridge and led to a short circuit;
- The polarity of the contacts on the battery has been reversed.
Experts are considering several options for checking the functionality of the generator rectifier. The first method involves using a multimeter. In the second case, a standard car light bulb is sufficient.
Diagnostics of a diode bridge using a multimeter
Before you understand why the diode bridge may be burning, you first need to dismantle the broken unit. After which a sound indication is installed on the measuring device. If such a function is not provided in the multimeter, then the test takes place in 1 kOhm mode. Individual measurements are carried out for all diodes. In the process of checking with the working contact, you need to touch the ends of the diode several times, while swapping the probes of the device. In one case, the test shows an infinitely high resistance, and in the second, the parameters should fluctuate in the range from 500 to 700 Ohms. If the measurement results turn out to be the same in different directions, this indicates that the diode under test has failed and needs to be replaced.
Checking the diode bridge using a light bulb
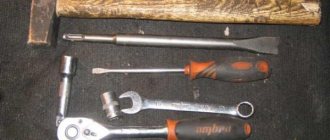
Naturally, not every car owner has a multimeter, and therefore you need to know how to check the vehicle’s generator using improvised means? To do this you need two pieces of electrical wire and a car lamp. The check itself involves the following simple steps:
- The protective casing of the generator is removed and a diode bridge plate is connected to the negative terminal of the battery.
- The wire from one end of the light bulb is connected to the positive of the battery, and with the other you need to touch the terminals of the remaining diodes and the connection points of the starter winding in turn.
- If the lamp lights up at any terminal of the diode, it means that this element is faulty and needs to be replaced.
In some cases, it may be necessary to check the diode bridge for an open circuit, for which you need to carry out the following manipulations:
- The wire from the negative terminal of the light bulb is connected to the negative terminal of the battery and in the same sequence as checking for breakdown of the diodes, they are tested. The only thing is that in such a situation the light should be constantly on.
- If, during the test, the light on any of the diode terminals does not light up or its light is very dim, then the part has broken and will have to be replaced.
You can find out why malfunctions occur in the diode bridge of the generator yourself in a garage. In this case, you will need a regular tester, which almost every car enthusiast has, or a car light bulb with two wires.
Video about repairing, checking and replacing a diode bridge
Vote, did you like the article?
remontpeugeot.ru