Surface preparation
The design feature of the LED strip provides a variety of applications for lighting and decorative lighting
LED strip is used to create lighting in the living room, bedroom, bathroom, hallway, and kitchen. Thanks to its flexibility and adhesive base, it is attached to wood, plasterboard, metal, plastic, and ceramic surfaces. Their shape can be rectilinear, curved, spherical.
During installation, the following rules should be followed:
- Do not allow mechanical impact on the board.
- You can cut the tape at specially marked places.
- When LEDs operate, heat is generated, so the canvas must be cooled.
- Connectors are used to connect sections of the LED strip.
- The tape is connected to the network through a power supply of appropriate power, which provides a voltage of 12 or 24 V.
LED strips are divided into 2 types according to the degree of moisture protection
The adhesive base of the LED strip is 3M acrylic tape. For its strong adhesion to the surface, the following conditions must be met:
- The surface must be smooth, without protrusions, sharp edges, or bumps.
- The base is pre-prepared: cleaned, dusted, degreased with isopropyl alcohol or a cloth with an adhesion activator. To degrease metal and plastic substrates, you can use white spirit or acetone. Painted surfaces are treated with a vinegar solution.
- Markings are applied to the base, allowing the canvas to be secured along the required trajectory.
- The room temperature is above 18 degrees. At room temperature, the tape sets as much as possible within 24 hours. At temperatures above 60 degrees – for an hour.
LED strip can be glued to wood. The wooden base must be smooth, painted or varnished. It does not adhere to an unprepared surface and quickly peels off.
General installation rules
Despite the fact that today LED strips are quite widely represented on the lighting market, do-it-yourself fastening of them is carried out in a similar way and has general rules.
Note! Having a large assortment of LED strips, these products can be installed on various surfaces in the kitchen, bedroom, living room, hallway and even the bathroom.
LED strip in the kitchen
To attach any type of LED strip to a surface, you must adhere to the following installation rules:
- LED must be connected exclusively through a special power supply, which reduces the 220 V network voltage to the required level (12 or 24 V). This need is dictated by the fact that all LED products are low-voltage products;
- since the tapes can be cut into fragments of different lengths, they must be connected to each other using certain connectors and sockets;
- You should avoid excessive bending of the tape during installation. Otherwise, the electrical component of the product may be damaged;
- when cutting a product and connecting individual pieces, it is necessary to maintain the integrity of the conductive paths through which the LEDs are powered;
Connecting pieces of LED strip
- if the segment is more than 4A, experts recommend using good old soldering rather than special connecting elements. In this case, soldering will create a more reliable connection of conductive elements;
- When organizing lighting in the kitchen or bathroom, you need to choose models that have a high class of protection against dust and moisture. For other rooms, such as the bedroom and living room, you can choose cheaper products with a low moisture resistance class;
- Before attaching the LED strip, you need to properly prepare the surface: clean it of dirt, dust and dirt;
- Self-adhesive LED strips can only be used once. In this regard, the length of the LED should be thought out in detail before installation begins. The best solution in this situation would be to pre-mark the installation path of the LED strip on the surface;
- Serial connection is possible only for five LEDs. Otherwise, the LEDs at the ends will glow less brightly. In the future, this situation will overload the stable plan of the entire lighting system.
Following these rules will allow you to install an LED strip with your own hands and make the lighting in any room (kitchen, bedroom, living room, etc.) impeccable.
Materials for gluing
LED strip is cut through three diodes
The LED strip has a standard self-adhesive backing. But it is not suitable for long-term fixation on rough surfaces, such as wood. The list of materials that can be used to glue the LED strip is as follows: aluminum profile, tape for LED strip, aluminum tape, quick-setting glue. They improve properties and increase fastening efficiency.
Adhesive tape for LED strip
Serially produced tapes are a printed circuit board with LEDs attached to double-sided tape. Its free side, used for installation, is protected by a smooth transport film. For high-quality models, the 3M marking is applied to it.
Acrylic tape 3M for various applications
How to glue LED strip:
- Markings are applied to the previously prepared surface.
- Wires and a power supply are connected to the backlight contacts or using a connector; install a switch.
- Using a sharp object, separate the beginning of the tape from the protective film and release a section 15-20 cm long.
- Apply the strip with LEDs to the surface and press firmly.
- Gradually freeing sections of the tape from the film, completely glue the tape along the marked path. When making connections in the corners, do not bend it, but use corner connectors or solder it.
- Install the power supply in a convenient place protected from moisture.
If, when removing the protective film, conductive paths are exposed, it is necessary to apply a backing of electrical tape to this place. Otherwise, a short circuit will occur when connecting.
The tape must be applied accurately to the markings. If it is placed incorrectly after detachment, the tape loses its properties. It will be difficult to reattach it firmly.
Aluminum profile
Aluminum LED Profile
The optimal mounting for LED lighting is aluminum profiles. They are used for extended, powerful models SMD 2835 and SMD 5630, 5730 and for the popular LED-based SMD 5050. For fastening structures with a power of more than 14 W, their use is mandatory.
Profiles can be overhead, mortise, or corner. LED lighting is glued inside the profile, and it is mounted on the selected surface.
Using aluminum profile for LED strip
Properties of aluminum profile:
- The self-adhesive surface of the tape fits perfectly onto a flat and smooth base;
- Easily and firmly attached to the mounting plane;
- the heat generated during the operation of LEDs is removed through the aluminum surface;
- The matte diffuser, which covers the front part of the profile, gives a pleasant appearance and makes the lighting softer.
An inexpensive alternative to an aluminum profile is a plastic cable channel without a cover. Its disadvantage, which leads to premature loss of brightness of LEDs, is poor heat dissipation during operation. Therefore, its use is not justified.
Glue
Super glue is perfect for gluing LED strips
The right LED strip adhesive provides a quick-setting bond. Adhesives cope with this task:
- based on cyanoacrylate, called superglue, for example “Moment Super”;
- based on rubber or silicone, for example, liquid nails “Titanium” or “Moment Montazh”.
Recommendations for fixing with glue:
- Superglue is applied pointwise every 50 - 100 mm. This way the tape is securely fixed and, if necessary, it is easier to dismantle it than when applying a continuous layer of glue.
- The strip with LEDs is applied with its base to the surface on which the glue is applied and pressed firmly.
Adhesive joints are used on vertical, inclined porous surfaces. It is resistant to temperature and humidity. The tape adheres to a properly treated surface in 20-60 seconds. They completely glue together in no more than 2 hours. You can use glue to attach the LED strip to metal, wood, plastic, wallpaper, glass.
Hot melt adhesive is not recommended. It attaches well, but due to its low heat-dissipating properties, overheating of the emitting crystals and their premature failure are possible. When exposed to elevated temperatures, it melts and emits an unpleasant odor.
Aluminum tape
Aluminum tape is used instead of a profile for LED strip
If it is impossible to use the profile of LED strips of low and medium power (6-10 W), they are attached to aluminum or foil tape. Its surface has heat-dissipating properties and can serve as a light reflector.
Aluminum tape for the LED strip is glued to the surface according to pre-applied markings. To ensure a good connection, superglue is applied pointwise to it. Then a strip with LEDs is attached to the tape.
Other mounts
Mounting clip
If the LED strip is hidden or appearance does not matter, you can use the following to fix it:
- disposable nylon zip ties;
- plastic clamps.
Do not fasten the LED strip using staples with a construction stapler.
Two methods of gluing LED strip have become widespread: with tape and with glue. The tape comes off over time. The strength of this installation is increased by using superglue. It is optimal to mount the lighting using an aluminum profile.
Advantages of LED lighting
An increasing number of owners of private and commercial real estate strive to ensure that their property looks original and presentable. One way to fulfill this desire is to install an LED strip in the kitchen.
This solution is supported by the advantages of this light source:
- High color rendering index. Crystals recreate the natural colors found in nature.
- Flexibility. Products can be given complex shapes and used to decorate items and objects with angular and curvilinear configurations.
- Easy to install. Fastening is done on an adhesive base.
The set of equipment has an affordable price for all categories of the population.
220V tape sticker
Using LED strip for street lighting
Models designed for 220 V voltage are produced without an adhesive backing and are placed in a hermetically sealed shell. They heat up during operation, so they are not recommended for use indoors. Used to organize external lighting of buildings in well-ventilated areas.
You can attach such a model in one of three ways:
- installation on an aluminum profile using clamps;
- fixation using fastening pads, clips, nails;
- gluing with double-sided tape.
To attach it to tape, it is cut into strips 3-5 cm long. One side is glued to the canvas every 5-7 cm. Then the structure, separating the free surface of the tape from the protective film, is fixed in the required place.
When using 220 V LED strip outdoors, the most reliable option is to mount it with clips.
How to glue an LED strip to a kitchen unit
LED strips are sold in rolls five meters long. For further installation, you should purchase fasteners, glue and a power supply. The backlight must be connected through a block that reduces the voltage. Low voltage products do not require a full power supply. Blocks come in different capacities and sizes. The strips themselves are cut, so they need to be connected to each other with special fasteners.
You can use superglue to attach it to the headset. In this case, the LEDs will not come off even after the expiration date. Many products already contain an adhesive layer hidden under a protective film. For a better effect, it is recommended to add double-sided tape for high-quality fastening. On one side the tape is glued to the surface of the headset, and on the other side the LEDs are attached.
Reference! A varied color palette of additional power supplies will decorate any interior of a modern kitchen. The backlight can be made in white, yellow, green, blue and red.
Where to hide the LED strip
When illuminating a stretch ceiling, first install the tape, then stretch the ceiling
Depending on the type and shape of the base on which the LED strip is attached, it can be hidden in several ways.
- Ceiling. LEDs are mounted in the ceiling plinth or plasterboard cornice . To prevent the tape from being visible, it is laid to a depth of at least 2 cm. If suspended ceilings are installed, first attach the lighting and lay the wires, and then stretch the fabric.
- Walls. To hide the tape in the wall, make a niche in the shape of a plasterboard box. Low-power models are mounted directly on the surface of the niche; for powerful ones, an aluminum profile should be used.
- Furniture. LED lighting can be attached to any cabinet furniture in the living room or bedroom, or kitchen unit. It is glued to the base of hanging cabinets, inside sideboards or cabinets with glass doors, highlighting their contents. To organize decorative lighting, it is glued to the top of the furniture.
- Stairs. You can highlight the staircase in a multi-storey building using LED lighting. It is placed under steps or in recesses in railings.
A hidden strip of diffused light complements the main lighting, creates illumination at night, focuses attention on decorative elements, or is used for zoning space.
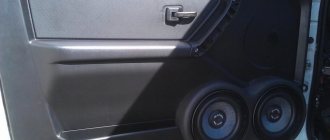
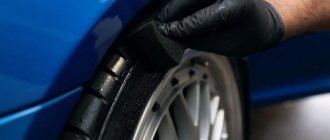
Flexible LED strip for car headlights
Diode lighting is widely used in our homes, and with great success it is replacing halogen bulbs from the car.
Today we will take a closer look at how a flexible LED strip for a car is installed in headlights or outside. It radically changes the appearance of the car, it glows modernly and beautifully. LEDs are mainly equipped with only expensive car configurations or prestigious models. To add a little personality, you can install it not only in the front, but also in the rear lights, such as markers, turn signals, and brake lights.
- 1. Light requirements
- 2. Types of flexible tape
- 3. Installation in headlights
- 4. Installation on headlights
- 5. How to connect the tape
- 6. Glue the backlight inside the headlight, video
Common errors and methods for eliminating them
The most important mistake is gluing a powerful tape without a profile directly onto the surface of the ceiling, wall, cabinet
The service life of the LED strip will increase if you avoid the following mistakes:
- Gluing lighting onto the surfaces of ceilings, walls, furniture without a profile. This fastening does not provide cooling for the tape; if it overheats, it will quickly come loose and the LEDs will fail.
- Gluing bare LED tracks. Mounting the strip on a damaged base through which the LED board protrudes will cause a short circuit when connected. To avoid this, apply a layer of insulation to the damaged areas.
- Using a stapler for fastening on wood and drywall surfaces. Attaching the backlight requires shooting the staples many times. If you make just one mistake, the LED board will be damaged and the strip will be unusable.
- Installation on a plastic profile from a cable channel. This type of profile is not intended for mounting LEDs: it does not provide heat removal, which leads to overheating of the structure.
- Using hot melt adhesive. When LEDs operate, it will heat up, preventing heat dissipation, and emit a harmful odor.
The LED strip should only be glued using specially designed materials.
Tools and materials for installing LED strips
To install an LED lighting system in the kitchen, it is enough to have a standard set of household tools.
To work you will need:
- perforator;
- level;
- roulette;
- tester;
- pliers;
- soldering iron;
- stationery knife;
- insulating tape;
- pencil;
- screwdriver;
- alcohol;
- cotton pads.
If you are designing the upper level of the kitchen, you will need a stable stepladder. To avoid injury, wear safety glasses and gloves.
"Glowing" ceiling
General lighting in the room can be achieved using an original solution, when the suspended ceiling acts as a diffuser. Aluminum profiles, which serve as heat sinks, are installed on the concrete floor at a certain pitch. A powerful LED strip is glued onto them. It is covered by a translucent stretch ceiling. The result is an effect as if the ceiling is uniformly glowing. The use of tape as a light source in this solution is due to its small thickness, as well as the ability to cut exactly to the size of the room.
LED strips allow you to implement lighting built into a translucent ceiling
The spectacular appearance and exceptional visual comfort have led to an increase in the popularity of “luminous” stretch ceilings. But it should be remembered that such a solution also has a serious drawback. If the light source fails, repair will be difficult. Essentially, you will have to dismantle the suspended ceiling, replace the LED strip, and then reinstall the polymer film with diffusing properties. Therefore, the most reliable tape should be used.
The small width of LED strips and the ability to arbitrarily choose the length of the segment turned out to be useful for illuminating staircase steps
The most common cause of strip failure is the “overclocking” of the LEDs used in it. Unscrupulous strip manufacturers purchase cheap, low-power LEDs for it. In this case, the values of the current-limiting resistors built into the strip are selected in such a way that the LEDs operate at currents higher than the rated ones. At first, such a tape glows brightly, but after just six months of use, its luminous flux will decrease by two or more times. And, if we are talking about a tape with a white glow, then it will also acquire an unpleasant tint for the eyes.
That is why for a “luminous” ceiling you need to purchase tape only from large suppliers that have proven themselves in the market. Ideally, they have their own production of LEDs and LED strips. An example of such a brand is Arlight, which produces LEDs and LED strips in Belarus.
How to connect the tape
Wire for power supply through the W5W socket.
There are several options for connecting a flexible LED strip with your own hands to car electrics:
- connection via a separate relay or control unit;
- parallel connection to a standard incandescent lamp;
- connection without a standard lamp.
1. Separate relay or block.
Controller with remote control. Price 300 - 400 rubles from the Chinese
The connection option via the control unit is as simple as the others. It ensures independence from the car's electronics because it connects directly to the battery. In terms of functions, it can be similar to a block from daytime running lights; it determines whether the engine is running or not, and determines whether the side lights or turn signals are on. It is programmed depending on the needs in operating modes, and can be equipped with a remote control. Surely you have seen cars with strobe lights and multi-color RGB lights that are installed in the radiator grille and flash red and blue, like American police officers.
Simple control unit, price 6$
To find such control units on Aliexpress, use the queries “Car Led controller”.
2. Connection in parallel. It is connected together with the installed light bulb, the wires are soldered to its socket, and they will light up simultaneously, which increases the brightness. The light device is disassembled and internally installed so that it shines not inside the lantern or headlight, but outside.
3. Install without a lamp. We completely remove the standard light source, only the tape will shine. In order not to solder wires to the cartridge, it is better to use a special connector, which can be bought from the Chinese. The connector is a base to which wires are soldered; it is enough to insert it instead of the lamp to obtain the required voltage. An empty cartridge may stick out unsightly; this is an important factor for auto tuning.