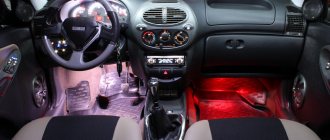
The VAZ-2107 car is an excellent classic product of the Tolyatti Automobile Plant of yesteryear. Despite the fact that it has been discontinued, the 7 remains on the wheels of many drivers. Inexpensive and easy to maintain, the device is well suited for getting acquainted with motor transport as a first car for study. But there is a significant drawback. Like any Russian-made classic, 2107 has poor sound insulation.
Why is sound insulation necessary, is it so important and how does it work - these and other questions can be answered in this article. Let's consider the sequence of actions when working independently with your own hands, the necessary tools and materials. And if you have to carry out such a procedure as soundproofing a VAZ-2107, is it worth it at all or is it better to take the car to a specialized technical service center?
Is sound insulation really necessary?
This question can only be asked by owners of foreign cars who have never been to a VAZ-2107 showroom. Having driven once behind the wheel or as a passenger in a VAZ Seven, you immediately understand that sound insulation is necessary. In the cabin you can clearly hear the sound of the engine, gearbox, noise from the wheels and other sounds outside the car.
Those who like to listen to high-quality sound in the VAZ-2107, which lacks sound insulation, will be greatly disappointed. Buying expensive musical acoustics will not help. As long as there is no good sound insulation in the cabin, the music from the speakers will be greatly distorted.
High-quality sound insulation brings joy not only to the ears of the owners of the 2107 model. During the cold season, the car will be warmer and the interior will warm up faster. In hot weather, with proper treatment, the interior of the car will be cooler and more comfortable. Many advantages of the complete sound insulation of 2107 can only be appreciated in person. All questions about necessity will then disappear by themselves.
An easy choice
Once the decision to carry out soundproofing has been made, it remains to decide where it can be done. There are actually few options:
1) specialized service station;
2) private garage;
3) own hands.
Each person will have to make a choice regarding where to make sound insulation for the VAZ-2107 individually. Let's look at the pros and cons of each option. A specialized service will have the highest price tag for the work, but a guarantee is possible if something is wrong. In addition, the most qualified work is possible there. A private service is usually much cheaper, but there is no guarantee. In both cases, it would be good to know if there is a specialist who makes high-quality sound insulation. Ideally, it would be good to take a ride in a previously made car for evaluation.
Do-it-yourself noise insulation
So, the only option left is to do everything yourself. Is it possible? In fact, anything is possible. But if you don’t have any experience in using a screwdriver and wrenches, then this option is not suitable. For any man, soundproofing a VAZ-2107 car is quite a feasible job. The whole complexity of the procedure lies not in the process itself, but in the disassembly and assembly of the insides of the car. After all, you need to get to the original sound insulation, or better yet, to bare metal.
There are several positive features of working with your own hands:
- the experience gained will not go anywhere and you don’t have to pay for it;
- a good opportunity to get to know your VAZ-2107 better;
- there is no time limit - you can work slowly and carefully;
- saving material resources;
- As a result, you can get a comfortable VAZ-2107, the sound insulation of which is at the proper level, an excellent thing.
Doors
Sound insulation on the doors of VAZ 2107 cars is necessary in order to reduce the level of noise coming from outside, as well as improve the sound quality of the audio system.
Sound insulation of VAZ 2107 doors
The insulation kit contains only vibration damping material, but it would not be amiss to treat the surfaces with noise absorbers.
- The first layer of processing is carried out through technological holes. Vibroplast Silver has proven itself excellent here.
- First, treat the areas behind the speakers.
- The second layer is Splen 4 millimeters thick.
- Now tape the outside of the doors under the cards. Use an audiophile. It is necessary to completely seal the technological holes, which will seal the volume of the doors where the speaker is located.
- Applying a vibration filter will increase the rigidity of the door, which will make the acoustics sound better.
- The outer sides are covered with vibroplast, and a layer of Spleen is applied on top for sound insulation.
- It would be a good idea to treat the door cards with anti-creak. Thick Bitoplast is suitable here.
- Crickets inside the doors will also make themselves felt over time, so immediately additionally cover the rods and handles with Madeleine.
- Don't use too thick a layer of insulation, otherwise you simply won't be able to secure the cards back together properly.
Features of the sound insulation process
In order to produce high-quality noise insulation, you first need to understand where the noise comes from, where it is more and what its nature is. It is known that the main sound comes from the running engine and exhaust system. Hence the conclusion: it is necessary to isolate the floor and the front engine partition as much as possible.
The noise that can come from the street is eliminated by soundproofing the doors and roof. Don't forget about the luggage compartment either. The noise from the trunk can be very annoying. As a result, it turns out that it is best to soundproof the entire interior completely. This process is also called complete sound insulation. Whereas partial means soundproofing of part of the cabin, for example, only the floor.
To understand the processes, it is easiest to turn to physics. After all, both sound and vibration have such a parameter as vibration frequency. And if vibration is usually low-frequency, then sound is the opposite. Therefore, it is more difficult to isolate and absorb. This already implies the importance of the thickness of soundproofing materials.
First steps
Soundproofing a VAZ-2107 with your own hands is an interesting and exciting process for those who like to tinker with their car. If the work is to be done for the first time, you need to prepare for it. The easiest option is to learn from a master who has been involved in similar events for a long time.
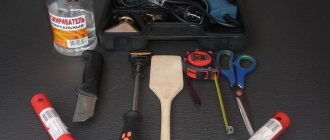
Information can also be found in technical documentation in printed and electronic versions. Having thoroughly prepared, you can go for the selected material and prepare the tools. Sometimes a hair dryer is needed to speed up the process. With its help, the soundproofing material warms up and becomes more plastic. This allows you to press it as tightly as possible to the metal base. A hard roller will be very convenient for smoothing coatings.
Ceiling
This type of noise eliminates crickets and reduces the amount of noise coming from outside. It is not difficult to carry out sound insulation on a VAZ 2107 with your own hands, and the result will exceed your expectations.
Soundproofing the ceiling of VAZ 2107
After completing the work, you will not hear a loud knock hitting the roof from above, plus falling drops of water during rain will not be so annoying. This will have a positive effect on the driver’s peace of mind and comfort.
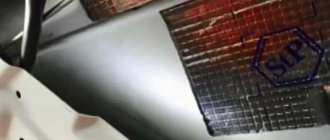
Alas, there are no special kits for quieting the ceiling. Experts recommend buying Vibroplast Gold. There are also worthy alternatives - Silver or Splen. Choose the latter with a thickness of 8 or 4 millimeters.
- Cut the leaf element in place.
- Pasting is carried out in a single sheet. Do not cut it into separate parts.
- The width of the rolls of the sold material almost perfectly matches the width of the car roof. Therefore, you will have to cut it into rectangles.
- The length is adjusted according to the distance between the roof reinforcements.
- It is better to remove the standard sound insulation, since it is of little use.
- Clean bare metal areas, degrease and dry.
- There are joints between the amplifiers that need to be treated with sealants.
- Glue a layer of material. It is impossible to do this work with only your two hands, so you will definitely need an assistant.
- One person heats the soundproofing material with a hairdryer, and the second rolls it onto the surface with a roller, first placing it on the glue.
- After the vibration damper layer comes Splen. It is laid in a continuous sheet, starting from the windshield.
- There are some uneven spots on the roof. In these areas, the material is heated and stretched to the required parameters.
- There can be 1 or 2 layers of Spleen. It is not recommended to make a layer too thick, since after Spleen you will need to return the factory Shumka to its place. After this, return all dismantled elements to their place.
Article on the topic: Instructions for replacing the pump on a VAZ 2114
Materials used
Factory sound insulation of the VAZ-2107 consists of two layers: anti-vibration and actual sound insulation, often of the simplest quality. For good quality work, these materials can be replaced with improved ones. In addition to these two layers, you can also add soundproofing and anti-creaking layers.
The very first layer protects the interior from vibrations. The reason for them may be different, but most often it is engine vibration transmitted through the supports to the body, as well as transmission vibration. The worse the power unit and gearbox cushions work, the more noticeable it will be felt. The vibration protection material most often consists of two layers: a mastic base and foil. Among the ready-made options are “Bimast”.
As for sound insulation specifically, it is known in auto stores as “Shumka”. Physically it is a porous material such as polyurethane foam or thick felt.
A material that looks similar to vibration insulation is used as a soundproofing layer necessary to reflect sound. But its properties are different. “Spleen” can be used as well-known brands. In addition to sound insulation, this material has high thermal insulation qualities.
Modern “Shumkas” are very convenient with their adhesive layer. Thanks to him, installation of coatings occurs quickly and efficiently. Many materials for sound insulation are used universally - both for cars and for the walls of a residential building.
The first defense is doors
Despite the fact that the most unpleasant sound enters the cabin through the engine partition and through the floor, it is best to start work from the doors. This is much easier than immediately disassembling the interior. It will take less time, and you will gain a lot of experience. The following stages will therefore go faster and better.
The first place to start is by removing the casing. Having reached the iron base, do a visual inspection for corrosion. If there is one, it is cleaned and treated with a rust converter and anticorrosive. Be sure to give it time to dry. Only after this, using a hairdryer, the vibroplast is heated and pressed against the surface with a roller. The next layer is the sound insulation of the VAZ-2107 doors. And last but not least, if desired, a layer of sound insulation.
Car doors have many moving elements that can cause squeaking. Therefore, the use of anti-squeak materials such as madeline or bitoplast is relevant here. The first has a small thickness of about 2 mm, and the second is somewhat similar to thin foam rubber impregnated with a special composition.
Winter tests the strength of both the car and its owner. Frosts, snowfalls, long nights - these and other difficulties cause an increase in the number of accidents. But you can, on your own, simply and inexpensively, reduce the influence of uncontrollable elements on you. No Ministry of Emergency Situations will help you as much as you can help yourself. Find out from this article what to do about the body and its equipment of the VAZ-2107 to make driving more comfortable and safer in winter.
Lubricate rubbing parts
Door locks, trunk and hood, their hinges, glass guides - this is a list of what needs to be lubricated. As a lubricant, it is convenient to use silicone grease in an aerosol can or, everyone knows, VD-40.
It is better to lubricate the glass guides with silicone grease. Lower the windows down and thoroughly saturate the guide fabric with lubricant. Lower and raise the windows several times to distribute the lubricant. Try not to let the grease get on the windshield. A thin tube is attached to the can. Use it to avoid splashing everything around.
To prevent the doors from freezing to the seals, they (the seals) can be treated with silicone grease.
Lubricate the hinges and door locks with a small amount of WD-40. Open and close the doors several times to distribute the lubricant. Repeat these steps. Don't forget to inject lubricant into the door and trunk lock cylinders.
The windshield must be intact
Cracks and chips in the windshield prevent the driver from keeping an eye on the road even in summer. In winter, when daylight hours are shortened, they can create serious problems. The headlights of oncoming cars, the taillights of passing cars, and traffic signals are distorted and refracted in cracks. As a result, you see something that is not what really is. There is one step left before an accident.
Replace your windshield if cracks or chips make it difficult to see the road. Remove toys, pendants, fringes, etc. Anything that interferes with the view should be removed. By doing this you will help yourself avoid trouble, and maybe save someone’s life!
Changing windshield wiper blades
The rubber bands of the brushes wear out very quickly, and they are not expensive. Make it a rule that brushes need to be replaced before the winter season. A clean and intact windshield will provide you with a clear view.
Checking the washer
The slush and dirt on the road does not end all winter. The wheels of the cars lift it all into the air and throw it onto your car. Helping the wipers clean off dirt is the job of the washer. In its system, we check the integrity of the tank and pipes, the operation of the injectors and pump. If necessary, we adjust the direction of the jet and replace damaged parts. Before the onset of sub-zero temperatures, fill in the “anti-freeze” and pump it until it comes out of the nozzles.
Read, it may come in handy: How to replace a broken headlight glass
Checking the light
Do you like being blinded by oncoming cars? Hardly. How long ago have you checked the headlights of your own car? Let's check it out right now.
To do this, stop where there is more space, so that nothing blocks the front of the car. Remove the headlight protection, if present. Turn on your low beams and look at their light from ten to twenty meters. The same must be done with three passengers in the back seat. You see, even the low beam began to blind. Find the headlight leveling control knob and turn it to the “full vehicle load” position. Now look at the headlights again. If everything is in order, then in low beam the headlights noticeably lower and stop blinding. All you have to do is remember the corrector at the right time and turn it to the desired position.
It’s much worse when you find that one headlight, for example, shines downwards, the other up and to the side... This happens after replacing headlights due to broken glass. On VAZ-2105, VAZ-2104, VAZ-2107 and their modifications, headlights are easy and convenient to adjust. Of course, if possible, it is better to contact the service. There is equipment there and they will do everything right. But you can also adjust the headlights yourself, even if not perfectly. To do this you need a flat area and a wall. Place the car five meters at a right angle to a vertical wall and turn on the low beam. You will see spots of light on the wall. Look at the picture, this is what the ideal light distribution looks like.
Screen diagram for adjusting the low beam of VAZ-2107 headlights
Now look under the hood and find the adjustment screws. Screw 1 deflects the light up and down, and screw 2 to the left and right.
Screw 1 turns the headlight up - down, screw 2 left - right
By alternately adjusting the left and right headlights, try to obtain light spots as in the figure.
You won’t believe it, but oncoming drivers will be very grateful to you after these adjustments!
Cleaning drainage and jack sockets
To prevent water from accumulating in the cavities of the thresholds, each of them has two drainage holes. Find and clean them. Clean the jack sockets so you don't have to worry about installing the jack in winter.
Let's warm ourselves up
“Classics”, of course, are eternal. But rubber door seals, over time, age and begin to leak air. On cars with significant mileage, a lot of heat escapes through leaks in doorways. What should I do?
Buy and glue additional seals. They are available in parts stores. You can find suitable seals at building supply stores.
Read, it may be useful: Tail lights of VAZ 2107: connection diagram, malfunctions, replacement and repair, instructions with video and photos
In severe frosts, standard thermal insulation under the feet of the driver and passengers is not enough. Therefore, many people place sheets of isolon or another material with similar properties under the rubber pads.
Frost is not scary
If you do all the work described above in the fall, your winter will become a little lighter and warmer. Good luck on the roads!
Soundproofing of the engine compartment
The engine compartment bulkhead has a very small surface area. But the time spent on covering it is usually the longest. And this is connected, of course, with the amount of disassembly work that needs to be done until the desired surface appears.
Good instructions for removing the instrument panel can be found in repair and replacement resources. After applying labor, patience and time, the partition of the engine compartment will appear for soundproofing work to be done on it. The order and procedure for gluing materials are similar to soundproofing doors. The advantage of the partition is that there is no weight limit for it, and therefore no limit on the number of layers. It is important to remember that the noise and sound insulation layers must be glued without gaps, unlike vibroplast. Sound has a higher frequency than vibration, so a small hole will be enough to penetrate the interior.
Floor and fender protection
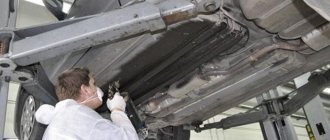
Soundproofing of the VAZ-2107 floor occurs in accordance with the general algorithm worked out on door panels:
- give access to the surface by removing all interfering elements;
- remove factory coatings;
- treat the bottom with anticorrosive;
- lay a layer of vibration insulation;
- lay a layer or layers of sound absorber;
- fix the sound insulation layer;
- put everything back together in reverse order.
At this stage there are practically no difficulties; there is no such work as removing the panel. The most difficult thing is removing the seats - their weight is the heaviest of what is in the cabin. Again, depending on what you compare it to. Of the nuances, it should be noted that the VAZ-2107, which has been maximally insulated, will have limited pedal travel. You will have to make a cutout under them for comfortable driving.
Floor
If you examine the standard sound insulation on the floor of a VAZ 2107, you will find a bitumen-based vibration damper no more than 3 millimeters thick, and a standard noise insulation of 7-10 millimeters. Moreover, more often than not, they were not laid very well, which affected the comfort of the driver and passengers.
Soundproofing the floor on a VAZ 2107
So that you are not bothered by all the pebbles that hit the bottom when moving, you will need to perform the noise yourself.
- This area opens up enormous opportunities for creativity and the use of all kinds of materials. Some use sheet insulators, others use mastics based on rubber and bitumen.
- The advice of experts is to use Bimast Bomb as a vibration damper, and make Shumka from Spleen.
- Pay special attention to the processing of the inner wheel arches. They will require 2-3 layers of the thickest insulating material.
- Thick sheets of Splen are not very convenient to lay, so it is better to use thin material and apply it in 2 layers, without leaving gaps.
Article on the topic: Installing Kirzhach headlights on a Lada 2110 car
Roof sound insulation
At first glance, it may seem like the easiest way to soundproof a car roof. There are no hanging elements here, like on the floor, and there are no difficulties with removing the dashboard like in front. The smooth surface of the roof is deceptive. In fact, there are many nuances here for carefully removing the original upholstery and coverings.
Once bare iron appears, the established procedure for surface treatment and application of protective coatings will not be difficult. As a result, a truly comfortable VAZ-2107, the sound insulation of which is made by yourself, will bring a lot of pleasant sensations. You shouldn't be atrocious with roof protection. The absence of noise during rain is good, but the presence of layers of sound insulation increases the weight of the car, slightly shifting its center of gravity.
Loud trunk of VAZ-2107
The trunk of a car also requires covering with soundproofing materials. If you provide protection, then make it maximum. In addition, it is in the trunk that most often a variety of small cargo is transported, which makes noise when moving.
Soundproofing the trunk of a VAZ-2107 is a fairly simple procedure. It's probably easier to just process the hood. But there is plenty of work here too. There are few smooth surfaces here, like on the roof, so you still have to try.
Trunk
Sound insulation of the trunk lid of VAZ 2107
It is highly desirable to treat the luggage compartment and lid. This will eliminate unnecessary noise and annoying squeaks. Moreover, if you plan to install a subwoofer for an audio system, you cannot do without noise.
Soundproofing the bottom of the trunk of a VAZ 2107
The work is carried out similarly to the processing of the hood. There are special ready-made sets of materials responsible for suppressing vibrations and absorbing sounds.
Sound insulation of the hood
Good sound insulation of the VAZ-2107 hood is a fairly simple matter. Scraps of vibroplast and a small piece of Shumka will suffice here. These works are best done at the very end or done very first to get your hands full.
If there is original sound insulation on the hood of the car, it should be left. If this is not available, you can use the thickest soundproofing material. But use vibration isolation to a minimum, which means no more than 50% of the surface area. Possessing its own weight, vibroplast can significantly weigh down the lid.
Hood
The seven's hood is glued with shim.
The STP kit includes the necessary elements for noise and vibration insulation. They are cut out in shape to perfectly match the body geometry of the VAZ 2107, so there is no need to cut anything out.
- Before applying Vibroplast, clean and degrease surfaces using white spirit.
- Heat the vibration filter element using a hair dryer.
- Carefully peel off the protective film and glue the material onto the hood.
- Use a special roller to carefully roll the insulation.
- The second layer is the Accent noise absorber.
The hood is soundproofed to prevent the engine from freezing in winter. That is, Shumka actually becomes thermal insulation. But this is not at all extra work from the point of view of getting rid of noise and vibrations. Don't ignore this stage.
