LED lighting for VAZ-2105 devices
Everyone knows that the illumination of our instruments (speedometer, tachometer, etc.) leaves much to be desired. It actually works very poorly. I would even say disgusting - in the dark it is impossible to look at the devices without tears.
The appliances are very dimly lit, and this despite the fact that there are quite consuming incandescent light bulbs installed there. And our task is to fix this - say no to the dim lighting of the devices on the five.
There are several drastic solutions here, including replacing the instrument cluster with a “Volgov” one from the GAZ-3110, but this is not a budget option and not everyone can afford it. Therefore, today we will correct this efficiently, but at the same time on a very budgetary basis.
So we buy these BLUE LEDs (you can either white or green, to your taste)
Pay attention to the LED lens made in the form of a funnel; such a lens scatters the light of the LED and it is advisable to use just such diodes. Why blue? With blue LEDs there is a very interesting effect - it seems as if the needle and instrument scales are glowing - like in foreign cars. There is no such effect with white diodes.
I don’t know about the other colors. How many diodes will be required? I have a modified instrument cluster (it costs a tachometer and oil, gasoline, temperature from a VAZ 2106, you can read about it HERE) for small instruments I used one diode each, and for large ones (speedometer and tachometer) 4 diodes and one diode lamp.
A diode lamp looks like this
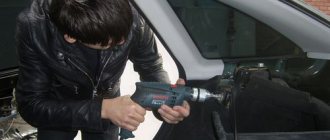
they are inserted instead of standard light bulbs. But it makes no sense to insert them into devices instead of ordinary lamps (they will not shine normally). So, we take out the devices and disassemble them. To do this, use a screwdriver to bend the chrome ring around the perimeter. So that it can be removed from the device. The ring will of course be damaged, but it won’t be visible from behind. We remove the ring.
And remove the glass from the device. There are two nuts or screws on the back of the device; unscrew them and remove the device from the housing. Next, we study small instruments (in the case of a five-piece torpedo, this is a voltmeter), the visible part of the scale, or rather the scale and the black plate above it. There is a distance between them into which we will push the diode.
We take a drill with a drill bit of 7 and make a hole like this from the very bottom of the scale.
And we glue the LED onto the second black cover with sealant. Like this
and in the body of the device we drill a hole in order to bring the wires from the diode into it. Then, once the sealant dries (in order for it to dry faster, I used a regular hair dryer), we assemble the entire structure. The hole we drilled will not be visible, just like the diode. It is hidden under the cover.
We put glass with rings on the device. And clamp the chrome ring. To do this, it is better to use the same screwdriver; I do not recommend using pliers because... they will damage the outer side of the chrome ring. Next, we connect the wires from the diode to the standard backlight wires on the devices, and throw out the standard light bulb - we don’t need it and it’s even contraindicated. Let's test what happened.
So the halo at the bottom in the photo is just the camera’s high sensitivity to light. Well, in fact, this halo is not visible. But the scale and arrow can be seen very well. Yes, and it’s beautiful in my opinion. Now we disassemble large devices. They are disassembled in the same way as small ones. We solder 4 LEDs on the wires and glue them with sealant into the housing.
I had a blue filter in the tachometer housing, so I left it. If yours is green, then break it out. I taped the outer ring of the visor on the inside with tape foil
This is not necessary, but if possible, it is better to glue it - it will reflect light better.
We drill a hole in the housing and insert the wires from the diode into it and bring them out, and also connect them to the wires of the standard light bulb. Instead of the standard light bulb itself, we install a blue diode lamp.
By the way, in the speedometer housing near this lamp I had a partition, I broke it out so that the light would be better distributed inside the device.
Let's check it in action.
Well, all the devices are in action
I'll repeat it again. All halos and glare in the photo are camera errors. In reality, everything is visible very well, nothing dazzles your eyes. The backlight is generally very soft and does not strain the eye, but only pleases it. It really feels like you are sitting in a foreign car.
From the blue backlight, it seems that the scales and arrows glow like in foreign cars. I recommend to all. PS if you don’t use car LEDs, but regular ones, then you need 630 Ohm resistors for them. We discuss the article here https://www.semerka.info/forum/viewtopic.php?p=15963#15963 Mr.
Ice specially for www.semerka.info
Source: https://www.semerkainfo.ru/node/158
Replacing Light Bulbs in the Dashboard of a VAZ 2105
Replacing light bulbs in the composition of VAZ-2113, 2114, 2115 devices
Now we will talk about such a widespread dilemma as the failure of dashboard on a VAZ-2114. The VAZ-2114 model is good in many ways, it is aesthetically pleasing and lively, has good technical features, but the dashboard leaves much to be desired in terms of quality and reliability. We will tell you how to change the panel lamps in this article.
Dashboard lamps
The dashboard provides the driver with a lot of useful information, allowing him to monitor the condition of the car, the driving process, diagnose breakdowns in time and correct them. Yes, a light bulb
The panel lights up for the following reasons:
- The battery is not charging.
- For one reason or another, the handbrake is stuck.
- Not enough fuel in the tank.
- The oil pressure has decreased (which indicates the need to urgently stop the engine to avoid more severe consequences).
- Excess water in the filter. To prevent water from entering the pump, which could lead to damage, it is necessary to drain excess water from the filter.
- The fuel system is malfunctioning.
- There was a failure in the propulsion system and almost everything else.
How to modernize a VAZ 2105, give it some zest and functionality using the instrument panel?
In order to fully use the information that the dashboard provides, you need to know the location and purpose of its instruments and indicators, and their characteristics. The instruction manual provides a description of the device. A standard panel consists of a set of measuring and control instruments, as well as alarms.
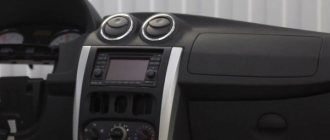
Instrument panel VAZ 2105
The dashboard typically contains the following components:
- speedometer – speed indicator with trip meter;
- coolant temperature and fuel level indicators;
- indicator lights for battery charge, oil level, fuel reserve;
- control lamps, turning on side lights, high beams, direction indicators;
- voltmeter;
- signaling unit;
- switches for heated rear window, rear fog lights;
- switches for exterior lighting and electric heater fan.
When installing an on-board computer, it becomes possible to monitor more than 20 parameters that allow you to control the operation of components and systems of the machine. The information is reflected on the display (the author of the video is RusLan 404).
Possible faults
Dismantling and repair of the device may be required for the following malfunctions:
- The control panel backlight does not light up. You should check the condition of the wiring, contacts, and the serviceability of fuses.
- Not a single sensor or indicator works, and the warning lights do not light up. First of all, you should check the fuse in the mounting block and replace it if it is burned out.
- If the indicator arrows jerk in different directions, the cause is most often poor ground contact.
- Malfunctions may be related to the operation of the dashboard itself. It is necessary to dismantle the shield and carry out diagnostics.
- Sometimes the functionality of the device is caused by a malfunction of the cigarette lighter. The instrument panel does not work or does not function correctly.
- The functionality of the control panel sometimes disappears after tuning.
Tuning with LED lighting
Installation and repair instructions
Dismantling the control panel may be required for repairs, tuning the panel, replacing sensors, etc. The procedure is simple and can be performed at home.
Tools and materials
Disassembly tools
To disassemble and repair the dashboard, you must prepare the following tools and materials:
- a set of keys;
- Screwdriver Set;
- diagnostic tester;
- new sensors and parts needed for replacement;
- elements for tuning.
Heating system assembly procedure
To assemble the body of the car heater, we use sealant and snap the brackets. It is better to assemble the air duct for blowing glass using sealant. Another common problem when assembling the panel is severe bending of the cables for controlling the damper. To solve this little problem, you can resort to changing the cable connection diagram.
- The upper lever is the heating system faucet.
- Middle lever – air flow adjustment.
- The lower lever is the oven air damper.
Then, for the next straightening of the cable, it is necessary to drill a hole in the air duct for heating the windshield and pull the cable through it. After successfully connecting all the cables to the heater and control unit, side air ducts should be installed. Usually, the right air duct is installed without much effort, but to install the left one, you will have to dismantle the steering column and pedal assembly. For deflectors you need to buy seals or take them from the VAZ-2101. After installing the air ducts, we return the pedal assembly and column to their original position.
How many light bulbs are there in the dashboard of a VAZ 2107
HomeVAZ 2110 How many light bulbs are there in the dashboard of the VAZ 2107
Burnout of lamps in the dashboard of VAZ cars is a common occurrence, since the conventional filament lamps installed there have a fairly short service life. Constant vibration and almost continuous operation associated with the new rules also do not add to their resource.
To replace the lamps, you need to disassemble the instrument panel and remove the shield.
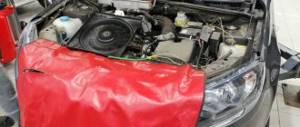
As in all cases related to electrical wiring repairs, you must first disconnect the battery by removing the negative terminal, if you do not have a ground switch.
Using a screwdriver, remove the stove control knobs
Unscrew the nut from the daily mileage reset cable. To do this, you can use pliers or wire cutters. We don’t bite it off with pliers, but with our open beaks we press it against the nut from the front and turn it.
We remove the plug for the screws securing the front part of the panel using a suitable screwdriver. And unscrew them.
We take it to the side, unscrew the speedometer cable, remove the econometric hose and disconnect the connectors.
Remove the instrument panel.
To remove the lamps, you need to turn them half a turn and remove them.
This instrument panel uses two types of lamps and sockets.
The backlight lamps are replaced separately, the control lamps are replaced together with the socket.
- Fuel reserve lamp
- Backlights
- Direction indicators
- CHECK ENGINE
- Side light bulb
- Oil
- Parking brake lamp
- High beam
- Battery charge
I recommend replacing all lamps with LED ones, since today you can choose any size, type and color of light.
ATTENTION! The battery charge control lamp cannot be replaced with an LED lamp, otherwise there will be no charging!
to your website.
moepervoeavto.ru
Illumination of the instrument panel VAZ 2107: design and repair
One of the breakdowns that does not directly affect the operation of the car, but causes a lot of trouble for the driver, is that the backlight of the VAZ 2107 instrument panel does not work.
During the day the problem is invisible, but at night the missing backlight makes driving your VAZ 2107 much more difficult.
Due to this malfunction, it becomes impossible to see the readings of the main instruments: tachometer, speedometer, econometer, fuel level indicators, charge level, coolant temperature.
The reason that the backlight of the VAZ 2107 dashboard does not light up is most likely the failure of incandescent lamps. Therefore, to eliminate it, you will need to replace the damaged light bulbs with new ones.
The task is simple and requires a minimum of tools and skills. However, in order to access the bulbs, you will have to remove the entire dashboard.
Armed with a flathead and Phillips screwdriver, you can get to work by first removing the positive terminal from the battery.
First, you need to remove the plastic handles from the heater valve and air damper control levers and unscrew the nut securing the daily counter reset handle so that they do not interfere with removing the VAZ 2107 dashboard.
Next, you need to use a Phillips screwdriver to unscrew the self-tapping screw hidden behind the plug next to the above-mentioned levers. The instrument panel is freed, it remains to perform a few simple manipulations to remove it completely and begin the repair:
- Unscrew the speedometer cable nut;
- Disconnect the hose from the econometer;
- Disconnect the three electrical connectors.
After this, we remove the instrument panel of the VAZ 2107 and begin replacing the failed light bulbs. Everything here is completely simple, we take out the burnt out ones and install new ones in their place.
Thus, on the VAZ 2107, both the backlight and control lamps are replaced. Their location diagram is shown in the following figure.
Here the number 2 indicates the instrument panel backlight lamps. The remaining lamps are control lamps:
- Fuel level;
- Direction indicators;
- Engine control systems;
- Turning on the side lights;
- Engine oil pressure;
- Activation of the handbrake;
- Turning on the high beam;
- Battery charge.
Advantages and disadvantages of VAZ panels
The most popular panel today remains the panel from the VAZ-2106; it has a tachometer, which gives it a slight plus. But this panel is not much younger than the “penny” one and also has a far from ideal heating system. Therefore, this option does not suit us. The next panel is from a VAZ-2105, has the ability to blow glass, is equipped with a good heating system, and also has the ability to install Euro trim, but the tachometer has disappeared. A good choice might be a panel from a VAZ-2107, it has a central air duct installed and the heating system is improved, and the tachometer also remains. Summing up, we see that the ideal option is the panel from the “seven”, but the choice is always yours.
Tuning the dashboard of VAZ 2108, 2109:
How to Remove the Dashboard of a VAZ 2105
How to modernize a VAZ 2105, give it some zest and functionality using the device panel?
The dashboard informs the driver about the state of the car at this moment. The article discusses the device panel of the VAZ 2105, its usual malfunctions, and provides annotations on removal and repair, as well as tuning the device.
Description and location of indicators and instruments on the panel
In order to fully use the information that the dashboard provides, you need to know the location and purpose of its instruments and indicators, and their characteristics. The instruction manual provides a description of the device. A standard panel consists of a set of measuring and control devices, as well as alarms.
Device panel VAZ 2105
The dashboard usually contains the following components:
- speedometer – speed indicator with trip meter;
- coolant and fuel level thermometers;
- indicator lights for battery charge, oil level, fuel reserve;
- control lamps, turning on side lights, high beams, direction indicators;
- voltmeter;
- signaling unit;
- switches for heating the rear window, rear fog lights;
- switches for external lighting and electric heater fan.
When installing an on-board computer, it becomes possible to track more than 20 characteristics that allow you to keep control over the operation of the machine’s components and systems. The information is reflected on the screen ( video author RusLan 404).
Possible faults
Dismantling and repair of the device may be required for the following defects:
- The control panel backlight does not light up . You should check the condition of the wiring, contacts, and the serviceability of fuses.
- Not a single sensor or indicator works, and the warning lights do not light up.
First of all, you should check the fuse in the mounting block and replace it if it is burned out. - If the indicator arrows jerk in different directions, the cause is most often poor ground contact.
- Malfunctions may be related to the operation of the dashboard . It is necessary to dismantle the shield and carry out diagnostics.
- Sometimes the functionality of the device is caused by a malfunction of the cigarette lighter.
The instrument panel does not work or does not function correctly. - The functionality of the control panel sometimes disappears after tuning.
Replacing lamps on the panel of a VAZ 2105 - 2104
MY AFFILIATE PROGRAM COME IN AND EARN.
Replacing the VAZ 2105 torpedo. 02/21/17. - part 1
Hello, I'm tired of advertising on video clips on YouTube, and you know why there are advertisements on them, for this advertising.
Tuning with LED lighting
Installation and repair instructions
Dismantling the control panel may be required for repairs, tuning the panel, replacing sensors, etc. The procedure is simple and can be performed at home.
Tools and materials
To disassemble and repair the dashboard, you must prepare the following tools and materials:
- a set of keys;
- Screwdriver Set;
- diagnostic tester;
- new sensors and parts needed for replacement;
- elements for tuning.
It is better to buy originals to avoid fakes.
Algorithm of actions
To dismantle the tidy, you need to perform the following steps:
- Turn off the power supply to the machine by disconnecting the negative terminal from the battery.
- After unscrewing the mounting bolts, you need to remove the casing from the steering column.
- By removing the plugs and unscrewing two screws, the instrument panel is removed.
- Next, the wire plugs are disconnected.
- After opening the glove compartment, you need to unscrew the mounting bolts. The bolts securing the shelf for things are unscrewed in the same way.
- By pulling the handle of the hydraulic light corrector, you need to remove . Then, using a socket wrench, unscrew the mounting nut and push it in.
- In the glove compartment, disconnect the power cord for the backlight lamp.
- After unscrewing the two bolts, you need to move the heater control unit.
- Next, you should dismantle the air duct.
- The next step is to unscrew all the console fasteners.
- When the last two fastening nuts in the center are unscrewed, you need to carefully remove the panel from the studs and remove it from the interior.
Next, the necessary repairs, tuning, replacement of sensors are performed, and backlighting is installed. After completing all the manipulations, the assembly of the device is carried out in the reverse order of disassembly.
To make assembly easier, during disassembly you should mark the wires and sort the devices and sensors.
Disconnecting connectors with wires
Tuning ideas
The VAZ 2105 was little modernized, mainly in the engine. Owners of “fives”, like UAZ cars, often resort to tuning the instrument panel to give it a modern look and increase functionality.
On the VAZ 2105, tuning is possible in the following options:
- purchase a ready-made kit, which includes dials for sensors, instrument panels, parts for lighting, wiring and terminals for connections;
- A budget option is to illuminate devices with LEDs of different colors;
- More technically difficult is the texture and color change of the console.
Using LED lighting, you can change the design of the control panel , make it stylish and give it a personal look.
Photo gallery
The photo gallery presents VAZ 2105 photos of various options for tuning the control panel.
Installation
Before starting work, you need to remove all excess from the panel. If you chose the “five” dashboard for installation, then only one of the four main fasteners will fall into place. Using metal strips, the central fasteners must be attached to the bracket.
To mount it on the right side, you need to drill holes in the partition of the engine compartment and weld a pin; if you don’t have one at hand, a bolt of the appropriate diameter will do. Then you can use the mount left over from the VAZ-2101. This is where do-it-yourself dashboard tuning ends; all you have to do is install the standard parts and instruments in their place.
Dashboard VAZ 2107. Tuning: