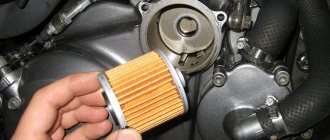
Additionally, we recommend reading our specialist’s article on how to change the oil filter.
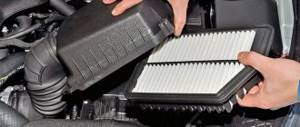
We also recommend reading an article by an expert in which he talks about how to replace the air filter.
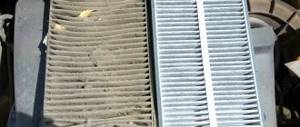
Types of cabin filters
The first cabin filters, installed in the early nineties, had much in common with simple engine filters. Efficiency was questionable, and two-layer versions soon began to be produced. Over time, three-stage purification with coal as the third stage appeared.
Modern car cabin filters belong to the dust collection category and are based on synthetic fibers that do not get wet and exhibit antiseptic properties, which prevents fungi from multiplying. Filters with the addition of carbon are considered the most optimal option, since before entering the cabin the air undergoes three-stage cleaning.
- Polyester-propylene fibers represent the first layer, designed to retain large particles of soot and dust.
- A thinner polypropylene microfiber is used as a second layer to trap fumes and small dust particles.
- The third layer is carbon, by 90% it purifies the air from harmful gases that can enter the cabin. As a result, the air is protected not only from dust, but also from odors.
When is replacement needed?
It is worth changing the filter regularly, it depends on the recommendations provided by the manufacturer. On average, this is 15 - 20 thousand kilometers or the first deterioration in terms of operation. In southern regions or polluted cities, the replacement frequency doubles. One way or another, aim for at least once a year. Among the external signs indicating the need for replacement, it is worth highlighting the following:
- increased humidity in the cabin;
- decreased airflow, weak operation of the air conditioner and stove (read also about whether you can turn on the air conditioner in winter);
- unpleasant odors in the cabin.
How often should you change the cabin filter?
The timing of replacement of a part is influenced by the following factors:
- The material from which the cleaner is made. Carbon elements are more durable than paper ones.
- Terms of use and locality. In winter, there is significantly less dust in the air than in summer, and with constant use in megacities, the filter element becomes dirty much faster than in small towns or villages.
- Driving style. When driving sharply and aggressively with frequent acceleration and braking, the device for filtering cabin air, like other components of the car, fails faster.
- Vehicle mileage and part operating time. Paper interior cleaners must be changed every 5–8 thousand km of vehicle mileage. Multilayer cartridges should be changed every 30-35 thousand kilometers, and carbon cartridges - after 50-60 thousand kilometers. However, regardless of the mileage, the cabin filter should be replaced after a year, even if the car has been sitting in a garage or parked all this time.
Buy or make it yourself?
It is worth immediately refuting the existing myth that high-quality filters are classified as expensive. Branded parts are twice as expensive as Chinese ones, but in the case of filters, the overpayment for the brand is not justified. The raw materials used are the same everywhere, and the design is not so complex that it breaks down too often. The only thing worth paying attention to is the presence of coal and multi-layering. If your car is classified as rare or you need to install a filter that is no longer produced for your brand, you can make it yourself. The procedure looks like this:
- Prepare a universal carbon filter used in household air conditioners, glue, metal mesh and the frame of the old filter.
- Thanks to the mesh, the structure will be more rigid. A mesh for air intakes or a decorative one is suitable.
- Cut out a piece of the universal filter to the required size and glue it onto the mesh in the frame.
- If your filter was not originally on a frame, you will have to make it yourself. Also, a frame suitable in width and length can be selected on the automotive market, and the height can always be trimmed.
Step-by-step replacement procedure
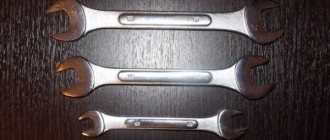
Replacing the cabin filter yourself will require a set of screwdrivers and instructions for your car. Next, your actions are as follows:
- Locate the cabin filter.
- Remove the plastic grille on the hood. Its fastening is carried out using several bolts. Get rid of the plastic plugs, unscrew the bolts and remove the right side of the cladding.
- To provide further access to the filter, remove the washer tubes and protective cover.
- At the next stage you will need to tinker a little with the mounting bolts; when they are loosened, pull the cover up and to the right.
- Two plastic latches will hold the dirty filter. Replace it with a new one, following the arrows. Please note that the arrow does not determine the upper part of the filter device, but the direction of air flow - it should be directed downwards.
- At the final stage, you will be assembled in reverse order.
Replacing the filter installed under the steering column
Replacing and installing a cabin filter on a Nissan Qashqai
Next, we will describe the operations for removing and replacing the cabin filter installed near the steering column. An example would be the Nissan Qashqai.
The only tool you need is a long screwdriver. To access the filter, you will need to remove the side decorative trim on the center tunnel under the front panel on the driver's side. It is held there by clips, and to dismantle it, you just need to pry off the cover with a screwdriver.
The box in which the filter is installed is located behind the accelerator pedal.
To get to the filter, you need to remove the cover from the box, secured with locking latches. To do this, pry up the lower latch with a screwdriver and remove the cover.
Extraction is carried out after preliminary squeezing it with your fingers. To make it easier to install a new filter, it is compressed on the sides, having previously found out which side it should be installed. After placing the filter, you need to straighten it by pressing the end with your fingers.
Next, the lid is placed and secured with latches, and after which the decorative trim is installed in place.
Features of replacing the filter on different cars
If you already know how to replace the cabin filter, all that remains is to understand the nuances of replacing different brands of cars:
- LADA Kalina The filter in this case is located under the hood. It is necessary to remove the glass lining by removing the plugs with a slotted screwdriver. Next, a standard screwdriver is used to remove the screws that secure the cover. Press down on the edges of the filter element and remove it, replacing it with a new one.
- Ford Focus II . The recommended replacement frequency is 25 thousand km. The location of the filter is under the steering wheel in a niche. Use a size 7 wrench to remove the 3 nuts from the gas pedal, unscrew the screws that hold the filter cover also using a size 7 wrench. The next procedure is similar.
- Nissan Qashqai . In this case, you will find the filter in the niche under the driver’s feet. Remove the plastic panel under the driver's feet using a socket wrench by sliding it to the side. To remove the flap, turn on the air conditioner at full power, https://www.youtube.com/watch?v=5c-IsWUIQ24 and it will fall out without your intervention. In this case, you won’t even need tools. At the next stage, it is necessary to get rid of the fastenings of the control unit of the air system of the machine. The filter is located immediately behind it. To get it out, bend the fasteners and pull. To install a clean filter element, bend it like an accordion.
- Chevrolet Lacetti . You will find the filter behind the glove compartment lid, which must be removed using a simple screwdriver. After unscrewing 5 screws, pull the structure towards you. To remove the filter from the niche behind the metal plate, just pull it.
- LADA Priora The replacement frequency in this case is 15 thousand km. Open the hood and find the sound insulation. Unscrew the two bolts that secure it and you will find the filter.
- VAZ-2112 . Since the filter here is protected by the windshield, the replacement procedure will be more labor-intensive than in previous cases. First, remove the bolts from the outside of the hood using a socket wrench or socket. Next, proceed to unscrew the screws under the hood using a classic screwdriver. Bend back a small part of the insulation and you will see the cover under which the filter is hidden. To speed up the procedure, first remove the washer reservoir and unscrew the 4 screws on which the lid is attached. When reassembling, remember that the corner of the filter element should be located behind the protrusion used to fix the sound insulation.
- Hyundai Solaris . The replacement frequency is also 15 thousand km, and you can get to the element being replaced through the interior and without additional tools, as in most Korean cars. The glove compartment valves must be unscrewed by hand and squeezed on the sides to remove them from the grooves. After dismantling the glove compartment, you will immediately see a niche for the filter.
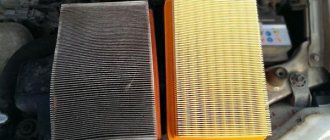
Types of cabin filters
The main types of cabin filter include:
- Paper filter. This type of filter is made of special filter paper and synthetic fibers. It has a corrugated shape and works on the principle of retaining small particles from the air passing through the filter element.
- Carbon filter. It has a more modern design and, thanks to its features, it is able to trap smaller particles (even microbes) compared to the previous type.
- Hybrid filters. This type of filter combines all the latest developments in the field of filters. This is a universal and most high-tech type of filter that provides maximum protection against harmful substances.
Read about eliminating air conditioning system odors. And also about the car's air conditioning system.
When to change the cabin filter?
The service life is influenced by many factors, from mileage to time of year and weather conditions (when used in winter, the filter becomes less dirty than in summer). In order not to bother too much with this issue, it is recommended to change the cabin air filter after 10 thousand kilometers of the car.
Watch a video about replacing the cabin filter in an Opel Astra.
Self-replacement
For this procedure, the car enthusiast does not need a large set of special tools, and, in most cases, before changing the cabin filter, it is enough to prepare a simple screwdriver, pliers and a small set of keys.
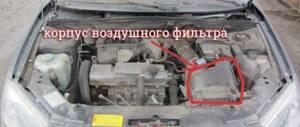
Depending on the make of the car, the location where the cabin air filter is located may vary. They are mainly located:
- Under the hood.
- In the cabin behind the glove compartment.
- In the cabin behind the steering column.
These are the most common places where the cabin air filter is located.
Replacing the cabin filter on an Opel Astra
Now let’s take a closer look at the process of replacing the cabin air filter using the example of an Opel Astra.
- Before changing the cabin filter, you need to determine the location of the filter. In our case, it is located behind the glove compartment.
- Removing the glove compartment to gain access to the filter element. In the Opel Astra, the glove compartment is mounted on four bolts, which must be unscrewed in order to remove it. Next, remove the glove box illumination lamp by releasing the latches and remove the wire coming from the light bulb from the corresponding connector. After the above manipulations, there is nothing stopping you from pulling out the glove compartment. This should be done carefully, without sudden movements.
- Remove the filter cover. After removing the glove compartment, we can see the lid, behind which the filter we need is located. This cover is secured with three bots. Unscrew these bolts and remove the cover.
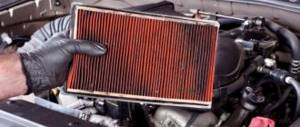
- We take out the old filter. In this case, you need to make some effort and get a little crafty, since doing this is not very convenient.
- Carefully wipe the filter seat. During the process of dismantling the old filter element, some of the dust spilled onto the seat. It needs to be wiped completely. Do not neglect this procedure, as this will extend the life of the new filter.
- Insert a new filter element. Here you will have to show even more patience and skill than when pulling out the old filter. But not everything is as scary as it might seem at first. Somewhere you just need to guide the filter with a screwdriver, somewhere with your hand, and soon it will fall into place.
- Put the filter cover back. We fasten it with three bolts.
- We put the glove compartment in its place. Before doing this, do not forget to connect the backlight bulb.
That's all.
The new filter is in place, and the driver and passengers breathe air without dust and exhaust. Published: May 01, 2020