Where is the VAZ 2109 pump located?
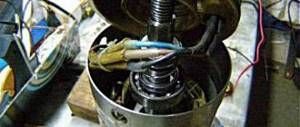
An automobile pump consists of a metal cast body, which is made of aluminum or cast iron, a moving shaft, bearings and an impeller . The tightness of the unit is ensured by a special seal. Under the action of rotation of the impeller, pressure is created in the mechanism, pushing out the antifreeze, which does its useful work by heating up in the channels of the cooling system and cooling in the radiator to again enter the engine cooling jacket. This process is regulated by a special device - a thermostat.
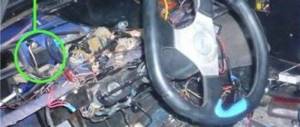
The pump is located under the timing housing, slightly below the camshaft gear.
Additional pump for a car heater: how to choose and install
As a rule, on many budget cars, the standard stove does not warm up the interior quickly and efficiently enough. To a greater extent, this applies to popular VAZ models (2109, 2114, etc.), as well as some foreign cars.
In practice, one of the most effective and affordable methods is an additional pump for the stove. Next, we will look at what the specified heater pump is, how to choose an additional pump, and also how to install an additional pump.
Signs that the water pump needs to be replaced
The most vulnerable point of a centrifugal pump is the oil seal - the same sealing part that prevents antifreeze from leaking . Over time, the seal wears out and leakage becomes inevitable. There are enough reasons for the oil seal to wear out: these are wild temperature changes, and the ingress of pollution from outside under the hood of the car, plus antifreeze always absorbs some of the combustion products of fuel and engine oil. Such an aggressive environment cannot but affect the tightness of the VAZ-2109 pump.
Water pump bearings often become unusable. At such moments, a characteristic knock appears under the hood of the car. If you do not resort to “surgical” intervention in the engine compartment, it is not far from jamming or distortion of the pump shaft.
We can briefly list the following symptoms of a malfunctioning centrifugal pump:
- Coolant leak.
- Howling sounds that appear when the engine is running.
- In critical situations, if the problem goes unnoticed after the first two signs, the motor may overheat, especially when the pump rotor is damaged.
Negative aspects of installing an additional stove in the cabin
- An increase in the heat capacity of the cooling system entails slow heating of the coolant.
- The characteristic noise of the stove in the cabin will be added, since now there will be two of them working.
- The air flow from the stove will raise dust from the interior.
- In the warm season, hot hoses under the floor covering will additionally heat the interior of the car, but there is a way out of this situation - install a tap in the engine compartment when making changes to the cooling system.
- If you do not install another heater regulator and heat dissipation to the side, then there will be no uniform heating, but only one part of the interior will become very hot.
Self-diagnosis
Based on indirect signs, one can guess whether the pump needs to be replaced, but this issue can only be more accurately understood by removing and inspecting this unit from all sides. You can preliminary judge the condition of the pump only by some indirect signs. For example, when the engine is operating in normal mode, a pump malfunction may be indicated by the temperature of the upper radiator hose and the presence of liquid in it. The hose must be warm. This can be determined by touch.
An external inspection can easily determine the condition of the oil seal. To do this, just remove the timing cover and inspect the oil seal hole. If there were leaks, deposits of a characteristic color will tell you about it.
Installing an additional pump
The main negative quality of the basic heating element of the VAZ-2109 is its low efficiency at idle speed. This problem can be solved by installing an additional pump (additional pump) in the cooling system.
Purpose
By installing an additional pump 09, you can increase the efficiency of the stove at idle speed. The base heater blows warm air at idle, and hot air only when driving. This means that fluid circulation in the engine cooling system is poor. Installing an additional pump makes the coolant move much faster, including at idle, therefore, during a stop, hot air will blow from the stove, and not warm as before.
Which additional pump is better to choose?
The most common and proven options are additional pumps from GAZelle or Bosch. These elements do not have any problems with leakage.
Installation of an additional pump from a GAZelle on a VAZ-2109
- Pump for GAZelle
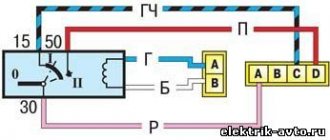
- Relay. You can take a relay with normally open contacts 2105, 2108 - starter or ignition relay and bridge contacts 30 and 86.
- Reinforced hose.
- Cooling.
- Several clamps.
Progress
- Wait for the antifreeze to cool completely and drain it.
- Unscrew the 4 top screws on the pump, where the impeller is located, and coat the rubber gasket with sealant.
- Secure the pump to the studs near the battery.
- Disconnect the coolant wire hose to the heater from the outlet pipe of the cylinder head and connect it to the horizontal pipe of the pump.
- Connect the hose of the connected S-shaped hoses (located in the cabin between the tap and the radiator) to the vertical branch pipe.
- Connect the second end to the head of the block, in the previously removed place of the base one.
- Pull all the clamps and do not forget to tighten the drain plug in the block.
- Fill the coolant to the maximum and check for leaks.
- If necessary, tighten the clamps.
- After running the engine for half an hour, bring the antifreeze level to normal.
Installing an additional pump from a GAZelle is very popular among VAZ owners, as it has only positive aspects. The car will be properly heated even at idle speed, and the price of the issue is about 2000 rubles. depending on the price of the purchased part.
Installing an additional pump on the stove
When all the nuances are taken into account and a suitable electric pump is purchased, you will often also need to buy the additional elements and fasteners discussed above. Only after assembling the complete installation kit can you proceed to installation. Let's look in general terms at a simple installation of a BOSCH pump.
- At the initial stage, a structure is assembled from two hoses and a pump. Considering that the pump is a outlet for antifreeze or antifreeze, it is important to securely fasten the hoses to the fittings.
- Next, you need to put the car on the handbrake, remove the terminals from the battery and drain the antifreeze. Next, having studied the installation diagram, you should find two hoses from the stove. For example, on a VAZ 2114 you will need to remove the right hose.
- Then the assembled structure is installed in place of this hose, and the pump itself is fixed in a suitable place (for example, on a VAZ 2114 on the gearbox housing).
- In fact, the pump cuts into the gap in the antifreeze supply hose to the stove, and a 90-degree angle insert made of a copper tube of a suitable diameter (for example, 22mm) is also installed. The output from the thermostat is connected to the top pipe (input), and the side pipe (output) is connected to the stove.
- Next, having connected all the pipes, all that remains is to pour antifreeze into the system, apply power to the pump and check the operation of the device. At the same time, all connections should be inspected for leaks.
Assembly Features
When installing the drive belt, you must again make sure that all the marks match, otherwise the gas distribution and ignition system will be disrupted
After installing the tension roller back, it is important to properly tension the belt
If the car does not start after complete assembly or starts poorly, it means that the belt on the camshaft gear is misaligned by one tooth. To eliminate such a malfunction, you will have to remove the belt from the gear again, turn the gear a little so that it moves relative to the belt by one tooth, and then put the belt back.
The operation of replacing the liquid pump is shown more clearly in the video:
Most engines in the VAZ line are liquid cooled - and the 2109 model is no exception. The movement of the coolant became possible using a water pump or pump. If it is faulty, the motor will overheat. Repairing your pump may not help much when problems arise.
Most often, specialists at service stations recommend replacing this spare part, since after repair there is no guarantee of long-term performance. Let's figure out how you can do this at minimal cost and on your own.
Step-by-step replacement instructions
Sooner or later you will have to go into the inside of the car and change the pump. First, you need to ensure two prerequisites: the engine must be completely cooled, and the coolant must be drained from the system to the last drop. After this, the necessary tools are selected:
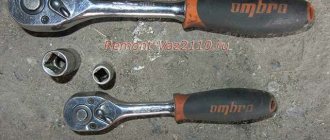
- Socket wrench 10 with extension.
- Open-end wrench 17.
- Screwdriver with a wide flat blade.
- To safely drain the coolant, you will need a special container. You can use a five-liter plastic container, the kind in which water is usually sold in supermarkets, after first cutting off the top part with the neck. Prepare a flexible hose by placing it on the lower radiator tap and unscrew the expansion tank cap.
- Turn the tap and the antifreeze will begin to drain. After draining the antifreeze, we look for the timing belt protection cover. Unscrew the retaining bolts and remove the casing.
- After this, you need to unscrew the timing belt tensioner pulley. Now remove the timing belt and lock the camshaft gear to unscrew the nut that secures it, after which the gear can be easily removed.
- Having finished with the gear, you can start working on the bolts of the inner timing cover. They are marked in the photo.
- And now we have access to the pump. You need to carefully disconnect it from the cylinder block with a screwdriver. When we managed to remove the pump, we carefully clean the place where it sits, take a new pump and replace it. It is better to replace the gasket that was under the pump with a new one.
Additional pump: what you need to know
So, if the stove initially works poorly, although it is fully operational, and also if the car is often operated in severe frost conditions, standard heating may not be enough even for a middle-class car.
In the case of a VAZ or old foreign cars, the problem is solved by gluing the dashboard, upgrading the heating system, installing tight dampers, replacing the heater radiator, the heater motor itself with a more efficient one, etc.
This allows you to more actively warm up the interior when the internal combustion engine is running or when the warmed-up engine is turned off, but the driver and/or passengers are in the car (fuel savings and increased comfort).
Also, an additional heater pump helps out when the engine is idling without load (for example, when sitting in a traffic jam) and quickly cools down. In such conditions, a standard stove usually does not blow hot air, but only warm air.
By the way, the same thing happens when driving on the highway at high speed in the cold season, when oncoming air flows intensively cool the engine compartment, as well as the coolant in the cooling radiator, etc. In turn, the additional pump to the heater causes the coolant to circulate more actively and give off more heat.
A simple connection of the pump to the vehicle's electrical network is also implemented. Usually, all the necessary fasteners, adapters, connectors, etc. are included with the pump.
Draining old oil from the engine.
We unscrew the oil drain bolt, this is what it looks like:
Before unscrewing it, place some kind of container for the old oil so that it does not spill onto the ground. While the old oil is draining, unscrew the old oil filter.
Pour new oil into the engine.
When all the old oil has flowed out, screw the bolt back into the pan and install a new oil filter. Before installing it, it is recommended to pour a little oil into it and lubricate the ring.
Now we fill in new engine oil. The volume of oil in the VAZ 2108, 2109 engine is 3.5 liters. That's the whole process of changing the oil. Also read other interesting articles about how to build a cramp yourself on our website.
Sources
- https://remont-vaz2109.ru/zamena-masla-v-dvigatele-i-maslyanogo-filtra/
- https://remontavtovaz.ru/vaz-2109/instrukciya-po-zamene-masla-v-dvigatele-vaz-2109.html
- https://vazkorch.ru/dvigatel-lada/zamena-masla-v-dvigatele-vaz-2109.html
