A clogged fuel filter in a Lada Vesta accelerates wear of the spark plugs and fuel pump. Repairing the fuel supply system will cost significantly more than purchasing a new coarse mesh. If there is no desire to disassemble the fuel pump to replace the filter elements, you can install an additional fuel filter on the Lada Vesta.
Author of the article: Roman Krasinets 05/12/2020 0 0
AvtoVAZ included a Lada Vesta fuel filter in the fuel pump. The car manufacturer allows the replacement of the mesh (coarse cleaning component). The fine filtration element is built into the fuel module. The manufacturer did not provide for the possibility of replacing it.
Fuel supply system design
The fuel supply system of the Lada Vesta car consists of 5 parts:
- Gas tank with filling pipe. The gasoline tank is made of compressed plastic and is attached to the bottom of the car with two metal clamps. The filler neck is located on the right side of the Vesta. The plug has 2 valve mechanisms. One ensures the release of excess pressure created in the tank due to thermal expansion. The other serves to intake air, which fills the container when the liquid level in the gas tank decreases.
- Fuel module. Provides pumping of gasoline into the fuel rail. Consists of a fuel pump, bypass valve, gasoline level sensor and filter device.
- Injectors. Located on the ramp. Fuel is injected into the internal combustion chamber.
- Adsorber. The main component of the vapor recovery system. Located on the right side of the car, near the front fender. Equipped with a purge valve.
- Pipelines. Serve to transport fuel and gases between components of the fuel supply system.
Where is the fuel filter on the Vesta? Photo source: https://www.drive2.ru/l/527598181760894565
Unlike the design of the unit installed on previous AvtoVAZ models, the Vesta fuel filter is not portable. According to the manufacturer, the cleaner's lifespan is sufficient for the entire life of the vehicle. Sometimes cases of low-quality gasoline are poured in, which forces owners to replace the mesh in the Vesta filter.
Replacement features
According to the automaker, the service life of fuel filters corresponds to the service life of the electric pump itself. Therefore, there are no exact recommendations regarding the frequency of replacement of this element from official representatives of the corporation.
Attention! The manufacturer guarantees the operation of only original car parts.
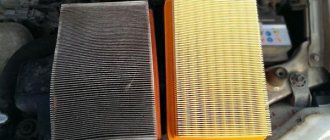
Despite this, car owners occasionally experience clogged filters. The coarse filter, which is a mesh, must be replaced, although this operation is now not so easy - it was easier on Grant. A different situation arose with the fine filter. It is made of paper and cannot be separated from the pump.
DETAILS: Replacing the Chevrolet Cruze cabin filter
As a result, in order to avoid problems and the need for an entire fuel pump, it is recommended to refuel only with high-quality gasoline.
The electric fuel pump of both Lada models is located in the gas tank of the car. In order to gain access to it, you must first remove the cover from the latter and lift the rear seat.
As a result, the car owner will see a system consisting of:
- electric fuel pump module;
- clamping ring;
- fuel tank;
- wiring harness blocks;
- rear fuel pipe.
Each of these elements plays an important role in the operation of the fuel system. So, the wiring connects the pump to the pressure regulator and the gasoline level indicator. And the gasoline line serves to supply fuel that has already been cleaned by filters to the fuel module.
When replacing, it is necessary to strictly monitor all fragile elements of this system.
The fuel filter on the Lada Vesta is changed according to an algorithm similar to that used when disconnecting and replacing other parts from the fuel module. The main difference is related to both the shape of the coarse fuel filter and its location.
Important! This section describes how to replace the coarse filter, since the fine element cannot be replaced.
In this case, the procedure will look like this:
- You need to take a flat screwdriver and, using it to help yourself, disconnect the drain tube from the intake chamber.
- From the intake chamber you now need to remove all the springs that hold the guides and themselves. In this case, it is important to mark which spring was put on which guide.
- After this, you can begin to release the electric pump fuel module from the intake chamber. It is attached using three clamps, which must be removed.
- The coarse filter is a mesh attached to the pump. It is held in place by one spring.
- In order to remove the filter, you need to pry off the spring with a screwdriver.
Once the old mesh has been removed, you can install a new one and secure it with a locking spring. After this, repeat all the steps in reverse order and return the removed elements to their place.
The coarse fuel filter for Lada Vesta and X-Ray is mounted in the fuel module and consists of a mesh. It can either be replaced or simply cleaned.
DETAILS: Error too rich mixture Causes and solutions for code p0172 rich mixture
But the fine fuel filter for Lada Vesta and X-Ray is made of paper. It is also integrated into the fuel module, however, it cannot be replaced, and therefore it can only be replaced as an assembly with a fuel pump.
In accordance with the maintenance for X Ray and Vesta, the fuel module of cars is designed for the entire service life.
And if so, then owners are advised to play it safe and refuel only at proven gas stations, and it is desirable that these are branded stations of the companies, and not a franchise.
Article number and cost of the original fuel filter
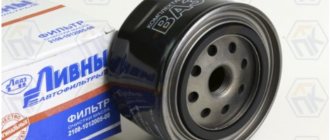
The original Vesta filter element does not have an article number. On the open market, a mesh that performs rough cleaning can be found at a price of 165 rubles. Produces consumables. Under its logo you can find repair kits for the Lada Vesta fuel pump costing 950 rubles. The kit includes coarse and fine filtration devices, a pulsator tube and a lid (assembled).
Replacing the fuel filter. Photo source: https://www.drive2.ru/l/527598181760894565
In an official car service, they do not change individual components, but install a new unit. The catalog number of the fuel pump is 21800113900900. The cost of a new original unit averages 6,000 rubles.
Is it possible to replace the fuel filter on Lada Vesta and XRAY?
The fine filter is made of paper and installed in the fuel module. They change it together with the fuel pump assembly.
A coarse filter (mesh) is also located in the fuel module. The mesh can be changed or simply cleaned of dirt (photo above).
According to the maintenance regulations (Vesta and XRAY), the fuel module is designed for its entire service life.
To extend the life of the fuel filter, try to refuel at reputable gas stations.
Let us remind you that built-in filters in the fuel module are the main distinguishing feature of the Vesta and XRAY fuel systems.
From the world by thread
The timing drive elements were not updated. The attachment drive circuit has been changed, and now when replacing the belt there is no need to remove the right motor mount. True, due to the different dimensions of the engine compartment, access to the tensioner roller has become more difficult - you need to partially dismantle the fender liner. But overall, belt replacement has become easier.
Paired with the domestic engine is a five-speed manual gearbox Renault assembled in Togliatti, which is also installed on Logan. The Vesta gearbox differs only in gear ratios. Maintenance of the mechanics is simple: periodic monitoring and oil changes, for which drain and filler plugs are provided.
An alternative is the five-speed AMT robot. It is built on the basis of VAZ mechanics and has proven itself well on the Kalina and Grant models. The housing still has a drain plug and a dipstick on top, as on its predecessors - changing the oil is still easy.
The process of replacing pads is more complicated than on Grant. Its drum is attached to the hub with bolts, but in the Renault mechanism you will have to unscrew the hub nut. This requires more effort and skill.
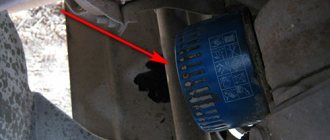
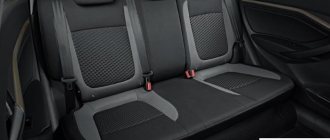
Grant's remote fuel filter, alas, is missing. Now, like on Logan produced after 2009, it is built into the fuel pump in the tank and is not available as a separate spare part. To replace the filter element, the unit must be completely disassembled - a rather labor-intensive operation. The pump is located under the rear seat - its cushion is secured at the front along the edges with latches (as on many foreign cars), and at the back is tucked under the backrest. To remove it, pull it forcefully upward from the corners. The pump is hidden under a plastic cover - to remove it, pry it off with a slotted screwdriver.
When operating a vehicle in a dusty area, the mileage between filter changes should be reduced by 1.5–2 times.
To replace the filter, remove the right lining of the floor tunnel and also dismantle the glove box.
It is better to clean the filter installation area with a vacuum cleaner.
Carefully install the filter cover along the lower guides and make sure that the latches are engaged. Next, we reassemble in the reverse order.
Lada Vesta and X-Ray became landmark models for AvtoVAZ. It is not surprising that their design included solutions that had not previously been seen on AvtoVAZ vehicles. This also applies to the location of the fuel filter - in sedan and crossover it is located directly in the electric fuel pump module, which makes cleaning or replacing it difficult.
For this reason, some car owners independently modify the design, by analogy with previous models of the Russian company, by installing a removable fuel filter. It is worth noting that such a decision by the owners is not without reason. It’s no secret that the quality of the fuel that is filled at many domestic gas stations leaves much to be desired. Therefore, it is not uncommon for fuel pumps on cars to burn out precisely because the filters are clogged.
But installing a remote component will greatly facilitate its replacement. As it turns out, there are several options for such a modification, depending on the type of engine.
When to change the fuel filter on Vesta
According to the manufacturer, the service life of the fine gasket is equal to the service life of the fuel pump. The fuel pump has a resource of 180 thousand kilometers. Photos on the Internet show dirty filter elements with more modest mileage figures.
On forums, car owners say that they change the fuel filter on their Vesta every 30-40 thousand km. The frequency of replacement is directly affected by the purity of the fuel used. When refueling at a suspicious gas station, the filter elements may become clogged within the first kilometers of driving.
Signs that replacement is needed
You can understand that the filtration device is clogged by some characteristic features of the machine’s behavior. These include:
- fuel pump noise;
- increased fuel consumption;
- reduction in engine power;
- car jerks when driving;
- floating idle speed;
- Difficulty starting the engine.
When the “Check Engine” light comes on and subsequent computer diagnostics, a clogged fuel filter displays error P0171.
Photo of the fuel filter on the Vesta. Photo source: https://www.drive2.ru/l/527598181760894565
These signs may also indicate other problems. But if the filter device was changed a long time ago, then you can start eliminating the problems by replacing it.
Where is the fuel filter installed?
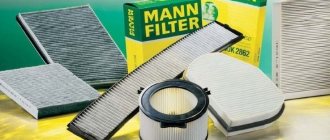
| Manufacturer | Cabin filter model |
| Nevsky filter | NF6433 |
| Nevsky filter | NF6433C (carbon) |
| TSN Citron | TSN 97888 |
| TSN Citron | TSN 97888K (coal) |
| SibTEK | AC 43003 |
| SibTEK | AC 0443003 |
Experienced car owners recommend installing a carbon filter in the summer, especially before the plants begin to actively flower. It better protects the air from harmful bacteria and allergens. In winter, you can get by with a regular cabin filter.
According to the Lada Vesta maintenance regulations, the cabin filter is replaced every 15 thousand km. But in fact, replacement may be needed more often. First of all, the service life of the filter depends on the environment. In places with increased gas and dust levels, the filter element needs to be changed 1.5–2 times more often.
The most obvious signs of the need to replace the cabin air filter:
- penetration of unpleasant odors from the street into the cabin (with the windows closed);
- in winter the stove does not work well, and in summer the temperature in the cabin constantly rises;
- fogging of windows;
- Dust quickly accumulates on interior items.
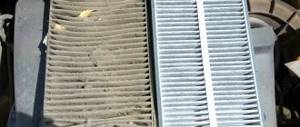
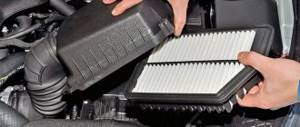
If the above problems occur, you need to replace the cabin filter, regardless of the mileage of the car. On the Lada Vesta, this part is located under the panel, to the left of the glove compartment, under the plastic facing decorative cover. Removing/installing the cabin filter on Vesta is a little difficult, since the seat is slightly smaller, and the installation of the filter element itself is carried out without a mounting cassette.
Fuel filters are installed on both gasoline and diesel cars. Moreover, the latter have higher requirements for filtration quality than gasoline ones. This is due to the fact that the pressure under which fuel is injected into the diesel cylinders is much greater than that of their gasoline counterparts.
As for the location of the fine filter, automakers' opinions have changed over time. In the beginning, all filters were installed under the car's underbody or in the engine compartment and were easily accessible for replacement.
Self-replacement of the coarse fuel filtration device
The process of removing the gasoline pre-purification mesh on Vesta is more complicated than dismantling the filter on AvtoVAZ cars of other models. Difficulties arise from the fact that the unit is built into the fuel pump. A flathead screwdriver may be needed when working to remove the fuel pump.
Video demonstrating how to replace the fuel filtration element on a Lada Vesta:
How to remove
Step-by-step instructions on how to remove the Vesta fuel filter:
- Remove the back cushion of the sofa. The seat is secured with latches at the front and hooks at the back. Remove the interior soundproofing gasket to provide access to the pump cover.
- Rotate the cover protecting the fuel pump and remove it.
- Vacuum and wipe everything thoroughly so that dust and small debris do not get into the gas tank.
- Disconnect the fuel pump power terminal.
- Start the car and let it run until it stalls.
- Remove the terminal from the battery.
- Disconnect the fuel line.
- Turn the fuel pump retaining ring counterclockwise and remove it.
- Remove the element in the plastic case. You need to pull out the knot carefully, at a slight angle. Otherwise, the float sensor that determines the fuel level may be damaged.
- Carefully pull the lower part of the pump, where the Lada Vesta fuel filter is located, and remove it.
- Disconnect the drain pipe.
- Remove all the springs from the glass, marking which part was on which guide.
- Unclip the 3 latches and remove the fuel module.
- Pry up the spring holding the mesh and remove the coarse cleaning element.
Getting to the place where the fuel filter is located in the Vesta is quite difficult. You need to remove the components of the assembly very carefully, otherwise the process of replacing the mesh will result in the purchase of a new fuel pump.
How to install a new one
The fuel pump is assembled and installed in the reverse order. After completing the work, you need to bleed the fuel supply system. To do this, insert the ignition key into the lock and turn it a couple of times without starting the car. Then the car is started.
Step-by-step work process
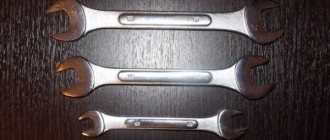
Required tools:
- set of automotive tools;
- new filter, mesh and fuel pump if necessary;
- rubber pipes, clamps - ties;
- rags.
The algorithm of actions is in many ways similar to the algorithm of work on the Lada Kalina, Priora. The bulk of the work is carried out in the cabin, on the back row of seats.
- We install the car within the perimeter of the repair area, provide priority safety measures, and secure the rear wheels with wheel chocks.
- We remove the back row of seats (cushion). To do this, just pull out the latch in the front part and remove it from the hooks in the back.
- Using a household vacuum cleaner and a rag, we clean the technological window from dirt and dust so that it does not fall into the cavity of the fuel tank.
- It is imperative to relieve the pressure in the system. To do this, unscrew the clamps and remove the fuel supply pipe to the injectors. We start the engine, it idles until it stalls on its own. Or we remove fuse No. 7 from the fuse block, thereby de-energizing the entire power system.
- After releasing the pressure, we begin dismantling. We follow basic fire safety rules and remove the terminals from the battery.
- We remove the fuel pipes and move them to the side. Place a rag to prevent fuel spillage.
- Unscrew the screws and remove the sealing (circlip) rings.
- Remove the fuel pump module assembly. Handle the float carefully. Damage results in the output of incorrect data about the actual volume of fuel.
How the module is disassembled
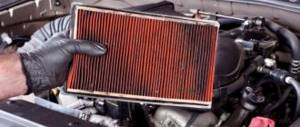
- We disconnect the lower half along with the metal mesh to clean the fuel. Depending on its condition: wash it with gasoline (kerosene), replace it with a new one if damaged.
- Disconnect the regulator wire.
- Remove the spring filter.
- We remove the hose, hold the clamps, and take out the fine gasoline filter.
The subsequent list of work depends on the results of equipment diagnostics. In the absence of obvious mechanical damage and depressurization, install a new filter element and assemble the structure in the reverse order. Replacement of the fuel filter Lada Vesta 1.6 (1.8) is completed. Subsequent scheduled maintenance after 150 - 180 thousand km.
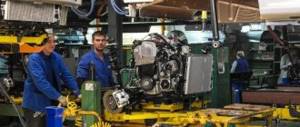
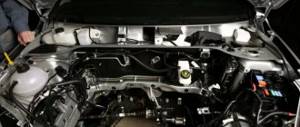
Engine Lada Vesta
Products from the Dustershop77 range on the topic of the article:
| Image | vendor code | Name | Manufacturer | Price | Availability | Add to cart |
| DC1300-20182 | Throttle valve gasket kit K4M/F4R (large+small) ROSTECO | Analogue | 500 / 350 rub. Discount: 250 rub. | 5 | ||
| DC380-ASAM-30376 | Radiator mounting pad ASAM-SA 30376 analog art. 7700430992 / 215081131R | Analogue | 150 / 100 rub. Discount: 80 rub. | 5 | ||
| DC800-8200291355 | Crankcase gas recirculation valve Renault 8200291355 | Original | 4500 / 3900 rub. Discount: 3600 rub. | 1 | ||
| DC919-226A41772R | Oxygen sensor lambda probe upper H4M 1.6 Renault 226A41772R / 226901841R / 226906393R | Original | 4500 / 4200 rub. Discount: 3900 rub. | 2 | ||
| DC1321-161757436R | Throttle valve gasket H4M original 161757436R | Original | 800 / 600 rub. Discount: 500 rub. | 1 | ||
| DC619-8200048024 | Expansion tank cover original Renault 8200048024 | Original | 700 / 500 rub. Discount: 250 rub. | 1 | ||
| DC1128-226901841R | Oxygen sensor lambda probe H4M 1.6 Lambda probe Renault 226901841R | Original | 4000 / 3800 rub. Discount: 3500 rub. | 1 | ||
| DC981-FCR210114 | Electric fuel pump FRANCECAR FCR210114 | Analogue | 1500 / 1200 rub. Discount: 1100 rub. | 1 | ||
| DC1211-8200132254 | Fuel injector for K4M engine original 8200132254 | Original | 2200 / 1900 rub. Discount: 1600 rub. | 8 | ||
| DC1200-BK64105/30598 | Fuel pump ring with gasket | Analogue | 1000 / 700 rub. Discount: 500 rub. | 3 | ||
| DC1322-224332428R | Ignition coil 1.6 H4m original 224332428R | Original | 2900 / 2500 rub. Discount: 2100 rub. | 2 | ||
| LRT-002/6001548140 | Washer reservoir is not original, ANALOGUE 6001548140 | LOGEM | 350 Discount: 350 rub. | 1 | ||
| DC382-ASAM-30494 | Expansion tank ASAM-SA 30494 (7701470460) | Analogue | 1000 / 700 rub. Discount: 600 rub. | 1 | ||
| DC1398-30777 | Gasket for fuel pump ring ASAM 30777 | ASAM | 300 / 200 rub. Discount: 150 rub. | 3 | ||
| DC1314-135101KT0A | Front crankshaft oil seal H4M original 135101KT0A | Original | 900 / 700 rub. Discount: 550 rub. | 2 | ||
| DC918-226A44171R | Oxygen sensor lower lambda probe H4M 1.6 Lambda probe Renault 226A44171R | Original | 11000 / 10500 rub. Discount: 9900 rub. | 1 | ||
| DC955-150100565R | Oil pump for F4R original 150100565R | Original | 5500 / 4800 rub. Discount: 4400 rub. | 1 | ||
| DC957-8200665520 | Starter K4M 1.6 original 8200665520 | Original | 12000 / 9900 rub. Discount: 9500 rub. | 1 | ||
| DC1302-166008992R | Fuel injector for H4M engine original 166008992R | Original | 3500 / 2600 rub. Discount: 2400 rub. | 4 | ||
| DC1315-122791HC0A | Rear crankshaft oil seal H4M original 122791HC0A | Original | 2000 / 1700 rub. Discount: 1400 rub. | 1 | ||
| DC1682-6001549070 | Fuel vapor absorber original 6001549070 | Original | 3300 / 2500 rub. Discount: 2000 rub. | 1 | ||
| DC1663-21120370501015 | Ignition coil VAZ 1.6/1.8 21129/21179 original 21120370501015 | Original | 1900 / 1200 rub. Discount: 900 rub. | 4 | ||
| DC1664-21179113201000 | Fuel injector VAZ 1.8l 2179 original 21179113201000 | Original | 1800 / 1500 rub. Discount: 1300 rub. | 4 | ||
| DC1643-140323253R | Intake manifold gasket H4M original 140323253R | Original | 1900 / 1500 rub. Discount: 1400 rub. | 1 | ||
| DC1644-140328698R | Intake manifold gasket H4M original 140328698R | Original | 700 / 600 rub. Discount: 400 rub. | 4 | ||
| DC522-233009370R | Starter for F4R engine original art. 233009370R | Original | 14000 / 10600 rub. Discount: 9900 rub. | 0 | ||
| DC1320-161191KA1B | Throttle valve H4M original 161191KA1B | Original | 15000 / 13000 rub. Discount: 11900 rub. | 0 | ||
| 6001548140 | Washer reservoir Renault 6001548140 original | Original | 850 Discount: 850 rub. | 0 | ||
| DC1002-B208A03276 | Fuel injector for K4M DEKO engine B208A03276 (analogue 8200132254) | Analogue | 2000 / 1500 rub. Discount: 1300 rub. | 0 |