Replacing the bearing of the air conditioner drive pulley Lada Granta VAZ 2190
Tool:
- Open-end wrench 10 mm
- Torque wrench
- Circlip pliers
- Three-jaw puller
- Vise
- Lathe
- Large hammer
- Mandrel
- Chisel
- Set of flat styli
- Axial runout indicator
Parts and consumables:
- Air conditioner drive pulley bearing
- Air conditioning compressor shaft seal
- Pulley
- Pressure plate
- Air conditioning compressor
- Adjusting washers
- Refrigerant
Note:
The air conditioner drive pulley is mounted on a double-row ball bearing, which does not require adjustment or lubrication during operation. When pressed out, the air conditioner bearing is destroyed, so press it in only to replace it.
1. Disconnect the wire from the negative terminal of the battery.
2. Remove refrigerant from the air conditioning system as described here.
3. Remove the air conditioning compressor as described here.
4. Remove the bolt securing the pressure plate, holding it from turning.
5. Remove the pressure plate from the air conditioning compressor shaft.
6. Inspect the pressure plate hub splines. If the splines are worn, replace the plate.
7. Inspect the surface of the compressor shaft seal. If there are traces of oil leakage through the shaft seal, the air conditioning compressor must be replaced.
Helpful advice:
In some cases, if a leak is detected, the air conditioner compressor shaft seal can be replaced. However, it should be remembered that a leak, as a rule, is caused by play in the compressor shaft due to wear of the support bearings, corrosion or wear of the shaft surface in the seal area. Therefore, replacing the oil seal will give, at best, only short-term results. If a leak is detected in the air conditioning compressor seal, it is recommended to replace the compressor assembly.
8. Using a special puller, remove the retaining ring of the air conditioning compressor shaft pulley bearing.
Note:
To remove the retaining ring, use a special expanding puller.
9. Install the puller and press the shaft pulley off the front cover journal of the air conditioning compressor.
Warning:
To avoid damaging the threaded hole of the shaft when installing the puller, screw the bolt securing the pressure plate into it several turns.
Helpful advice:
To remove the air conditioner compressor shaft pulley, it is convenient to use a universal three-fingered puller.
10. Inspect the friction surfaces of the pulley.
11. Inspect the surfaces of the pressure plate, paying attention to the presence of deep annular marks, scoring, obvious signs of wear and overheating. Replace defective parts if necessary.
12. Inspect the pressure plate dampers. There should be no signs of rubber bulging, cracks or tears on the rubber array of dampers. Replace the pressure plate if necessary.
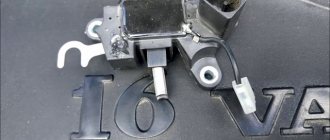
13. After removing the air conditioner compressor shaft pulley, inspect the splines (1), threaded hole (2) of the shaft, groove (3) for the snap ring and seating surface (4) of the cap journal. If they are worn out or damaged, the air conditioning compressor must be replaced.
Elements of the front cover of the air conditioning compressor Lada Granta VAZ 290 (magnet coil removed): 1 - shaft splines; 2 - threaded hole of the shaft; 3 — groove for the retaining ring; 4 — seating surface of the cap neck.
14. Using a lathe, cut off the flanges that secure the air conditioning compressor bearing in the pulley.
15. Using a mandrel of suitable diameter, press the old air conditioning compressor bearing out of the pulley.
16. Press in a new air conditioning compressor pulley bearing. When pressing, apply force only to the outer race of the bearing. You can use the outer race from an old bearing as a mandrel.
Warning:
When pressing the air conditioning compressor pulley bearing, be as careful as possible.
The wall of the outer race of the pulley bearing is very thin. Even a slight misalignment can lead to bearing failure. After pressing, check the condition of the bearing. It should rotate evenly, silently, without jamming. There should be no axial or radial play.
17. After pressing, secure the air conditioning compressor pulley bearing by punching the edge of the pulley mounting hole.
18. Press the pulley onto the front cover of the air conditioning compressor. When pressing, apply force only to the inner race of the bearing. You can use the inner race from an old bearing as a mandrel.
19. Install the retaining ring. Make sure it fits completely into the groove.
Warning:
After installing the pulley on the air conditioning compressor, make sure that the pulley rotates smoothly, quietly, and without jamming. There should be no axial or radial runout. Otherwise, the air conditioning compressor pulley must be replaced.
20. Place the pressure plate on the shaft.
21. Screw in the fixing bolt.
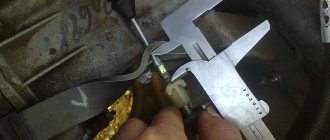
22. Using a flat feeler gauge, measure the gap between the friction surfaces of the pressure plate and the pulley. If the gap is not the same at different points on the circle, then the pressure plate is deformed and must be replaced. The nominal gap is (0.35±0.02) mm.
23. The gap can be checked more accurately using a dial indicator. To do this, install the air conditioning compressor in a vice.
Install the dial indicator as shown in the figure. Connect the positive terminal of the battery to the coil winding connector, and the negative terminal to the air conditioning compressor housing. Measure the gap A between the friction surfaces of the pressure plate and the pulley (the gap is equal to the difference in the measured values between the on and off clutch of the air conditioning compressor) every 60° around the circumference.
If the gap is not the same at different points on the circle, then the pressure plate is deformed and must be replaced.
24. If the gap is different from the nominal value, remove the pressure plate again. Using shims installed on the rotor shaft, adjust the clearance. Reinstall the pressure plate and check the resulting clearance.
Note:
To adjust the gap, use special calibrated shims.
25. After completing the adjustment, tighten the fixing bolt to a torque of 8 Nm. Before final screwing in the bolt, apply an anaerobic fixative to its threaded part.
26. Install the air conditioning compressor and all removed parts in the reverse order of removal.
27. Refill the air conditioner and air conditioning system with refrigerant at a specialized car air conditioning service center.
The article is missing:
- Photo of the instrument
- Photos of parts and consumables
- High-quality photos of repairs
How to check the air conditioner clutch
All electromagnetic clutches consist of 3 main parts: a pressure plate, a pulley with a bearing and an electromagnetic coil.
The pressure plate is rigidly connected to the compressor shaft via a splined or threaded connection (sometimes “keyed”).
When the air conditioner is turned off, the pressure plate is located at a short distance from the pulley, the pulley rotates “idling” on the bearing. Accordingly, the compressor shaft does not move.
When the air conditioner is turned on, an electromagnet is triggered, presses the plate against the pulley and the plate begins to spin along with the pulley and rotate the shaft.
| Photos | Type of malfunction | How to diagnose | Elimination method | Recommendations |
| Bearing wear | Noise when the pulley rotates (increases under load), runout/play of the pulley on the compressor neck | Replacing the pulley bearing or clutch assembly | The bearing must be installed only by pressing using the support on the outer and inner race of the bearing (an old bearing can be used for support). After installation, the bearing must be rolled | |
| Combustion of the electromagnet winding or thermal fuse | The air conditioner does not turn on, the resistance on the coil is about zero | Replacing the electromagnet | After installing a new electromagnet, it is necessary to eliminate the cause of combustion of the old one. Most often these are dirty cooling radiators or excessive wear/overheating of the pulley bearing. In both cases, the system overheats and the thermal fuse trips. You should also make sure that there is no jamming/wedging of the compressor shaft - in this case, characteristic blue traces of severe overheating from friction of the pressure plate on the pulley will be visible on the pulley. | |
| Mechanical wear of clamping planes | The drive plate does not press well (slips) onto the pulley | Adjusting the pressure plate and pulley clearance or replacing the pressure plate | In this case, an uneven pressure plane of the pulley and the pressure plate—a “wave”—will be visible. The gap between the pressure plate and the pulley should be on average 0.3-0.7 mm | |
| Mechanical wear of the spline part and wear of the damping elements of the pressure plate | Metallic clanging sound when the pulley rotates (as if it is hitting something) | Replacing the pressure plate | When dismantling, pay attention to the adjusting washers of the pressure plate - do not lose them, they will definitely be needed during installation. After dismantling, make sure that there is no compressor shaft wedge. |
How to replace an air conditioning compressor bearing yourself?
Owners of both domestic cars and expensive foreign cars periodically face the need to repair their car. Sometimes such repairs do not take much time, in other cases it will take more than one hour to identify the cause of the breakdown. Now we will tell you how to replace an air conditioner compressor bearing and what is needed for this.
When to change a bearing
The core of the problem lies in the fact that the compressor pulley bearing is engaged all the time when the engine is on, regardless of whether the air conditioning is on or not. Even in winter, when you hardly turn on the air conditioner, the pulley bearing performs its function. Failure can occur naturally due to aging. The bearing lubricant thickens and during operation it becomes very hot. Excessive tension on the drive belt also contributes to failure.
The consequences of its failure can be the most unpleasant. When an air conditioning compressor bearing becomes wedged, its seat may be “eaten up,” which will ultimately lead to the need to replace the entire air conditioning compressor or its front half, which is very unpleasant financially. The next step in a possible series of troubles may be a rupture of the air conditioning compressor pulley drive belt and the infliction of severe “injury” by this belt on the electrical wiring and other engine components located in the engine compartment.
Location and function
The air conditioning compressor can rightfully be called the heart of the entire vehicle air conditioning system. Accordingly, its condition should always be working in order to avoid problems in the operation of the climate system. The bearing plays an important role in the functioning of the compressor, without which the operation of the air conditioner would be impossible.
The bearing operates all the time when the motor is turned on. Regardless of whether the air conditioner is functioning or not. At any time of the year and in any weather. As a rule, its breakdown occurs due to aging of the element. Since this component always heats up during operation, its lubricant becomes very thick.
As for the location, it is installed on the compressor. In most cases, it can be accessed by removing the front left wheel and guard. But it all depends on the specific transport model.
Replacement process
If you decide to repair your car's air conditioning compressor yourself, you can use this material. But first think - can you do everything yourself? If something is done incorrectly, it may affect the functioning of the system as a whole in the future.
A set of necessary tools
- set of wrenches;
- Screwdriver Set;
- rags.
Step-by-step instruction
So, how to replace an air conditioning compressor if it is jammed. The instructions provide a replacement based on the example of the Volkswagen Sharan. In principle, the process is not much different for other car models, but there may be certain differences in the procedure:
- The first thing you will need to do is access the device directly. In some cars it is limited. Sometimes it will be enough just to remove the front wheel and protection, that is, the fender liner. But sometimes the hydraulic booster and cooling system pipes can interfere with this, as a result of which the antifreeze will have to be removed and the power steering dismantled. In any case, depending on the design of the vehicle, it is necessary to gain access to the compressor in order to remove the pulley bearing if it is stuck. If you decide to access from above rather than from the underbody, as is the case with the Volkswagen Sharan, you will need to remove the intake manifold. Remove the injector bar.
- The gasoline pressure valve does not need to be turned off. Just remove it from the bar.
- Now you need to remove the fastenings of the bar itself. To do this, use a wrench or a screwdriver, depending on the fastening. The bar can be removed together with the nozzles.
- Next, using a wrench, unscrew the intake manifold pins. Having done this, you need to remove the air tube and crankcase ventilation pipe from the device. Dismantle the collector itself. Take old rags and plug the timing belt inlets with them so that no nuts or other small things get into it during operation.
- Now, to get to the compressor pulley bearing that is jammed, you just have to dismantle the generator. In our case, the device together with the compressor is held in place using screws, each of which is attached to the motor block. Remove the screws and remove the generator.
- The hoses that lead to the compressor are rubber, so there is no need to relieve the pressure. You need to unscrew the nut that secures the friction pulley. You can use a screwdriver for this.
- Now you should remove the friction pulley. To do this, you can use two screwdrivers that you prepared in advance and remove the pulley from the shaft splines. Here, please note that under the dismantled pulley you can see several adjusting washers - there can be from one to three, depending on the design and model of the vehicle. So, you should not lose these washers under any circumstances. If they disappear somewhere, the work will be unfinished. And if lost, it will be very difficult to pick them up.
- If you have a special device for removing retaining rings, then it will come in handy now. If not, use a flat-head screwdriver. Remove the retaining ring.
- Now you can dismantle the clutch pulley. In this case, you can also use a slotted screwdriver.
- This will give you access to the bearing that is stuck. If it is jammed for the first time and you have never changed it, then it will most likely be rolled at the installation site. But this should not stop you, because you have already done most of the work and there is no point in retreating. Take the ground and head at “32”. You need to knock out the element that caused the extra hum. Purchase an identical bearing and replace it with a new one. Don't forget to lubricate it.
- All further assembly must be carried out in reverse order. There are several nuances that need to be noted. When you mount the friction pulley along with those very washers that cannot be lost, pay attention to the splines themselves. In one place the slot will not be visible, just like on the disk. This shows the correct position of the pulley on the shaft.
- When the assembly is completed, it is necessary to check the functionality of the coupling. Rotate the disk, but the friction pulley should not rotate. When rotating, nothing should cling anywhere. Also note that the nut that secures the friction pulley should be replaced with a new one. If this is not possible, then the thread where it goes should be lubricated with thread sealant. When installing the intake manifold, its sealing rubber should be coated with a small layer of heat-resistant and fuel-resistant sealant. When you install the nuts, do not forget that everything must be done correctly. In particular, it is necessary to remember the sequence of nuts and the tension force.
This completes the element replacement procedure. As you can understand, this process is not so easy, one might even say difficult. Consider your strengths and capabilities in advance - is it worth doing it yourself? Perhaps it makes more sense to pay money, but be sure of the quality of the work? We hope that our instructions will help you.
Buy bearings for your car model. These elements may vary depending on the model and year of manufacture of the vehicle. But forcing an unsuitable bearing into its installation location is not the best solution.
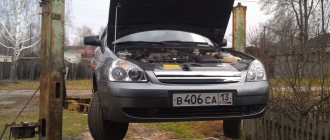
How to replace an air conditioning compressor bearing on a Priora at home
- We place a jack under the front right wheel, remove the bolts on the wheel and jack up the wheel. Next, completely unscrew the bolts and remove the wheel.
- Using an “8” key and a TORX, unscrew the fasteners of the mudguards and anthers, then remove them.
- Next, unscrew the tension roller of the generator.
- Using the “8” socket, you need to unscrew the coupling mounting bolt, and then carefully remove the top cover of the coupling. Be careful not to lose the puck.
- We remove the retaining ring that secures the coupling pulley to the compressor shaft, then we remove all this equipment and knock the bearing out of the seat. If your bearing is cored, that is, seated, and then fixing notches are applied around the circumference, then it will be more difficult to get the bearing out. It is best if pressing and pressing is done using a press; without it, everything can be ruined.
- We take a new prepared bearing and press it into place; if you do not have a press or device for this, you can go to the nearest service station, they will help you without any problems.
- Now we take a chisel or similar device and use a punch to make notches in a circle, thereby fixing the bearing inside the pulley.
That's all the pain, all that remains is to put everything back together in the reverse order, put on the belt and check if the whistle is gone. That's all for me, the work is done, I hope you are happy with the result!? Goodbye everyone and see you again at VAZ Repair.
How to replace the pulley bearing and clutch of the Lada Largus air conditioning compressor
The compressor pulley is mounted on a double-row ball bearing.
When pressed out, the bearing is destroyed, so we press it out only to replace it
We bleed the refrigerant from the air conditioning system and remove the compressor, as described in the article - How to remove the air conditioning compressor of a Lada Largus car
Holding the compressor rotor from turning with a special device
Device for fixing the compressor rotor
Unscrew the nut securing the pressure plate
Using a puller, press the pressure plate from the compressor shaft
If the pressure plate is tight and rusted to the shaft splines, do not attempt to remove it by inserting a screwdriver into the gap between the pulley and the plate. This will cause the plate to deform.
To remove the pressure plate we use a special puller