- The reason for the knocking may be replacing one type of oil with another, more liquid one, without flushing the system.
Tip: To create the required pressure for hydraulic compensators, a thicker lubricant must be poured.
If the actions taken did not help, you need to replace the hydraulic compensators of the VAZ 2112, it will be cheaper on your own.
Advice: Hydraulic compensators need to be replaced all at once, despite the fact that not all are broken. This is explained by the fact that the devices will break over time, and they are sold as a set. If you replace them all at once, the cost of repairs in the future will be lower.
Replacing hydraulic compensators in a VAZ 2112 car
If the hydraulic compensators operate inadequately (a knocking sound appears), the hydraulic compensator on the VAZ 2112, the entire set, needs to be replaced. But you need to make sure that the knocking is caused by a non-working main valve. This is done with a phonendoscope, in which a characteristic sound is heard. You can try to eliminate the knocking of one element by following these steps:
- The crankshaft is rotated until the valve opens slightly, which corresponds to the knocking main valve.
Work order:
- Oil change.
- The system is flushed.
- The oil filter is changed.
- The oil flow channel into the hydraulic fluid is cleaned using compressed air.
- Replacing hydraulic compensators on a VAZ 2112 car with your own hands is done no earlier than when at least 30 minutes have passed since the engine is turned off. This is necessary to reduce pressure in the blood vessels.
- Before installing new elements, the mounting hole is lubricated.
- At the initial moment, a knock may occur due to incomplete filling of the hydraulic fluid with oil. But it will stop after filling the mechanism with liquid.
Actions that will help the hydraulics start working quietly in normal mode:
- Let the engine run for five minutes at 2500 rpm.
- Then idle for 30 seconds.
- The noise in the hydraulic compensators will disappear. This means air is leaving the system. As the knocking continues, the cycle is repeated several times, usually 1-3 cycles.
How to replace valve lifters on a VAZ 2112 car
Replacing the VAZ 2112 valve hydraulic compensator is carried out when one or more elements fail. So:
- The plastic cover is removed.
- The receiver is removed. The hole in the intake manifold is closed with a cover.
- The ignition module is removed.
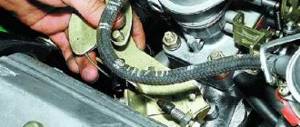
- The crankcase ventilation hose is disconnected from the pipe installed on the cylinder head cover.
- Use a 10mm wrench to turn the bolt that secures the bracket for the wiring harness connector for the injectors.
- The cylinder head cover is released from fixation and removed.
- The hydraulic compensator is checked by pressing a drift made of soft metal on it. In this case, the camshaft cam should be “back of the head” facing the pusher.
- In normal condition, the hydraulic pusher should be pressed with force. Otherwise, it needs to be replaced.
- To do this, the camshaft toothed pulleys are removed.
- The wire is removed from the oil pressure sensor.
- The bolts securing the camshaft bearing housing are unscrewed.
- The bolt securing the rod to the power unit bracket and its rear support is unscrewed and pulled out.
- The rear support bracket is removed.
Removing the rear support bracket
- The camshaft bearing housing is removed.
- The guide pipes for the spark plugs are removed from the housing.
- The intake camshaft differs from the exhaust camshaft by the presence of a belt near the first journal of the shaft.
- The camshafts are removed along with the seals.
- The rear plugs installed on the cylinder head and camshaft bearing housing are removed.
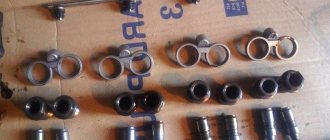
- The hydraulic compensator is removed from the cylinder head. To do this, apply a magnet to the end of the element, as shown in the photo.
The hydraulic compensator is pulled out from the cylinder head
- If necessary, the hydraulic compensators of the VAZ 2112 valves are replaced with new elements.
- Remains of old oil and sealant are removed.
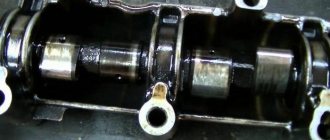
- Engine oil lubricates the cams and camshaft journals.
- The shafts are placed in supports on the cylinder head.
- Loctite No. 574 sealant is applied to the mating plane of the shaft bearing housing and the cylinder head using a bead, 2 millimeters thick.
- The bearing housing is installed and the fixing bolts are tightened evenly.
- The O-rings are lubricated with engine oil.
- Pipes are installed in the bearing housings and cylinder head holes.
- New camshaft seals are pressed in.
- The plugs are pressed into place on the opposite side of the cylinder block (see Replacing VAZ plugs: how to do it correctly).
- Final assembly is performed in the reverse order of disassembly.
How to replace hydraulic compensators on a VAZ 2112 16 valves is clearly visible in the video. After correctly replacing the hydraulic lifters on a VAZ 2112, the engine will operate silently for a long time, which increases its service life.
Reasons for the need to replace hydraulic compensators
The hydraulic compensator (HC) is the most important component of a car engine. It eliminates the thermal gap between the valve lifter and the camshaft cam. Eliminating this gap allows you to ensure uninterrupted operation of the engine at the level of design parameters. During operation, if the operating conditions and instructions of the manufacturer are not observed, premature wear of this part occurs. At the same time, a characteristic knocking sound is heard in the engine. This sound tells us that the hydraulic compensator has failed and needs to be replaced. The reasons for failure of the hydraulic compensator may be the following:
- Contamination of the oil supply channels in the engine.
- Wear of the working surfaces of the check valve and plunger pair.
- The occurrence of shock loads as a result of non-filling or partial filling of the hydraulic compensator with oil, in other words, its “airing”.
Now let’s briefly go over each of the above points. The oil passages of the engine lubrication system must not be allowed to become contaminated. This is a clear violation of operational standards that can lead to serious consequences. The reasons for contamination of oil channels may be:
- Using motor oil that does not comply with the instructions.
- Untimely replacement of engine oil.
- Oil filter malfunction.
As for increasing the seating gaps in the plunger pairs, in this case, increased oil leakage will occur from the high pressure chamber. In this case, the compensator will lose its resistance force and the effectiveness of the force of pressing the cam on the valve stem of the gas distribution mechanism will decrease. The internal space of the hydraulic compensator must be completely filled with oil. If this condition is not met, then the GC will not eliminate the gap in the parts of the gas distribution mechanism. As a result, dynamic loads will arise, in other words, shocks, which will lead to rapid wear of timing parts and a significant deterioration in engine performance.
It should be remembered that malfunctions in the operation of the main engine can also be caused by the ingress of small particles into it with the oil, which appear as a result of wear of engine parts. In this case, the node may jam.
If you do hear the aforementioned knock, then you should not immediately dramatize this event. If a breakdown of this nature occurs, it is quite possible to replace the hydraulic compensators on a VAZ 2112 yourself. But first, you can try to eliminate the knocking by performing the following simple steps:
- Remove the timing cover.
- Rotate the crankshaft so that the valve that is knocking begins to open.
- Turn the spring a little to shift the points of previous contact. The valve will also turn.
- Install the timing cover.
- Start the engine.
If the knocking does not disappear, then more effective measures need to be taken. Let's return to the idea that replacing hydraulic compensators on a VAZ 2112 with your own hands, in this case, will be the most optimal solution to the problem.
Diagnosis of the problem
Obviously, replacing hydraulic compensators on a VAZ 2112 with your own hands begins with diagnostics. First you need to determine which specific compensator has failed. To do this, it will be very convenient to use a device such as a phonendoscope. Applying it one by one in the area where each compensator is located, it is necessary to listen to the operation of each unit to identify increased noise and characteristic knocking. Having thus determined which hydraulic compensator needs to be replaced, you can begin disassembling.
Tip: If you don’t have a phonendoscope, you can build some kind of one. Attach a small tin can to one of its ends to a small metal rod (approximately 500mm long and about 6mm in diameter). Attach a wooden handle in the middle of the rod. By applying the free end of the rod to the location of the compensator, you can listen to the operation of the unit through a tin can.
Causes and consequences of malfunction of VAZ 2112 hydraulic compensators
Failure to promptly change the oil and filter, or adding low-quality, contaminated or used engine oil to the engine lubrication system can lead to the following consequences:
- Increasing clearance in the plunger , which causes increased oil leakage from the bushing under the plunger. As a result, the hydraulic compensator does not have time to select gaps in the timing belt, and characteristic knocking noises appear.
- Wear or clogging of the ball valve , leading to an increase in oil leakage from the cavity under the plunger, resulting in loose closure, leading to wear of parts and their premature failure.
- Wedging of the plunger pair completely disables the hydraulic compensator. Loads occur in the timing belt, leading to wear and damage to the camshaft cams.
Replacing expansion joints
It should be noted that replacing hydraulic compensators with your own hands on a VAZ 2112 has its own certain nuances. Knowledge of these technical subtleties will allow car enthusiasts and professionals to successfully solve problems of this kind. The following provides detailed instructions for replacing the main body:
- First, remove the plastic cover.
- Next, the receiver is removed. It is necessary to close the intake manifold openings with covers.
- Then you need to remove the ignition module.
- Then the crankcase ventilation hose is removed.
- Next, remove the fastening of the injector wires. To do this you need to use a 10mm open end wrench.
Remove the fastening of the injector wires
- Then remove the valve cover. To do this, you need to unscrew 15 bolts using a 8-mm socket.
Removing the valve cover
- Next, remove the cylinder head cover.
- We check the functionality of the hydraulic compensator. To do this, press on it with any rod, preferably made of soft metal. In this case, the camshaft cam should be turned towards the compensator with its blunt back side. If the compensator is pressed easily, with little force, then it needs to be replaced.
Checking the functionality of the hydraulic compensator
- We dismantle the camshaft toothed pulleys.
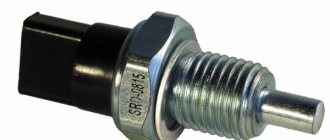
- Disconnect the wire from the oil pressure sensor.
- Unfasten the camshaft bearing housing. To do this, you need to unscrew 20 bolts using a 8-mm socket.
- Unscrew the bolt securing the rod to the rear engine mount bracket.
- Next, unscrew the three nuts securing the rear support bracket. This is done using a 15mm socket.
Unscrew the bracket fastening
- Remove the rear support bracket.
- Now you can remove the camshaft housing.
- Remove the spark plug tubes from the housing.
- In order to distinguish the intake and exhaust camshafts, there is a belt on the first journal of the intake shaft.
Intake and exhaust camshafts
- Next, remove the camshafts with seals.
- Next, you need to remove the rear plugs of the camshaft bearing housing and cylinder head.
- Using a magnet, we remove the hydraulic compensator from the socket.
- If necessary, we replace the hydraulic compensator with a new product and reassemble it in the reverse order.
Before assembly, be sure to clean the camshaft bearing housing and cylinder head from any remaining old sealant and oil. Before installing the camshafts, their bearing journals and cams must be lubricated with engine oil. The bearing housing mounting bolts must be tightened evenly and thoroughly.
As can be seen from the photo, the proposed set of works does not present any particular difficulties. After the replacement is completed, the engine may operate with increased noise for some time. In this case, the hydraulic compensators are pumped. To do this you need to do the following:
- Start the engine and let it run at 2500 rpm for 5 minutes.
- Then go to idle speed and let the engine run for half a minute.
- Next, turn off the engine and wait one minute.
- After a minute, start the engine again. If the knocking noise has disappeared, then the hydraulic compensator has been bled; if not, then the entire procedure must be repeated again. You may need up to five or more repetitions.
Before the VAZ 2112 hydraulic compensators are replaced, the video below will help you avoid sad misunderstandings:
As this video shows, the purchase of new spare parts must be treated very, very scrupulously.
Bolts as an alternative for hydraulic compensators
Quite relevant today is the replacement of hydraulic compensators with VAZ 2112 bolts. This topic causes a lot of discussion and has many positive and negative opinions. Here are some pros and cons in relation to hydraulic compensators. Positive sides:
- The valves will always be tightly closed and, as a result, the likelihood of burnout is minimal.
- There is no need to adjust the gaps.
- The noise of the gas distribution mechanism is significantly reduced.
- More stable operation of a warm engine at idle speed. This is the result of the valves closing tightly.
- In this case, we see, perhaps, only one disadvantage - the price of spare parts. This refers to the cost of the hydraulic compensators themselves and the parts associated with them. However, constant adjustment of a non-compensatory gas distribution mechanism will require no less cost and even more hassle.
Replacing hydraulic compressors on a 16-valve VAZ-2112 with your own hands (+ video)
Hydraulic compressors, or hydraulic valve pushers as they are also called, are designed to automatically adjust their thermal clearances. Simply put, they are a kind of gaskets between the camshaft cams and valves, capable of changing their thickness. The hydraulic compensator consists of a cylindrical body, as well as a special plunger consisting of a bushing, a spring and a ball valve. Their use on the VAZ-2112 engine makes it possible not to periodically check thermal clearances, as on the 2108 engine (valve adjustment) .
The replacement of hydraulic compensators is described and shown in detail and “up close” in the video below:
Operating principle of hydraulic compressors
Hydraulic compensator disassembled
The principle of its operation is as follows. When the cam is turned with its blunt side towards the pusher, a gap is formed, and at this time the plunger, under the influence of the spring, closes it, rising upward, and the oil through the channel, bypassing the ball valve, enters directly into its cavity.
When the camshaft cam is turned on the opposite side, it presses on the pusher, sending it down. And at this time the valve is closed by the ball, since the force of the cam is transferred to the plunger.
Signs and causes of malfunction
The main sign that the hydraulic compressors have failed will be their characteristic knocking sound, in which case for any car enthusiast this will be the first signal for diagnostics.
There may be several reasons for the malfunction:
- The service life of hydraulic compressors has been exhausted .
- The oil supply channels were clogged , resulting in oil starvation.
- Wear on the plunger pair caused by wear parts entering it.
If hydraulic compressors have worked their entire service life and require replacement due to wear and tear due to purely operational characteristics, then there is no reason for frustration. However, in two other cases, this will indicate problems in the operation of the oil pump, elements of the lubrication system, as well as inconsistencies in the type of oil for the engine.
The hydraulic compensator will work properly and for a long time only in cases where the entire working space is filled with oil. Otherwise, dynamic loads will gradually lead to its destruction, which will be the result of knocking. To diagnose hydraulic compensators, you can use a phonendoscope.
An example of hydraulic compressors knocking
The other side... supports
The main reasons for the failure of the hydraulic compensator (HC) are contamination of the engine oil channels and wear of the working surfaces of the check valve and plunger pair, manufactured with a high degree of precision. Contamination is caused by the use of inappropriate oil, failure to comply with oil change intervals, or a malfunction of the oil filter that allows dirty oil to pass through the bypass valve.
As the seating gap in the plunger pair increases, oil leakage from the high-pressure chamber increases. The hydraulic compensator loses its “stiffness”, so the efficiency of transmitting the force of the cam to the timing valve stem decreases. The same thing happens when the check valve of the high-pressure chamber wears out. Malfunctions in the engine lubrication system slow down the filling of the main gearbox with oil and do not allow gaps in the timing belt to be absorbed.
The internal volume of the HA must be filled with oil. An empty or partially filled ("aired") hydraulic compensator does not fulfill its main purpose - eliminating gaps in timing parts. As a result, shock loads occur, which manifest themselves as a characteristic knock. This leads to accelerated wear of timing parts and deterioration of engine performance. Breakdowns can also be caused by particles of worn parts getting into the hydraulic fluid with oil: the unit can jam. Depending on the position in which this happened, large gaps will either appear in the timing belt, or the valves will be “pinched” (the load on the camshaft increases, power decreases, etc.).
