Acoustics for the front doors of Lada Granta
Installing speakers in Granta doors allows you to be independent of the body type - speakers in the doors do not require an acoustic shelf. This means that you can install speakers in a sedan and a hatchback according to the same principle.
Preparatory work
Before we begin the installation itself, let's figure out how to prepare the car. For this:
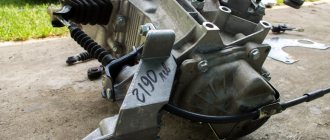
- We disassemble the door : dismantle the handle (pry up and remove the trim, unscrew 2 screws), the tip of the limit switch, two screws from the bottom of the door, overcoming the resistance of the retaining pins, pull the door card toward you and remove it from the door;
- We soundproof the door: in the warm season or in a heated garage, we cover all accessible parts of the door with vibroplast. Vibroplast StP M2 is suitable; when applying it to the door, be sure to heat it with a construction hairdryer and roll it with a pressure roller;
- If you have Spleen thermal insulation material, we cover the inside of the door card with it. This will further hide noise from the door when assembled;
- We are preparing spacers , if any are required for installing 16 cm speakers - more about them later in the text;
- We replace the factory terminals on the speaker wire in the door with normal ones (usually good terminals are included with the speakers) - to do this, we simply cut off the unnecessary connectors and attach the terminals we need to the wiring. A high-quality twist with heat shrink is enough;
- If the door panels do not have holes for speakers , we prepare them. It would be optimal to supply factory acoustic grids, which are installed on luxury versions of Granta and Datsun OnDo.
Installing speakers in Granta front doors
The standard acoustics in Grant are 13 cm speakers. They do not produce good sound, but they are easily installed in the factory holes for the speakers without unnecessary manipulation. The procedure for dealing with them is simple:
- connect the speaker cables, observing the polarity;
- fix with screws in regular places in the metal of the door or directly on the door card;
- install grids (in common parlance - grills).
An important disadvantage is that the center of the mounting hole and the place under the grill do not coincide. This means that when installed with complete grills, they will look asymmetrical and clumsy.
Standard acoustics most often do not produce a rich sound and, when installed with their own grids, look poor.
Pinout of contacts of the head unit priors
| A | B | C | |
| 1-SCV | 1-Speaker RR+ | 1-line output LR | 11-AUX IN |
| 2-TEL MUTE | 2-Speaker RR- | 2-line output RR | 12-AUX GND |
| 3-Speaker RF+ | 3-GND line outputs | 13-CD BUS * | |
| 4-BAT+ | 4-RF Speaker- | 4-line LF output | 14- |
| 5-Control ant. | 5-Speaker LF+ | 5-line RF output | 15-CD BUS GND * |
| 6-Backlight | 6-Speaker LF- | 6-12V | 16-A+ CD * |
| 7-A+ | 7-Speaker LR+ | 7-RXD | 17-U+ CD * |
| 8-GND | 8-Speaker LR- | 8-TXD | 18-CD-NF GND * |
| 9-GND | 19-CD-NF LEFT * | ||
| 10-line subwoofer output | 20-CD-NF RIGHT * | ||
* Pins 13-20 of connector “C” are used to connect the CD Changer
It is possible, and not only via power wires, since the unified connector of the head unit has linear outputs designed for this. Another thing is that they are not the usual nests for the so-called “Tulips”.
But connectors of this design are used on many foreign cars, for example BMW...
Below is a picture of the pinouts of these connectors.
Unfortunately, the sub output is not implemented, nor is its control implemented.
But this is not a global problem, since the existing outputs can be used for these purposes.
When using contact No. 3 - GND of linear outputs, hum may appear at the amplifier output when the engine is running. In this case, simply do not place the wires of the line wire screens on this contact, but fasten them to the minus, or the radio body and the background will disappear...
It should be noted that the first version of the head unit of the Priora car was much more modest in functionality, characteristics and design. Photo below:
For those who are looking for connector specifications, the following photo:
Open the instructions for the car and, accordingly, inside it for the radio here...
to the article: Is it possible to connect an amplifier to the standard Priora radio?
Yes you can, I installed a buffer and amplifier on mine
Installing speakers in Granta rear doors
The procedure for working with the rear doors is identical to the front ones. Important difference : homemade spacers are not required here. The plant produces a set of special mounts for installing 13 cm speakers in the rear doors.
Articles for ordering online:
| Speaker Mount - Rear Left | 21907901033 |
| Speaker Mount - Rear Right | 21907901032 |
| Rear left column trim | 21906202095 |
| Rear right column trim | 21906202094 |
| Trim for front left door | 21906102097 |
| Trim for front right door | 21906102096 |
Installation sequence:
- Disassemble the door;
- Cut a hole in the door card for the lining;
- Install the speaker mount on the door;
- Replace the standard audio terminals with normal ones;
- Connect the wires to the column, secure it;
- Install the trim and assemble the door.
You can replace the fastening with improvised materials, but factory production takes into account all bends.
General information about music in Grant
In this section, we will consider general non-professional points about music in the Lada Granta.
Installing music
If you have a VAZ 2190 in the basic configuration (or Norma) with audio preparation, then installing music will entail the following steps:
- Removing the radio cover - on the back side there are ISO connectors for power and speaker wires. You will have to run the wires to the rear speakers yourself if you plan to install an acoustic shelf, since from the factory the wires are routed only to the doors;
- Installation of a 1- DIN radio (for 2-DIN you will have to farm, cutting out a jumper in the panel and looking for a suitable frame);
- Finding and connecting the plug of the pre-installed antenna - often the antenna wire on the roof is lost under the ceiling trim and it turns out to be easier to install the antenna separately than to find the factory cable;
- Pulling wires into the trunk to connect an amplifier, subwoofer and speakers installed in an acoustic shelf.
- To install the amplifier, you will also need a separate power cable from the engine compartment directly from the battery terminal through a fuse.
Connecting the amplifier to the standard radio
Connecting the amplifier to the standard radio of most cars is carried out in the following order:
- Before starting work, be sure to disconnect the battery terminals.
- A red +12V wire is pulled from the battery to the amplifier. A fuse should be installed as close to the battery as possible.
- The black wire (ground) is connected at one end to the metal part of the body, and the other to the amplifier.
- The amplifier is connected with special wires to the speakers and subwoofer.
- Wiring is laid from the radio to the amplifier using special connectors on the radio. It should be located separately from the standard wiring to avoid interference.
- You only need to attach the terminals to the battery after the installation is complete.
The amplifier is located in the passenger compartment or trunk of the car. If it is located in too narrow a space, additional cooling will be required, since the amplifier gets very hot during operation.
In this way, the amplifier is connected to the radio of a Lada Priora, Grant, as well as Kalina 2, Lancer 10 and many others. Differences appear only in the last point, since the radios have different connectors. The connection is made through the radio connectors marked ISO or mini-ISO.
Since different radio models have different connector locations, before installing the amplifier, you need to familiarize yourself with the diagram of their location. It can be found in the receiver's instruction manual.
- Step-by-step installation of a Lada Granta radio: how to install it yourself in standard, normal and luxury
Crib
Instead of a conclusion, let's summarize:
- You can plug in budget sound into the Grant for an amount of 20,000 rubles or more.
- Podiums in the front doors = impossible to open the glove compartment.
- 16 cm speakers in the front doors - cut the metal of the door or prepare spacers with the factory facing of the speakers.
- The acoustic shelf covers the ISOFIX mounts.
- Audio preparation pulls wires only in the doors.
- Article numbers for ordering speaker covers and mounts are in the “Installing speakers in rear doors” section.
Choosing the best subwoofer in the Lada Granta
The Lada Granta car is a bestseller in recent years from the domestic automobile industry, which has won the hearts of consumers with its affordability and very good characteristics for its price. However, the sound quality of the standard audio system in the basic configuration of this car leaves much to be desired, as, in fact, in the vast majority of domestic cars. And there’s no need to talk about the deep sound of low frequencies - to get truly powerful bass, you can’t do without a high-quality subwoofer.
The online store of audio and multimedia systems for cars 4CarAudio offers you to choose the best car audio option for your Lada Granta car. From us you can buy an active or passive subwoofer, choose the best subwoofer option for the standard radio or a new, more powerful audio system kit. In one of the service centers that are partners of our store, the purchased subwoofer will be installed in the fender or trunk of your car, and the warranty from the manufacturer and the store will not lose its validity.
The price of the goods presented in our catalog will pleasantly surprise customers, in addition, for each there is the possibility of an individual discount. Are you choosing a subwoofer, audio system, recorder or other accessories for your car? Call or write to us - we will offer the optimal solution.
Connecting a subwoofer to the Priora's standard radio
Owners of the Lada Priora car truly appreciate the comfort inside the car's interior. The soundproofing materials that the car doors are equipped with muffle almost all sounds from the environment, and a special atmosphere is created inside the car. This atmosphere can be filled by silence, the sound of conversation, or the melodic rhythm of music. The car is equipped with a standard radio from the factory, but to improve the sound quality and volume, many owners are interested in the possibility of connecting a subwoofer.
In this article we will try to answer the question “How to connect a subwoofer to the standard Priora radio?” Connecting this element of the sound system is carried out in several stages.
Stage one: choosing a subwoofer model
To begin with, you should choose a subwoofer of optimal power that is suitable for you. You can choose a subwoofer based on the advice of friends, reviews on the Internet, or simply by communicating with the seller and testing the subwoofer. In the store, you can also consult whether this subwoofer will fit the Priora's standard radio. When the subwoofer is purchased, you should proceed to the second stage.
Stage 2: dismantling the standard radio
To remove the Priora's standard radio, you should use special hooks that can be purchased at a specialized car store. If it is not possible to buy hooks, you can make analogues from a metal saw blade. The hooks are inserted into the holes under the “Scan” and “TA” buttons until they click, then they are brought together, after which the radio can be carefully removed.
Stage 3: Connection
To connect a subwoofer, you should purchase mini iso-line out connectors at the store. Their cost is on average 125 rubles. In the store, you also need to select an amplifier for the standard Priora radio. Next comes connecting the battery power to the subwoofer. The wire can be pulled into the passenger compartment through the clutch cable plug. The blue wire (which is the control wire from the radio) should be routed to the location where the subwoofer is installed.
The most optimal place is the trunk, but, depending on the size and shape of the subwoofer, it can also be marked on the shelf under the rear window. Installing a subwoofer also requires connecting the amplifier to the standard radio. Priora has a 12-volt battery under the hood, so there is no question about powering the amplifier.
After connecting the subwoofer, amplifier and speakers to the radio, all that remains is to check their functionality. If the speakers and subwoofer are working, then all the steps have been carried out correctly, you just need to adjust the sound to your taste and enjoy the ride with high-quality music.
This article provides answers to questions about how to connect a subwoofer and how to connect an amplifier to a standard radio. After such actions, Priora will be transformed, and driving a car will bring even more pleasure.
Subwoofer for Lada with amplifier - a universal solution
When deciding to buy and install a sub in your car for powerful and deep bass sound, you should decide whether it will be an active or passive model. Not only the price of the device depends on this, but also the complexity of connection and setup, as well as sound power. An active Lada subwoofer with an amplifier built into the same housing as the subwoofer is easier to install and provides excellent sound, but is much more expensive than a separate passive subwoofer in the trunk or other place in the car.
It’s up to you to choose which one is more suitable for your Lada Granta car, based on your preferences and financial capabilities. Our online store employees are always ready to help with choosing a subwoofer or audio system for a Lada or any other car. Here you will find a subwoofer for the rear parcel shelf of the Granta sedan and you can buy it on excellent terms.
Article: 99999002544602 Recommended price: 7,908 rub.
Passive cabinet subwoofer TS-WX254 (1100 W).