Device
The mechanism includes an electric motor, which consists of a rotor and stator, a brush holder, a solenoid relay and a bendix.
The solenoid relay is designed to ensure synchronous operation of the starter. When the driver turns on the ignition and tries to start the engine, an electric current is supplied to this relay. As a result, a magnetic field is formed. The relay then acts on the engagement lever, which engages a gear on the flywheel. Next, the electric current flows to the winding of the starter itself.
The armature, or rotor, is responsible for rotating the Bendix gear. When the motor starts, the armature returns to its original position. It is equipped with a return spring, through which the contacts open.
The Bendix, or overrunning clutch, as it is also called, is necessary to control the speed of rotation of the shaft. The drive shaft must operate at higher speeds than the driven one. Brushes, as well as brush holders, are designed to supply voltage to the armature. The brushes also increase the power of the electric motor.
How to find a starter?
Experienced car enthusiasts are confident that if beginners can repair the starter with their own hands, then after that they will be able to cope with all other breakdowns. Why do they say that? It's simple. This part is installed in a very inconvenient place under the hood. Therefore, in order to dismantle it, you will have to make a lot of effort. In most cars, the starter is located under the engine on the driver's side.
To dismantle the device, you need to have patience and a good set of tools - open-end wrenches, sockets, wrenches. Flexible adapters will also come in handy. It is best to dismantle the element in an inspection hole on an overpass.
How to repair a starter: typical problems
The service life of modern engines, and not modern ones too, is much higher than the operating time of the starter. Sooner or later this unit will have to be repaired or replaced. But don't rush to buy a new starter. If it doesn't work, then it may not be the reason at all. Sometimes diagnostics will reveal that the problem was with the battery or even the flywheel. And finally, repairing the starter yourself is much cheaper than replacing it with a new one.
In order for the repair to take place as quickly, efficiently and successfully as possible, it is necessary to determine the reasons why the unit decided to fail. There are several of the most popular breakdowns.
So, the solenoid relay fails. For this reason, the Bendix gear will not engage the splines on the flywheel. It is also common to see worn graphite brushes. These elements are erased during use. But they can be replaced.
Bearings wear out and fail. This is diagnosed by fairly strong vibrations. You can observe destroyed parts of the mechanism, although the starter itself may work quite well. During operation, it is the gear teeth on the bendix that experience the greatest loads. After a few years, the teeth wear out, and this is the reason why the engine does not start or starts, but not always. The problem is solved by replacing the Bendix gear or installing a new flywheel ring.
How to install a starter on a walk-behind tractor - the correct procedure
Even a beginner can remove the electric starter from the walk-behind tractor in order to further repair the broken mechanism. However, many novice farmers usually have problems installing the starter back onto the unit with their own hands. Due to improper installation, the starter does not start the walk-behind tractor engine even after several strong jerks. To avoid common mistakes, you should study the algorithm for installing a starter on a walk-behind tractor in more detail.
Installation of the starter should be done in this order:
- First you need to remove the flywheel - this will be required to install and fix the crown on it. To dismantle the flywheel, you need to dismantle the air filter, which will give free access directly to the internal structure of the walk-behind tractor on the farm;
- Then you will need to remove the protective casing and unscrew the screws that secure the starter mechanism basket, flywheel and its nut. Removing the flywheel, as a rule, causes certain difficulties, and therefore many experts advise purchasing a removable key immediately before repairing the walk-behind tractor. As soon as the flywheel is dismantled, you should unscrew the key, which is located immediately behind the flywheel;
- After this, the generator should be installed. The wiring in it must be inserted into a hole located in the metal wall of the engine. The generator will then need to be secured in place on the motor wall;
- Next, generator magnets must be installed inside the existing flywheel. In this case, all existing holes in the flywheel and generator must match. Both elements will need to be connected with fasteners, after which the crown of the walk-behind tractor used will be installed. Immediately before installing the crown, it must be heated using a spray burner;
- The assembled mechanism must be installed on the motor of the walk-behind tractor, simultaneously screwing in the nut and key of the flywheel;
- Next, you need to screw in the starter basket, fix the casing and firmly install the standard air purification filter in its regular place;
- Then you will need to remove the plug and install the starter itself on the engine;
- Next, you will need to connect the generator wiring to the charging relay;
- At the final stage, the starter terminals must be connected to the walk-behind tractor battery and the unit must be started.
Installing a starter on an existing walk-behind tractor is not as difficult as it seems at first glance. The most important thing is to be as careful as possible and adhere to the correct assembly algorithm.
All of the listed methods for repairing a starter are suitable for owners of Neva, Cascade and Agro walk-behind tractors. The procedure for removing and reassembling the mechanism will be similar for agricultural machines of all listed equipment manufacturers.
Diagnostics
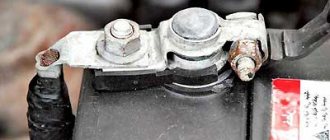
To check the functionality of the starter removed from the vehicle, use a charged battery. The ground is connected to the body. The positive wire is used to find a breakdown.
If the plus is connected to the corresponding contact on the solenoid relay, it will work and extend the bendix, provided that it is working properly. If the relay does not work, then it is recommended to replace it or try to repair the starter yourself. Whether it’s a VAZ or a foreign car, it doesn’t matter - the unit is designed the same on all cars. But sometimes repair is impossible - modern relays are made non-separable.
If the positive wire is connected to the contact after the relay, the starter should start. If nothing happens, you need to disassemble the assembly and look for a fault inside it.
Removing and installing the starter
I think it’s no secret to anyone what role the starter plays in the car’s electrical system, and how bad it is when the car doesn’t start at the right time. Although repairing a starter is not an easy task and requires skill and equipment, in most cases starter problems are repairable. Also one of the reasons for removing the starter is removing the gearbox from the car.
- Below we will list some reasons for removing the starter from a car.
- 1. The armature does not rotate, and the traction relay does not operate.
- 2. The armature rotates excessively slowly or does not rotate at all, and the traction relay is activated.
- 3. Repeated operation and shutdown of the traction relay.
- 4. The armature rotates, but the flywheel does not rotate.
- 5. When the armature rotates, an unusual noise comes from the starter.
Starter VAZ-2110
This car is equipped with a four-pole brush motor, with a two-winding traction relay, as well as a planetary gearbox. Power is 1.55 kW. The no-load current is 80 A. In the inhibited state, the device consumes 700 A. In maximum power mode - 375 A.
Do-it-yourself repair of the VAZ-2110 starter begins with dismantling. Disconnect the negative wire from the battery, then remove the wire from the traction relay. Next, use a 13mm wrench to unscrew the nut holding the positive cord and remove it. Next, use a 15mm wrench to unscrew the nuts on the clutch housing. Now you can remove the starter.
Next, you should study the diagram and carry out diagnostics. If the key turns but nothing happens, then there is no current flowing to the starter. Take the indicator and start looking for a leak. This is often due to a malfunction of the solenoid relay. You can use a screwdriver to close the bolts on the relay cover.
If the starter rotates very weakly, then the battery is most likely dead. Check both the battery and the charging system. The second reason is the brushes, bushings, windings, gearbox, armature, teeth, crown and flywheel. These parts (if they are the problem) are replaced with new ones. They can be purchased at any automobile store.
It happens that the starter is not screwed in properly. Then they twist it even tighter. If the device works properly, but noise is heard, then the problem is in the bendix. The starter is disassembled and worn parts are replaced.
Main signs and causes of starter malfunction
1. The starter clicks but does not turn. This malfunction may be due to insufficient battery capacity.
Its voltage may be enough for the retractor relay to start working, but the contacts of the nickels do not close and the electric drive does not turn on.
If there is sufficient voltage on the battery, the contact plate may be burnt and not close the nickels. Also, the starter may not turn if the brush mechanism is worn out.
Mechanical jamming of the starter is associated with wear of the rear or front bushing.
In this case, they must be replaced.
2. The starter turns, but the engine does not start. As a rule, such a malfunction is caused by problems with the engine management system.
In the cold season, if the battery is low or the compression is insufficient, the starter may not create enough torque to start the engine.
3. The starter does not respond to turning the ignition key. This malfunction has a number of reasons:
- failure of the ignition switch contact group;
- blown fuses serving the contact group of the lock;
- violation of the electrical wiring leading to the main contact of the starter (thick wire) and to the solenoid relay (thin wire).
4. The starter turns poorly when the battery is charged. This malfunction may be caused by wear of the bushings, wedging of the gearbox, poor contact of the power wire, wear of the brushes, or damage to the gear.
5. The car will not start, the starter will not turn. In case of such a malfunction, you should check the supply voltage to the main contact of the starter.
To control, you can directly apply voltage from the positive terminal of the battery to the contact of the solenoid relay.
If the starter starts turning, it means it is working. If the starter does not work, it must be dismantled and the cause of the malfunction determined.
6. Extraneous mechanical sounds when the starter is operating. The malfunction is associated with wear of the bushings, gears, and forks.
How to check the starter for performance?
If there are grounds for removing the starter and identifying the faulty unit, it is dismantled. Specialized service stations have a stand for testing generators and starters.
The starter is installed on a bench mechanism. Supply voltages are connected to it, torque and currents in the power and control circuits are measured.
How to test the starter on a battery yourself. To do this, the dismantled starter is carefully secured on a flat, non-conductive surface.
Next, using insulated wires with a cross-section of at least 10 mm2, connect:
- positive battery terminal with main contact bolt;
- the negative terminal of the battery - with the starter housing.
The starter is started by applying a positive voltage to the terminal of the solenoid relay from the positive terminal of the battery. If the starter is working properly, after the retractor relay clicks, the fork will operate, which will set the bendix in motion.
The starter motor will begin to operate and the drive gear will begin to rotate. When the starter is activated, a large rotation impulse is created; if the device is poorly secured, it may become dislodged. You must be careful not to allow a short circuit.
VAZ-2106-07
Do-it-yourself repair of a VAZ-2106 starter will require a lot of patience and skillful hands. The first step is to dismantle the device. Then, using a 13mm wrench, loosen the nuts holding the wires to the contacts of the solenoid relay and remove the wire tip. Next, diagnostics are carried out - 12 V is supplied to the relay, and the negative wire is connected to the housing. An ohmmeter measures the resistance on the contact bolts. If the starter is working properly, the armature will push out the overrunning clutch. The bolts will close. If the traction relay is faulty, it is replaced with a new one.
Then remove the cover from the starter. To check the condition of the brushes, use a slotted screwdriver to unscrew the screw holding the contact wire. While holding the spring, remove one brush, and then all the others. Use an ohmmeter to check for short circuits to the housing. Next, the commutator and windings are checked using visual inspection. If the latter are charred, this is a bad sign. In this case, repairing the VAZ-2107 starter yourself means replacing the armature. The Bendix gear will rotate easily in only one direction. There should be no chips or gouges where the teeth connect to the flywheel. If the gear is worn out, it is replaced. It is also possible to install the entire coupling assembly. Then all debris is blown out of the housing. Lubricate all moving parts - support bearings, rotor bushings, splines on the armature shaft. Next, the starter is assembled.
In the same way, you can repair the VAZ-2109 starter yourself. The design of the unit is similar to starters for classic VAZ models.
HELPFUL ADVICE
The stator windings can be checked with a megger. Connect one contact to the terminal, the other to the stator housing. The winding resistance must be at least 10 kOhm. If it is less, replace the stator.
Inspect the anchor. If the collector is dirty or has marks or scratches on it, sand it with fine glass sandpaper. If the commutator is significantly rough or if mica protrudes between the plates, turn the commutator on a lathe and then sand it with fine glass sandpaper. The core runout relative to the shaft journals should not exceed 0.08 mm. If the runout is greater, replace the armature.
If there is yellow deposits from the bearing on the armature shaft, remove it with fine sandpaper, otherwise it will cause the gear to jam on the shaft. If nicks or nicks appear on the surfaces of the journals and shaft splines, replace the armature.
Check the reliability of soldering of the armature winding leads to the commutator plates. Inspect the winding at the ends of the armature: the diameter of the winding should be less than the armature iron package. If the diameter is larger, replace the armature
Check the condition of the armature winding using a test lamp in a 220 V AC circuit. Connect the wires to the commutator plate and the armature core. If the lamp lights up, it means there is a short circuit in the armature winding or commutator plate to ground. In this case, the anchor must be replaced.
Gasoline tools, scooters
You can diagnose starter failures on a scooter using the same principle as on cars. The device and principle of operation are almost the same here. Often, most malfunctions are associated with severe contamination of the main components.
It is better to start repairing a scooter starter yourself with a thorough cleaning. Next, you need to wash everything with alcohol and install new brushes. Lubricate the bushings and put the device back together. After this, the node should work.