Gearbox seal VAZ 2107 - description and purpose
An oil seal is a special seal in a vehicle that is necessary to seal gaps and cracks. For example, in a gearbox, the oil seal plays a vital role - it is fixed at the junction between the moving and stationary mechanisms, preventing oil from leaking out of the gearbox.
The oil seals in the VAZ 2107 gearbox are not made of rubber, as most drivers believe. In fact, this product is constantly in the transmission oil, and to keep production to a minimum, manufacturers make oil seals from CSP and NBR composite materials. At the same time, the gasket feels equally “good” at any temperature - from -45 to +130 degrees Celsius.
Box seal dimensions
The gearbox itself on the “seven” is designed for many years of service. However, the service life of the device directly depends on how often (and in a timely manner) the driver changes the seals. Indeed, during the operation of the machine, it is the oil seals and sealing joints that are the first to fail (tear, wear out, squeeze out). Therefore, timely replacement of the oil seal will help prevent expensive repairs of other gearbox mechanisms.
For proper replacement, you need to know the dimensions of the VAZ 2107 gearbox seals:
- The input shaft seals have a weight of 0.020 kg and dimensions of 28.0x47.0x8.0 mm.
- The secondary shaft seals weigh a little more - 0.028 kg and have the following dimensions - 55x55x10 mm.
Which ones are better
The main question for any VAZ 2107 driver when repairing the gearbox is: which oil seal is best to put on the shafts to avoid rapid wear? In fact, there is no universal option.
The standard equipment of the shafts involves the use of Vologda oil seals, but if necessary, you can install any others, even imported ones.
Industry leaders can be considered:
- OJSC "BalakovoRezinoTekhnika" (main materials of manufacture - composites and alloys);
- (the main manufacturing material is thermoplastic elastomers);
- (made from rubber compounds with various additives).
The most affordable oil seal for a box shaft costs 90 rubles; the more modern the manufacturing technology, the more expensive the product will be valued.
Photo gallery: selection of the best oil seals for the VAZ 2107 gearbox
Signs of oil seal destruction
The seals are located directly on the shafts inside the box, so their wear can be visually determined only when disassembling the gearbox. However, any driver can quickly detect oil seal damage by eye, because there are obvious symptoms:
- Transmission oil leaks under the car.
- Constantly low oil level in the box.
- Problems with shifting gears while driving.
- Crunching and grinding in the gearbox when changing gears.
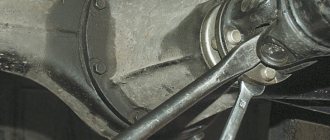
There are plenty of options. If there is an oil leak at the junction of the clutch bell and the engine, then it could be either the engine crankshaft rear oil seal or the gearbox input shaft oil seal. If there is a leak at the junction of the clutch bell and the gearbox body, the gasket is kaput. If it is wet at the rear end of the box - the gasket or oil seal of the secondary shaft
Electrician
https://www.vaz04.ru/forum/10–4458–1
It would seem how the performance of such a complex unit as a gearbox can depend on a small part. However, loss of tightness for the box is fraught with big problems, because even minor losses of transmission oil will immediately affect the lubrication of moving elements.
It is recommended to change the oil seals in the VAZ 2107 box every 60 - 80 thousand kilometers. The replacement is associated with an oil change, so it will be convenient for the driver to perform these works at the same time. Before this period, it is necessary to change the oil seal only when there are clear signs of its destruction.
Difficulty switching
The reasons for difficult gear shifting may be severe contamination of the lever linkage or jamming of the sliders.
In order to determine the cause of this malfunction, you need to take the shift lever housing and check if there is any jamming when the lever moves. If there is one, you need to establish the cause and eliminate it.
If the lever in the body moves without much effort, then the reason is in the sliders. After removing them from the gearbox housing, you need to carefully inspect them. Usually, in places where the sliders jam, marks remain in the form of abrasions and scratches.
More on the topic Do-it-yourself oil change in a Lada Largus manual transmission - video guide
POPULAR WITH READERS: Main faults of a car transmission
Then you need to inspect the seats of the slides for the presence of particles that cause jamming. Alternatively, there may be a slight bend in the slider itself. In this case, the slider is replaced.
Input shaft oil seal
The input shaft oil seal is located directly on part of the input shaft and is in contact with the clutch housing. Therefore, to replace this product, you will need to remove the casing.
To work you will need to prepare:
- nut heads;
- hammer;
- puller;
- flat screwdriver;
- knife (they are most convenient for removing the old gasket);
- new oil seal;
- transmission oil;
- new input shaft seal.
The procedure for replacing the seal can be carried out either on the removed box or directly on the car. However, it is easier and faster to change the product on a dismantled gearbox:
- Disconnect the gear shift fork from the box.
- Remove the release bearing by clamping it with a puller.
- Unscrew the six nuts securing the clutch housing.
- Remove the casing from the box.
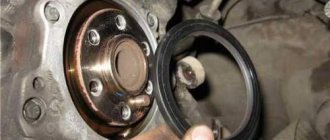
- Use the tip of a knife or screwdriver to pry up the old oil seal on the input shaft and remove it.
- It is good to clean the landing area so that there are no traces of the seal, spraying or oil leaks.
- Install a new oil seal, having previously lubricated it with transmission oil.
- Next, assemble the box in reverse order.
Video: replacement instructions
Secondary shaft oil seal
This gasket is located on the secondary shaft and disconnects it from the box flange. In this regard, replacing the secondary shaft oil seal proceeds according to a different scheme and is very different from working on the primary shaft.
To replace you will need:
- spanners;
- screwdriver with a flat thin blade;
- puller;
- pliers;
- transmission oil.
The work progresses according to the following algorithm on the removed gearbox:
- Firmly fix the box flange so that it does not move.
- Turn the nut securing it with a wrench.
- Using a screwdriver, carefully pry up the metal ring and pull it out from the secondary shaft.
- Place the puller against the end of the shaft.
- Press out the flange together with the fixing washer.
- Use pliers to grab the old oil seal.
- Clean the seating area and install a new oil seal.
- Next, assemble the structure in reverse order.
Video: operating instructions
Thus, replacing oil seals on a VAZ 2107 gearbox does not present any serious difficulties. However, inexperienced drivers are advised to seek help from professionals to avoid problems with the car, since working with the gearbox requires knowledge and experience.
Replacement of the secondary shaft oil seal for gearbox 2101-07.
I created this video with the help of YouTube Video Editor ()
- Disconnect (better remove) the battery.
- Engage neutral gear, disengage the handbrake, raise and hang the rear axle.
- Unscrew the bolts securing the cardan and the gearbox flange, and disconnect the cardan.
- Remove the exhaust manifold pipe by unscrewing the bolts.
- Disconnect the oxygen sensor.
- Remove the starter.
- Inside the car, remove the console and gearshift knob.
- Remove the gearbox protection.
- Unscrew the clamp connecting the catalyst to the exhaust pipe.
- Remove the clutch slave cylinder.
- Unscrew the speedometer cable, remove the boot and the reverse speed sensor wire.
- Remove the driveshaft.
- Unscrew the traverse while holding the gearbox.
- Unscrew and pull out the gearbox.
Replacing the secondary shaft oil seal of a VAZ 2107 gearbox
The need to replace the secondary shaft oil seal in the gearbox of a VAZ 2107 car arises when oil leakage is detected from the gearbox. The presence of oil drops on the gearbox housing is not allowed, but oil sweating is acceptable, which is not a sign of oil seal damage. To perform the work of replacing the oil seal in the gearbox, you will need a three-jaw puller and fixing glue.
Removing the gearbox seal of a VAZ 2107
1. We install the VAZ 2107 car on an inspection hole or overpass (see “Preparation of the VAZ 2107 car for maintenance and repair”). 2. On VAZ 2107 cars with an injection system, remove the heat shield (see “Drivetrain - removal and installation”). 3. Disconnect the driveshaft from the rear axle gearbox and unscrew the two bolts securing the intermediate support of the driveshaft to the cross member (see “Driveshaft - removal and installation”). 4. Disconnect the elastic coupling of the cardan drive from the flange on the secondary shaft of the gearbox (see “Drivetrain - disassembly and assembly”) and move the cardan drive back. 5. Using pliers, remove the thrust ring.
6. Secure the elastic coupling flange from turning by inserting bolt A into its hole. Using a 30 mm wrench, unscrew the flange fastening nut and move the centering ring B of the elastic coupling along the shaft.
7. After tightening the nut a few turns, use two slotted screwdrivers to pry up the centering ring and remove it from the secondary shaft of the gearbox.
8. Unscrew the nut.
9. Remove the bolt from the flange hole. 10. Place the screw of the three-jaw puller against the end of the secondary shaft and press the flange off the shaft.
11. Remove the flange along with the washer.
12. Using sliding pliers, remove the damaged oil seal from the gearbox.
Installing the VAZ 2107 gearbox oil seal
Attention
Before installing the oil seal, check the condition of the inner cylindrical surface of the flange in contact with the oil seal.
There may be signs of corrosion and wear that should be removed by polishing. Before installation, lubricate the surfaces of the new oil seal with a thin layer of grease. 1. Press in the oil seal with a mandrel of suitable diameter.
For clarity, we show the following operation on a gearbox removed from a VAZ 2107 car. 2. Use a hammer to press the flange onto the shaft. Having installed the washer, apply fixing glue to the threaded surface of the shaft (according to the instructions for use) and tighten the nut.
Replacing the Primary Shaft of the VAZ 2107 gearbox
Content
replacing the input bearing
Vas
2107
The gearbox on the classic VAZ (called the “seven”) is especially reliable. Sooner or later there comes a time when it is urgently necessary to replace the input shaft bearing of the VAZ 2107 gearbox. Often the gearbox is “subjected” to 1-2 engine repairs before it is repaired. But at some point it was her turn. One of the parts of the gearbox, most often, is the need to replace the VAZ 2107 input shaft bearing . Replacing the silent blocks of the front levers on VAZ 2101. 2107. is not an easy task. Changing the oil in the gearbox of a VAZ LADA 2107 yourself. The reason for its premature failure may be a factory defect or extreme driving style. Changing the oil in the transmission and rear axle of a VAZ 2106. If you “break the gear shift lever”, constantly overload it with sudden accelerations or heavy loads when towing, even a high-quality bearing cannot last long. Another reason for bearing failure may be neglect of regular maintenance of the gearbox, which is regulated by the manufacturer.
Many people believe that replacing the primary shaft bearing requires complete disassembly of the gearbox and prefers to entrust this operation to specialists in a car service center. Replacing the alternator belt for cars 16 shaft VAZ 2110 with 16 valves VAZ-2112. But practice has shown that complete disassembly of the gearbox is not required. Repair of the VAZ 2107 gearbox Remove the front gearbox shaft from the intake shaft hole. Change the bearing yourself Input shaft
this is possible without serious disassembly of the gearbox and the work does not require the highest qualifications and special devices and tools.
READ Which Oil to Pour into Gas 31105
Symptoms of primary failure of the VAZ 2107 gearbox shaft bearing
There are several signs of bearing failure:
- When the engine is running at neutral speed, an unusual noise is heard that changes as the speed increases.
- The gearbox periodically knocks when the car is moving. And there is a knock in any gear.
- Gears switch on or off spontaneously.
- The clutch does not engage with the removed bearings.
The problem cannot be ignored: displacement of a faulty bearing will damage the clutch basket. And even if there is no misalignment, a worn part will cause the transmission and/or clutch to fail.
Bearing replacement can only be done with the gearbox removed. This is where the work begins.
Removing the VAZ 2107 gearbox
You will need a pit or lift to remove the transmission. Changing the oil in the gearbox (gearbox) of a VAZ 2101. Replacing the bearing of the input shaft of a VAZ 2107 gearbox. The procedure is as follows:
Gearbox VAZ 5-speed. repair
Disassembly, defect and assembly. Help the project "Avtoznahar Group VKontakte":.
Disassemble the classic 5st
For those who repair the car themselves. Replacing the front brake pads of a VAZ 2107 yourself. The article contains detailed video instructions and tips from professionals. This video shows a step-by-step breakdown of the 5CT. VAZ gearbox
2105.
- Disconnect (better remove) the battery.
- Place the gear in neutral, release the handbrake, and raise and raise the rear axle.
- Unwind the universal joint bolts and gearbox flange, disconnect the universal joint.
- Remove the exhaust manifold exhaust pipe by unscrewing the bolts.
- Disconnect the oxygen sensor.
- Remove the starter.
- In the cabin, remove the console and shift knob.
- Remove the gearbox.
- Remove the clamp that connects the catalytic converter to the intake pipe.
- Remove the clutch slave cylinder.
- Unscrew the speedometer cable, remove the cover and the reverse speed sensor wire.
- Remove the power take-off shaft.
- Unscrew the gear while holding it.
- Unscrew and remove the gearbox.
READ Replacement Rear Brake Pads Largus 16 Valves
replacing the primary bearing of the VAZ 2107 gearbox shaft
Remove the bells and latches from the disassembled box. No further disassembly is required. Description of the input shaft of the VAZ 2107 gearbox. Replacing the rear and front brake pads on the VAZ 2107 video. Changing the oil in the VAZ gearbox. Checkpoint. YouTube failure, malfunction. How to change a bearing. The procedure looks like this:
- Use a powerful screwdriver to secure the groove on the VAZ 2107 gearbox input shaft bearing . This will take a lot of effort, so the screwdriver should be chosen as securely as possible so that it does not break or bend.
- Pull the transmission input shaft forward using the bearing. shaft as support
- Slowly remove the bearing from the main bearing shaft by tapping it with a hammer. The shaft should rotate slightly between hammer blows to prevent the bearing from becoming askew.
Knocking in the bearing takes from 5 minutes to half an hour. It all depends on the skill of the mechanic and how well the bearing is “connected” to the shaft.
The new bearing is pressed onto the shaft with a light hammer. Change the oil in the VAZ 2107 engine. The blow should be applied to the inner race of the bearing. Replacing the silent suspension of a VAZ 2107 is not an easy task. How often you should do this directly depends on the operating conditions of the vehicle, the quality of the parts, etc. This should be done carefully and evenly, pulling the input shaft forward.
READ How to Remove Radiator Heater Volkswagen Passat B3
The advantage of this method is that there is no need to disassemble the inside of the box, risking balancing it. Also replacement
bearing without disassembling the entire gearbox saves a lot of time.
After replacing the bearing, all that remains is to install the gearbox. repair of VAZ 2107 gearboxes, disassembly and assembly of the gearbox. main blow. Given its weight, it is advisable to work together. The operations are performed in the reverse order of removing the box and do not cause any difficulties.
The meaning of the primary and secondary shaft oil seals
The direct and main purpose of these small parts is to reliably seal the metal parts and connections of the gearbox housing and other parts of the vehicle system to prevent transmission oil from leaking. Oil seals are made of durable polyurethane alloy using special compounds, since they are constantly in an aggressive environment. Oil is constantly present inside the parts, which negatively affects the condition of the part over a long period of time. Externally, these parts can be damaged as a result of mechanical stress due to breakdown or under the influence of an aggressive natural environment. The average resource or lifespan of units largely depends on operating conditions.
The manufacturer does not provide a specific guarantee for these parts; accordingly, it does not limit their service life; planned replacement is not required at certain mileages. However, in most cases, under normal operating conditions, the service life of the parts is sufficient for runs of up to 200 thousand kilometers. When used in harsh natural conditions, reliability decreases accordingly, and with it the service life of up to 100 thousand kilometers.
These parts are located at the junction of the transmission with the clutch in the case of the primary shaft, and the secondary one is located directly inside at the junction of the flange and the gearbox housing. Sealing of pipes and hoses, as well as metal parts, is achieved by tightly connecting two parts directly to the seals, which is a circle with several layers of polyurethane material. It is precisely because of the unsatisfactory condition of these small parts that transmission fluid often leaks outside the box. Therefore, responsible owners, when the first signs of malfunction appear, replace the part with a new one. Due to their simple design and the absence of any moving parts, these units cannot be repaired; they are simply replaced with new ones. However, their failure can cause major consequences in the form of failure of the entire gearbox as a result of oil “starvation”. Therefore, preventing the condition of oil seals is one of the important procedures in the daily maintenance of the VAZ 2107.
Dimensions of oil seals in the VAZ 2107 gearbox
To correctly replace VAZ 2107 gearbox seals, precise geometric dimensions are required, as well as the weight of the product. Otherwise, when installing other parts, the operation of the entire gearbox may be impaired, which may also lead to breakdown. The manufacturer has established clear dimensions for the VAZ 2107 gearbox seals; these parts must fit under them, regardless of the company that will produce them for installation on this model. For the secondary one, the length is 55 mm, the circumference height is also 55 mm, and the width/thickness is 10 mm. The secondary seal weighs 28g, although weight may vary by supplier and is not particularly significant.
Bearing numbers in the VAZ 2107 5-speed gearbox
To simplify the selection of bearing data for the VAZ 2107 5 mortar gearbox, special numbers are provided, which are designated in GOST. In accordance with these numbers, various manufacturers are obliged to produce products in strict accordance with GOST, which includes not only physical dimensions, width, length, but also the composition of the materials used, various temperature conditions, as well as operating tolerances.
More on the topic How to repair a punctured tire yourself without removing it
It is in compliance with GOST standards that the advantage of domestic manufacturers lies, since this standard was developed taking into account the specific operation and loads of the gearbox in domestic conditions. Foreign analogues can use this standard in production, but in many cases they do not do this, supplying the market with low-quality products. For the secondary shaft, the bearing number according to GOST is set as 6-205KU, for the intermediate shaft 6-156704.
Diagnostics of VAZ 2107 gearbox seals
A responsible car enthusiast, owning a domestic rear-wheel drive car, is obliged to constantly monitor the condition of many units and components. One of these are oil seals. There are simple but quite labor-intensive means of checking and preventing these parts. To do this, you need to lift the car on a lift or drive it into a pit and conduct a visual inspection of the box body. In the places where the seals meet the parts of the clutch or rod there should be no fogging in the form of oil stains or drips of this substance. Fogging at the place where the part is attached is the first sign of failure; even if there are small spots, it is necessary to replace it, since the leak will only increase in the future.
It is also necessary to wipe and clean the parts from dirt and dust and inspect them for cracks, which may subsequently leak.
The simplest method of prevention without using a lift is to periodically check the oil level in the crankcase using a dipstick.
In addition, one of the signs of failure of parts and the subsequent need to replace the seal of the VAZ 2107 five-speed gearbox is a crunching sound when shifting gears both down and up. Also, this situation may be accompanied by a parasitic hum, which is not inherent in this type of box. At the first signs of malfunctions, it is necessary to urgently carry out a visual inspection, either yourself or go to a specialized service.
Possible gearbox malfunctions, their causes and methods of elimination of the VAZ 2107 Zhiguli
- Repair manuals
- Repair manual for VAZ 2107 (Zhiguli) 1982+.
- Possible gearbox malfunctions, their causes and methods of elimination
| Gearbox noise | |
| Cause of malfunction | Elimination method |
| 1. Bearing noise | 1. Replace defective bearings |
| 2. Wear of gear teeth and synchronizers | 2. Replace worn parts |
| 3. Insufficient oil level in the gearbox | 3. Add oil. If necessary, eliminate the causes of oil leakage |
| 4. Axial movement of shafts | 4. Replace the bearing retaining parts or the bearings themselves |
| Difficulty shifting gears | |
| 1. Incomplete release of the clutch | 1. See subsection “Clutch” |
| 2. Sticking of the spherical joint of the gear lever | 2. Clean the mating surfaces of the ball joint |
| 3. Deformation of the gear lever | 3. Eliminate the deformation or replace the lever with a new one |
| 4. Stiff movement of fork rods (burrs, contamination of rod sockets, jamming of locking crackers) | 4. Repair or replace worn parts |
| 5. Tight movement of the sliding clutch on the hub when the splines are dirty | 5. Clean parts |
| 6. Deformation of gear shift forks | 6. Straighten forks if necessary replace them |
| Spontaneous shutdown or unclear gear shifting | |
| 1. Wear of balls and rod seats, loss of elasticity retainer springs | 1. Replace damaged parts with new ones |
| 2. Wear of synchronizer blocking rings | 2. Replace locking rings |
| 3. Broken synchronizer spring | 3. Replace the spring |
| 4. Wear of synchronizer clutch teeth or synchronizer ring gear | 4. Replace clutch or gear |
| Oil leak | |
| 1. Wear of the oil seals of the primary and secondary shafts | 1. Replace seals |
| 2. Loosening of the gearbox housing covers, damage to the sealing gaskets | 2. Tighten the nuts (the torque is indicated in the appendix) or replace the sealing gaskets |
| 3. Loosening the clutch housing to the crankcase gearboxes | 3. Tighten the nuts |
↓ Comments ↓
1. Vehicle operation and maintenance
1.0 Operation and maintenance of the vehicle 1.1. Vehicle operation 1.2 Vehicle maintenance
2. General information
2.0 General data 2.1 Technical characteristics of vehicles 2.2 Controls and monitoring devices 2.3. Ventilation control and interior heating
3. Engine
3.0 Engine 3.1 Removal and installation of the engine 3.2 Disassembling the engine 3.3 Possible engine malfunctions, their causes and methods of elimination 3.4 Engine assembly 3.5 Bench tests of the engine 3.6 Checking the engine on a car 3.7. Cylinder block 3.8. Pistons and connecting rods 3.9. Crankshaft and flywheel 3.10. Cylinder head and valve mechanism 3.11. Camshaft and its drive 3.12. Cooling system 3.13. Lubrication system 3.14. Supply system
4. Transmission
4.0 Transmission 4.1. Clutch 4.2. Gearbox 4.3. Cardan transmission 4.4. Rear axle
5. Chassis
5.0 Chassis 5.1. Front suspension 5.2. Rear suspension 5.3. Shock absorbers
6. Steering
6.0 Steering 6.1. Inspection, check and adjustment of steering 6.2. Steering mechanism 6.3. Steering rods and ball joints 6.4. Swing arm bracket
7. Brakes
7.0 Brakes 7.1. Checking and adjusting the brakes 7.2 Possible malfunctions of the brakes, their causes and methods of elimination 7.3 Bracket for the clutch and brake pedals 7.4. Vacuum booster 7.5. Brake master cylinder 7.6. Front brakes 7.7. Rear brakes 7.8. Rear brake pressure regulator 7.9. Parking brake
8. Electrical equipment
8.0 Electrical equipment 8.1 Electrical equipment diagram 8.2. Battery 8.3. Generator 8.4. Starter 8.5. Ignition system 8.6. Lighting and light signaling 8.7. Sound signals 8.8. Windshield cleaner 8.9 Headlight cleaner 8.10. Heater electric motor 8.12. Control devices
9. Body
9.0 Body 9.1. Doors 9.2 Possible body malfunctions, their causes and methods of elimination 9.3. Hood, trunk lid, bumpers 9.4. Body glazing 9.5. Windshield and headlight glass washers 9.6. Instrument panel 9.7. Seats 9.8. Heater and ventilation of the body interior 9.9. Body frame repair 9.10. Paint and varnish coatings 9.11. Anti-corrosion protection of the body
10. Modification and equipment of VAZ-2107 cars
10.0 Modification and equipment of VAZ-2107 vehicles 10.1. Car VAZ-21072 10.2 Car VAZ-21074 10.3. Car VAZ-21073-40
11. Applications
11.0 Appendices 11.1 Appendix 1. Tightening torques for threaded connections* 11.2 Appendix 2. Tools for repair and maintenance* 11.3 Appendix 3. Used fuels and lubricants and operating fluids 11.4 Appendix 4. Basic data for adjustment and control 11.5 Scheme
How to change the oil seal on a VAZ 2107 gearbox
The procedure for replacing the rear oil seal of a VAZ 2107 gearbox differs from that on the front part due to the design features of the fasteners, as well as the very location of the parts and their design. In general, both procedures are divided into several stages.
Replacing the input shaft oil seal in a VAZ 2107 gearbox
Replacing the front oil seal of a VAZ 2107 gearbox occurs in several stages:
- First you need to disconnect the parts of the clutch with which this part interacts by dismantling the clutch fork, housing and release bearing, which are secured with several bolts.
- Then it is necessary to dismantle the casing itself, thereby freeing up space for removing the oil seal itself.
- After this, you should remove the used part by removing it from the seat using a knife. The vacated seat must be carefully processed to remove any remaining waste oil from the part, as well as other contamination.
- A new unit is installed in its original location, lubricated with transmission oil, and the entire system is reassembled in the reverse order.
Replacing the secondary shaft oil seal in a VAZ 2107 gearbox
The secondary oil seal is changed in another way:
- Fix and dismantle the gearbox flange, since it is this part that is fixed to the secondary oil seal.
- After dismantling, it is necessary to press it out using a special puller and gain access to the oil seal itself.
- Next, use a screwdriver or other tool to remove the used part, and also treat the landing site.
- Install the new element and reassemble in reverse order.
Video - How to change the gearbox seal of the VAZ secondary shaft
The bearing of the secondary shaft ensures free rotation of its end in the place where the shaft already leaves the gearbox. From the inside, the bearing is filled with a lubricant, which facilitates the rotation of the part.
The gearbox secondary shaft oil seal is installed in the same place. The oil seal is a rubber O-ring that fits onto the shaft and fills the gaps between the shaft and the transmission housing. The oil seal is designed to prevent oil leakage and ensures the tightness of the system.
More on the topic: What are the dangers of parking a car for a long time in a cold garage?
Over time, both the seal and the bearing are subject to natural wear. Parts of the bearing are destroyed and begin to loosen the shaft. Gradually, the friction between the parts increases, and the bearing begins to disrupt the shape of the shaft. The balancing of the shaft becomes unbalanced over time and it begins to vibrate. The very first to suffer is the oil seal, which will lose its shape and will no longer be able to hold oil in the gearbox.
The oil gradually disappears and the lubrication of gearbox parts is disrupted. In addition, the oil seal may fail due to wear, which occurs in any case. The fact is that a rubber product has a certain service life, which is determined by mileage and the oil seal begins to crack and also lose its sealing properties.
You can diagnose a seal malfunction visually. To do this, it is enough to look from time to time at the junction of the cardan and the secondary shaft. If traces of transmission oil are found there, then we can confidently say that the oil seal has become unusable and needs to be replaced.
Bearing failure is quite difficult to determine. To do this, you need to have good hearing and know your car perfectly. When driving in gears, a hum and vibration may appear from the gearbox; when the clutch is depressed or the gear is disengaged, the hum disappears, but this sound should not be confused with the sound of a faulty clutch release bearing or gearbox input shaft.
- The car must be driven onto a pit or overpass. The most important requirement will be that he must be immobilized for safety reasons. To do this, install wheel chocks under the wheels or block the wheels using the hand brake.
- Prepare the gearbox for removal. Without this operation, replacing the oil seal and bearing is impossible. First, disconnect the ground or negative terminal of the battery. Now find the shift lever inside the car, push it down and use a screwdriver to release the locking sleeve. The lever should come out. After this, release the remote plastic sleeve using two screwdrivers, which need to be used to release the special fastening tabs. Then, go down under the car and remove the exhaust pipe, as it will interfere with further removal of the gearbox.
- In the same place, on the gearbox, disconnect the special block of the two wires that are responsible for turning on the reverse lights. Unscrew the universal joint drive mount, the starter mount, release the clutch release hydraulic cylinder, but do not unscrew the hose from it to avoid subsequent bleeding of the clutch, and remove the flexible speedometer cable.
- Now the most important thing: unscrew the fastenings of the cross member holding the box at the back, and place any support under the gearbox so that it does not collapse when unscrewing the fastenings to the engine. Unscrew the corresponding fasteners and remove the gearbox from the support.
- Disassemble the gearbox, but before doing this, all the oil must be drained from it. Once the transmission is completely disassembled, locate the bearing mounted on the shaft and press it out using a puller. After this, install a new bearing in the same way and change the oil seal.
- Reassemble the gearbox in reverse order and install it on the car.
At this point, the replacement of the oil seal and bearing of the secondary shaft of the VAZ 2107 gearbox is completed. If you are not fluent in tools and do not understand the structure of a car transmission at all, then it is best to entrust this task to professionals from the field of car maintenance.
Depending on the location of the structure, the methods of carrying out repair work within the system also differ. To implement them, the owner will need a lift, a set of keys, various types of screwdrivers, a hammer, and a small knife.
As basic advice, we can give a recommendation on the selection of replacement units. Foreign products are not always superior in quality to Russian products, which are made according to strict state standards. Therefore, you should not focus on cost when purchasing. Also, when working to change these parts, it is necessary to strictly follow the sequence of actions.
For ease of use, you should always use a lift or pit in the garage. This will make it possible to carry out not only operations to replace parts, but also preventive maintenance of other gearbox elements and the general condition of the gearbox. Also, close attention should be paid to the moment of centering and tightening of parts. In the case of increased load, the life of the bearings decreases in proportion to the increased load and, accordingly, the next replacement will be required at shorter mileage.
Welcome! The gearbox is one of the most important parts when assembling almost any car, because as we all know, if there is no gearbox, the wheels will not spin at all, since torque is transmitted only from the gearbox to the wheels of the car. Over time, the box, like any other unit, becomes unusable and there comes a time when it needs to be replaced, but not everyone knows how to perform this operation without damaging themselves (Since the box is very heavy and can fall on your leg, etc.)
e) and the car. Note! To replace the box, you will need to stock up on: A basic set of wrenches, which will include wrenches “10”, as well as “13” and “19”. Instead of wrenches, you can also stock up (if you have one) with heads of the same size, as well as cardan joints and an extension on which all this will be put on!
To replace it, you will also need to take with you: A screwdriver, pliers, if possible, a funnel and an unnecessary 2-liter container, which you can then close with a lid, since the container is needed to drain the used oil, which you can then pour back into the box or throw away the container !
You will also need to stock up on: A long thick block, thanks to which, when removing the box, you can prop it up so that it does not hang and thereby calmly unscrew all the bolts that secure it!
Tips and recommendations for replacing the oil seal in a VAZ 2107 box
There are many manufacturers of spare parts for VAZ cars on the market. These are both domestic and foreign enterprises. A lot of these also produce seals. However, the negative side of diversity is the unstable quality of spare parts. There are frequent cases of defects, regardless of the country of origin. Therefore, responsible drivers should carefully examine the unit when purchasing it for quality of workmanship, the presence or absence of cracks.
In general, despite the low cost of the part itself, the installation process takes quite a lot of time, so the best option would be to purchase the part from the car manufacturer itself, which complies with the design dimensions, as well as the production technology of original spare parts.
Also, when installing new parts, it is always necessary to have a drain container on hand to remove excess parts of the transmission fluid, as well as new fluid for subsequent topping up.
