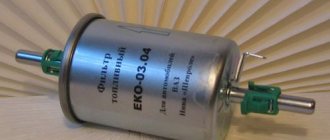
When there is clean air inside the car, it is very pleasant not only for the driver, but also for the passengers. The cabin filter protects against road dust and exhaust gases. It is also called a stove filter. The VAZ 2114 cabin filter cleans the air that enters through the engine compartment openings. In just one hour, more than 200,000 liters of air passes through this filter. It is clear that after a certain time the VAZ 2114 cabin filter needs to be replaced.
What is a cabin filter adapter
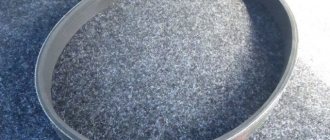
This product is a casing for the interior ventilation and blowing system, made of plastic or stainless steel. Inside there is a built-in car filter from the VAZ 2110 model. The casing itself is made in the form of a detachable metal structure, which consists of two parts - rear and front. All joints and connections are filled with rubber or silicone filler in order to avoid the appearance of condensation inside and to improve the tightness of the structure. The so-called sides are installed on the front part. They serve to prevent water from getting into the filter when washing the car.
DIY adapter installation
The convenient design of the casing allows you to install a pleated filter from a VAZ 2110 car. And its location will not prevent you from cleaning it in just a few seconds.
Special adapter for cabin filter VAZ-2114
Special adapter for the VAZ-2114 cabin filter
Although the filter element is quite effective for cleaning the air, many VAZ users complain that it does not at all correspond to the analogues of modern cars. And in order to create something modern from a standard filter element, you need to install an adapter.
An adapter is an adapter that matches the dimensions of the new filter and the geometric dimensions of the landing site. It can also be called a modernized ventilation housing, which also has space for a filter.
The adapter is designed in two parts: front and rear. A filter is installed in the front part, and both parts of the adapter are connected using special rubber gaskets. The advantage of this design is that when washing the car, the filter is completely protected from water entering it.
Device functions
The functions of the cabin filter adapter may differ slightly from each other, depending on the modification made to it. The main functions inherent in any adapter include:
- Purification of air coming from the street;
- Retention of dust, debris and harmful automobile exhausts;
- Providing the salon with clean, fresh air.
More expensive and high-quality filters have a number of additional functions, such as:
- Air purification from bacteria and microorganisms;
- Adding activated carbon sorbent;
- Extending service life;
- Possibility to install a filter of a more modern design into the adapter.
You can buy such a thing at any car store for about 1,500 rubles. But, let's consider the option of making an adapter yourself.
Making a stainless steel adapter
In order to make a cabin filter adapter with your own hands, you will need the following materials and tools:
- Several sheets of stainless steel;
- Metal scissors;
- Drill;
- A drill designed for drilling metal;
- Bolts brand M3, 50 pcs.;
- Auto-sealant, in a medium-sized tube;
- Vise;
- Mallet (necessarily made of wood or rubber);
- Pliers;
- Sheets of A4 format, with drawings printed on it, which will be used in the future as a stencil;
- And most importantly - a lot of free time.
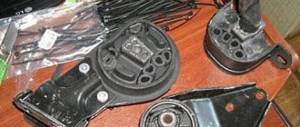
Manufacturing of cabin filter adapter for VAZ 2113, 2114, 2115
I decided to make a cabin filter adapter.
I printed out the drawings, found iron (iron is some kind of aluminum alloy, it bends very well). I drew the layouts on the iron and started cutting, this is what happened... All parts were successfully cut out
I cut iron with scissors, nothing complicated
Bend. You just need to know which way
I bought 40 pieces of rivets
Also, a gravitex balloon was purchased, the adapter itself will be painted with it
I trimmed it a little, removed the excess sealant, and painted it
Filter space
The adapter will, of course, be slightly modified in terms of removing the excess seal and fitting the part where the elastic is put on. Regarding the installation, I will say that the bottom corners on the part where the filter fits were rounded because it did not fit into place. There were no more problems in terms of installation
Bye - something like this
The filter becomes tight, I immediately took a carbon one
This is what happened - everything is tight, the seams are sealed
https://www.drive2.ru/l/8088932/, https://www.drive2.ru/l/8098358/, https://www.drive2.ru/l/8195295/
Sound insulation of the interior of VAZ 2113, 2114, 2115
Sound insulation of doors VAZ 2114 Sound insulation of fender liners VAZ 2114 Sound insulation of floor VAZ 2114 Sound insulation
Let's look at the step-by-step instructions for making an adapter for the VAZ 2114 with your own hands
Before you begin, you need to make a stencil. To do this, print ready-made drawings that have a 1:1 ratio. Be sure to use A4 size sheets for printing. After you have all the drawings in your hands, you will need to cut out each part and then use its dimensions as a sample.
Next, the stencils cut out of paper should be attached to the stainless steel and traced with a pencil. Then, carefully cut along the contour using metal scissors. At the bends, draw a hatched line with a marker. When everything is ready, clamp the part in a vice and carefully bend it along the line. A wooden or rubber mallet will help to level the bending angle. Do not use a metal hammer under any circumstances, as stainless steel is a rather thin material and can easily become deformed from an impact.
After the parts are completely prepared, you will need to drill holes in them for fastening. The places where they will be located are indicated on stencils. Carefully transfer them to the stainless steel workpiece.
Making a device from stainless steel
Now, all the parts are ready. All that remains is to fasten them together with bolts. At the joints, use silicone or liquid rubber as a sealant. The resulting structure can be installed in the engine compartment of a car. For easier installation, it is recommended to remove the plastic protection that is installed on VAZ 2114 cars to prevent leaves from getting under the hood.
After installation, you should also seal all cracks with sealant to avoid air leakage. Otherwise, such an adapter will be of no use.
Adapter
Alas, the quality and efficiency of the standard cabin filter provided for the VAZ 2114 leaves much to be desired.
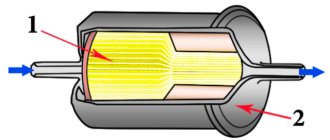
Essentially, it is a strip of filter material that is located between two plastic grilles. The effectiveness of this design is insignificant, which forces car owners to take certain measures.
The best measure is to install a filter adapter. Making it yourself is not difficult, although there are other ways to obtain this design.
Adapter drawing example
Thanks to the adapter, it becomes possible to install a truly effective air purifier for the cabin, which retains the smallest particles and does not allow the driver and passengers to breathe dust.
Externally, the adapter is an improved housing for the interior ventilation system with a filter built into it. The design consists of two elements - the rear and the front. A filter is inserted into the rear component, and the joints between the adapter parts are sealed with rubber gaskets. This ensures the necessary tightness. The design nuances will allow you to avoid moisture penetration even when washing the car.
Article on the topic: Do-it-yourself replacement of brake fluid on a VAZ 2110
When planning the installation of the adapter, experts strongly recommend using a pleated cabin filter borrowed from the VAZ 2110.
The simplicity of the adapter design makes it possible to replace the filter with your own hands in the shortest possible time. And during installation you do not have to remove the heater. So this is an ideal solution to significantly improve the ventilation system of your VAZ 2114.
Options for obtaining an adapter
If you have made the right decision that you want to get an adapter for your VAZ 2114, you need to decide how exactly you will get it.
There are three main options for this.
| Option | Advantages | Flaws |
| Buy a device in the online store | You get a high quality device, made of thick metal and powder coated | The high cost of the product itself, plus equally expensive delivery |
| Order from those who make them with their own hands | The purchase will be much cheaper compared to an online store | If desired, you can make such a device yourself, spending only on consumables. Quality may be poor |
| Do it yourself | Significant financial savings, the ability to produce a truly high-quality adapter. You will know what it is made of and how | You will have to spend a lot of time and effort on manufacturing |
You should start making your own adapter only if you are completely confident in your own abilities. Spend the money you save on purchasing a high-quality carbon filter from a VAZ 2110.
Making the adapter
The instructions for creating an adapter with your own hands are quite simple. Another question is how accurately you can implement your plans.
- Find diagrams to create an adapter. Now there are many of them on the Internet. Just keep in mind that you need an adapter specifically for the VAZ 2114.
- Make a layout out of paper so that you understand exactly where each part goes and how they are connected to each other.
- Stock up on the required amount of stainless or galvanized steel. Some people use plastic, but it is a little more difficult to work with, plus it can cause problems when getting bends.
- Cut out the necessary adapter elements from the material, guided by the drawing and layout.
- Use a vice and mallet to make bends. The walls will be thin, so do not use a metal hammer. It is better to take a wooden or rubber mallet.
- The parts are connected using M3 bolts or rivets.
- The advantage of rivets is that you do not need to drill holes in the metal. But they also have a drawback - a high probability of damage to a thin sheet of metal.
- At the last stage, carefully treat all joints, connections and holes with sealant. This will allow the structure not to make unnecessary noise while driving.
Article on the topic: EPHH on the VAZ 2109 (carburetor)
Finished design
The manufacturing process will take at least 6 hours. Plus, you will additionally have to spend time studying diagrams, drawings and creating a layout. So be patient.
Making an adapter from plastic
In order to make an adapter from plastic, you will need slightly different materials than when making it from stainless steel. Well, if you still decide to do this, here is a list of the materials you need:
- Wide plastic ventilation pipe (150 cm length, 200 cm width);
- A4 sheets with drawings;
- Marker and pencil;
- Metal scissors;
- Bulgarian;
- Superglue, cold welding;
- Silicone sealant.
So, as in the first case, with stainless steel, first cut out a stencil from paper. Next, trace them on the plastic with a pencil or marker. It is best to choose a ventilation pipe, as it is white and all marks will be clearly visible on it. After you trace the parts, they will need to be cut out. There are two ways to do this. The first is using ordinary metal scissors, and the second, more accurate, is to take a regular knife (preferably not needed) and heat its blade over the fire. Once it is hot enough, gently run it along the cut line. This method will take you much more time, but the result will be obvious.
Device layout
Next, on the parts you will need to mark the bend location with a dash-dot line. It is worth paying attention to the fact that there is no need to drill holes for fasteners, since such an adapter is attached with glue. Unlike stainless steel, plastic is quite difficult to bend. And if you manage to do this, then how can you leave it in this position? There is an exit. Take a grinder and make a shallow cut along the dash-dot line. The depth of the slot should not exceed half of the entire thickness. Now your parts will be able to acquire the desired shape, and the most important thing is to maintain it.
Now it's time to connect the parts together. As stated earlier, there is no need to drill holes for the bolts. In order to fasten all the parts together, first, coat the joints with glue and attach them. Wait a little while for them to set. Once they hold, secure them firmly using cold welding. It should be applied both to the inside of the joint and to the outside. Since such a connection, in itself, will create a tightness, applying a sealant is not necessary.
And now, your plastic cabin filter adapter is ready. But, before you start making it yourself, remember that this work is quite hard and requires some experience. If you have never made anything from plastic, then it is better to choose a stainless steel adapter.