- Alternator belt problems
- Adjusting belt tension
- Replacing the alternator belt
- Useful video
Sometimes you may notice that the VAZ 2114 8-valve generator belt begins to make a whistle or strange sounds. What this could mean, how to fix this problem, and also how to properly replace the belt - we’ll tell you today.
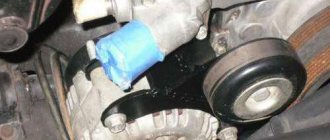
Alternator belt VAZ 2114
Alternator belt problems
The most common sign of a malfunctioning alternator belt is its whistling.
There may be several reasons for this phenomenon, the most likely of which are:
- Weak tension. This causes the belt to slip during movement, producing corresponding sounds. Moreover, the intensity of the latter clearly increases at night - after all, the generator in this case works not only for the usual “24-hour” consumers, but also for lighting.
- Belt failure. Long-term use of the generator belt causes natural aging, which negatively affects its structure - cracks form on the surface, and some parts of it may even crumble. In this case, the belt may slip and not transmit the required torque to the generator pulley. The only way out of this situation is to replace it.
- Belt gets wet. Although this happens extremely rarely due to the design and location of the generator drive, when water gets on the surface of the belt, it can also slip due to reduced friction of the working surface.
- Generator jammed. If the generator breaks down, it may jam, causing the belt to slip. In this case, it is not the belt that needs to be repaired, but the generator itself.
Problems with the VAZ 2114 alternator belt
In order to avoid problems with the generator belt, you should periodically (every 1-2 months) check its tension, and also inspect the outer surface for defects.
If during operation of the car it turns out that the belt is in good condition, but at the same time whistles during operation, it is enough to simply tension it.
Adjusting belt tension
Incorrect tension of the alternator belt can have an extremely negative impact on the operation of the components and assemblies that depend on it. Thus, too weak a tension will lead to its slipping, leading to unstable operation of the generator (due to poor transmission of torque) and interruptions in the on-board network (including rapid battery discharge).
On the contrary, an excessively tight belt tension can cause excessive stress on the generator bearings, thereby leading to their rapid wear or even destruction. It is for this reason that the tension value is extremely important and should be checked periodically.
In order to correct it and return the belt to normal operating condition, you need to:
- loosen the generator fasteners from below and from above;
- turn the adjusting bolt and thus tighten the tension (to increase the tension, rotate the bolt to the right, to loosen it, to the left);
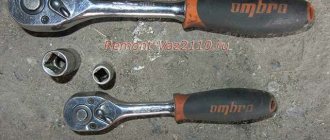
- Using a wrench, turn the crankshaft several turns and check the tension;
- If the tension is OK, tighten the generator fasteners.
VAZ 2114 generator belt tension
The tension check itself can be done by simply pressing the belt with your hand. If it is tensioned correctly, its deflection will be about 8 mm. If the deflection is greater, the tension should be increased; if it is less, it should be weakened.
You can check the correct tension in another way - just put the multimeter in DC voltage measurement mode with a limit of 20 volts and measure the voltage at the battery terminals with the engine running. Stable readings will indicate that the belt is tensioned well (which means that rotation is transmitted smoothly to the generator). If the voltmeter readings fluctuate, the belt tension should be adjusted.
Another clear sign of proper belt tension is that it runs silently. If it moves smoothly, without making a whistle, hum or other extraneous sounds, then everything is fine. If any noise is heard during its operation, it means that the tension was performed incorrectly (in some cases, the cause of the noise may be jamming of the generator, as discussed above.
That is why, if after repeated attempts to adjust the belt tension it is not possible to remove the whistle, you should pay attention to the condition of this device).
What does tension affect?
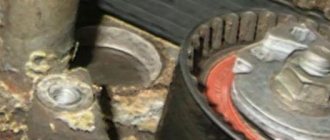
Excessive force will lead to rapid failure of the generator bearings. A breakdown in the initial stage manifests itself as a hum from the generator. When replacing a belt, it is advisable to check the condition of the bearing. To do this, unscrew the pulley by hand. Rotation should occur evenly and silently. If a hum still appears during engine operation, you can remove the belt, and then for 10-15 seconds. start the engine. This way you can determine whether the noise is coming from the alternator bearing or timing rollers.
Insufficient tension leads to belt slippage and accelerated wear. The first sign of such a malfunction manifests itself as a squeak when cold or when wet. Excessive stretching will result in no charging. This is why it is important to know how to check the tension of the alternator belt.
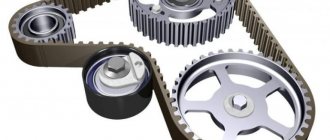
Types of construction
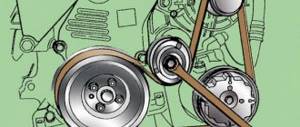
There are two types of generator drive:
- individual - the generator is connected to the crankshaft pulley by a separate belt drive. The tension is carried out using a special adjusting bolt, the rotation of which will move the generator away or closer. In other cases, the force is regulated by the position of the body;
- common - one service belt is used for the generator, crankshaft, cooling system pump and power steering pump. In this case, the force is set automatically by the tensioner, which is fixed with a special roller.
How to determine the correct tension level:
- Using a ruler, the difference between the resting and tensioned positions is measured. In this case, the applied force, the measuring point, as well as the standard difference are indicated in the vehicle repair and operation manual. The photo shows a diagram for a Chevrolet Niva. You can measure the tension at points A and B, that is, in the middle between the pulleys in the most convenient place for you. The measured value for point A should not exceed 10-15 mm, and for point B - 12-17 mm. The applied force (98.1 N, that is, 10 kgf) can be measured by tensioning the belt using a hand-held spring scale;
- twist test. If you do not have accurate information about tolerances, you can use the traditional method. It is considered that the generator belt is tensioned correctly if it cannot be twisted around its axis by more than 90º in the middle of the generator pulley and the crankshaft. The degree of effort exerted is difficult to describe, but with experience this feeling comes automatically;
- using a frequency meter. Owners of VAZ cars have probably heard about the Lada Norma-Pinar device. The device is designed to measure vibration frequency. The data obtained allows us to determine the degree of tension. To check, you need to bring the sensor to the belt, and then run your finger along it, like along a guitar string. The automaker regulates the normal frequency for each internal combustion engine model. This method is used infrequently, since purchasing a device for repairing a personal car is impractical. But such a device can be built with your own hands.
Tension
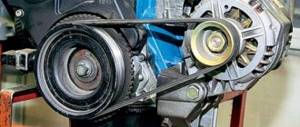
Let’s look at how to properly install a car’s alternator belt using the example of two types of construction:
- loosen the tensioner bolt by unscrewing the locknut. Rotating the bolt itself will tighten and loosen the belt. After setting the tension, secure the tensioner bolt with a wrench and tighten the locknut;
- loosen the bolts securing the generator to the brackets. Place a pin between the generator housing and the engine. Pull the belt using lever force, after which you can tighten the generator fastenings;
- in systems with a single service belt drive, tensioning can be carried out automatically. The design contains a special tensioner, to loosen it you need to loosen the roller bolt and then remove the tensioner using a wrench.
In the case of a ripple belt, start and stop the engine before making a final check of the tension level. This will ensure that the belt is in the correct position in the pulley grooves.
The performance of the internal combustion engine depends on the quality of the generator. After the engine starts, the device is the main source of electricity on board the car. However, in order for the rotor to rotate smoothly, it is necessary to properly tension the car’s alternator belt, otherwise problems with current generation will occur.
How to tension a car's alternator belt.
Replacing the alternator belt
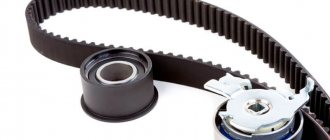
If, after checking and inspecting the belt, it turns out that it is cracked or crumbled, then it should be replaced with a new one, which is extremely important - a similar one. Thus, the size of the VAZ 2114 8-valve generator belt is individual. It differs from the size of the belts of other VAZ cars, and therefore you should purchase the belt for the 14th model at the auto store. Its standard length is 698 mm (if power steering is installed on the car, the belt length will be longer).
Replacing the VAZ 2114 alternator belt
The replacement itself is performed in the following sequence:
- loosen the belt tension adjustment nut and the lower mounting nut of the generator;
- loosen the tension on the alternator belt;
- move the generator towards the engine - this will loosen the belt as much as possible;
- remove the belt from both pulleys - the generator and the crankshaft;
- put a new belt on the drive pulley (on the crankshaft axis);
- put the belt on the driven pulley (on the generator axis);
- tension the new belt according to the scheme described above.
Thus, replacing the drive belt is quite simple, and the procedure itself will take very little time.
How to replace the alternator belt on a VAZ 2113-VAZ 2115?
Removal: 1) First, decide which side will be easier for you to replace (You can replace it from above, but this is not very convenient, or crawl under it from the side, but this requires more time), once you have decided, proceed to it, at the beginning we will describe how to replace it if you crawl under it from the side (Even if you are going to change it from above, still read this and do not jump to another point, because you will miss very important details that we will not describe in the next paragraph) , to do this, lift the right front side of the car with a jack and as soon as it is raised, remove the right wheel (For information on how to properly remove a wheel, read the article: “Replacing wheels on a car”), after which you will have excellent access to the alternator belt (If you have you have the fender liner installed, then remove it too, all the fender liners are attached with screws, so they will need to be unscrewed), but by the way, if the crankcase protection still bothers you (there are simply bulky protections that cover the entire bottom, how to remove the protection, read the article : “Replacing the crankcase protection on a VAZ”), then remove it too, and now proceed with the replacement, to carry it out, loosen the two nuts securing the generator (One nut is indicated by a red arrow, the other white in the small photo) and then completely unscrew the bolt to the maximum amount by which it will turn away (Indicated by the blue arrow) and thereby remove the old alternator belt from the side through the arch, but before removing it, pull the alternator itself completely to the car engine until it stops.
2) As for replacing the belt from the top, in this case there is no need to remove any wheel and you also don’t need to lift the car into the air, but simply unscrew the two nuts securing the generator (They are shown in the photo above, one of them is shown with a red arrow, and the other white, by the way, if the bottom nut cannot be unscrewed, it is still indicated by a white arrow, then do not unscrew it, the red one will only need to be loosened thoroughly and that’s it) and after that, unscrew the bolt itself to the maximum value (Indicated by the blue arrow in the photo above) and likewise With one hand, bring the generator close to the car engine, and with the other, remove the belt itself from it and pull it out through the top if you succeed.
Installation: Installation of a new belt begins with putting it on the generator drive pulley and only after that it is put on the generator roller (So that you can distinguish the pulley and the roller from each other, we will tell you right away that the pulley is a large part, and the roller is small and it comes out exactly from the generator, we also indicated the roller with a yellow arrow in the second photo from the top), after the belt is on, proceed to adjust it, to do this, move the generator itself away from the engine with your hand (It moves because its fastening nuts are loose) and then adjust tighten the bolt (Indicated in the photo below by an arrow) clockwise (This way the belt will tighten), but if you suddenly overtighten it, then loosen the belt tension a little, to do this, loosen the adjusting bolt counterclockwise and at this time move the generator itself closer to the car engine, all this is done until the belt is adjusted normally, as soon as you have achieved the correct belt tension, tighten all the nuts previously turned out until they stop and you can start the car and check the operation of the new belt on the car, let's immediately note the fact that It shouldn’t make any extraneous sounds (Whistling), if it does, it’s either too loose, or it’s very cold outside and the car hasn’t warmed up yet, or the material itself from which the belt you bought is made is too oak and that’s why this is happening. whistling sound in a car engine.
Note! The best way to adjust the belt is to bend it with your finger with a force of 10 kg by 6-10 mm in the middle part. For more details on where the belt needs to be bent with your finger, see the photo below, by the way, to be 100% sure if it’s normal Is the belt tight or not, we recommend that you use one of the methods, the first is that you must put the car in fourth gear and drive it (About 5-10 meters), the second method will give us the same thing as the first, it’s just done according to another, namely, the neutral gear is engaged and the bolt that secures the generator drive pulley is turned with a socket head (see photo below, this bolt is indicated by an arrow; to get to it, you need to crawl under the wheel on the right front side and, if possible, even remove this wheel and through the arch you can easily reach this bolt) you need to turn this bolt about 2-3 turns, then check the belt tension again and, if necessary, loosen it or tighten it again, but only if you adjust the belt tension again , then again perform one of the two operations indicated just above!