Installation of a short-stroke rocker on a Lada Priora
Previously, we have already reviewed the installation of a short-stroke rocker on a VAZ 2109, so here there will be no information about what it is and what the benefits of this part are, we will talk about its installation.
Algorithm for installing a short-stroke rocker on a Lada Priora
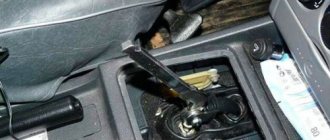
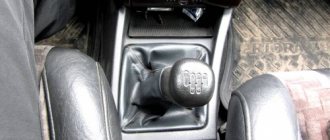
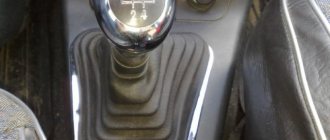
- To gain access to the bolts, the decorative cover must be removed from the knob box lever. The latter is not secured to the lever in any way; to remove it, it will be enough to pull strongly.
How to install a short-throw rocker on a Lada Priora
- We dismantle the gearbox lever rod from the cardan by loosening the clamp using a key set to “13”.
Installing a Lada Priora short-stroke rocker yourself
- To gain access to the lever, you must release the ball that blocks the engagement of reverse gear, which springs when engaged. Be careful! Do not pull the lever to get it released.
How to install a short-throw rocker on a Lada Priora
- The retaining ring is removed, then you need to remove the lever with the ball and spring inserted into the plastic case.
Do-it-yourself short-throw rocker on a Lada Priora
Do-it-yourself short-throw rocker on a Lada Priora
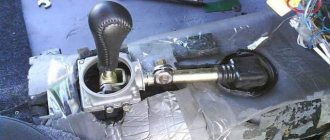
- Remove the lever with the rod through the interior. To make it more convenient, they can be separated.
How to make a short-throw rocker on a Priora
- Remove the cardan. To do this, tighten the rubber boot with a “10” key. Then you need to unscrew the bolt that secures the cardan on the left side.
How to make a short-throw rocker on a Priora
- It is noticeable in the photo that the cardan rods are different in length. This problem can be solved by shortening the Kalinovsky rod, taking into account the type of short-stroke link. Sometimes the rod does not go in completely, so the gearbox lever moves towards the handbrake. If you need to shorten it, cut off 1-2 centimeters.
Kardanchik Klin and Priora
Reasons for replacement
There are several situations when the owner of a VAZ 2109 has or wants to get into the design of the gearbox and specifically work with the rocker:
- Oil is leaking due to a damaged rocker seal. It must be replaced;
- The old drawstring was out of order;
- I would like to exchange the long-stroke for a short-stroke in view of its advantages.
Now to the question of when replacing or repairing the backstage is a necessary measure.
- The backlash of the gearbox selector has increased significantly.
- Gears change with difficulty, and when changing speed, extraneous sounds appear.
- It is possible to change gears, but with a lot of effort.
- Speeds change incorrectly. Instead of one, a completely different one turns on.
- It is impossible to turn on all or part of the gears at all.
Even if the resulting play is still insignificant, it is advisable to immediately begin repairs or completely change the drawstring.
Replacing the oil seal
If you find that the oil in the gearbox is gradually disappearing, you can suspect the rocker seal. There is nothing else left to do but change the element.
- First, buy a new shift rod seal. It costs about 70-100 rubles.
- Drain the oil from the box, having prepared a clean container in advance. This is in case you refill the same oil. Although this is an excellent reason for you to change the transmission lubricant at the same time.
- To make sure the oil flows out better, first unscrew the filler plug or remove the speedometer gear. After draining the oil, screw the cap back on.
- We climb under the car and disconnect the fasteners of the gearbox lever driveshaft.
- Pull the boot off the cardan, unscrew the bolts securing it to the gearshift rod. Problematic fasteners that you will have to tinker with.
- After removing the cardan shaft, remove the rod boot.
- We remove the damaged oil seal using an awl or suitable available tools. The main thing here is the stock itself.
- We install a new one in place of the old oil seal and press it with a tube of the appropriate diameter.
- Put the boot back in place and rotate the driveshaft.
- Please note that the bolt securing the cardan to the rod is an adjustment bolt. Therefore, screw it in exactly the same way as before dismantling. Otherwise, some speeds may not turn on.
Article on the topic: Installing fog lights on a VAZ 2109
Stuffing box
After the work done, do not forget to check the result.
Replacing the cardan
Practice shows that if problems arise with the slide, it is not at all necessary to completely change it.
The VAZ 2109 has its own disease, the weak point is the backstage joint. Replacing it with an analogue from Kalina will solve the problem and turn a disadvantage into an advantage.
Kardanchik
The instructions for replacing the cardan are as follows.
- Using two 13mm spanners, unscrew the clamp that relates to the speed switch drive rod.
- Pull the boot off with a screwdriver, moving towards the box. If you want, remove it completely. So it definitely won’t interfere with the repair process.
- Using a 10mm wrench, unscrew the fixing bolt on the cardan.
- Apply several gentle, not strong blows with a hammer to knock the cardholder off the shaft. Remove the boot to the side if you have not done so before.
- We replace the old cardan with a part from Kalina. It is more reliable, efficient and durable.
- For reassembly you will need the help of a friend. Do not rush to tighten the clamp immediately at the end.
- The assistant will set the position of the gearshift lever at the optimal points from inside the cabin. First you need to catch the center, then move the lever a little to the right while you tighten the clamps from below.
- Check if the gears engage well. If yes, then we continue assembling the unit and check the updated gearbox under real road conditions.
The experience of VAZ 2109 owners shows that when there are problems with the rocker, the essence often lies in an unsuccessful factory cardan. By replacing it with an analogue from Kalina, you will be able to get rid of discomfort and continue to confidently operate your car. By replacing the cardan shaft, the design of the gearbox will improve significantly.
Article on the topic: Replacing the fender liner on a VAZ 2114 with your own hands
Adjustment
After changing the link or cardan, you should definitely adjust the operation of the unit.
- Engage reverse gear, loosen the clamp tension.
- Set the gearbox selector to the position in which it should ideally be located when engaging reverse.
- Tighten the clamp back.
- A similar operation is performed with other speeds.
There are situations among VAZ 2109 owners when difficulties arise when engaging reverse gear. This is where adjustment can help.
- Set the gear lever to first gear;
- Loosen the rocker clamp;
- Turn the rocker drive counterclockwise;
- Turn the drive until the selector is pressed against the plastic stopper for the reverse gear. You will feel this without any problems;
- Resting against the stopper, tighten the clamp under the bottom. That's it, the adjustment is done.
Adjustment process
Also check out
- How to replace the cabin filter of a Lada Priora with your own hands
- Algorithm for replacing the front brake pads of Lada Kalina at home
- Installation of new front struts on Lada Priora cars
- Install the Kalinovsky cardan by applying lithol to its inner surface. Since the bolt is cone-shaped, screwing in is not difficult.
VAZ short-stroke rocker
- The thrust should be installed through the interior. It's good if you have an assistant nearby. He will hold it by the elastic band in the cabin, at this time you need to stretch the traction.
Installing a short-stroke rocker with your own hands
Assembly is performed in reverse order
- First, we put the rod on the cardan shaft.
- Then you can begin assembling the reverse gear locking mechanism. Lubricate the spring ball.
- Adjust the gearshift lever.
- Tighten the clamp on the rod.
Replacement instructions
Before starting work, we advise you not only to purchase a new spare part, but also to watch training videos on replacing the slide. The procedure is not very complicated, but a visual aid will never be superfluous. Especially if you do not have much experience in repairing a car and transmission in particular.
Replacement procedure
The process involves performing several sequential steps.
- Remove the housing from your gear shift knob.
- Raise the car using a jack. In some cases, an inspection hole will do, if you have one in your garage.
- Now you should dismantle the console, which will give you access to the backstage.
- The element is held in place by six bolts, which can be removed using a regular 13 mm wrench.
- But it's not that simple. You won’t be able to unscrew the top two bolts with a wrench, so don’t even try. They are specially planted as tightly as possible, so to dismantle them you simply need to cut them down with a grinder.
- Now you can safely remove the remaining two bolts in the lower fastening of the rocker, for which your effort and a 13 key will definitely be enough.
- The next step is to remove the clamp and move the boot. You will need to remove the hinge. At the same time as replacing the link, we recommend changing the hinge. It would be a good idea to replace the oil seal and cardan shaft. These elements have a limited service life, and since you decide to change the slide itself, there are objective reasons to do everything as efficiently as possible.
- After this, install the new unit in place of the old one. Act carefully so that the rubber bands of the slides fall on the welded bolts, which you previously sawed off using a grinder.
- The assembly is now reassembled, operating in the opposite sequence to disassembly. It is not necessary to seat the top mounting bolts tightly, but try to tighten them firmly.
Article on the topic: Crankshaft position sensor (CPS) ON VAZ 2114: checking, errors and replacing the sensor
Attention!
If you first assemble the reverse gear locking mechanism, the long rod will not allow you to put the rod on the cardan shaft. The problem can be solved by shortening it. It is important not to forget to put the boot on the driveshaft.
How to install a short-throw rocker on a Priora
How to make a short-throw rocker on a Lada Priora
Adjust the reverse gear locking mechanism, since the consequence of adjusting the scenes is that the mechanism does not match the plate to which it clings. The problem can be solved by removing the plate and adjusting the hook (it is a cutout on the mounting bracket). You can sharpen it with sandpaper or a file.
The photo shows the adjusted toe.
Installation of a short-stroke rocker on a Lada Priora
To complete the procedure, you need to put on a manual transmission cover with a knob.
