The topic of soundproofing a car hood causes a lot of controversy among car enthusiasts. Some use it as a testing ground for training on the “noise” of the entire car and note an insignificant effect from its implementation. Others generally consider this activity a waste of time and a waste of money. Only those who have soundproofed the hood in combination with the “noise” of the engine compartment are satisfied. In this case, drivers enjoy a significant reduction in noise in the cabin, and at idle speed the engine becomes inaudible at all. In addition, additional sound insulation of the hood creates a thermal insulation effect, which leads to a reduction in engine cooling time in winter. True, in the summer this circumstance has the opposite result. In any case, the advantages of soundproofing a car hood outweigh the disadvantages, and given the ease of installation and low material costs, this stage of car noise reduction should not be skipped.
Tools and materials for soundproofing the hood
Before starting work, stock up on the following tools:
- rolling roller
- heat hair dryer
- garbage brush
- rags
- degreaser
- cutting knife
- sharp scissors
- cardboard
And the following materials:
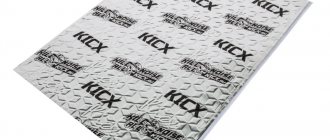
- Bimast Super (or Vizomat MP)
- Splen 4-8mm
- Madeleine
Rules for car soundproofing
- The following rules apply to soundproofing any area of the car. Compliance with these recommendations will ensure 100% success of the noise insulation work carried out, the result of which will reach an almost professional level.
- The vibration-absorbing material, which is applied as the first layer, should be glued to a previously cleaned surface of dust, dirt and rust. Follow the principle of cleaning the surface “for painting”.
- After cleaning, the surface should be treated with a degreaser. It is better to use White Spirit for this.
- Before covering the surface to be treated with soundproofing material, it should be rolled into place. This is done like this: a sheet of material is taken, applied to the surface to be treated and rolled with a special roller.
- It is better to process figured body elements using patterns made of hard cardboard. To do this, you should make patterns that will exactly follow the desired contours.
- Before removing the protective film from the adhesive surface, you should attach the pattern to the desired location to ensure that the contour part of the body is accurately repeated. Making patterns will take you a little time, but will save on material and make the work process easier.
How to choose materials for proper car sound insulation
Due to the huge range of insulating materials, it is difficult to make the right choice. When selecting a product, the car owner must take into account the following parameters:
- Specific gravity (not in all cases should be large). Some modern materials are able to dampen vibration due to their technical characteristics, for example, due to the plasticity and internal design features of the fibers. However, formulations that are too light should not be purchased, as their effectiveness will be low. It is better to take vibration-proofing material with an aluminum (reinforced) layer with a thickness of 0.1 mm. If the thickness is very large, then efficiency will not increase much, while installation will become more complicated and the price will increase.
- MLC, or mechanical loss coefficient, measured as a percentage. It is believed that the higher this indicator, the better (the norm is from 10 to 50%). The sound loss coefficient (SLC) characterizes the absorption of sound waves. The higher the indicator, the better (the norm is from 10 to 50%).
These two parameters are the main ones, in most cases decisive when choosing. But in addition to these, additional factors should be taken into account:
- Plasticity . Affects the tightness of contact with the surface of the car body.
- Ease of installation . You need to choose noise and vibration insulation materials either separately or one universal one. It is important to choose the right additional tools: a hair dryer, a roller, etc. Easy installation helps save money, as it allows you to do the work yourself, without turning to specialists.
- Long service life . The higher the number, the better. Information about the warranty period can be found in the instructions. Experienced car enthusiasts will say a lot about the durability of a particular brand of vibroplast (and which car sound insulation to choose), based on personal experience.
- Resistance to mechanical stress . Throughout the entire service life, materials should not change their characteristics and shape. But, as a rule, sound insulation is installed in areas where it, in principle, cannot be deformed.
- The thickness parameter affects the choice of areas that will be glued (from large areas to small joints of plastic parts).
- Qualitative characteristics of mastic . Not only vibration isolation or noise insulation properties are important. It happens that when heated, inexpensive mastic of poor quality during the installation process for soundproofing a car becomes liquid, begins to flow out of the sheet and spread over the entire area of the surface being treated. Therefore, it is better to beware of purchasing such a product.
- Matching quality and cost . It is important to adhere to this rule in the same way as when choosing any other product. You shouldn’t throw money away buying expensive insulation to treat a cheap domestic car. It is better to purchase expensive and high-quality material for the purpose of installation on a foreign car from the middle price range.
Of great importance is the adhesion indicator, that is, the level of adhesion of different-sized surfaces of solid and/or liquid substances. Fastening requires a certain amount of force from the insulating material to adhere to the surface being treated. As a rule, the manufacturer prescribes this parameter. But some unscrupulous manufacturers provide false information, thereby misleading car owners. The optimal adhesion index is 5–6 N per 1 cm². We can talk about a marketing move in the event of a large increase in this value specified in the instructions. As practice shows, the above adhesion value is quite sufficient for the material to adhere well to the surface.
Of course, the choice largely depends on the name of the trading company (brand) that produces soundproofing products. The most famous and recognized manufacturers, whose products are widely distributed in Russian markets: Dynamat, STP, Kics, Shumoff, etc. Each of the above companies has several product lines in their arsenal.
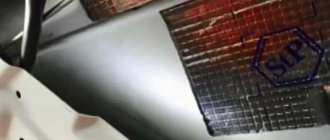
Vibration isolation of the hood: first layer
To eliminate metal vibrations, vibration absorbers should be used as the material for the first layer. Considering the fact that the engine compartment maintains a high temperature, the choice of material should be based on its ability to withstand thermal effects. Therefore, it is advisable to choose those materials that require heating during pasting; more elastic vibration absorbers can “float”. The presence of an aluminum surface of the material is also desirable; the fact is that the foil layer reflects heat waves well. Bimast Super or Vizomat MP are ideal for these purposes. Most cars have a hood, which is a rigid frame consisting of a steel profile, parts of which are soldered together, and a sheet of steel, which is, in fact, the hood cover. The vibration absorber should only be applied to the hood cover from the inside, cutting out small pieces using patterns that repeat the flat areas between the stiffeners.
It is important not to get carried away with excessive layering of material, since if you, for example, paste over the stiffeners, the hood lid may skid over time.
How to increase the level of comfort in a car yourself: car soundproofing
So, having decided on what result is most important to obtain, you can move on to what and how to make the car “noisy”. Do-it-yourself noise insulation, especially if the budget is limited, can be done in stages.
For this reason, it is better to immediately buy good material, gluing individual parts of the body. This approach allows you not to lose quality, and also does not immediately require large investments.
In other words, sound insulation of doors, sound insulation of the hood, as well as sound insulation of the roof, bottom, trunk, wheel arches, etc. can be done gradually.
As for preparation, sound insulation for a car requires the presence of certain tools, as well as appropriate sound-proofing materials prepared in advance. Please note that sound insulation is only the initial stage. If necessary, vibration and heat insulation is also performed, but even just one noise is enough to obtain a noticeable effect.
To carry out the work yourself, you need to prepare at least:
- construction hair dryer (an ordinary household hair dryer will not work);
- rolling roller to roll the material to the surface;
- knife and scissors for cutting sheets;
You also need to have brushes and a suitable degreaser on hand to properly prepare the surface for gluing. You will also need tools for disassembling the interior and removing various panels and elements (a set of keys, screwdrivers, etc.)
We also add that vibration insulation for cars, as well as materials for sound insulation, must be of good quality. You should not chase cheap little-known analogues, since only high-quality soundproofing material fully complies with the declared characteristics and allows you to count on consistently high results.
First of all, if sound insulation is planned, the materials must be calculated in advance, taking into account all the nuances of a particular body or individual elements that are planned to be noisy within a particular stage.
If we consider the main stages:
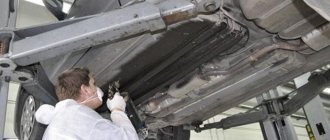
- You can start right away with soundproofing the hood. It is important to understand that just covering the hood will not be enough to reduce engine noise. In fact, hood insulation only partially reduces noise and vibration. At the same time, thermal insulation is improved. The main thing is to select a material that is not too heavy, so as not to weigh down the hood too much.
- Sound insulation of doors is needed in order to cut off or reduce extraneous sounds from outside, as well as to improve the sound of car acoustics.
When selecting, you should pay attention to the weight of the material, since heavy weight can damage the hinges and require replacement. The nuance is that the more noise and vibration isolation, the better the effect. For high-quality sound you need at least 4 layers. We also recommend reading the article on how to make soundproofing of the engine compartment with your own hands. From this article you will learn why you need to insulate the engine compartment, what effect you can expect, and also how to make sound insulation yourself to reduce engine noise. - Soundproofing the roof of a car allows you to get rid of the knocking of drops during rain and partially reduces external noise. It is not recommended to skip this stage in order to save money, since the maximum effect cannot be achieved without noise from the ceiling.
- Soundproofing the floor and wheel arches allows you to get rid of extraneous sounds, noise from wheels when driving, audible impacts of stones, etc. To make noise from the bottom and floor, it is strongly recommended to additionally use vibration-proofing material (2-3 layers).
- As for the sound insulation of the trunk and its lid, this solution is also mandatory, especially if the soundproofing is done in a comprehensive manner. Also, soundproofing the trunk can significantly improve the sound of the subwoofer, if it is located there.
Note that in the process of pasting various body elements, it is important not to cover the stiffeners with insulation. If this is done, the ventilation of the amplifiers is disrupted, closed, unventilated cavities appear where condensation will accumulate.
You can also add that it would not be superfluous to treat the wheel arches on the outside. For this you can use so-called “liquid fender liners”. If a plastic fender liner is installed, the liner is removed, after which a layer of vibration-absorbing material is glued onto it.
It should also be recalled that to reduce engine sound in the cabin, separate sound insulation of the dashboard and engine shield is necessary. This solution allows you to get rid of extraneous squeaks and noises, and the sound of the engine will penetrate much less into the cabin.
Hood noise insulation: second layer
In principle, noise insulation of the hood is not needed, since all resonant sounds of metal can be drowned out by the first layer of vibration damper. The second layer will rather have a thermal insulation value and will act as a reflector of sound waves. Therefore, Spleen or any other building heat insulator with an aluminum surface is suitable as a material.
Factory sound insulation: third layer
If it was available, then we install it in place, if not, then we should stop there. Some aesthetes treat the soundproofed surface with madeleine, so it takes on a more well-groomed appearance.
Whether you choose to soundproof the hood is up to you. We advise you to produce it in combination with the “Shumka” of the engine shield. This way you will definitely drown out all the sounds that accompany the operation of the engine and transmission. The high-quality “noise” of the hood and engine shield at idle engine speeds can completely silence the engine from the interior, and at speeds above 3000 make its operation much quieter.
Video:
Step-by-step instructions on how to soundproof a car
Before you start performing soundproofing work, you need to decide what task you are setting for yourself: improve acoustic sound, eliminate squeaks inside the cabin, add comfort. Depending on the purpose, it is necessary to choose the material.
If the budget is limited and you have to do the work yourself, it is better to do it in stages, gradually improving. First, the doors are soundproofed, then the floor, car trunk, etc.
1. List of necessary tools.
To work you will need:
- construction hair dryer (household hair dryer is not suitable);
- a stitching roller for rolling material - will bring tangible benefits (it is inexpensive, no more than 300 rubles);
- cutting scissors;
- solvent to degrease surfaces (white spirit will do).
2. List of materials used.
Most often used for sound insulation:
- Vibroplast Silver. It is a flexible plastic self-adhesive composition with aluminum foil. The material is marked with squares (5x5 cm). This helps in cutting the sheet into parts with the required parameters.
Vibroplast Silver has water-repellent characteristics and is not subject to decomposition under the influence of the environment. In addition, the material has anti-corrosion properties and sealant qualities. This vibroplast is easy to install even on difficult terrain, and it does not need to be heated. The value of the mechanical loss coefficient ranges from 0.25 to 0.35 conventional units. Weight is 3 kg per m2, and thickness is 2 mm.Installation is carried out on the interior floor, doors, roof, side parts of the body, hood, trunk, front panel of the vehicle.
- Vibroplast Gold. This is a similar material to the previous one, but a little thicker (2.3 mm).
Accordingly, its vibration isolation characteristics are better. Mechanical losses are 0.33 conventional units. Vibroplast Gold weighs 4 kg per m2.
- "BiMast Bomb." This type of vibration-absorbing material is a multilayer structure, which includes a front layer (made of aluminum foil), 2 sheets with a bitumen and rubber composition.
Before installation, it must be heated to approximately 50 degrees. "BiMast Bomb" has water-repellent properties. This is the best vibration material, characterized by the highest efficiency value. Ideal for work on audio preparation of speakers. The amount of mechanical losses is not less than 0.50 conventional units. The weight of the material is approximately 6 kg per m², thickness – 4.2 mm. Installed on the front panel, tunnel, wheel arches, area above the muffler and driveshaft. - "Splen 3004". This brand of material is soundproofing. It has an adhesive layer and is endowed with high heat-insulating characteristics. “Splen” is easy to mount on surfaces (vertical and curved). In addition, the material is moisture resistant and is not subject to decomposition processes under the influence of the environment. Thickness – 4 mm, and weight – 0.42 kg per 1 m³. Use is possible at temperatures from -40 to +70 °C. They cover the front panels on the side of the car interior, wheel arches, doors, and tunnel.
Two more varieties: “Splen 3008” with a thickness of 8 mm and “Splen 3002”, which is 2 mm thick.“Splen” is used to cover the vibration-absorbing layer. The doors, rear and front arches, as well as the side areas are treated. To ensure a strong connection, all surfaces are pre-cleaned and dried. White spirit or acetone is used for degreasing.
In order for the adhesive composition to retain its adhesive properties, it is necessary to observe the temperature regime (ideally from 18 to 35 oC). At temperatures below +10 ͦС, Splen is not recommended to be used. The tape should be glued, being careful not to pull it. The protective layer is removed only before starting work.
- "Bitoplast 5" (anti-creaking). This is a type of noise-absorbing and sealing material that is designed to eliminate squeaks and rattles inside the cabin. The base is polyurethane foam with a sticky layer, which is protected by an anti-adhesive gasket impregnated with a special composition.
The material has high moisture resistance, durability, and excellent thermal insulation characteristics. In addition, “Bitoplast 5” is odorless, does not decompose, and does not lose its properties at very low temperatures (down to minus 50 o). The thickness can be from 5 to 10 mm, and the weight is 0.4 kg per m².
- "Accent 10". Refers to sound-absorbing materials. It consists of a metallized film, elastic polyurethane foam, and an adhesive mounting layer. It has good thermal protection characteristics and an extended operating frequency range. With a thickness of 10 mm and a weight of 0.5 kg per m², it is capable of absorbing up to 90% of extraneous sounds. Application temperature from -40 to +100 ͦС. Installed on the hood, trunk, partition in the engine compartment.
- "Madeline." This material on a black fabric base is not only sealing, but also decorative. It has an adhesive layer that is protected by an anti-adhesive gasket. The thickness ranges from 1 to 1.5 mm.
We recommend
“Diagnostics of the car chassis: first things first” More details
Used for:
- eliminating gaps formed between the decorative elements of the car interior and the body;
- filling gaps in the instrument panel;
- air duct seals.
3. About hood soundproofing . Engine noise will not disappear if you soundproof the hood. This procedure is mainly needed to insulate the engine in frosty weather. To work you will need “Accent” with a thickness of 10 mm and Silver vibroplast.
It is important to take into account the weight of the material, since if the hood becomes too heavy during the soundproofing process, the hood shock absorbers will begin to leak, which will lead to their replacement.
Therefore, you should take lightweight vibration-proofing material (for example, “Silver” or its equivalent). Thermal insulation "Accent" retains heat inside the engine in winter. In addition, the material is resistant to high temperatures and will not catch fire from a very hot motor. It is better if the thickness is greater.
The factory thermal insulation layer should not be removed. When choosing the thickness of the “Accent”, you need to adhere to the rule - so that later you can simply put on standard sound insulation.
The hoods of some cars are not equipped. In these cases, it is necessary to soundproof this area using the thickest heat-insulating material (at least 15 mm) together with a vibration-proofing layer. This way you will get the best result.
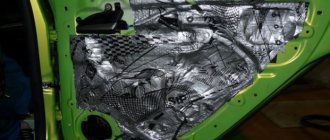
4. Stages of work on soundproofing doors . The main objective of this type of work is to eliminate external sounds and improve the sound quality of music inside the car.
To perform minimal sound insulation of car doors, you need one vibration-proofing layer (Silver or Gold). Vibroplast is applied to the doors on the inside opposite the column. The larger the processed area, the better the sound will be. The thickness of the metal affects the amount of vibration-proofing material. The thinner the metal, the more vibroplast is taken.
When soundproofing doors, it is necessary to take into account the weight of the materials used. Doors that have gained significant weight will begin to sag over time, and hinges will need to be replaced. It all depends on the tasks: if you need to improve the sound, you can’t do it with little spending. In this case, you need to take an integrated approach and sound insulation with at least 4 layers. The first layer, glued to the inside of the doors, contains vibroplast brand “Silver” (or “Gold”) and a little “BiMast bombs” (glued to the speaker at the back). The second layer is approximately 4–8 mm of Splen.
The third step is to soundproof the car doors from the outside, in the area under the door cards. To achieve high-quality sound from the audio system, the technological holes are sealed entirely to form a sealed door volume.
As a result of the procedure, the rigidity of the door increases, making the music sound even better.
On the outer sides of the door they glue “Silver”, on it “Spleen”.
To eliminate creaks and noise, door cards are soundproofed. For these purposes, Bitoplast is used, which has anti-creaking and noise-insulating properties. More thickness is better. To get rid of “crickets” inside the doors, they glue “Madeline anti-creak” to the rods and handles.
The steps for soundproofing the rear and front doors are similar. Moreover, if there are no speakers on the doors, then you need to take a simpler vibration-proofing material and reduce the number of layers.
5. Soundproofing work on the roof and ceiling of the car. In order to reduce external noise (for example, from rain) and remove “crickets”, the roof is soundproofed. After this work, the “drum roll” from falling raindrops will disappear, only dull impacts will be heard.
Typically, Silver or Gold vibroplast is used. It is necessary to pay attention to the weight of the sound insulation, since a layer that is too heavy has an adverse effect on the handling of the car. The greater the mass of the ceiling, the higher the center of gravity.
Sound-absorbing “Splen” (4 mm and 8 mm) is used, which in some cases is laid in 2 layers. The main thing is that at the end of the work the ceiling lining falls into place.
We recommend
“Frame structure of a car: its features and advantages” More details
6. About sound insulation of the floor in the car interior. The work is necessary to get rid of the noise coming from the road surface and the impact of small stones on the bottom of the car. The floors are covered with the highest quality, although heavier vibroplast “BiMast Bombs”. A sound and heat insulation layer “Splena” (4 or 8 mm) is laid on it.
It is better to take thinner vibroplast and lay it in two layers over the entire floor area. You need to try to avoid gaps. The coverage area should be as large as possible.
Special attention should be paid to the wheel arches on the interior side. They are usually covered with 2 or 3 layers of thick vibroplast (for example, “BiMast bombs”, “Gold”).
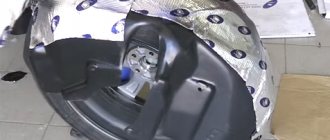
7. How to soundproof the trunk, wheel arches, and arches. Pay attention to the niche where the spare tire is located. These areas should be treated completely. The plastic lining of the luggage compartment of the car needs to be “noisy” with Bitoplast.
Wheel niches must be soundproofed to ensure a comfortable stay in the car. Proper work will reduce noise from wheels and road to a minimum. And in winter, the rustling of thorns will not be heard.
Instructions for soundproofing car wheel arches:
- Remove the factory plastic fender liners. Don't throw these parts away because they are excellent insulators.
- Clean surfaces from dirt.
- Apply vibroplast (for example, “Gold” brand) to the inside of the arch.
- Treat the niches with anti-gravel to protect against corrosive destruction and provide additional sound insulation.
- To soundproof plastic fender liners, vibroplast “Silver” is used, which is glued on the inside. Sound insulation is carried out with Biplast.
- Reinstall the fender liners.
If all steps are completed correctly, then the impacts of stones on the wheel arches will not be heard.