Removing the Lada Granta instrument panel
Tools:
- Open-end wrench 10 mm
- Ratchet wrench
- Extension
- 8 mm head
- 10 mm high head
- 13 mm head
- 21 mm head
- Torx T20 socket
- Medium Phillips screwdriver
- Large flat screwdriver
Parts and consumables:
- Technical capacity
- Coolant
Notes:
Carry out work if it is necessary to replace the instrument panel, panel wiring harness and elements of the heating and ventilation system.
1. Disconnect the wire terminal from the negative terminal of the battery.
2. Drain the engine cooling system as described in this article.
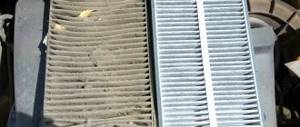
3. In the engine compartment, remove the heating and ventilation system filter as described here.
4. Using a Phillips screwdriver, unscrew the four self-tapping screws securing the heating and ventilation system filter casing to the instrument panel and remove the casing.
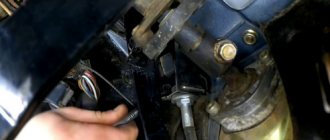
5. Loosen the clamps securing the heater inlet and outlet hoses and remove the hoses from pipes 2 of the heater radiator. Using a 10 mm high socket with an extension, unscrew nut 1 of the stud securing the flange of the heater radiator pipes to the front panel.
6. Inside the car, remove the mounting block cover as described in this article.
7. Remove the instrument cluster as described here.
8. Remove the floor tunnel lining as described in this article.
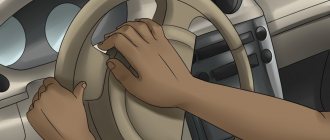
9. Disconnect the steering column from the instrument panel frame and lower it to the floor or remove the button completely, as described in this article.
10. Remove the instrument panel center trim as described here.
11. Remove the seals for the right and left door openings at the installation locations of the instrument panel and the A-pillar upholstery.
12. After overcoming the resistance of the clamps, remove the left side trim of the instrument panel.
13. Similarly, remove the right side trim of the instrument panel.
14. Use a screwdriver to pry up the upholstery of the left front pillar and, overcoming the resistance of the pistons, remove the upholstery.
15. Similarly, remove the right front pillar trim.
16. Remove the headlight beam adjustment knob by pulling it towards you.
17. Using a 21 mm socket, unscrew the nut securing the regulator to the instrument panel and remove the nut.
18. Remove the headlight beam adjustment control from the instrument panel hole.
19. Using a screwdriver, press out the two latches on the glove box and remove the top edge of the box from the instrument panel.
20. Open the glove box to a large angle and, applying the necessary force, pull the four split hinges of the box from their axes.
21. Near the opening of the left door, use a 10 mm socket to unscrew nut 1 securing the tip of the “mass” wire and remove it from the stud.
22. Using a 10 mm socket, unscrew the two nuts securing the ground wire lugs to the right bracket of the instrument panel console and remove the wire lugs from the studs.
23. Using a 13 mm socket, unscrew the bolt securing the right bracket of the instrument panel console to the body bracket.
24. Similarly, unscrew the bolt securing the left bracket of the instrument panel console to the body bracket.
25. Squeeze the two clips and disconnect the wiring harness connector from the brake light switch.
26. By pressing the latch, disconnect the wiring harness block from the gas pedal module.
27. Disconnect the instrument panel wiring harness connector from the clutch pedal position sensor wiring harness connector.
28. On the right side of the instrument panel, pressing the latch, disconnect one block of the wiring harness from the controller.
29. Using a screwdriver, use a screwdriver to slide the block clamps and disconnect the two wiring harness blocks from the fuse and relay mounting block.
30. Disconnect the two front engine compartment wiring harness connectors.
31. Using a 13 mm socket, unscrew the two bolts securing the instrument panel frame to the front panel bracket (for clarity, the instrument panel trim has been removed). The arrows show the bolts securing the instrument panel frame to the front panel bracket (for clarity, the instrument panel trim has been removed).
32. Using a 13 mm socket, unscrew the two bolts on the left securing the instrument panel frame to the side panel bracket.
33. Similarly, unscrew the two bolts of the right fastening of the instrument panel frame to the side panel bracket.
34. Remove the instrument panel assembly with frame, heater and air ducts through the doorway.
Note:
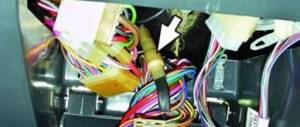
The numbers in the two photos show the connecting blocks of the wiring harnesses on the instrument panel and the front panel.
35. To remove the plastic trim of the instrument panel, use a Phillips screwdriver to unscrew the two screws under the instrument cluster.
36. Under the mounting block cover, use a Phillips screwdriver to unscrew three screws on the left side and one screw on the right side.
37. Using the same tool, remove the five screws on the right side of the instrument panel.
38. Under the center trim of the instrument panel, remove the two screws in the center and one screw on the top.
39. Using a Phillips screwdriver, unscrew the four self-tapping screws securing the heating and ventilation control unit to the instrument panel trim.
40. Disconnect the wiring harness connector from the cigarette lighter.
41. Remove the two screws that secure the instrument panel trim to the frame at the bottom.
42. Using a Phillips screwdriver, unscrew the screw of the upper left fastening of the instrument panel trim to the frame.
43. Similarly, unscrew the screw of the upper right fastening of the cladding.
44. Using a Phillips screwdriver, unscrew the two self-tapping screws securing the windshield defogger duct and remove it.
45. Using the same tool, unscrew the self-tapping screw securing the air duct of the right side deflector and remove it.
46. Unscrew the screw securing the air duct of the left side deflector and remove it.
47. Remove the instrument panel trim from the frame.
48. Install the instrument panel trim and the instrument panel assembly with frame and heater in the reverse order.
Removing, installing, replacing the instrument panel of the Lada Granta VAZ 2190 torpedo
Lada 2110 AGRESSOR Logbook Repair of power window control unit
This subsection describes the removal and installation of the decorative instrument panel.
To remove the instrument panel frame, it is necessary to disconnect a significant number of wiring harness blocks from the system blocks and connecting connectors, which requires highly qualified performers. If you do not have sufficient skills in such work, if you need to remove the instrument panel frame (dashboard), contact a specialized automotive service center.
1. Disconnect the wire from the negative terminal of the battery.
2. Remove the cigarette lighter socket and disconnect the wiring harness connector from it (see “Replacing the cigarette lighter”).
3. Remove the audio system head unit and disconnect the antenna cable tip and wiring harness connectors from it.
5. Remove the glove compartment cover.
6. Unscrew the fastening screws and remove the inner panel of the glove compartment (glove compartment).
9. Remove the steering wheel (see “Removing and installing the steering wheel (steering wheel)”), having previously installed the steering wheel in a position corresponding to the straight-line movement of the car.
10. Remove the plastic fuse box cover.
14. Disconnect the connectors of the wiring harnesses and remove the instrument cluster (see “Removing and installing the instrument cluster”).
15. Remove the four screws securing the air duct damper control unit to the instrument panel.
17. Move the decorative panel away from the frame as far as the air ducts attached to its inside allow.
18. Carefully put your hand under the instrument panel and, using a screwdriver with a long cross-shaped blade, remove two screws 1 (Fig. 11.14) (one on each side) securing the front side windows to the decorative panel of the air ducts. Remove the ends of the air ducts from the nozzle pipes 2, then remove the inner ends of the air ducts from the heater body pipes.
19. Pull the instrument panel towards you and, bending the air duct 4 of the windshield, move it through box 2 (see Fig. 12.1) for supplying air to the central deflectors on the heater body. Remove the decorative instrument panel (dashboard).
20. To make it easier to reinstall the decorative panel (torpedo) in the future, remove two screws 3 (see Fig. 11.14).
21. . and remove the air duct 4 of the windshield.
22. Remove two clamp nuts from the torpedo brackets.
23. . and move them to the air duct brackets - this will allow you to install the dashboard in place without an air duct, and fix the air duct to the panel after its installation by screwing in the screws from the interior side.
24. Install the decorative instrument panel (dashboard) on the Lada Granta VAZ 2190 car in the reverse order of removal, taking into account the following:
— before installing the decorative instrument panel, place the windshield air duct on the window of the heater housing;
— after installing the decorative instrument panel, put the air duct brackets in place (for clarity, this and the following work are shown on the removed dashboard).
. and screw in the mounting screws on the interior side.
Rice. 11.13. Location of screws securing the decorative instrument panel (torpedo) Lada Granta VAZ 2190
Rice. 11.14. Decorative instrument panel (torpedo) Lada Granta VAZ 2190 (view from the inside):
1 — screw securing the air duct of the front side window; 2 — side nozzle of the instrument panel; 3 — screw securing the windshield air duct; 4 - windshield air duct
Removing the dashboard (panel) of the Lada Granta
If you decide to soundproof the engine shield, or cover the dashboard with carbon film, then carefully study the instructions on how to remove the Lada Granta panel with your own hands.
We remove the Lada Granta dashboard with our own hands
– flat and Phillips screwdrivers.
– socket head “13” and “24”.
1. Disconnect the negative cable from the battery.
2. Remove the cigarette lighter (squeeze the lock and remove the cigarette lighter socket, disconnect the connector with wires).
3. Remove the head unit of the audio system (radio tape recorder) and disconnect the block with wires from it.
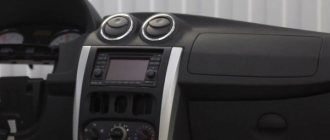
4. Remove the central panel trim (dashboard).
5. Remove the glove compartment cover and remove the screws securing the inner panel.
6. Remove the pillar trim. Then remove the central tunnel. Then remove the steering wheel. Remove the steering column cover and steering column switches.
7. Remove the external lighting control unit (first remove the fuse box cover, then unscrew one screw and disconnect the block).
8. Remove the headlight hydrocorrector regulator (remove the handle, unscrew the fastening nut, remove the hydraulic corrector regulator).
9. Remove the instrument cluster.
10. Then remove the 4 screws securing the air duct damper control unit to the instrument panel.
11. Remove the 18 screws securing the decorative panel to the frame (Figure 11.13).
12. Move the decorative panel away from the frame as far as the air ducts attached to its inside allow.
13. Place your hand under the panel and use a long Phillips screwdriver to remove two screws No. 1 (Fig. 11.14) (one on each side) securing the front side glass air ducts to the decorative panel. Remove the ends of the air ducts from the nozzle pipes No. 2, and then remove the inner ends of the air ducts from the pipes of the heater body.
14. Pull the panel towards you, and bending air duct No. 4 of the windshield, transfer it through box No. 2 (Fig. 12.1) for supplying air to the central deflectors on the heater body. Remove the decorative instrument panel.
15. To make it easier to reinstall the panel in the future, remove two screws No. 3 (Figure 11.14).
– Remove air duct No. 4 (Fig. 11.14) of the windshield.
– Remove the two bracket nuts from the panel brackets.
– And move them to the air duct brackets - this will allow you to install the decorative panel in place without the air duct, and secure the air duct to the panel after its installation by screwing in the screws from the interior side.
Figure 11.13.
Location of Lada Granta panel screws.
Figure 11.14.
Decorative instrument panel (view from the inside):
Installation of Lada Granta panel
Installation of the dashboard is carried out in the reverse order, but a number of points should be taken into account:
Before installing the panel, install the windshield duct over the heater housing window.
1. After installing the panel, put the air duct brackets in place (shown on the removed panel for clarity)
2. Screw in the mounting screws on the interior side.
How to remove the instrument panel on a grant video
1200 rub. for the photo report
We pay for photo reports on car repairs. Earnings from 10,000 rubles/month.
Write:
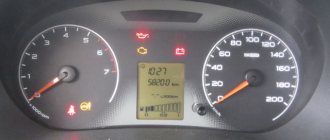
The Lada Granta dashboard combination includes a speedometer, tachometer, as well as warning lights and a trip computer display. And in order to remove Grant's instrument panels for some purpose, you only need a flat-head and Phillips screwdriver. First you need to remove the negative terminal of the battery and then continue removing the Lada Granta instrument panel .
- Remove the fuse box cover;
- We unscrew the 3 fastening screws of the instrument cluster trim;
- Remove the lining;
- Having gained access to the Granta dashboard mounts, unscrew 4 screws;
- We move the tidy and disconnect the clamp of the block with wires;
- We remove (dismantle) the Granta instrument panel.
And so I found some free time to describe a little the process of soundproofing my car. Let me remind you that the car was picked up from the dealer and went straight to my bay to install additional equipment. On the way I had to stop by and register it because... the car stood up for a long time and for more than half of the installation period (about 20-25 days in total) could not be driven - they took it apart well.
Along with the installation of the security complex, noise insulation, music installation, a DVR, and various other additions were made, which I will try to describe in the coming posts.
And so noise. It all started with disassembling the interior. They took it apart thoroughly and down to the bare metal. There were no unforeseen situations with disassembling the interior; the car is not complicated in this regard.
With the choice of the sound insulation material itself, everything was simple for us; in St. Petersburg there is such a brand as STP, it is easy to get, convenient to work with, and there is always material available for any task.
I'll start with the trunk lid. There was no need to disassemble it; in the factory configuration there is simply nothing there except a cambric, which is placed on the sharp edge of the metal so as not to cut your hand when closing the trunk. Before soundproofing, the lid is very light, which allows it to rise well when opened with the trunk tarsion bars in the middle position.
Removing and installing the dashboard of a Lada Granta car
We remove the instrument panel when it is necessary to change the wiring or when repairing the interior heater; we also remove the panel during body work
We prepare the vehicle for work. Disconnect the negative terminal of the battery.
Drain the coolant from the engine cooling system.
We remove the filter of the heating and ventilation system.
Using a Phillips screwdriver, unscrew the four self-tapping screws that secure the heating system filter casing to the instrument panel.
Loosen the clamps securing the heater hoses and remove the hoses from pipes 2 of the heater radiator.
Using a 10mm socket, unscrew nut 1 of the stud securing the flange of the heater radiator pipes to the front panel.
Removing the cover of the mounting block
Removing the instrument cluster
We disconnect the steering column from the instrument panel frame and lower it to the floor of the body or remove it completely
We take out the seals of the front door openings
Unfastening it from the clips, remove the left side trim of the instrument panel.
We also remove the right side trim of the instrument panel
Use a screwdriver to pry up the upholstery of the left front pillar, separating it from the pistons, and remove the upholstery.
We also remove the right front pillar trim.
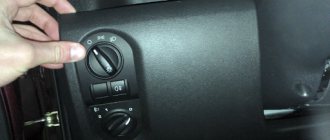
Remove the headlight beam direction control knob
Using a 21mm socket, unscrew the nut securing the regulator to the instrument panel
Remove the headlight dimmer from the panel hole
Using a screwdriver, press out the two latches on the glove box and remove the top edge of the box from the instrument panel
We open the glove box completely and, applying force, pull the box off the split hinges
Near the left door opening, use a 10mm head to unscrew the nut of the ground wire tip and remove it from the stud
Using a 10mm socket, unscrew the two nuts securing the terminals of the ground wires to the right bracket of the panel console
Removing the instrument panel assembly with heater
We remove the instrument panel assembly with the heater to replace the heater core, remove the heater fan motor, and also to remove the heater assembly.
Disconnect the wire terminal from the negative terminal of the battery. Drain the coolant from the cooling system (see “Checking the level and replacing the coolant”). Below the car ... Use the “8” head to loosen the tightening of the clamps. . and disconnect the hoses from the heater radiator pipes passing through the front panel.
Using a high 10mm head, unscrew the nut securing the heater to the front panel. We take out the cabin filter (see “Replacing the filter element of the ventilation and heating system”).
Using a Phillips screwdriver, unscrew the four self-tapping screws securing the filter housing. We unscrew the nuts securing the steering column and lower the column to the floor (see “Removing the electric power steering column”). Disconnect the wire ends from the brake light switch (see “Removing the brake light switch”). Remove the floor tunnel lining (see “Removing the floor tunnel lining”).
We disconnect the seven wiring harness blocks behind the relay and fuse box.
Using a 13mm socket, unscrew the bolts securing the console brackets to the floor tunnel on both sides.
Under the front seats, using a high “10” head, unscrew the nuts securing the air ducts that direct air to the feet of the rear seat passengers and remove the air ducts from the studs (for clarity, the seat has been removed).
. and remove the end cap on the right side of the instrument panel. Remove the plug on the left side
Using a 13mm socket, unscrew two bolts securing the instrument panel on both sides. Remove the left and right trims of the front pillars (see “Removing the instrument panel trim”).
Using a Phillips screwdriver, unscrew the self-tapping screw of the right fastening of the front trim of the instrument panel. Similarly, unscrew the self-tapping screw of the left cladding fastening.
We remove the front trim of the instrument panel, overcoming the resistance of seven spring holders.
Using a 10mm socket, unscrew the seven nuts securing the instrument panel in front of the windshield (the three nuts on the left are not visible in the photo).
Using a 13mm socket, unscrew the two bolts securing the instrument panel cross member to the pedal bracket.
How to remove the dashboard for sizing
Recently a guy asked how to remove the dashboard for sizing. I want to share my impressions about this process. Suddenly someone wants to do this too. So here it is. I removed the panel last summer. Also for sizing. I did everything alone. I’ll say this: you can remove/install it alone, but it’s very messy. It's easier with two people, but I don't think it's much easier. Don't believe the repair book, it's much more complicated than it says. Too much will have to be removed in addition to the panel itself: the central trim, air duct tubes, gearbox housing, handbrake housing, floor tunnel, passenger airbag (if equipped), A-pillar trims, tidy. There are a lot of different screws and self-tapping screws, during assembly it is easy to get confused as to which ones were screwed in where. If I'm not mistaken, there are 26 screws alone for securing the panel itself! There are two treacherous screws on the left and right right under the windshield, which you can’t unscrew with a regular screwdriver, you can’t get under them. While the panel is being removed, you are left without glass blowing, and in current weather conditions this is fraught with consequences, including an accident due to fogged windows. If you just park the car. In terms of time: removal took 3 hours, installation took 4 kopecks. The steering wheel gets in the way. The left air duct pipe did not want to fall into place, it rested either on the body or on the windshield, it took me a whole hour just to do this. According to the results: the panel became a little more assembled, but after a WEEK it began to crunch again. In addition to this, the airflow on the windshield has become uneven - it blows weaker in the middle than at the edges. I’m generally silent about the numerous scratches on the dashboard and front door trims. You can remove them with an autogen lighter, but still the appearance is no longer marketable. Summarizing all of the above, from the bottom of my heart I HIGHLY DO NOT RECOMMEND doing this. You'll only make it worse. But this is purely my opinion, and then see for yourself. Maybe if you have experience in this matter, it will be easier for you. But I wouldn’t do this again now for any money, there are too many body movements and nuances
Similar articles
Dismantling the console on Kalina
This stage involves removing the Lada Kalina torpedo into its component components.
- Remove the ashtray: pull it towards you and unscrew the 4 screws. They keep her in her nest.
- Next we get to a pair of plugs, which are located on both sides of the emergency button. They need to be pryed off with the same screwdriver and put aside.
- Let's move on to the screws located under the plugs. It is these mounting components that hold the console underneath.
- Having unscrewed a couple of screws, we begin to pull the console towards us. We do it slowly in order to avoid a break in the electrical connections.
- We disconnect the cable blocks from the sockets of the current collectors, simultaneously marking them.
- It's time to unscrew the steering column cover. It is held in place by a pair of size 10 bolts and five screws.
- We unscrew the screws (2 pcs.) holding the casing of the panel itself.
- The upper section of the panel is held in place by nuts, the number of which should be seven. We “defeat” them.
- Removing the stove air duct is problematic. To “surrender” it, we tear off two lock washers, and then unscrew the remaining list of screws. During subsequent installation of this particular small unit, it is enough to use only screws.
- We look for all the “hidden” screws around the perimeter and “sentence” them to unconditionally unscrew them.
- Only now can you carefully pull the panel towards you. If she “listens” to you, then everything was done correctly. If any obstacles appear, it is not difficult to find the “hidden” fastening element.
How to disassemble the instrument panel of a Lada Granta
Lada Granta is a budget car, which means that the car’s owners are often young people who don’t mind adding some special features to their car. Probably one of the most popular tuning methods in a car interior is changing the dashboard lighting from the standard green to white or red.
Due to the fact that the Granta instrument panel is completely electronic, the illumination is performed not by light bulbs, as was the case before, but by LEDs, which are already soldered on the instrument panel board. To change the backlight, we will need to unsolder the standard LEDs and solder in our own ones, in the color that you like most.
Please note that all manipulations associated with disassembling the instrument panel and interfering with its operation may result in failure of the entire panel. You carry out all work at your own peril and risk!
First, remove the instrument panel from the car, we have already described how to do this in another article on our website, but let us briefly remind you:
- Disconnect the negative terminal from the battery;
- Remove the fuse box cover to access the lower screw securing the decorative casing;
- Unscrew the bottom screw of the decorative casing, two in the visor and, pulling it towards you, remove the decorative trim; for convenience, you can lower the steering wheel all the way down;
- Unscrew the four screws securing the instrument panel to the instrument panel and pull slightly towards you to access the connector;
- Disconnect the connector by lifting up the locking tab.
Next, prepare a flat screwdriver or special plastic spatulas for working with interior plastic and a regular household fork.
Using a flathead screwdriver or plastic spatula, unclip all latches around the perimeter of the instrument panel. You can insert a plastic card into the spacer to prevent them from snapping back.
After we have removed the cover, remove the arrows using a household fork, turning the arrow as you go and smoothly pulling out its top.
After removing the arrows, you can remove the board from the case by carefully disconnecting the on-board computer screen connector.
Thanks for subscribing!
Here we ask you to pay attention to the fact that on the instrument panels of the first years of production the screen was soldered to the board and to dismantle the board you will need to unsolder the legs of the on-board computer screen. We recommend doing this operation yourself only if you have extensive experience working with microelectronics.
If you did everything correctly, the result of the work will be a similar instrument panel board. In the photo, the locations of the LEDs for illuminating the scales are marked in white, LEDs are in red for illuminating the arrows, and blue LEDs are for illuminating the on-board computer screen.