- We fix the shaft in the side gear; to do this, take a wooden block, place it on the drive shaft and hit the block with a hammer along the axis of the drive shaft. Further assembly is performed in reverse order.
Replacing outer and inner CV joints on Lada Kalina
CV joint (constant velocity joint - approx.) or popularly just a “grenade”, is designed to transmit torque to the wheels of a car. CV joints can be internal or external, and the devices themselves are quite simple in technical terms and consist of a ball bearing that rotates transversely to its axis.
In the video, replacing CV joints on a Lada Kalina:
Failure of the CV joint on the Lada Kalina is a very common occurrence, and the main reason for its failure is torn anthers. Because, together with dust and water falling under them, the lubricant turns into thick mud, and it is no longer able to fully perform its functions.
Replacing the outer CV joint
In the process of replacing the outer CV joint
The work of replacing an outer or inner CV joint is not very difficult and can be done by any motorist who has at least once repaired a car with his own hands. And in order for the repair to be easier and faster, you need to prepare the following tools:
- Socket heads for “17” and “30”.
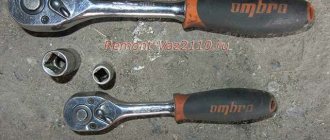
- Driver or ratchet.
- Extension for the wrench.
- Jack.
- Wheel chocks.
- Hammer.
- Vise.
Step-by-step disassembly procedure
After you are convinced of the malfunction of one or another CV joint, you can begin to work.
- First of all, we tear off the mounting bolts from the wheel and the hub nut, then we set the wheel chocks under the rear wheels. (To make it easier to tear off the nuts, it is better to use an extension for the wrench - approx.).
- We put the car on a jack and hang the wheel.
- We remove the wheel and, for greater reliability, place it under the car next to the jack.
- Now that this picture appears before you, all that remains is to unscrew the 2 bolts that secure the ball joint to the steering knuckle.
Unscrew the bolts marked with a red marker on both sides.
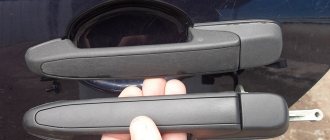
CV joint VAZ. Lada grenade. Comparison of different manufacturers
They counterfeit everything related to the AvtoVAZ assembly line. Any part purchased at a car store can be a counterfeit...
BEWARE OF FAKE! CV joint LADA Image. features
CV Joint Review
(grenades) for VAZ 2108-2115.
Without causing strong blows, the CV joint will move out of place
If the internal CV joint is supposed to be replaced, then work 1 to 6 should be performed as well, after which, using a pry bar, we remove it from the gearbox and take out the entire assembly.
We take the inner CV joint assembled with the axle shaft to a vice where we clamp it and dismantle it.
- After the “bare” axle shaft appeared before us, the work on removing the CV joint can be considered completed.
Step-by-step assembly procedure
Work on assembling all parts should be carried out in the same order as removal, however, there are some nuances in these works.
- First of all, we put the new boot on the axle shaft; this may cause some difficulties. To make the task easier, the axle shaft can be coated with lubricant.
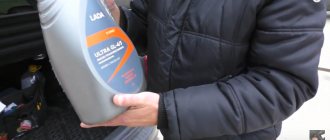
- Then add lubricant to the CV joint.
New lubricant added to CV joint
All work on changing the CV joint, if the work is carried out correctly, will not take more than 1.5-2 hours. You can check the quality of the work performed immediately after the repair. If you start driving with the wheels turned to the side and there is no crackling, squeaking or noise, it means that the repair was carried out correctly and the car can be safely operated further.
Step-by-step algorithm for replacing a CV joint
The process should be started if there is complete confidence in the failure of the specified unit. Replacing the outer CV joint step by step if you do it yourself.
- We loosen the tightening of the wheel fasteners and the hub nut (first remove the cotter pin) on one of the sides of the car.
- We hang up this side with a jack and install stops under the wheels of the stern, and a safety support under the body.
- We completely remove the wheel.
- Unscrew the two bolts holding the ball joint to the steering knuckle bracket and the hub nut.
- We turn the steering wheel of the Lada Kalina as far as possible to the side, move the axle and remove the axle shaft from the splined engagement of the hinge and the hub. If there are difficulties with the free exit of the axle shaft, then use a hammer, applying impact forces to the shaft through a drift.
- When the axle shaft is released, we begin to dismantle the outer joint boot in combination with the clamps. These items must be replaced.
- Now we move on to removing the CV joint. To do this you will need a special puller. If it is missing, then use the hammer again. It is forbidden to apply an impact load to the separator, so we apply gentle blows to the body in an outward direction. The joint will come off if the retaining ring compresses, allowing the cage to slide off the axle shaft.
- When it is necessary to dismantle the entire axle shaft, the algorithm of actions up to point No. 7 is similar, and then, using a mount, we remove the shaft of the designated CV joint from engagement with the side gear in the transmission differential. Before such manipulation, drain the oil from the box. We take out the axle shaft as an assembly, after which we perform the necessary disassembly steps, etc.
- Removing the internal hinge involves the identical procedure given in point No. 7. To make disassembly easier, we use a vice in which we place and fix the structure.
Signs of CV joint failure
The first signs of a faulty grenade are crunching sounds in the area of the front wheel on turned out wheels when starting to move. When the fault is severe, noise appears at less significant loads.
The anther begins to crawl
In order to prevent such damage in advance, you should periodically inspect the anthers from the outside for cracks and integrity in general.
How to determine that the CV joint boot needs to be replaced?
The method is simple: you need to go to the pit and inspect the boot; if it is dry and no traces of oil are visible, then everything is in order and replacement is not required yet.
If, after checking, you find that there is a malfunction and a replacement is needed, then you will need the following tools: 1. Jack, hammer, wooden block; 2. Keys for 17 and 30; 3. Mount, balloon; 4. Flat screwdriver, special pliers for installing clamps; 5. New boot + CV joint grease, graphite grease, kerosene or similar flushing fluid.
There is a situation when, during a sharp start, a single knock or crunch is heard in the area of the front wheels. Most likely, you are already too late and will have to change the CV joint itself.
On a note!
Constant velocity joints, which are sold in the store in sets, include grease, a boot and all the necessary clamps in their sets. Pay special attention to this fact so as not to overpay for additional spare parts and accessories.
I had to change more than one CV joint. Of course, I had to tinker with the first one for a couple of hours, since I didn’t really know all the subtleties, but I changed the subsequent ones almost with my eyes closed.
I bought a grenade for viburnum. The assembly includes the grenade itself, a finger guard and clamps. You can change it in an hour without rushing, it can be done faster. But why rush in such a matter?
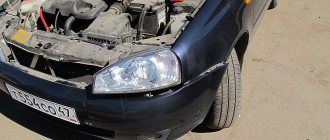
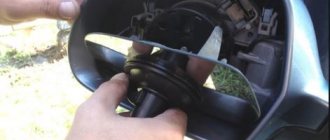
What is this? Is the seal leaking? He's darling!
Jacked it up and removed the front left wheel:
I drained the oil from the box into a basin:
I hung them on a rope) They shouldn’t be hanging from the brake hoses! :
Unscrewed the ball joint from the hub:
We place a thick beam under the hub so that it does not twitch.
Unscrewed the steering knuckle:
Attention! I also unscrewed the two bolts securing the strut to the hub, because I decided to replace the “leaked” strut at the same time. If the rack does not require replacement, then these bolts:
Under no circumstances should you touch it, as it will disturb the wheel alignment. To maintain the “camber” you need to unscrew 3 nuts:
This will allow us to untie the strut from the body, thereby giving the hub more freedom to move when we pick out the CV joint from the leaking oil seal.
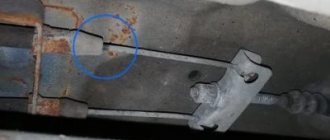
To pick out the CV joint we need a high-tech tool:
We insert the end of the nail puller into the gap between the box and the CV joint:
and begin to furiously uproot the CV joint from the oil seal. It comes out very tight! Therefore, you need to do it fiercely)
There is a retaining ring at the end of the CV joint. It must be alive!
We uproot the old oil seal:
We insert a new oil seal. I stuck it in like this: I leaned the old one against the new one and lightly hit the old one with a hammer.
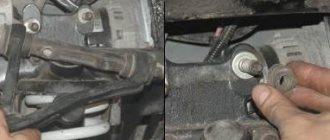
Afterwards, you need to hammer the CV joint back. It should not be particularly bent relative to the shaft. The straighter you keep the CV joint on the shaft, the better.
I inserted the CV joint, supported the shaft, supported the hub and hit the hub a couple of times with a sledgehammer through a wooden board. The CV joint is in place.
PROCEDURE FOR REPLACING THE BOOT
Replacing the outer CV joint boot on a Lada Kalina with your own hands, if you have the necessary tools and minimal skills, will take no more than 2-3 hours and will not cause any special problems.
PREPARING THE VEHICLE
To carry out repairs, you need to place the Lada Kalina on a level surface, apply the handbrake and block the rear wheels with wheel chocks. Next, you should loosen the wheel bolts, use a flat screwdriver to remove the protective cap of the hub and use a 30mm socket with an extension to remove the hub nut. Then we lift the car on a jack and finally remove the front wheel.
Warning! Do not carry out work to replace the hinge on a jacked up Lada Kalina; install a stop of a suitable height or at least place a pair of wheels under the bottom.
DISCONNECTING THE DRIVE FROM THE HUB
Using a 17mm wrench, you need to unscrew the two bolts that secure the ball joint to the steering knuckle.
After this, unscrew the hub nut and remove the Lada Kalina thrust washer.
Advice! To secure the axle shaft from possible rotation, you need to depress the brake pedal.
Then you need to turn the front wheels to their extreme position and remove the outer “grenade” from the hole in the hub. If the repair is carried out without assistants, first secure the drive axle shaft with wire to the car body to protect it from falling.
REMOVAL OF CV JOINT
Replacing the outer CV joint boot on a Kalina can be done directly on the car without disconnecting the axle shaft from the gearbox, which will avoid draining the transmission oil.
Unclench or cut off the clamps and move the rubber boot to the middle of the axle shaft. Then we dismantle the CV joint using a puller. You can do without it and carefully knock the hinge outward with a hammer through a wooden spacer. After this, remove the boot from the shaft.
DIAGNOSTICS OF CONSTANT VELOCITY JOINT
Since the outer CV joint has been removed, the old grease should be removed and washed with gasoline, kerosene or another product for subsequent assessment of the condition. If the part has signs of wear, chips, cracks or play, it will need to be replaced.
INSTALLING A NEW BOOT
First of all, we put a new boot on the axle shaft. To make replacement easier, you can lubricate the shaft with a small amount of grease. If the retaining ring was broken when removing the hinge, a new one should be installed in the groove of the axle shaft.
After this, a special lubricant is generously added to the CV joint, and its remains are applied inside the boot. "Grenade" ready for installation. Using gentle blows of a hammer on the shank of the CV joint through a wooden block, install the part onto the axle shaft until a characteristic click is heard.
Next, we put a protective boot and clamps on the hinge. We tighten one clamp and lightly squeeze the boot to remove air from it. Then fasten the second clamp on the other side. The boot replacement is complete.
Important! The clamps must be installed with the outer end in the direction opposite to the rotation of the shaft when the vehicle moves forward.
FINAL ASSEMBLY
Further work is performed in the reverse order: you need to insert the hinge into the hole in the hub, install the lock washer and secure it with a nut. After this, the ball joint is screwed on, the wheel is installed, and the car is lowered from the jack.
Warning! Do not reuse the removed hub nut. After completing the repair work, you need to carefully tighten and lock the new Lada Kalina hub fasteners.
Lada Kalina Sedan [email protected] › Logbook › Replacing the CV joint on Kalina
The main reason for the malfunction of CV joints (constant velocity joint) on Kalina is the depressurization of the CV joint boots. Initially, incorrectly installed anthers, or rather loosely tightened clamps and leaky or worn out anthers, do not provide a normal seal to the assembly. Water and dirt begin to get under them. Gradually, the lubricant turns into a rusty mess and ceases to perform its functions. The first sign of a faulty CV joint is a crunching sound in the area of the front wheel when the wheels are turned out when starting to move. In more advanced cases, such a crunch appears with less pronounced loads on the wheel.
Replacing the outer CV joint on a viburnum
Replacing the outer CV joint on a Lada Kalina car is not a serious problem. A person who has at least a minimal understanding of car repairs with their own hands can cope with this operation.
To replace the outer CV joint on the Lada Kalina we will need:
1. Ratchet or wrench 2. Extension for extending the wrench or ratchet (a piece of pipe of suitable diameter will do) 3. Socket 17 4. Socket 30 5. Hammer 6. Jack
Replacing the inner CV joint on a viburnum
First you need to hang the wheel. Before putting the car on a jack, you need to remove the wheel bolts and the wheel nut. Using a wrench and a 30mm socket, we tear off the hub nut. To do this, it is better to extend the knob (for example, with a metal pipe of a suitable diameter). We unscrew the wheel bolts with a spray bottle. After we remove the wheel and nut, the following picture appears before us:
Now you need to unscrew the 2 bolts securing the lower ball joint to the steering knuckle. They are unscrewed using a ratchet or a wrench and a 17mm socket.
Along with the CV joint replacement procedure, we replaced the brake pads.
After we unscrew the ball from the steering knuckle, we have access to the CV joint. Now, by carefully hitting the CV joint (in the place where the hub nut was located) through the lining, so as not to damage the thread, carefully knock the CV joint out of the hub. For convenience, you can turn the wheels out.
Next, remove the boot. To do this, you need to remove the clamps and move the boot to the gearbox.
4After this, you need to remove the CV joint itself. If you have a puller, use it. If there is no puller, then knock the grenade off the axle shaft with gentle blows of a hammer. We didn't have a puller and we knocked down the CV joint with a hammer. If the CV joint is “stuck” tightly and does not budge, then the seperator will need to be broken. With gentle blows of a hammer, preferably placing a rag on the separator (it is easily chipped and fragments can scatter throughout the garage or get into your eyes), apply blows while rotating the CV joint (For those who do not understand where to apply blows, they must be applied in the place where the the “balls” of the hinge themselves, we need to break this very hinge). The inside of the cage will remain on the axle shaft. To remove it, you must first remove the retaining ring:
After this, you can finally remove the boot. Now a “naked” axle shaft appears before us:
The dismantling process ends here and the process of preparing and installing a new CV joint begins. First, open the package with the new CV joint. We purchased a CV joint. In our box we had the CV joint itself, a new boot, lubricant and clamps (tape clamps, without fasteners, not very comfortable)
First, let's put the boot on the axle shaft. This may require significant effort. You can add a little grease to the axle shaft to make the task easier.
After this, add lubricant to the CV joint itself:
And squeeze out the remains into the anther:
Now we install the CV joint in place. In order for it to sit in its place, we apply light blows with a hammer (through a board or other lining, so as not to damage the thread. After the grenade is in place, we put the boot and clamps on it. Next, we fasten them, having first released air from the boot.
New CV joint installed. All that remains is to put everything back in place and the car is ready for use again. Assembly occurs in the reverse order and there should not be any difficulties with it.
Procedure
To prevent the bearing from falling apart at high speed, the CV joint must be replaced. To do this you need the following tools:
- jack or block;
- extension;
- ratchet;
- balloon;
- socket heads (17 and 30);
- hammer;
- vice;
- a small block of wood.
First you need to put the car on the handbrake and remove the wheel bolts. In the same position, you need to remove the hub nut using an extension. Then you need to place the car on a jack on one side and remove the wheel. Be careful! Even if you know how to change the boot on Kalina quickly and easily, do not limit yourself to one jack, install an additional block.
Next, you should find the two bolts that secure the CV joint to the steering knuckle. They may not give in immediately; you will need an extension cord to remove them. Now you should unscrew the steering wheel to its extreme position, pull back the steering knuckle and remove the outer part of the hub along with the outer CV joint. A hammer will come to the rescue, but you need to hit not directly on the CV joint, but on a wooden block, so as not to inadvertently damage the part.
How to replace the inner CV joint boot on Kalina? This can be done in a similar way, but the CV joint is removed from the box using a pry bar. After the old element is dismantled, a new boot is installed. When replacing the hinge, the boot must also be removed. Even if the old dust cover is still quite good, you absolutely cannot put it back. It is already worn out enough and it will not be possible to screw it with the same tension.
How to change the inner CV joint on Kalina, Priora, Nexia
The inner CV joint is one of the most important mechanisms in the transmission system. Its purpose is to transmit torque from the transmission directly to the front wheels. Most modern front-wheel drive cars are equipped with this part, and each drive is equipped with two CV joints: internal and front.
Failure of this small part if not corrected in a timely manner can lead to wear and damage to other important parts of the transmission. To prevent such an unpleasant situation, the car owner must know:
- signs of CV joint failure;
- basic diagnostic methods.
And also be able, if necessary, to replace a damaged mechanism with a new one. This does not require extensive experience in car repair, therefore, if desired, almost anyone who confidently holds a wrench in their hands can cope with the task. Next, the features of replacing the internal CV joint will be described.
Replacing outer and inner CV joints on Lada Kalina
CV joint (constant velocity joint - approx.) or popularly just a “grenade”, is designed to transmit torque to the wheels of a car. CV joints can be internal or external, and the devices themselves are quite simple in technical terms and consist of a ball bearing that rotates transversely to its axis.
In the video, replacing CV joints on a Lada Kalina:
Failure of the CV joint on the Lada Kalina is a very common occurrence, and the main reason for its failure is torn anthers. Because, together with dust and water falling under them, the lubricant turns into thick mud, and it is no longer able to fully perform its functions.
Features of the internal CV joint design
The main feature of the internal CV joint mechanisms on Kalina and most other front-wheel drive cars is that they are made from materials of increased strength, since the parts operate under significant loads and are susceptible to exposure to aggressive environments. The use of high-strength alloys significantly increases the service life of all components, however, under the influence of various factors, they can be subject to accelerated wear.
Two grenades are installed on each wheel, which is what people call CV joints. One of them is internal, the other is external. Both of them have approximately the same structure, with minor differences only in the shape and size of the parts.
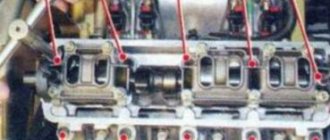
Here are the main parts that make up the CV joint:
- frame;
- driving and driven shafts;
- inner race;
- a separator containing six balls located between the inner walls of the outer housing. They rotate in special grooves.
The mechanism is protected by a rubber boot that prevents debris, dust and water from getting inside.
The elements are made as accurately as possible, therefore, when assembled, they have no play when moving. When the cage rotates, it transmits force to the outer housing. As the balls move, the angle between the axes changes.
During operation of the mechanism, the materials wear out, play appears, and during rotation a sound similar to crunching occurs. This is the first sign of a mechanism failure.
Replacing the boot of the outer CV joint Kalina
From this instruction we will learn how to replace the outer CV joint boot yourself without the help of specialists. Of course, it happens that a breakdown is detected in the CV joint itself, but it also happens that the problem lies in the boot itself.
Now we’ll talk about how to change the boot itself. The CV joint is very similar to a grenade, by the way, experienced drivers, so to speak “experienced” ones, call it exactly that.
The fact is that most often the boot fails due to its failure. When the boot breaks, cracks appear on it, oil flows out, and empty spaces form in place of the oil, replacing which dirt gets in.
If you suddenly fail to fix the problem in a timely manner, then you may cause your car to suffer.
How to recognize a replacement?
Let's do a little diagnostics. Check the boot, see if there is any damage on it, if there are any traces of oil.
There are other signs when you press on the gas sharply, then you may hear unpleasant sounds similar to crunching and knocking.
To replace we will need to take the following tools:
Jack, hammer, wooden beam.
Key for seventeen and thirty.
Mount, cylinder
Flat screwdriver, pliers.
Boot with lubricant, which is intended for CV joints, graphite lubricant, kerosene.
About the replacement procedure itself:
First, we will place the car on a flat surface, then tighten the handbrake thoroughly, and install wheel chocks under the rear wheels (we advise not to avoid this point).
Now let's take a spray bottle, with the help of it we will dismantle the wheel. But do not rush to install the car on the jack. Next we remove the mounting bolts.
Domkat is very serious, we advise you to protect yourself in every possible way from unforeseen situations.
Now, using a flat-head screwdriver, we need to carefully pry off the half-pack, and then remove the fender liners.
They installed some kind of container under the drain plugs, because liquid (transmission oil) will flow there.
In order to remove the ball from the steering knuckle, we need to unscrew the bolts that secure it.
The next step is to unscrew the hub nut; to do this we need to hold the hub with another wrench. In general, you need an assistant here. Which will press the gas pedal.
Then you need to get the thrust washer. After this, we unscrew the wheels, and the CV joint needs to be pressed in. Make sure that the shaft does not fall; it can be carefully suspended using wire.
Now we need to carefully press out the inner CV joint.
We take the drive shaft, install it in a vice and begin to carefully pull off the protective clamp. After this, look at the anthers, we must carefully cut them off, since we will not use them further.
If you decide not to remove the anthers, then there is no need to cut them off.
Now let's take a hammer and use it to knock out the inner CV joint.
You will treat that same grenade with a special liquid. If suddenly you checked and didn’t see anything suspicious, then you can continue installing new boots.
The boot is pryed off with a flat screwdriver, and treat the body with lubricant.
We also remove the CV joint ring, which is located inside, and treat it with lubricant.
Now you can perform the collection in reverse order.
See all photo news >>
Causes of failure
Knowing the main reasons for the failure of the internal grenade, you can prevent this situation at least partially, since in most cases the driver himself is to blame. Here is a list of the most common problems that cause mechanism failure:
- There must be a certain amount of special lubricant inside the part. Poor quality lubrication or its absence leads to increased wear of internal surfaces.
- Low quality metal, fake components were used in the assembly.
- Damaged boot and untimely replacement. As a result, dust, debris or moisture may get inside the grenade.
- Poor quality of roads, aggressive damage to the car due to constant driving on them.
- Late replacement of spare parts for CV joints.
Main symptoms of a malfunction
Sometimes drivers simply do not pay attention to the fact that when turning the steering wheel, some uncharacteristic sound appears, or the car behaves differently than usual. Such inaction leads to rapid failure of the entire drive system. While at the initial stage only some parts of the grenade can be replaced, which will not cost the car owner too much, if a new mechanism is installed, the costs will be more significant.
Here are signs that help you draw a conclusion about the nature of the car malfunction:
- a characteristic sound resembling a crunch. It can occur when you sharply turn the steering wheel, start, or change the dynamics of the car. The reason is wear of the balls and the appearance of gaps between their surface and the grooves;
- shaft play appeared. If you grab the axle shaft with your hand and move it from side to side, significant play will be felt in the CV joint area, which indicates wear of its internal parts;
- When starting and changing gears, the car jerks. But these are signs of a fairly serious malfunction, and it is better not to bring the car to such a state.
Assembly
When the old element is disassembled, it's time to prepare the new one for installation. Please note that when installing the CV joint, the boot of the Kalina “grenade” is also replaced. It is strictly forbidden to use the old one, even if it is intact. The element has already undergone wear and tear, and the clamps will not provide the same tightening.
Which CV joint crunches?
As already mentioned, each wheel has two grenades, internal and external. But a characteristic crunch may appear in both the first and second parts. It is the outer CV joint that fails faster, which is why many drivers often diagnose its problems, forgetting that the inner joint can also be subject to wear. The result is unnecessary costs while the problem is never resolved.
There are two ways to determine as reliably as possible which CV joint is crunching:
- With the car stationary, you should alternately pull the axles near each hinge. This needs to be done left and right. There should be no backlash. If it is observed, it means that there is a malfunction on the CV joint near which the axle is unstable.
- While driving, you need to listen carefully to sounds.
First of all, it is the outer hinge that is diagnosed. To do this, when driving on a flat surface, the steering wheel is turned as much as possible alternately left and right. When turning, the right or left joints may knock, this indicates a malfunction of one of the outer CV joints.
In order to determine a breakdown in the internal joint, you should choose the most uneven road with a large number of holes. The part will feel a crunch when entering a hole. Accordingly, the left or right CV joint will knock. In this case, you should drive into the recesses alternately with the right and left wheels.
Removing the front wheel drives
We carry out the work on an inspection ditch or overpass.
Drain the oil from the gearbox.
Unscrew the front wheel hub bearing nut from the side of the drive being removed.
Unscrew the two bolts securing the ball joint.
We hang up the front of the car and remove the wheel.
To remove the right drive, remove the lower cover of the clutch housing.
An assistant will be required when removing the right drive.
1. Move the steering knuckle with the stand to the side and remove the splined shank of the outer hinge housing from the hub.
2. Place the drive on the stretcher.
We insert a chisel (preferably not sharpened) into the hole made in the bracket of the rear support of the power unit, so that the wedge of its working part falls on the beveled surface of the internal joint housing.
To do this, you can turn the drive by hand.
From the flywheel side, we place the mounting blade under the housing of the internal drive joint.
3. Using a hammer, hitting the chisel, and squeezing the inner joint housing away from the gearbox with a mounting blade, we push the shank of the hinge housing out of the spline hole of the drive gear.
4. Remove the right drive.
When removing both drives, after dismantling the first one, it is necessary to insert a retainer into the hole of the drive gear, for example, a roller made of wood or soft metal, or an old internal CV joint.
Otherwise, the differential drive gears may become misaligned and the drives may not be able to be installed.
5. When dismantling the left drive, it is convenient to rest the mounting blade through the spacer on the gearbox housing.
6. Remove the left drive.
7. Before installing the drive, use a screwdriver to pry up the retaining ring of the shank of the internal joint housing, which secures the drive in the gearbox.
8. Remove the retaining ring.
We install a new ring into the groove of the shank of the internal joint housing.
Reuse of retaining rings is not permitted. We insert the splined shank of the outer joint housing into the hole in the wheel hub, install the washer and tighten (without tightening) the hub bearing nut.
Then we insert the shank of the internal joint housing through the hole in the drive oil seal and, by turning the shaft, align the splines of the shank with the splines of the drive gear.
Moving the suspension arm downwards, with a sharp movement of the rack with the steering knuckle towards the gearbox, we send the drive to its place.
By pulling the internal hinge housing towards you or prying it with a mounting blade, we make sure that the housing shank is fixed in the drive gear.
We carry out further assembly in reverse order.
How to remove CV joint
In order to conduct a more detailed inspection of the mechanism and identify the exact cause of the breakdown, it is necessary to disconnect the entire structure from the car. A hole or a fairly high overpass is best suited for this. After preparing the repair site, the following steps are performed:
- all fastening bolts are unscrewed;
- The CV joint is removed from its seat;
- using a large screwdriver or pry bar, the hinge is removed from its seat;
- the hinge is disconnected from the shaft; to do this, the retaining ring and clamps are unfastened;
- the anther turns to the side or moves away;
- the hinge is removed with a hammer; as a rule, this cannot be done by hand;
- The CV joint is thoroughly washed with warm water.
Disassembling the hinge
An important diagnostic step is to inspect the CV joint boot. If it has visible damage, water or blockages have almost certainly penetrated inside.
In addition, it is necessary to completely disassemble the mechanism. To securely fix the part, you will need metalworker's cleats. After the outer CV joint housing is removed, all balls should be removed from the separator. This can be easily done with a screwdriver. It must be made of a sufficiently soft metal so that the surfaces of the parts are not damaged during operation.
Then you will need to remove the separator from the holder. In this case, special attention should be paid to the position of the separator windows. When working, the following sequence must be observed:
- To reach the separator, the elongated windows must be located against the protrusions in the housing.
- The clip should be removed when its tabs are placed in the windows.
Parts inspection and diagnostics
In order to inspect all components of the CV joint, they should be thoroughly rinsed with warm water. To do this, you should arm yourself with a basin and a soft brush.
It is quite simple to identify faulty parts by visual inspection. Grooves larger than one mm, depressions, black spots - all these are signs of wear on the internal surfaces of the CV joint.
Particular attention should be paid to inspecting the separator. If there are chips or cracks between the ends and the windows, the CV joint definitely requires replacement.
If there is no damage, the mechanism can be assembled. But first you need to fill the hinge with a special lubricant, this will prevent the possibility of premature wear of the component parts.
CV joint assembly
Assembly is carried out according to the following scheme:
- installation of a separator with a cage;
- balls are driven into the cage, first two, then all the rest one by one;
- we make sure that the grooves of the inner and outer parts of the CV joint do not coincide, they must overlap, otherwise the unit will immediately jam;
- parts are rubbed with lubricant only after the balls are in the cage;
- a boot is put on the assembly;
- the structure is assembled in the reverse order.
CV joint replacement
If the hinge has internal defects, it should definitely be replaced with a new one. To do this you just need to install the whole node. If the protective boot was changed quite a long time ago, it should also be removed and a new part installed.
To do this, install the hinge on the axle. For maximum fixation, you can attach a wooden block to the free edge of the axle and hit it with a hammer.