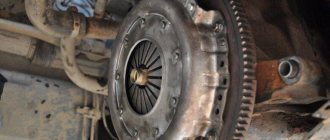
Production of the VAZ 2107 ended in 2012, but even today this brand remains one of the most used in the VAZ line, along with 2106 and 2109. Drivers consider a durable, hard-to-kill body to be a feature of the 2107 configuration, the elements of which, although not coated with zinc, show high performance characteristics.
Replacing a VAZ 2107 wing is a type of repair that every Zhiguli owner has to deal with sooner or later. The market offers a complete catalog of body parts for the entire VAZ line, so choosing an original part from official manufacturers is not difficult.
In what cases are body parts replaced?
Few drivers know that rolled, black, galvanized steel loses 1% of its thickness every year. This is a natural process that builders and metallurgists know well. For body parts, natural wear and tear as thickness decreases is more than 2% per year of the original figure.
Therefore, the first reason for repairing and replacing a car body is natural processes, which for all metal parts end the same way: complete rotting or corrosion of the parts. Corrosion processes cannot be stopped, but can be delayed for 2-3 years by constant inspection of the body and anti-corrosion treatment of the metal. Reasons when an element needs to be changed:
- Corrosion has covered more than 50% of the surface, and there are through-holes.
- Accident, careless parking. Replacement is carried out if there is a break in the part, a deep dent that cannot be pulled out and straightened.
- The material used to make the part is plastic.
If there are small scratches on the paintwork, shallow dents with non-sharp edges, it is not advisable to replace the entire wing; it is recommended to straighten and draw out the metal.
Before changing the wing on a VAZ 2107, you need to inspect the element to check how the part is attached to the body. Factory assembly involves only welding; the wing is welded to the base at certain points. If the car is used, there is a chance that the model already has removable fenders mounted on bolts. In this case, replacing the part does not require the use of a welding machine.
Preparation of VAZ 2107
Replacing the front wing of a VAZ 2107 begins with preparing the car and selecting the necessary tools and materials. For repair you will need:
- drill with a set of drills 0.8 mm;
- angle grinder (grinder);
- impact screwdriver;
- set of wrenches;
- hammer;
- chisel;
- clamps or other metal fasteners;
- welding machine.
If it is necessary to replace a removable part, then clamps and a welding machine are not required. Regardless of the structure, removable or non-removable, before work it is necessary to dismantle some of the mounted body elements. Step by step preparation process:
- Remove the front door.
- Remove the hood cover and the wheel under the wing that needs to be replaced.
- Remove the bumper and headlight unit.
Preparing the car to replace the front wing
To carry out all the necessary procedures you will need the following tools:
- drill or so-called hole punch;
- Grinder;
- spanners;
- impact screwdriver, etc.
To remove a damaged car part, namely the fender, you must first remove several other parts. The first thing you need to do is remove the front door.
This can be done using an impact screwdriver, as it is screwed on with Phillips screws.
It will be useful: VAZ 2115 injector fan does not work: causes and repairs
Next, the hood, wheel, headlight, and front bumper are dismantled, regardless of whether the right or left fender is being replaced. It is advisable to seal the doorway to prevent dust from entering the interior. This way you will avoid unnecessary expenses on dry cleaning services. When operating the grinding machine, it is necessary to cover the windshield from abrasive particles.
After all the dismantling and preparation of the site for installation of the new wing has been carried out, you can begin to directly replace the part.
Removing the old wing on a VAZ
Dismantling, depending on the method of its installation, will be different. How to change the front wing on a VAZ 2107 if the original part is installed on the body by welding? The process of dismantling the old element step by step:
- Determine spot welding locations. At the service station, to dismantle the wing, they do not use cutting out the part with a chisel, but welding it with a welding machine.
- Drill out the welding points of the gutter on the body, cut off the gutter with a chisel.
- Cut off the connection between the fender and the front panel from the headlight downwards.
- Cut the connecting seam in the area of the side post, 5 mm away from the bend line.
- Use a grinder to cut out the remaining parts of the wing.
- Clean the cut areas and straighten the deformed edges.
- Inspect the body cavity, if there is rust or corrosion plaques, carry out repairs and treat the surface with anti-corrosive or zinc-chromate primer class GF-073. Experienced drivers recommend using Movil for any body work. This will protect the new wing from corrosion.
To dismantle a removable element that is installed on the body with bolts, you must use a power screwdriver. With this replacement, there is no need to remove the hood and door covers, and also protect the windshield from welding. Dismantling process step by step:
- Raise the hood and install the support stand.
- If the model is equipped with special protection, remove it.
When replacing the right fender, the steering wheel is turned all the way to the right; when replacing the left fender, it is turned to the left.
- Under the hood, in the side drain, unscrew the four upper mounting bolts.
- Unscrew the lower mounting bolts.
- Unscrew the two bolts located under the car fender, which secure the part and the front pillar. Parts are difficult to find, they are often covered with a layer of dust and dirt; before reinstallation, it is recommended to wash the car with a Karcher.
- Remove from seat.
The part is attached to the VAZ 2107 using 8 bolts. The process of replacing removable, often plastic elements is a fairly simple procedure even for an inexperienced technician. Repairs take up to 2 hours and are carried out in the garage.
Preparing the car for front wing replacement
Before deciding to replace the front fenders, you should make sure that such actions are necessary. If the damage is minor, the part can be straightened. It will cost much less than buying a new wing. If the wing has significant damage, then it is better to replace it.
To replace the front fender yourself, you need to prepare the following tools:
- Drill for drilling holes.
- Angle grinder - grinder.
- A set of wrenches for removing the old and installing a new part.
- Impact screwdriver.
If you plan to replace a part, the first step is to replace the damaged device. This can only be done after dismantling the front door and headlights. To remove the door, you will need to use an impact screwdriver. To remove the front fender, you will also need to remove the front headlight unit on the right or left side, depending on the part being removed. You will also need to remove the wheel, fender liner and front bumper, after which you can begin dismantling and installing a new front wing on the VAZ 2107.
Replacing the front fender - when necessary
When is it necessary to replace the part in question? If you love your car and try to take care of it, then the first sign of corrosion will greatly upset you. However, in this case, you should not remove the part and replace it with a new one. Replacing the front wing on a VAZ 2107 is carried out for a number of the following reasons:
- Corrosion marks in the form of through holes. In this case, you can use soil substances and do without welding, but such repairs will not last long. The best option to prevent further damage to the part by corrosion is to replace it. You can use a repair insert or overlay, but to do this you need to cut out the rotten part and weld the metal overlay. This method is labor-intensive and requires the use of paints and varnishes.
- The part was damaged if the car was involved in an accident. Often it is the front wings that are affected. If the straightening specialist says that the wings cannot be repaired, then it is better to replace them.
To make a replacement, you will need to buy a new or used device. When purchasing, it is important to pay attention to the geometric dimensions of the part, as well as the color. You can do the replacement work yourself at home, but we’ll find out how to do it correctly below.
Removing the old wing
When carrying out dismantling work, you should use an impact screwdriver and WD-40. When it comes to the wing or wings themselves, before removing them it is necessary to clarify that they are secured with welds. To dismantle a wing secured by welding, you will need to use an angle grinder.
When the wing on a VAZ 2107 is dismantled, in order to prevent dust and dirt from entering the interior, it is better to first seal the doorway with polyethylene. It is advisable to put a cloth on the windshield that will prevent chips and abrasives from getting on it. After this, we proceed to dismantling manipulations:
- The first step is to cut off all welding joints by which the part is attached to the drain gutter.
- The connection near the headlamp also needs to be cut with a grinder, making an indent of about 2-3 mm.
- The cut from the side post must be made at a distance of 5 mm from the bend.
- The remaining parts are also removed using a grinder, and the joints ultimately need to be cleaned.
It will be useful: Where is the fuel pump fuse for Chevrolet Niva: photo, diagram
When the old wing is removed from the car, you can begin to prepare the area for installing the new part. To do this, we evaluate the condition of the car body. If there are no obvious damages (including corrosion), then we proceed to removing contaminants and cleaning the joints. Many people do not pay due attention to this process, but if the procedure is not performed properly, the result will be disastrous. Soon you will need to remove the front fender again and repair or replace it.
If there are places of corrosion, they must be cleaned with a grinder and then primed. Before installing a new wing, it is necessary to treat its cavities with primer and apply Movil. In this way, you can completely protect the part from the emergence of new corrosion foci.
How to install a new wing on a VAZ 2107
To install a new wing on a VAZ 2107, you will need to use a welding machine - semi-automatic or gas welding. You can secure the part using connecting bolts, but this will require drilling holes and cutting threads. This method cannot be called simple, but you need to choose depending on the tool at your disposal.
Replacing the front wing on a VAZ 2107 is carried out in the following sequence:
- Reinstall all the dismantled elements in their places - the door, the headlight block and the hood.
- Position the device, observing the gaps between the body and the product.
- The wing must be secured in the extended position using clamps.
- We grab the product with a welding machine, after which the door, hood, bumper and headlight are dismantled again.
- After this, the correct location of the device is checked again.
- The final fastening of the wing to the body is carried out.
At this point, the replacement procedure is completed, and all that remains is to replace the doors, hood, headlight and bumper. If the fender has a color different from the car body, then it needs to be painted. Welded joints are recommended to be thoroughly cleaned, primed and treated with Movil. At this point, the repair work to restore the appearance of the VAZ 2107 car has been completed.
Installation of a new VAZ 2107 wing
Replacing a front fender requires the ability to operate a welding machine. It is recommended to use gas welding with a brass rod L-62 or L-58. After checking the part on the seat, contact welding is carried out in increments of 40-50 mm. If electric welding is used in a carbon dioxide environment, it is recommended to use wire Sv 08 G1S or G2S, with a diameter of 0.8 mm. Welding should be done with a 10 mm seam in increments of 30-40 mm, the optimal current strength is 50-90 A.
Before installing a new element, it is necessary to mount all the removed parts on the body: door, hood cover, bumper and try on the new element on the seat.
Replacement using welding step by step:
- Insert the wing into the seat, observing the gap.
- Secure with clamps or other fasteners.
- Remove the bumper, hood, door.
- Grab the part in the area of the front pillar and check the geometry.
- Remove the clamps.
- Weld.
- Clean weld areas.
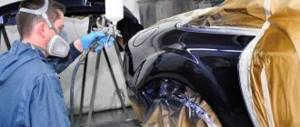
- Prime the joints, treat them with anti-corrosion agent, and paint over them after drying.
Replacement procedure
At the beginning of the dismantling operation, the front or rear wing of the car is removed by cutting with a grinder or cutting with a pneumatic chisel at a distance of 10-15 mm from the edge.
Before starting dirty and loud work, it is necessary to remove all adjacent intact parts: the front door, bumper, light fixtures. After dismantling the VAZ 2105 wing, VAZ 2107 wing, it is necessary to clean the joints, drill out the weld points, removing excess metal, and separate the drain using a regular chisel.
After separating the old wing and removing the remaining weld metal, it is necessary to clean the joint with a grinder along the circle of the future joining of the new wing and the body. Mechanical cleaning will remove dirt and traces of rust.
It will be useful: VAZ 2111: what is the fuel consumption and how to reduce it?
It is necessary to clean the new wing from the transport soil using a grinder and coat the inner surface with fresh product. To ensure a good fit of the fender to the drain at the bottom and the threshold of the car, you need to drill holes for welding and grind the places from the inside for alignment and a tight fit.
Before welding, it is recommended to fix the fender in place using self-tapping screws to adjust the distances to the hood and door of the car.
Welding can be done either with resistance welding pliers (if available) or with conventional electrodes with an intermittent seam 10 mm long and at intervals of 15-20 mm.
After welding, it is necessary to check the mating of the parts and correct any inaccuracies.
Then you need to sand the joints and prime the surface to prepare for painting. After painting, reinstall all the removed parts in their original places: bumper, front door, light fixtures. Stand in front of the car and admire the well-done repair.
At the same time, the only disadvantage is the time spent on this, which is covered by minimal costs, acquired knowledge and skills, and a feeling of satisfaction from quality work done with your own hands.
Installation of plastic wings on a VAZ 2107
Plastic fenders with bolts on the VAZ 2107 are an alternative to a metal element, which has its own advantages and disadvantages. The advantages of the plastic element are obvious: the wing is not subject to corrosion, the aerodynamic performance of the car is improved, and the total weight on the body is reduced. In addition, plastic elements are simply removed and installed; the price of spare parts starts from 300 rubles.
Among the shortcomings, the minimum resistance of the part to impacts is noted. At the slightest collision, the plastic breaks or bends. The part can no longer be repaired; a full replacement and complete painting of the car is necessary; it is almost impossible to choose the color of the spare part to match the paintwork. The process of installing plastic elements instead of the standard metal one:
- Using a chisel, the old element is disconnected along the weld seams and pulled out.
- The deformed edges are cleaned, the remains of the old element are cut off.
- A layer of auto putty or auto glue is applied to the joints between the body and the plastic fender.
- The part is applied to the seat using glue and secured with bolts.
- 36 hours after the glue has hardened, the bolts are removed and the excess putty that has come out over the edge at the places where the glue is glued is removed.
- A layer of graviton and laminate is applied to the gluing areas.
- The structure is puttied and painted at the final stage.
The cost of replacing the original element with a plastic analogue at a service station starts from 7,000 rubles. Replacing the wing on a VAZ 2107 in 70% of cases is carried out independently. Repairs only require some skill when working with welding.