How to dismantle the first clamp
To make repairs or remove the rubber band from the drum of the washing machine, you must first remove the clamp holding the cuff along the curly curved side. As a rule, each washing machine has either a spring or a plastic clamp visible on the side of the rubber band. To properly remove the plastic clamp, you should pull it towards you in the area where the locks are located. If the clamp is made in the form of a spring, you need to unscrew the retaining screw or simply pull the spring towards you by prying it with a screwdriver. After the clamp has been removed, the cuff sealing the hatch closure can be easily removed.
Removing the internal (second) clamp
Before removing the second clamp of the washing machine, you must carefully inspect the cuff for a mark for installation. Thanks to this mark, the cuff is located in a strict position in relation to the tank. This ensures hermetic closure of the hatch and proper drainage of water. If it was not possible to find the mark, you should mark on the rubber band its location in relation to the tank. This little detail will turn out to be important when a new cuff of the washing machine is installed. Then the grooves, freed from the worn rubber, must be thoroughly cleaned of accumulated dirt and thoroughly lubricated with a soap solution. When the grooves are slippery, it will be easier to replace the cuff with a new one.
Installing the front (front) outer clamp
If replacing the cuff was accompanied by removing the front part of the body, then put it in place. Then we install the outer clamp in place. The plastic one should be in an open state, closing its ends directly into the installation groove.
The wire should be in an assembled state, starting from the junction of the spring with the bent edge of the wire, gradually seating it in the groove.
After installing the cuff of the washing machine with your own hands, you need to check the tightness of the connections. To do this, close the hatch and turn on the washing mode for wool, delicate fabrics or rinsing. After a few minutes of work, drain the water and tilt the machine back towards the wall. There should not be a drop of water under the car.
We also use additional lighting to inspect the internal parts of the washing machine for leaks. If there are no leaks, then you managed to change the rubber band in the washing machine yourself, without the help of a specialist.
Here is the approximate time required to replace the cuff:
| Sequence of stages | Approximate time spent |
| Removing the front clamp (and removing the rubber from the body) | 1-5 minutes |
| Removing the inner clamp (and cuff from the tank) | 5-15 minutes (without removing the front part of the case and with removal, respectively) |
| Installation of a new part (with preparation of the seat) | 3-5 minutes |
| Installation of the internal clamp | 5—15 minutes (without mounting the front wall of the case and mounting, respectively) |
| Installation of the front clamp (with preliminary installation of rubber on the body) | 1-5 minutes |
Installation of new sealing rubber
Carefully replacing the rubber hatch seal is a responsible matter; the continued operation of the washing machine will depend on it. Especially if the repair is done by yourself. To change old tires to new ones, you need to match the mark of the cuff and tank. Then insert the curved side of the cuff onto the grooves lubricated with soap. To do this, you need to take the rubber by the inner side and carefully press it onto the rim of the tank with your fingers. But, when the main part of the rubber has already been inserted, further insertion of the cuff will be difficult, since the inserted side will begin to slip.
The area of the cuff that has not yet been inserted should be put on the tank ring, moving your thumbs towards each other. When you have managed to completely replace the tires, you should finally feel the entire rim of the tank to be sure of the tightness of the fit. All repairs to the washing machine should be carried out very carefully, avoiding the use of sharp objects, so that the new rubber does not tear.
Installing the Inner Clamp
The internal clamp of the washing machine has a screw for adjustment; during installation, it should be turned to the required diameter, put the clamp in place and tighten it with the screw. If the clamp is a spring type, replacing the collars will be a little more difficult, but also doable. You will need to securely hold the first tension point of the clamp. To hold the spring clamp of the washing machine, you will need a screwdriver. It should be inserted into the channel that fixes the hatch all the way to the stop. After this, the spring is pulled with a screwdriver along the entire rim of the tank, placing it in the grooves.
Having put on most of the spring, difficulty in holding the clamp again appears, since the tension angle has changed. To replace the spring clamp on older machines, pliers are used because such springs were produced without an adjusting screw.
If you managed to cope with the internal clamp, the external one can be installed without much effort. To install clamps that do not contain spring or screw tension, curved round nose pliers are required. With their help, you need to open the tightening hooks and install the clamp.
Examination
When you have managed to replace the sealing rubber of the hatch and install the clamps, you should check the quality of the repair. Having set the rinse mode, we start the machine, wait two or three minutes, and drain the water. When the water has subsided, tilt the machine in the opposite direction and inspect the bottom of the rubber. If there are no drips, then the repair was successful.
Of course, the first is determination by the eye, i.e. visually. Look carefully at the cuff itself; if you find a hole or puncture in the elastic band of the washing machine, you have found the reason for the appearance of a puddle of water on the floor, i.e. The cuff tore.
The second is the nature of the leak. Those. water may appear from below under the washing machine or leak from the hatch during washing or rinsing.
If leaks occur, carefully inspect the hatch cuff to determine damage. As practice shows, detecting them is not difficult.
What causes the need to replace the washing machine door seal?
1. Natural “physical” wear and tear.
When washing clothes, the cuff, which is made of rubber, is constantly exposed to various types of influences: changing cold and chemical detergents, friction against the elastic band of the clothes and the drum of the washing machine. Over time, under the influence of the above factors, the elastic acquires such physical qualities as fragility and looseness, which undoubtedly violates the tightness of the cuff, and, as a result, leakage occurs.
The hole might look like this
2. Mechanical damage. When washing, various sharp objects (a pin, a screw, small children's toys, etc.) may accidentally fall into the drum of the machine, which tear the rubber seal. Or you could pinch the cuff by carelessly closing the door.
3. Mold or fungal lesions. In such a situation, it will definitely appear in the washing machine. The most common way to solve this situation is to replace the rubber seal on the washing machine.
What to do: replace or repair the cuff?
Do not rush to replace the cuff!
In some cases, you can save your finances and get away with repairing it. Wait and listen to a professional's advice on this matter. Often, if the cuff is damaged on the side or at the top, the repair will only consist of sealing it and not replacing it with a new one. By the way, for some unpopular models of washing machines it can be very difficult to find the necessary spare parts, so a specialist needs to repair the damaged seal.
Note! Repair by sealing the cuff is a temporary measure, because... it is constantly exposed to aggressive influences, both chemical and mechanical. Therefore, replacing a new one is a matter of time. It is on this basis that the cuff repair warranty is given for 2 weeks.
Repair of a rubber seal by a specialist includes the following steps:
Stages of work to replace the cuff
When contacting a specialist, find out the following information in advance:
- and, if possible, the washing machine model that requires seal replacement. For example, Bosch WLG2426WOE or LG F1089ND5. On the tag located on the body of the washing machine you will see the model number. If you yourself have already purchased a new spare part, you only need to indicate the brand of the device. We also ask you to indicate the time and day of the week that is convenient for you for the master’s visit. And of course, your contacts – address, phone number, first and last name.
On the day you specify, the specialist will call you back to clarify the time of the visit, because plans can sometimes change.
Advantages of our repair:
1. Convenient work schedule.
Specialists work from 8 a.m. to 10 p.m. every day, not excluding weekends and holidays. You choose a time that is convenient for you for repair services.
2. and a technician’s visit – the service is free when repairs are performed by a specialist from our company.
3. Carrying out repairs at home within 24 hours. There is no need to organize the delivery of the washing machine to the office yourself; all repair work will be carried out directly at home - the necessary tools and spare parts are always with you.
- Providing a guarantee. When installing a new cuff, you are provided with a 1-year warranty.
The process of replacing a cuff on a washing machine
Installing the cuff
The company replaces cuffs on washing machines in St. Petersburg and in large cities of the Leningrad region. A day after receiving your request, our specialist will rush to you and quickly repair the cuff of your “assistant” door, and most importantly - with a guarantee! We provide a 1-year warranty on the new cuff and repair work to replace it.
How much does it cost to change the hatch cuff on a washing machine?
The cost of replacing the cuff, excluding the cost of a new rubber cuff seal, starts from 1,900 rubles. The final cost of replacement is determined by a specialist on site and varies depending on the brand and model of the washing machine. The table shows the estimated cost of cuff replacement, which covers:
- cost of a new part,
- dismantling the old seal,
- installation of a new cuff.
| Washing machine brand | Cost of repair services, work of a master + spare parts) |
| Ariston | from 2700 to 6500 rub. |
| Atlant | from 3200 to 5500 rub. |
| AEG | from 3200 to 5900 rub. |
| Ardo | from 3900 to 6900 rub. |
| Brandt | from 3800 to 7200 rub. |
| Bosch | from 2900 to 6900 rub. |
| BEKO | from 3300 to 5500 rub. |
| Candy | from 3500 to 6500 rub. |
| Gorenje | from 3500 to 6500 rub. |
| Hotpoint Ariston | from 3800 to 7500 rub. |
| Indesit | from 2700 to 5900 rub. |
| Electrolux | from 3200 to 5900 rub. |
| LG | from 3500 to 7500 rub. |
| Miele | from 4500 to 11500 rub. |
| Siemens | from 4300 to 9000 rub. |
| Samsung | from 3200 to 6900 rub. |
| Zanussi | from 3600 to 7500 rub. |
| Whirlpool | from 3900 to 7900 rub. |
| Other brands | from 2700 to 12000 rub. |
| Call a specialist | For free |
If you purchased a new cuff yourself, then payment is made only for replacement or repair services (from 1900 rubles).
Contact companies
Replacing or repairing a cuff is a rather complex process that requires the necessary skills and knowledge. If you determine that the rubber seal is leaking or damaged, trust the professional technicians.
A maximum of 24 hours after your request, our experienced specialist will arrive to you and repair or replace the cuff of your washing machine. Everything is done accurately, quickly and, most importantly, with high quality!
Before you start replacing the cuff of the Indesit washing machine, you must disconnect it from the electricity. Repairs may be necessary if it becomes damaged or mold accumulates.
You can replace the rubber hatch seal without disassembling the machine and removing the tank. Since its outer edge is attached to the front body of the machine, and the inner edge is attached to the tank, you need to start removing the old cuff from the front.
The photo shows detaching the door, but this is not necessary. It is enough to open the hatch and access to the cuff will be provided. If, nevertheless, it is more convenient for you to remove it, then you need to unscrew the two fastening screws, move the entire structure up, slightly pull it towards you and the door will detach from the body along with the hinge.
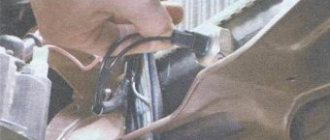
The cuff is attached to the front wall using a metal clamp, which is a wire in the shape of a circle, the ends of which are connected by a piece of spring for tension. To disconnect the clamp, you need to find the spring on it by inspecting the perimeter of the circle and pry it off with a flat-head screwdriver. Then, moving it to the side, remove the clamp.
Starting from any area and moving along the perimeter, manually detach the outer edge of the cuff from the front wall. After this, it is necessary to gain additional access to the interior. To do this, you need to remove the top cover of the washing machine. This will open up a view of the tank and its connection to the cuff, which is secured to it using a clamp made of a solid spring.
To disconnect, just grab the seal with your hand anywhere, closer to the tank, and carefully pull it out together with the clamp.
Before installing a new cuff, it is important to compare it with the old one in order to additionally visually verify the similarity of their sizes. Then find and understand for yourself the seats on which it will be fixed, as well as the marks of the upper and lower points:
- the top point is almost always marked with a triangular protrusion and is aligned with the mark on the tank during installation;
- a guideline for the lowest point; in addition to the same marks, there may be holes for water drainage in the cuff itself.
ATTENTION! It is very important to install according to the marks. Otherwise, the cuff may move during installation and may be damaged during subsequent work.
Installation must begin from the top edge, aligning the protrusion of the cuff with the mark on the tank. Holding the already attached upper section with one hand, press the rubber seal completely inside the body with the other hand. Next, starting from the top and moving around the perimeter in any direction, completely insert the inner edge of the cuff onto the washing machine tub.
For ease of installation, it is better to view it through the top, through the opening of the removed cover (photo in the center). After attaching the inner part of the cuff to the tank, you must carefully check the alignment of the marks. If they are displaced during the installation process, then you need to take the time to remove the cuff and perform the installation again.
Next comes the installation of the spring clamp. This is the most difficult part of replacing the cuff. For convenience, it is advisable to fold its outer edge inward. And disconnect the hatch lock by unscrewing two screws, as shown in the photo.
Insert a screwdriver into the locking hole and hook the spring clamp onto it (pictured on the left). This is necessary so that during the process of pulling the clamp onto the cuff it does not come off and remains fixed.
You need to tighten the clamp around the perimeter in any direction, both up and down. When tensioning, you need to constantly monitor the position of the screwdriver, especially if the work is done alone, without an assistant. Since in the event of weakening of the tension or other sudden movements, the screwdriver may move to the side and then the spring will jump off it.
When the spring is fully put on and is in the recess of the seat on the cuff, then holding it, you need to slowly pull the screwdriver out from under the spring.
Next, you need to feel the entire spring around the perimeter with your fingers and make sure that it fits correctly into the recess everywhere, and that the edges of the cuff fit exactly to the tank everywhere and are not wrinkled. Loose spring fits need to be corrected.
ATTENTION! If the spring does not fit tightly into the cuff seat, a leak may occur.
Also at this stage it is advisable to check the tightness of the connection between the cuff and the tank:
- To do this, use a ladle to draw water into the tank, but so that it does not flow out of it.
- If there are no leaks, then the spring is installed correctly.
- If leaks appear, locate the location where the seal is broken, drain the water, fix the problem and check the leak again.
Before we begin securing the outer edge of the seal, we return the hatch lock to its place and secure it with two screws. The front edge of the cuff has a bend of a certain shape, which corresponds to the bend at the edge of the hole in the front wall of the machine. Having folded the front edge, as shown in the far right photo, you need to put it on the body of the machine and so on around the entire perimeter.
When the cuff is finally put on from the front, you need to look and feel it along the entire perimeter in order to finally set it in place.
At the last stage of assembly, all that remains is to put on the outer clamp. Doing this the first time is not always easy, since the spring is not easy to stretch by hand. However, there are two ways to fit the clamp:
- One of them is shown in the photo. Holding the clamp with both hands from different ends of the spring, stretch it in different directions, push it into the recess and, without weakening the tension, sliding your hands along the clamp further and further from the spring, put it on until it is completely seated.
- The second method is to fix one end of the spring, apply tension to only one side, and gradually place the clamp around the perimeter into the recess.
After installation is completed, you need to check the correct placement of the second clamp and the location of the front edge of the cuff. The tightness of the seal to the glass of the hatch depends on this. This tightness can be checked visually by closing the door. Place the top cover of the washing machine in its place.
As always, after a repair, you need to check the serviceability of the element that was replaced, in this case the tightness of the joints of the cuff with the tank and the hatch glass. To do this, run the machine for washing. If leaks are detected, repair the problem.
A washing machine, like any other device, consists of many parts. Each of them has its own service life. When any part fails, it is time for repair. Most often, the rubber seal on the drum needs to be replaced. How to repair it? How to remove the rubber band from the drum of a washing machine?
The cuff of the washing machine hatch is torn - how to fix it
Without a washing machine, housekeeping becomes much more difficult, since clothes have to be washed by hand, and such washing takes a lot of time and requires a lot of labor.
That is why any malfunction of the washing machine is perceived by housewives, to put it mildly, negatively.
This fully applies to the violation of the integrity of the cuff of the washing machine hatch, which in everyday life is more often called rubber or elastic.
If the cuff from the washing machine is torn, this is manifested by the fact that water constantly flows in the area of the hatch during washing. This malfunction makes further operation of the machine almost impossible, and therefore, it is necessary to immediately resolve the issue of repairing the cuff or replacing it with new rubber.
Residents of Moscow in such a situation can and should turn to a service center for help, whose highly professional, experienced technicians will immediately arrive at the client’s home and, in the shortest possible time, carry out the appropriate repair work to eliminate the malfunction, that is, they will repair or replace the cuff, after which the washing machine can be used further.
Causes of cuff damage
Note that damage to the hatch cuff of a washing machine is a common occurrence. If such a problem happened to your washing machine, then it is important to understand what exactly caused it in order to plan your next steps. Knowing the causes of the problem will allow you to understand whether it makes sense to repair it, that is, for example, to seal the sunroof cuff or whether you will have to change it.
Violation of the integrity of the cuff can be due to a number of reasons.
| Cuff damage | Causes of damage | Solution |
| Cuff cracks | The occurrence of cracks is associated with strong vibrations of the washing machine drum. | Regardless of what decision you make: seal the cuff or replace it, you must eliminate the cause of the increased vibration of the drum; |
| Wiping the cuff | The cuff is worn out due to malfunctions in the washing machine, as a result of which it rubs against some part. This often occurs due to the drum being misaligned. | The problem must be corrected before you make a decision: repair or replace the cuff, otherwise very soon the cuff will be damaged again. |
| Rupture or cut of the cuff | In the vast majority of cases, the cuff breaks or a cut appears on it due to the fault of the users of the washing machine, or rather, due to their negligence. The fact is that breaks and cuts are caused to the cuff by foreign objects, which, as a rule, fall into the drum from clothing pockets that were not checked before washing. | If you want to ensure that the hatch cuff of your washing machine is not damaged by various foreign objects, be sure to check the pockets of the clothes you put in the wash and check the drum itself, since foreign objects can be “placed” in it by children or pets. |
In case of all the listed damages, it is possible to seal the cuff, but you must understand that we are talking about a temporary measure that will only postpone the need to replace the cuff with a similar new part for some short period of time.
Moreover, you should be aware of the existence of “incurable” injuries, when it is most likely impossible to seal the cuff, and there is no point in doing so. We are talking about heavily worn cuffs, on which cracks will appear again and again.
How to repair the hatch cuff of a washing machine yourself
Today on the Internet there are many descriptions of what needs to be done if the cuff is torn. Sealing the cuff
Sealing a cuff - you will find a lot of materials on this topic on the Internet, and most importantly - advice from “sofa” craftsmen on how and with what to repair a cuff.
Advice
In principle, it is possible to seal the cuff - nowadays there are a sufficient number of effective adhesives, another issue is that they cannot withstand high temperatures (from 40 to 90 degrees), vibration and an aggressive environment, which is an aqueous solution of detergents.
Our experience
For more than 10 years, he has been closely involved in repairing washing machines. Despite their efforts, its craftsmen were never able to find a reliable means for gluing the cuff, despite the fact that they tested a variety of means: Moment, Superglues, Silicone adhesives, special adhesives, automotive adhesives, Permabond Rus, etc.. Your experience
However, taking into account the peculiarity of the mentality of Russians, who like to learn from their own mistakes, we will still tell you how to seal the cuff.
- From a prepared piece of thin rubber you need to cut a patch, which should be 1.5-2 centimeters larger than the damage along the entire perimeter.
- Thoroughly degrease the surfaces to be bonded with gasoline or alcohol.
- Apply a thin layer of glue to them.
- Connect the surfaces to be glued.
- Then the cuff is carefully unfolded in the most natural position for it and left for at least 24 hours.
- Test the patch by trying to tear it off. Then heat the patched cuff area with a hair dryer and try to tear off the patch again. The last stage of the test should be to place the “repaired” cuff in a large container of water, which must be brought to a boil or at least to a temperature of 90 degrees.
If you don’t believe it, you’re doing the right thing. Check it out for yourself if you don’t mind your time and washing machine. Cuff repair by suturing
There is another way to repair a cuff - by stitching. Service technicians will share their experience. Our experience
This repair method is very simple: the damaged area is sewn up and sealed with sealant. The cuff will hold water, but not for long.
What's happening
Under the influence of the vibration of the drum, the threads cut through the cuff, and the sealant completely flies off - it does not stick to the cuff at all.
Mechanical contraction
Mechanical tightening is, unfortunately, the only working way to repair the cuff. On the other hand, it is effective only for minor damage that is not located on the bend. Under these conditions, you can try to pull the hole through two coins pre-drilled in the middle.
Materials
To repair a cuff by mechanical tightening you will need:
- screw with nut and locknut;
- 2 coins;
- 2 washers;
- red high-temperature silicone gasket sealant (ABRO has proven itself well, its operating temperature is up to 343 ° C).
Repair algorithm
- We drill a hole in the middle of the coins, generously coat the hole, coins and screw with sealant.
- Place the washers on top of the coins and apply the resulting “devices” to the outside and inside of the hole.
- We insert the screw from the inside so that the smooth head of the screw is on the inside of the cuff, after which we tighten the entire “structure” with a nut.
- There is no need to remove the excess sealant that is squeezed out when screwing, it will fill all the pores, and the structure becomes monolithic and reliable. There is also no need to tighten it too much, so as not to damage the product itself.
There is also no need to immediately test the reliability - the sealant should dry well. You will end up with a patch that looks like a car gasket, firmly secured between two clips, with the edges of the coins forming the gasket.
Purpose of the seal
Why do you need a rubber seal? In almost all models of popular manufacturers, for example, Indesit, Samsung and LG, it plays the role of a sealant between the drum of the washing machine and its body. If the rubber band breaks, water may enter the electrical part of the device. As a result, the machine will fail.
Another rubber seal is located on the door. It serves to tightly close the washing machine after laundry has been loaded into it. If such a rubber band breaks, water will flow out of the drum, and this can lead to a short circuit.
When does the need for repair arise?
You may need to remove the old one and install a new rubber band in two cases:
- The part has worn out and its service life has expired.
- Mechanical damage has occurred.
An elastic band can break for several reasons:
- Low-quality detergents were used during the washing process.
- The washing machine was often used to wash heavy or hard items, such as sneakers or large outerwear.
- Loading and unloading laundry is very sloppy.
- The washing temperature exceeds the maximum permissible.
- Keys, nails and other sharp objects got into the drum.
How to understand that the rubber seal for the washing machine drum has failed? There are several signs:
- During washing, a puddle of water appears near a device of any model, for example, LG or Samsung.
- The machine door is harder to close than usual.
- During the washing process, you may hear extraneous sounds, for example, crackling. This is the most dangerous sign. If repairs are not started in time, a leak may occur, and then a short circuit.
The repair will depend on which seal needs to be repaired.
How to seal the hatch cuff in a washing machine
Cause of failure
Typically, the cuff breaks due to cracks that occur due to excessive vibration of the drum of your washing machine. To do this, first of all, you need to balance your unit on the floor surface.
The cuff also breaks due to friction against another part of the washing machine. In the future, friction will lead to displacement of the drum and more serious malfunctions of the washing machine. In this case, before gluing the cuff, eliminate any problems in the mechanism.
But, as experience shows, most often the cuff breaks due to the fact that foreign things regularly get into it, such as small change or sharp objects that you did not remove from the clothes before washing. If the cuff of your washing machine is cracking due to age, repairing it will not help. It will tear every time you wash it.
Preparation for repair
If the damage to the cuff is located on the outside, it can be glued without removing it. If the damage is internal, remove the clamp holding the cuff in place. In some models, this will require removing the hatch or even the drum. Choose a patch and glue. An ordinary medical glove, or even a condom, folded in several layers, is suitable for this purpose. The glue must remain elastic after hardening and be moisture resistant. Regular rubber or shoe polish is perfect for this purpose. You will also need scissors, surface degreasing liquid (alcohol, gasoline) and a soft cloth.
Cuff repair
If you choose rubber to seal the cuff, cut it to the size of the damaged area of the cuff. If you decide to seal the break with a regular condom or glove, fold the material in several layers, carefully gluing each layer of the future patch. And only then cut out the patch.
Please note that it should be approximately one and a half centimeters larger than the gust on all sides. The cuff must be thoroughly degreased, and after sealing, do not use the washing machine for about 24 hours.
Apply a patch and a sufficient layer of glue to the damaged surface, and then follow the instructions for the selected glue. For example, you will need time before gluing the parts together, or they will need to be put together immediately after applying the glue.
It is important that the patch lies on the cuff as naturally as possible, does not tighten the cuff and is smooth itself. After a day, run a test wash to make sure the washing machine works without leaks.
If you follow these instructions, the cuff will stop leaking. But it is worth remembering that gluing the cuff is only a temporary measure that will help until you purchase a new cuff, and it is better not to postpone this purchase. Frequent washing or washing at high temperatures may cause the patch to come off.
Source: https://youtwig.ru/news/kak_zakleit_manzhetu_lyuka_v_stiralnoy_mashine.html
The working process
Putting a new rubber band between the drum and the door is not that difficult. The main thing is to take it off correctly, and then put on another one. It is worth remembering that the repair of washing machines from different manufacturers, for example, LG and Indesit, may differ. So it's a good idea to read the instructions first.
The main difference is whether or not you need to unscrew the front wall. If the rubber band can be removed this way, the repair will be much easier. First of all, you need to remove the door. Then disconnect the special rim that holds the seal. A knife or a regular screwdriver will come in handy here. You need to act as carefully as possible so as not to break anything. After the headband is removed, you can remove the elastic band.
- If it is removed, you should unscrew the screws, remove the detergent compartment and the panel itself. After removing the rim, take out the seal.
- If the panel cannot be removed, you need to find a second metal rim from inside. Remove it and only then remove the elastic band.
If the rubber band in the washing machine between the drum and the door breaks, it would be better to replace it with a new one. How to do this correctly? Repeat the previous steps, but in reverse order:
- Before you put the rubber band on the drum of the washing machine, you need to determine its correct location. In its upper part there is a special mark, as in the photo, and inside and below there are drainage holes. This must be remembered before starting repairs.
- The next step is installing the metal rim. This is the most difficult job. The rim must be placed on the gutter and tightened with a screwdriver. This is the case if the front panel is removed.
- Next, in a certain order, as shown in the photo, it is necessary to install all the removed parts: counterweight, panel, lock, lower and upper parts of the panel, powder compartment, top cover.
- At the end, you need to install the elastic band in its place, securing it with the outer rim.
- Install the door.
Before removing the rubber band from the drum of the LG, Indesit, Samsung and other models of washing machines, you need to pay attention to a few tips:
- The rubber seal between the door and the drum is easy to damage. Therefore, you need to take it off and put it on as carefully as possible.
- The rim may bend during operation. You also need to be careful with him.
- You should not start repairs while intoxicated or after taking medications.
Removing and putting on the rubber seal in the washing machine is not that difficult. This work can be done independently, without the help of a specialist. Before starting repairs, it is recommended to read the instructions, then replacing the worn part can be done quickly and efficiently.
Causes of cuff damage
Note that damage to the hatch cuff of a washing machine is a common occurrence. If such a problem happened to your washing machine, then it is important to understand what exactly caused it in order to plan your next steps. Knowing the causes of the problem will allow you to understand whether it makes sense to repair it, that is, for example, to seal the sunroof cuff or whether you will have to change it.
Violation of the integrity of the cuff can be due to a number of reasons.
| Cuff damage | Causes of damage | Solution |
| Cuff cracks | The occurrence of cracks is associated with strong vibrations of the washing machine drum. | Regardless of what decision you make: seal the cuff or replace it, you must eliminate the cause of the increased vibration of the drum; |
| Wiping the cuff | The cuff is worn out due to malfunctions in the washing machine, as a result of which it rubs against some part. This often occurs due to the drum being misaligned. | The problem must be corrected before you make a decision: repair or replace the cuff, otherwise very soon the cuff will be damaged again. |
| Rupture or cut of the cuff | In the vast majority of cases, the cuff breaks or a cut appears on it due to the fault of the users of the washing machine, or rather, due to their negligence. The fact is that breaks and cuts are caused to the cuff by foreign objects, which, as a rule, fall into the drum from clothing pockets that were not checked before washing. | If you want to ensure that the hatch cuff of your washing machine is not damaged by various foreign objects, be sure to check the pockets of the clothes you put in the wash and check the drum itself, since foreign objects can be “placed” in it by children or pets. |
In case of all the listed damages, it is possible to seal the cuff, but you must understand that we are talking about a temporary measure that will only postpone the need to replace the cuff with a similar new part for some short period of time. Moreover, you should be aware of the existence of “incurable” injuries, when it is most likely impossible to seal the cuff, and there is no point in doing so. We are talking about heavily worn cuffs, on which cracks will appear again and again.