What are the effective methods and how to seal the gas tank so that it can be used in the future? Similar questions will be discussed in this section. After all, this topic concerns more used cars, and even those of domestic production.
Structurally, gas tanks are practically not protected from external damage, unlike their foreign counterparts. Often, small fractions of gravel, crushed stone, and asphalt bouncing off the rear wheels gradually destroy the coating of paint and primer, causing irreparable damage to the metal. After some time, the metal begins to rust. The driver begins to notice a fuel leak.
How to seal a car's gas tank?
Today there are two options for gluing:
- Using cold welding to seal cracks and holes;
- Epoxy glue or popularly called fiberglass. It is better to buy a two-component one.
Each method is good in its own way. Of course, you can find other ways to eliminate leaks in a gas tank, but they are less effective than the above.
Tools and related equipment
- Several sheets of sanding paper;
- Half a liter of acetone;
- Epoxy resin;
- Fiberglass.
First, we purchase all the above materials, carefully read the terms of the instructions for use.
Troubleshooting algorithm
- We drive the car onto a viewing hole or overpass;
- We mark the location of the leak with chalk;
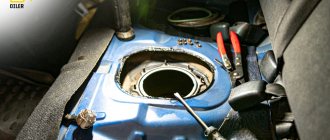
- We remove the fuel tank from the car;
- Pour out the remaining gasoline or diesel fuel;
- Be sure to dry it in the open air, since the vapors of the chemical reagent are explosive;
- Using a rag and a soap solution, we externally clean the gas tank from residual tar, dirt, and other impurities;
- To clean difficult-to-remove chemical compounds, we use coarse sandpaper;
- Degrease the surface of the gas tank with acetone. This procedure must be carried out several times, since the quality of gluing of the gas tank material depends on how well the degreasing is carried out;
Preparation stage and epoxy bonding
For gluing, it is necessary to use glue with a viscous consistency, otherwise the effect may not be achieved.
- We cut the pieces of fiberglass so that they protrude 1-2 cm more than the perimeter of the crack or other damage. We thoroughly soak the scraps of fabric in epoxy;
- Carefully place the fiberglass cloth on the surface of the gas tank so that there are no air bubbles left, otherwise eliminate the defects;
- Using a rag, remove excess glue and resin;
- Smoothes the glass strip with a small piece of plastic to make the platform even;
- After this, we proceed to apply the second ball and carry out a similar procedure. Depending on the degree of damage to the gas tank, the number of fiberglass balls is determined. Accordingly, minimal damage will require a minimum number of fiberglass balls, deeper affected areas will require a larger number of balls.
Note to the driver, it is necessary to remember that the quality of the rest of the structure depends on how the first layer is laid.
Each subsequent layer should be slightly wider than the previous one and at intervals of 15-20 minutes.
In addition, we impregnate the last layer with additional aluminum powder, which can be purchased at a car store.
After a day, the structure will completely dry and harden. You can sand it using fine sanding paper.
We proceed to painting or priming, depending on the need.
We use cold welding similarly to the above processes. Despite advanced technologies in the form of welding, many drivers prefer old, proven and durable methods. So the question of how to seal the gas tank has already been sorted out. A similar procedure can be carried out both in a garage and at a car service center, depending on your decision.
A fairly common occurrence that can catch the driver in the most unexpected situation. Failure of a gas tank is a serious problem that must be at least partially eliminated at the scene of the accident. This will allow you to transport the car to the nearest service center, where a major inspection and repair can be carried out. Repairing a gas tank with your own hands is not too difficult for people who have some knowledge about this.
The location of the gas tank is the lower right corner of the rear sector of the vehicle. This is due to ensuring safety for the driver and passengers, as well as the formation of the correct center of gravity in the car, which improves its handling. However, the lower section most often suffers from constant physical impact, which leads to repeated damage to all the mechanisms located here. The fuel tank is no exception.
Causes of damage to the gas tank and basic repairs
Failure of gas tanks is most often associated with gradual development. Their effect on the inside of the fuel tank is especially dangerous. The provoking factor for the appearance of rust is water. It is almost impossible to avoid it getting into the tank.
Also, the cause of holes in the gas tank may be a malfunction in the vehicle's power system. A discharged pressure is formed inside the tank, which provokes the formation of an extreme load on all the walls of the fuel container. After some time, it becomes covered with small mechanical cracks.
Rules for repairing a gas tank of any type:
- Before starting the procedure, it is required from the gas tank. Using a jack, the car is installed in an inclined position. Gasoline is drained using pipes. Next, the gas tank should be thoroughly dried.
- Determine the extent to which it is necessary to completely remove the fuel tank for repair work. It is recommended to take into account the area of damage and the degree of ease of repair.
- Determine the feasibility of conducting full monitoring of the tank for the presence of additional holes.
Methods for repairing fuel storage tanks
There are several ways to troubleshoot. Most of them are applicable in extreme conditions, which will avoid spending additional money on.
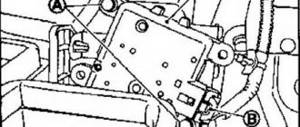
Installing the patch using a nut bolt and rubber gasket
. First, using available means, you need to expand the hole in the tank to a size that matches the bolt. A washer with a rubber gasket is placed on its narrow part. Then the entire structure is inserted into the hole through the neck. A cuff with a washer is installed on the outside and tightened with a nut.
The rubber must be petrol resistant. Not every driver has such material stored in his car. A camera from any truck will be suitable as a replacement. This patch is considered quite durable. When contacting a service station, you can wait. This method is often used by truckers who spend most of their time on the road. A good patch can last more than five years.
Using Moment glue or any of its analogues to repair damage
. The method is relevant for not very serious damage. To create a patch, you need a piece of dense but pliable fabric soaked in glue. It needs to be pressed firmly to the site of injury and held for a while. After the main gluing, the patch should be treated with nitro paint from the repair kit. This is a temporary measure to allow you to get to the nearest service station.
In the video, repairing a hole in the gas tank:
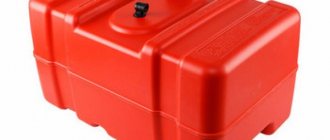
Temporary replacement of the gas tank with any bottle.
The method is suitable for breakdown of the fuel capacity of carburetor-type cars. A plastic or any other container is filled with gasoline, and a hose running from the gas pump to the fuel tank is immersed in it. The container should be securely secured so that it does not tip over and lead to negative consequences. This method will easily help the driver get out of a difficult situation.
Repairing damage with laundry soap
. The method is considered effective only for superficial problems.
Sealing the crack area with epoxy glue and fiberglass
. The gluing area must be thoroughly cleaned and dried, and the gasoline must be drained. Clean the work area with sandpaper, degrease and dry again. A piece of fiberglass must be glued to the damaged area. After complete drying, apply another patch of the same type. The number of layers must be at least three. When gluing the last layer, you should use a plasticizer, which can be aluminum powder.
Repair of plastic gas tanks and metal gas tanks using cold welding
. The best fight against holes. Damage is removed using epoxy resin. The first stage of work is sanding the surface with sandpaper. Then, in a separate container, mix the epoxy resin with the hardener until a homogeneous mass is obtained. If heating is required, the container can be placed on the engine. This method also uses a fabric patch. Saturate it generously with the resulting mixture and apply it to the hole in the fuel tank. Let dry thoroughly. This patch is very strong and can last quite a long time.
hole in the gas tank. soldering or cold welding
bring it guys! So I returned from the Black Sea. 11 thousand km were driven in 3 weeks. a lot of impressions, a report with photos will be coming soon
In the meantime, the question is: the gas tank broke under Samara. the hole is 3 cm long and 0.5 cm wide. It was sealed with cold welding. I returned home and I’m thinking about soldering to make it humanly possible or leave it as is?
I looked beforehand to remove the tank you have to disassemble the whole backside.
H.z.