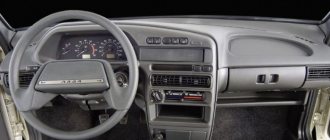
Operating instructions for the VAZ-2115 on-board computer
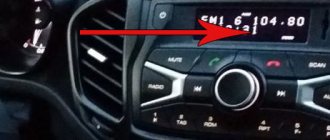
Cars manufactured on the territory of the Russian Federation are equipped with a computer. The first on-board computer appeared on the VAZ-2114. In simple terms, the on-board computer can be considered a kind of electronic reference book on the condition of the car. The driver needs it in order to understand the condition of his car, as well as what faults have appeared in it.
The first on-board computers on domestic cars performed the following functions:
- Controlling the amount of fuel poured into the tank.
- An approximate calculation of the distance that can be driven with the remaining fuel in the tank.
- Monitoring the temperature of the coolant in the engine, as well as preventing it from overheating.
The modern on-board computer on the VAZ-2115 is designed for:
- transmitting information about indicators “online”;
- displaying information on the information panel;
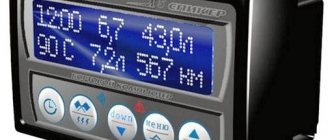
- reflections of route parameters, such as current fuel consumption, travel time, number of kilometers traveled, etc.;
- diagnostics of the engine condition with subsequent display of errors on the on-board computer screen.
Among other things, depending on the vehicle’s configuration, its on-board computer may receive the following data:
- information about the time of the next vehicle maintenance;
- information about the need for adjustments to certain vehicle functions;
- warning about the need to renew the insurance policy;
- information from the organizer;
- parameters at which the cooling system fan will automatically turn on.
Operating principle of the on-board computer
Cars such as the VAZ-2109 were equipped with devices that acted as routers. Let us remember that these were carburetor cars. But the VAZ-2114 and 2115 began to be equipped with injection power plants, which required the use of a completely different type of device.
Therefore, the main functions of the on-board computer on these cars are diagnostics, as well as control of the operation of almost all vehicle systems.
The principle of operation of the on-board computer on the VAZ-2115 is as follows:
- acceptance of signals using the control unit, their subsequent processing and output of the necessary information to the computer display;
- the ability to make some adjustments;
- processing of signals received from systems that are not controlled by the controller. If an abnormal situation occurs in the car, a sound signal will be sent to the on-board computer, and error information will appear on its screen.
What capabilities should an on-board computer have?
In the following list we present the most important functions that every bookmaker should have:
- Remaining fuel in the tank.
- Battery voltage.
- Time.
- Antifreeze temperature.
- Temperature outside.
Additionally, the following options are available:
- Average gasoline consumption per 100 kilometers.
- Quality of engine oil.
- Worn spark plugs.
The Multitronics X140 diagnostic computer, in addition to the above capabilities, has voice guidance. This function warns the driver in time about various changes in the car. For example, when fuel runs out, the system instantly notifies you if there is less than 5 liters of gasoline left in the tank. In cold weather, the computer reminds you that there may be ice on the road.
We recommend: Is it necessary to warm up the engine before driving in winter and summer?
According to reviews from experienced drivers, some are very annoyed by the display backlight when driving in the evening/at night. But after some time of use, everyone gets used to this device, and driving without it becomes no longer so convenient.
Diagnostic capabilities of Multitronics x140:
- Gasoline consumption while driving and parking.
- Antifreeze temperature. This indicator allows you to monitor the proper operation of the temperature sensor. It also determines the process of warming up the internal combustion engine.
- The voltage of the car's electrical network in volts. Thanks to this parameter, you can timely track various generator malfunctions, belt slippage and other breakdowns in the on-board system.
- The tachometer displays the crankshaft speed when the engine is idling. If the deviations are significant, this indicates that there is a malfunction in the vehicle’s fuel system.
- Throttle position. Using this characteristic, you can monitor the health of the sensor (TPS). In addition, the driver knows about the depth of travel of the gas pedal. When the engine is turned off, but the ignition is on, when you press the pedal, the indicators should smoothly change from 0 to 100 percent.
- Speed. Duplicates the traditional speedometer, but here the readings are more accurate.
- Malfunctions of the injection system.
Thus, the on-board computer in question receives all diagnostic fault codes and interprets them on its display in a form understandable to the driver. BC allows you to reset accumulated information.
Brief instructions for operating the on-board computer
When you purchase a VAZ-2115 car, you will receive instructions for operating the on-board computer along with it. It describes in detail what to do in various situations. And now it’s time to talk about how to properly use the on-board computer on the VAZ-2115. To do this you need:
How to reset the standard computer board on a VAZ 2114
Standard on-board computer 2114
Review of the standard on-board computer VAZ
2113 - 2115 Trip computer readings How to reset...
- Study the instructions with the on-board computer information display turned on. Such an action is necessary if the bookmaker is endowed with numerous different functions, which are impossible to understand on your own;
- greatest attention should be paid to the symbols and icons corresponding to emergency commands;
- The operation of the VAZ-2115 on-board computer is regulated using a special panel with buttons. Once you understand what functions each button performs, it will be much easier to manage the bookmaker.
There is no need to memorize all kinds of error codes. It’s best to simply find the designations of all the errors on the Internet, where, by the way, they are freely available, print them out on a piece of paper and carry them with you in the car all the time. And when you see a particular error code on the computer information board, it won’t take you much time to understand what exactly it means, you just need to look at the previously printed list.
By the way, it often happens that the on-board computer issues a danger signal for absolutely no reason. The reason for this may be the on-board computer processor or some sensor that is not working correctly. Remember, no one is immune from electronic errors. Nevertheless, in the vast majority of cases, the VAZ-2115 on-board computer works quite correctly.
Broken wire to the line on a VAZ 2114. Do-it-yourself diagnostics using the K-line, part 1
The control unit is a microprocessor device and can transmit information about its operation via a serial communication channel.
The standard for such a channel in automotive electronics is the K-line. The diagnostic line is a means of transmitting information between the electronic unit and external devices: immobilizer, testing equipment, diagnostic devices. Communication with the immobilizer is established after turning on the ignition switch. The control unit and the immobilizer exchange via the K-line the parameters specified during training of the immobilizer. If the parameters meet the specified conditions, the electronic unit proceeds to the normal operation of the control algorithm. Failures and malfunctions in the communication lines with the immobilizer, mismatch of training parameters transfer the control program of the unit to a mode in which engine operation is impossible. The K-line in the car is connected to a diagnostic connector, to which a tester can be connected to diagnose the operation of the control system. The standard software protocol for data exchange between devices and the electronic unit, implemented in these devices, makes the operation of all devices connected to the K-line transparent. Lack of communication between the control unit and the diagnostic tool may indicate a malfunction of both devices. If there is no such connection, and confidence in the performance of the tester is beyond doubt, then the first step is to check the diagnostic circuit. First you need to make sure that there is power to the on-board network at the control unit and the K-line circuit from the control unit reaches the diagnostic connector. The voltage at the K-line terminal of the diagnostic connector, with a working circuit, is equal to the on-board network voltage. Since the K-line circuit is connected to the diagnostic connector through the immobilizer connector, checking the circuit should be carried out taking into account the serviceability of the immobilizer. If the immobilizer is not functionally involved in the system, it is best to connect the wires (K-line input and output) directly from the immobilizer connector. During the preparation of production, it was assumed that immobilizers would be installed on some cars with a control system based on blocks from Bosch. But mass production of immobilizers was not prepared in the required time frame. In this case, if the wiring harness provides for the installation of an immobilizer, the connection between the diagnostic output of the control unit and the diagnostic block is broken. To correct this situation, it is necessary to install a jumper between pins 9 and 18 of the immobilizer connector. On vehicles where the wiring harness does not provide for the installation of an immobilizer, this problem does not exist. Good day to everyone who is reading this entry! And so I’ll start with the fact that I don’t have an on-board computer, I have a desire to install it, but more on that later. There was an interest in identifying my car with my own hands. In one of the previous articles, I wrote that after a rainstorm I filled up the air flow sensor, the check light came on and I went for diagnostics: they charged me 100 UAH. Within 30 seconds, having discovered that the sensor does not work, it needs to be replaced. I don’t need professional diagnostics; if necessary, I’ll go to a diagnostician, and for easy diagnostics, I decided to buy a K-line scanner
VAG-Com 409.1 K – Line scanner
oh, and even though my car is from 2004, it is 1.5l and 8kl with EURO-2, and is equipped with an ODB-1 connector. I googled it: it turns out that ODB-2 was already installed but on 16kL cars with EURO-3 from earlier years. I also had to buy an adapter with
Adapter OBD-II 16pin to GM12
I ordered everything from the online store, along with the cords I received a disk with programs for diagnostics and a bunch of different information on diagnostics. I configured all the com ports on the laptop and went into the garage with the laptop to try. I plugged it in, turned on the ignition, bam, and the fuel pump immediately began to hum without stopping. Naturally, nothing happened and I abandoned the matter (and this was last year at the end of autumn). Well, it’s already warm - there is a desire to resume this business. When I rang the adapter, I didn’t really understand anything, one rings 3 at a time, some don’t ring at all, I decided to redo it all. As you know, for diagnostics via the K-line you only need 3 wires (channels): 1) potassium itself 2) +12V 3) -12V aka ground, ground
K-line connection
I would like to note that in the figure above the contacts on the adapter are drawn as they should be, and not on the adapter or block! So imagine applying the adapter and think about where the contacts on the adapter and block should be, here is the picture below
location of K-line contacts on the blocks
Lamaaat adapter! Well, what can you do, the design is not collapsible (breaking the connector turned out to be not an easy task))) the black body is very hard, everything inside is still filled with white plastic. 4 wires are soldered, everything is called where which goes to the adapter where is the K-line, +12 and ground, the fourth, judging by the continuity, is the L-line, which we do not need. I’ll connect these 3 wires directly to the diagnostic block and try to connect to the ECU again! Good luck for me! Read the continuation!
| Do not forget to disconnect the battery before performing any manipulations. Next, you need to get the trip computer itself (MK or BC). It is obtained in the same way as a watch, by prying it off with a screwdriver. The BC is held on by four plastic latching brackets, two at the bottom and two at the top. Next, you need to familiarize yourself with the bookmaker itself, with the inscriptions on the back side. Why this is necessary, I explain, initially the BC of the Kursk Schetmash (passport) (I can lie further, but as far as I understood everything exactly like this) was obliged to contact the K-line, but VAZ changed the technical specifications, and the firmware was cut off, i.e. the part responsible for communication with the ECU was simply cut out. |
|
| If there is a track, and when you press the 'clock' button in clock mode, nothing happens, then you have a full-fledged BC with defective firmware that needs to be updated (file 527-10.hex and instructions for the firmware are in the archive). You can update the firmware using standard means (by unsoldering the processor, it is there, by the way, PIC18F252, and flashing the firmware in the header, or by soldering the wires directly to the legs, I did this), or through the K-line from the PC. There is information that this did not work with all K-line adapters, plus for this you need to have Win 95-98, some did it on XP, but most had problems with XP. In order not to install Win 95-98 solely because of the BC firmware, you can use a virtual machine (thanks to Ivan Kuchinsky for the successful experiment). |
The K-line is connected to the BC block simply; fairly common contacts are used there. We prepare a contact with a wire, insert it into the BC connection block, and connect it to pin 7 of the OBD-II block. Next, select your controller in the settings, as described in paragraph 3.8.3 of the BC instructions:
- ECU.0 - M1.5.4
- ECU.1 - M1.5.4N or January-5.1
- ECU.2 - MP7.0
- ECU.3 - MIKAS 5.4, MIKAS 7.1, 301.3763 000-01
- ECU.4 - Bosch 7.97
Communication with the controller only when the ignition is on. Information does not appear immediately! We wait patiently from a few seconds to minutes.
By the way, it doesn’t work fully with Bosch 7.9.7, but there is an option to look at errors and reset it.
What I mean is that it is not indicated in the instructions at all. And yet, don’t be afraid to kill him! You will always have the opportunity to buy the same PIC18F252 processor and flash it (ask anyone who is interested in or works with microelectronics) separately, or solder it and flash it. But this does not at all negate the accuracy and thoughtfulness of actions! If you have any questions, I am ready to provide clarification. Instructions on how to check the VAZ K-line
10/11/2014 02:52
Most often, the solution to the problem really lies in breaking the K-line wire. That is, the wire has simply moved slightly out of the block (the APS block of the immobilizer, or the BC block) and there is no longer any contact.
If you have checked all the contacts, but the on-board computer still does not see the K-line wire, then you can proceed as follows:
1) Check the voltage on the K-line. We set the multimeter to the mode for measuring constant voltage, connect the red probe to the K-line, and the black probe to ground to any point on the body. The readings on the device should be 12+-2V. You cannot use a lamp to check the voltage, because it has a load.
2) If on your VAZ the connector with the APS is disconnected, then check for the presence of a jumper in the APS block between pins 9 and 18.
3) The problem may be in the immobilizer (the K-line signal comes, but disappears after the immobilizer). Check for the presence of a K-line on pin 18 of the APS block. Using the same method, you can check whether there is a break between the APS block and the BC block.
4) Interference or broken wire. Try replacing the wire from the BC to the diagnostic connector with a new, shorter one.
You can also check the k-line at a service center using computer diagnostics, or by connecting a known working on-board computer to the car. And if the k-line does not work and at the same time there are problems with starting the engine, then start checking the additional VAZ fuses.
Thematic materials:
Operating instructions for Chevrolet Captiva Opel Astra or Kia Rio - which is better? Features of self-change of oil in the automatic transmission of a kia rio car Description of the M20 Pobeda model (M20 Pobeda) Oil volume in the engine of a tank d 12 Motorcycle 125 technical characteristics History of domestic mopeds Bicycle engine “Irtysh” History of ZID mopeds: serial, conceptual and racing models
103583
If you notice an error, select a piece of text and press Ctrl+Enter
What to do if the on-board computer on the VAZ-2115 stops working
Sometimes it happens that even though the car is in full working order, the on-board computer completely refuses to work. What to do in this case?
Of course, you can try to fix the problem yourself. But it’s still much better if a real specialist does this. It is he who will be able to reliably determine the cause of the device malfunction.
But before going to the service center, the first thing to do is check fuse F3, which could simply have blown. It is installed in the power supply circuit of the VAZ-2115 processor. If, after replacing the fuse, the on-board computer still shows no signs of life, you can also check the connectors connected to it. We repeat that if you are not an electrician, and generally do not have much knowledge of electronics, this task should be entrusted to a professional.
Remember, any malfunction that the on-board computer shows can be eliminated, just like a breakdown of the on-board computer itself. But, as they say, it is better to prevent a problem than to solve it later. Therefore, each car should be kept in good condition, undergo technical inspection on time and replace spare parts that are out of order. Among other things, it is better not to allow spare parts to break at all, but to replace them as they wear out. Only in this case will driving the car be safe from a technical point of view, and during the trip there will be no emergency situations associated with improper operation of the car.
The serviceability of your car is a guarantee of the safety of both the driver and passengers.
There is a special offer on our website. You can get a free consultation with our corporate lawyer by simply submitting your question in the form below.
Five days ago I finished what I had been doing for a month... I was soaring that the BC screen was glowing green when the inscriptions were glowing red. Not in order! I was looking for how to do it, there is no information, only rare perverts do this. But one day I found an article that explained everything very clearly! A question came into my head: “Overexposure on the board! Why didn’t I think of it?!” I began to disassemble the BC and took it apart. To begin with, I soldered 3mm matte LEDs to SMD.
Then I began to think about how to get the screen.
I decided to follow the instructions in the article - bite off the legs with side cutters... In vain. After the first leg I bit off, the screen bent and cracked in the corner. Well yeah. Okay, it won’t be very noticeable, I take a second bite and it cracks in the middle!
After that, the work stopped - I searched for a donor for 2 weeks, found him for 700 rubles. I decided to desolder the screen with a DMMC soldering gun. The high temperature causes the screen to heat up and darken, but as soon as it cools down, the crystals return to normal. They soldered it in four hands, there is no photo of the process. Photos will not convey the subtlety of that moment. I will say this, very carefully, first heating one side gradually, I bent the screen with tweezers, VERY CAREFULLY, the tweezers are iron, and the screen is glass. But we still tore off one leg. I attached it back and then couldn’t even find where that leg was. Then again a downtime of 1 week. Either there is no time, then there is no desire. But when I started collecting, I collected until 4 in the morning. I found thin PCB and red diodes and began to come up with a board. The main question was how to arrange the diodes evenly and add more resistance for them. I didn’t read the article carefully... In the original, the author did it without resistance, because those screen legs are supplied with 3 V, but for some reason I thought that 12... Okay, I more or less made the circuit, etched it out, it didn’t work, I didn’t do it right. It worked the second time.
Operating principle of the on-board computer
Cars such as the VAZ-2109 were equipped with devices that served as routers. Let us remember that these were carburetor cars. But VAZ-2114 not 2115 began to be equipped with injection power plants, which required the introduction of a completely different type of device.
Therefore, the main functions of the on-board vehicle on these vehicles are diagnostics, in addition to controlling the operation of almost all vehicle systems.
The mechanism of operation of the on-board vehicle on the VAZ-2115 consists of the following processes:
- acceptance of signals with the implementation of a control unit, their subsequent processing does not provide the necessary information on the computer screen;
- the possibility of making some adjustments;
- processing of signals acquired from systems that are not controlled by the controller. If an emergency occurs in the car, a sound signal will be sent to the on-board vehicle, and error information will appear on its screen.
Standard on-board computer 2114
Review of the standard on-board computer VAZ
2113.
2115
Trip computer reading values How to reset.
- Study the instructions with the on-board computer information display turned on. Such an action is necessary if the bookmaker is endowed with numerous different functions, which are impossible to understand on your own;
- greatest attention should be paid to the symbols and icons corresponding to emergency commands;
- The operation of the VAZ-2115 on-board computer is regulated using a special panel with buttons. Once you understand what functions each button performs, it will be much easier to manage the bookmaker.
What to do if the on-board computer on the VAZ-2115 stops working
Sometimes it happens that even though the car is in full working order, the on-board computer completely refuses to work. What to do in this case?
Of course, you can try to fix the problem yourself. But it’s still much better if a real specialist does this. It is he who will be able to reliably determine the cause of the device malfunction.
But before going to the service center, the first thing to do is check fuse F3, which could simply have blown. It should be borne in mind that on a VAZ 2101-2107 it is not at all necessary to purchase a new clutch disc and replace the old one. It is installed in the power supply circuit of the VAZ-2115 processor. If, after replacing the fuse, the on-board computer still shows no signs of life, you can also check the connectors connected to it. We repeat that if you are not an electrician, and generally do not have much knowledge of electronics, this task should be entrusted to a professional.
Remember, any malfunction that the on-board computer shows can be eliminated, just like a breakdown of the on-board computer itself. But, as they say, it is better to prevent a problem than to solve it later. Therefore, each car should be kept in good condition, undergo technical inspection on time and replace spare parts that are out of order. Among other things, it is better not to allow spare parts to break at all, but to replace them as they wear out. There is another fuse near the motor. On the VAZ 2115, can you tell me where it is located? Only in this case will driving the car be safe from a technical point of view, and during the trip there will be no emergency situations associated with improper operation of the car.
The serviceability of your car is a guarantee of the safety of both the driver and passengers.
There is a special offer on our website. You can get a free consultation with our corporate lawyer by simply submitting your question in the form below.
Recommendations
Comments 40
Contact them on their website: www.multitronics.ru/supp they always provided advice before.
I have exactly the same one. Write what happened
I think that my ECU January 7.2 Avtel is simply not compatible with it ((
I also have January, and it works. Judging by the video, it shows the voltage correctly. The temperature inside is 222, so the wire with the sensor is not connected. Did you connect to the diagnostic connector? Top row, second from the right, it seems
It will be useful: Do-it-yourself repair and replacement of vesta vases
I have an x115 on-board vehicle and everything works (so of course I connected it)
Why didn’t you like the old one?)
It contains less information. missing (speedometer, instantaneous consumption, average consumption)
If my memory serves me correctly, then I have the same BC and it shows the average consumption, for which I don’t remember the instantaneous, but there are also l/hour. Why didn't you like the speedometer on the dashboard?)))
Don’t know))) I’m used to having it on the trip computer
I looked today, I have an X114, it’s probably different in some way)
You must have voiceover
that's all the difference))
clear) in extreme heat or cold, does the BC malfunction?
Ummmmm, definitely not in the heat. But I can’t say anything about the cold, because... I installed it in April)))))
find instructions on the internet (if you don’t have them) you need page nine! pull out the immobilizer block and see if you have a jumper as in the picture in the instructions, if not, then put it back in, plug the connector back in, try to start the BC again, if that doesn’t work, pull the connector back from the immobilizer without plugging it in, try again (THAT IS IF YOU HAVE AN IMOBILIZER YOU ARE INACTIVE!)
there are brains that are closed and need to be hacked
