How to tighten the alternator belt on a Priora that does not have an additional option
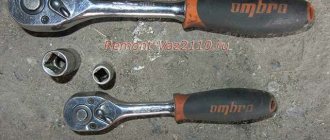
If a regular Priora does not have an additional air conditioner or power steering installed, then the generator drive belt is tightened by moving the unit itself on a movable lower mount. The generator belt tensioning system on such machines is designed in such a way that there is no need, as was the case on previous models, to displace the generator using a crowbar or pry bar. There is a special device here that allows you to perform this operation by rotating the adjusting screw with a wrench. To tighten the belt you only need two keys:
- 10mm ring wrench;
- wrench 13.
This is quite enough. According to the procedure, first of all it is necessary to turn off the power to the machine.
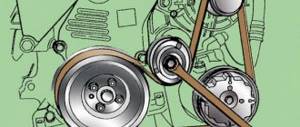
After disconnecting the negative terminal, you can begin adjustment. First of all, loosen the fixing nut 13 on the upper mount of the generator by one turn. After this, you need to loosen the nut of the lower mounting bolt by 1.5-2 turns. Well, after that, you can tighten the belt by rotating the long adjusting bolt clockwise with a 10mm socket head. During the tensioning process, you need to be careful not to tighten the belt too much. If the tension is strong, it puts too much load on the generator bearings when the engine is running, and quickly damages them. But we must take into account that modern dynamos installed on Priora are designed for a limited number of bearing replacements. They can be replaced 2 at most 3 times. Then the body needs to be changed. In this regard, the belt tension must be strictly defined. If you don’t have a special measuring device, you can check it by eye. You need to take the belt in a free area and turn it. It should rotate freely around its axis by 45 degrees, and with noticeable force by 90. This is a normal position. It is quite possible using a ruler as in the figure.
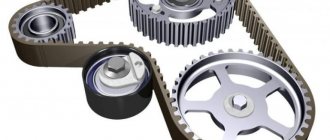
Step-by-step tensioning of the generator belt
Probably every car owner, especially those with experience, knows that during the operation of a Priora or another car model, the belt drive is subjected to a slight, but still stretching. This, in turn, reduces the degree of adhesion of this element to the rollers and pulleys. There is only one way out of this situation - to properly tension the belt drive.
You can make sure that the alternator belt needs tensioning by the peculiar whistle that is heard when the engine is activated.
Tensioning the belt drive is easy if the car owner performs the work in a certain sequence and prepares the following tool:
- two wrenches size 19 (socket and open-end);
- a wrench that is required to work with a car roller, used to replace the disk on a tool called an “grinder”;
- protective gloves if necessary.
Having prepared the necessary tools, you can begin to tension the alternator belt yourself:
- The fastening of the roller is loosened using a tension wrench, with which you need to hold the tension roller cage.
- When making rotational movements using a tension wrench, you need to carefully rotate the belt drive tension roller cage, thereby increasing the tension force of the belt.
- Having tightened the generator belt to the desired level, you should securely fix the previously loosened roller fastener.
A correctly tensioned belt drive should bend by about 10 mm with slight pressure between the pulleys, but this only applies to the simplest vehicle configuration. After all, if the Priora is equipped with a car air conditioner or power steering, then the belt drive should provide a different trajectory of movement, since the area of interaction between the pulleys and the belt should be slightly reduced. If upon visual inspection the compensation is not enough, you will have to repeat the tensioning process to tighten the belt a little more. Experienced drivers can determine the belt tension by ear. If the element whistles and slips after tensioning, then the tension will be insufficient, and if you overdo this process, the bearings will make a hum.
How to determine the need for replacement or adjustment
The condition and tension of the belt must be checked at least once a quarter.
This will allow you to quickly detect weak tension or damage to the belt. A whistle that appears when starting the engine and accelerating the car indicates weak belt tension. Rapid battery discharge (as well as weak charging current) may also indicate a loose alternator belt. The service life of a high-quality alternator belt is 40–60 thousand kilometers or 2 years. After this, the belt must be replaced, even if it looks normal. If cracks or breaks appear on the belt, it must be replaced, regardless of mileage. To determine the condition of the belt, it is necessary to carry out diagnostics.
Checking the condition of the belt
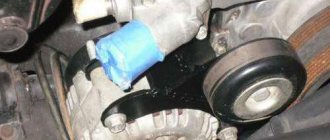
On 8 and 16 valve engines, diagnostics are carried out in the same way. To do this, you need to lift the front right side of the car using a jack and place a safety support on the mod car. Do not work under a machine that is supported by a jack; this can be fatal. Any awkward movement can cause the car to jump off the jack and fall to the ground.
Remove the front right wheel, then unscrew the screws and remove the plastic fender liner. This will allow you to get close to the crankshaft pulley and the alternator belt. To check the tension, press the belt at its longest point. When pressed, it should push down 1 cm. If it pushes down easily by 1.5 - 2 cm or more, tighten it. If it is pressed down less than 1 cm, the tension must be loosened.
Carefully inspect the belt and tension roller. If the belt has cracks, tears or severe wear, it must be replaced. If grease comes out of the roller, it and the belt must be replaced. Try turning the generator impeller by hand. If it spins, the belt is not tensioned enough.
How to change the alternator belt on a Priora yourself?
Home » Alternator » How to change the alternator belt on a Priora yourself?
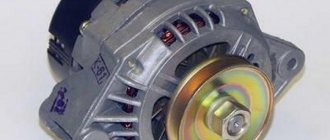
As you know, the correct operation of the generator unit largely affects the performance of the vehicle as a whole. And domestic cars Lada Priora in this case are no exception. Like any other unit, this unit requires periodic maintenance. In this article we will talk about the signs by which you can calculate the wear of a Priora alternator belt and how to replace it yourself.
In what cases is it necessary to check and change the belt on a Lada Priora 8 or 16 valves, which belt is better to use, how to tighten the tensioner correctly?
First, let's look at the main signs of wear:
- First of all, the check is carried out if the strap begins to whistle. The whistle usually appears when starting the engine, increasing the speed, or activating electrical equipment. Sometimes fixing the problem involves tightening the strap by tightening the tension roller. If the tension is normal, there is a possibility that one of the drives, for example, a compressor or generator unit, is jammed. Also, the whistling may be due to wear of the bearing elements of the Conder clutch; all worn bearings must be replaced.
- With the motor turned off, you should carefully inspect the device. If it is clear that the strap has lost its elasticity or has become damaged in the form of cracks, delamination or tears, this indicates that it will soon have to be replaced.
- Looseness may also be due to wear on the tension roller.
- The car begins to shake when the electrical equipment is activated. This problem happens very rarely and usually in such cases car owners have no idea what to do. Reduced traction and shaking can be caused by high loads on the car's electrical network.
- The low battery indicator began to light up on the dashboard, and you are sure that the battery itself is functioning normally and is fully charged. But keep in mind that this problem may also be associated with wear of the component parts of the generator set, for example, brushes or rotor (video author - Vladimir Z).
Step-by-step instructions for replacing consumables on models without power steering and air conditioning
Briefly about how to disassemble the main elements and remove the strap in cars without air conditioning and power steering:
- First of all, it is necessary to loosen the nut of the generator unit bracket using a wrench, as well as the adjusting screw.
- Next, the unit should be moved as far as possible towards the engine.
- After this, you need to unscrew the bolts securing the front wheel (right) and remove it.
- Next, the fender liner is dismantled, so you can gain access to the installed strap.
- It should now be removed from the pulley and replaced.
- A new strap is installed, after which it is tightened. The tension is checked - note that the part should be normally tensioned, but not overtightened. Over-tightening can cause more accelerated wear of the bearing device.
Photo gallery “We change it ourselves”
1. Unscrew the nut on the bracket. 2. Remove the screw. 3. Remove the old belt from the pulley and install a new one.
Guide to replacing a car with power steering or air conditioning
The size of the strap with power steering and air conditioning is 1125 mm.
Replacement is carried out as follows:
- First, you should treat the screws that secure the power unit cushion and the bracket with WD-40, this will allow you to unscrew them without any problems.
- Wait about 20 minutes, then unscrew the nuts that secure the bracket.
- Now the front wheel should be jacked up. Unscrew the bolts that secure it, then place a reliable support under the engine; the wheel itself can be removed.
- Lower the car slightly and unscrew the installation tension roller.
- After completing these steps, you can bend the strap a little and unscrew the screws that secure the pillow.
- After this, the car must be lowered slightly so that the power unit begins to hang out. Having done this, the pillow should be moved slightly towards the engine.
- Now you can start replacing the strap. The old belt is removed, its installation location on the pulley is cleaned, and a new one is installed.
- The vehicle is raised on a jack to lower the engine. You must be careful at this stage, otherwise it may cause the strap to become dislodged, as well as the cushion.
- Now all the screws and nuts should be screwed back in. The wheel is put in place, the bolts are tightened, the car is removed from the jack (the author of the video is the channel Diary of Mechanics).
Stretching and checking
To tension and check, follow these steps:
- First you need to loosen the nut that secures the roller, and the clip should be secured with a wrench.
- Rotate the wrench to turn the roller cage, after which its nut should be tightened.
- Now you need to check the tension on the longest section of the belt, between the pulleys.
- If you press on this section, the installation belt will bend; no more than 1 cm of deflection is allowed. This is true for models without power steering and air conditioner.
- As for a car with power steering, in this case the tension should be stronger; insufficient tension will be accompanied by a whistle. If it is too strong, there will be a hum from the bearing devices.
Video “Features of belt tensioning on Priora”
The main features and nuances of this process are shown in the video below (author - channel A little bit of everything).
Support the project - share the link, thank you! Rate this article: Do you have any questions? Specialists and readers of the Avtoklema website will help you ask a question
avtoklema.com
How to change the alternator belt on different engines
The mounting location of the generator on 8-valve engines depends on the presence of a power steering pump. If a power steering pump is installed, then the generator is placed above it, using a mount similar to that used on 16-valve engines. Therefore, the technology for replacing the alternator belt on 8-valve engines without power steering and air conditioning differs from the same operation on any other engine.
8-valve engine without power steering
Loosen the nut that secures the generator to the guide bar and move it towards the engine. Remove the old belt and put on the new one. Move the generator away from the engine and tighten the nut a little. Tighten the tension bolt and from time to time press the belt with one finger in the middle between the generator and crankshaft pulleys. It should be pushed down by 1 cm. If it’s pushed down more, you need to tighten the bolt a little. If you cannot push the belt through, loosen the bolt. When you have finished adjusting the belt tension, tighten the locking nut.
8-valve engine with power steering and 16-valve engine
Remove the front right wheel and plastic fender liner. Place a jack under the engine. Some car enthusiasts and craftsmen prefer to use a stand rather than a jack for this, adjusting the engine height by raising and lowering the body. But this method is much less safe, because it is impossible to install a support stand. Without it, any work under the car poses a fatal risk.
The best alternator belts for Priora
The service life of the alternator belt on a Lada Priora car reaches 60,000 km, but quite often after replacing the belt it begins to whistle. After tightening, the whistle goes away, but appears again until the tension roller can no longer tighten the belt. This is due to the fact that the car uses a low-quality belt.
The table below shows the best and highest quality alternator belts.
Price and dimensions of the Priora generator frames
| Manufacturer | Size | Price, (rubles) |
| Gates | 742, 1115, 1125 | 400-800 |
| Dayco | 742, 1115, 1125 | 600-800 |
| Luzar | 742, 1115, 1125, 1420 | 350-700 |
| Lada | 742, 1115, 1125, 1420 | 500-800 |