The power plant of a vehicle is considered the main automotive unit, the operation of which gives utility to the mechanical vehicle and benefits from its functioning. The engine of a car must be operated under certain conditions; failure to comply with the rules for its use, such as: the condition of the road surface, extreme driving methods, large differences in temperature values in the atmosphere will significantly reduce the operational life of the vehicle components.
Prerequisites for engine overhaul
In such conditions, repair of the VAZ 2106 engine is inevitable, the extent of which depends on the scale of the defects caused, which can only be assessed with in-depth diagnostics of the power plant and all interacting system components. Correct diagnostics of the motor complex includes not only establishing the performance parameters of the motor mechanisms, but also tests of all associated systems, such as ignition systems, power supply, and other interacting complexes.
Carrying out major engine repairs, a book about which is available for sale in large auto repair stores, is possible for those car enthusiasts who have certain skills in plumbing, a great desire and the necessary set of tools. Such repair of a VAZ 2106 engine, a video report of which is presented on our Internet resource, is possible not only in a stationary service station, but also in a personal garage, which will undoubtedly reduce financial costs.
After all, the cost of an engine overhaul is quite a large amount, and not every car enthusiast is able to shoulder the burden of paying for such expenses. Global repair includes a complete replacement of all components of the unit with updated parts, which requires dismantling the power plant and disassembling all elements into their component parts.
Distinctive features of the VAZ 2106 engine
The VAZ 2106 engine is a fairly successful modification of the previous version of the VAZ-2103 engine, during the creation of which modern technologies were used.
Manufacturers have set themselves the task of improving the finished part by any means:
- The power was increased using the total effective volume of the engine. Particular attention was paid to improving the cylinder.
- Such modifications influenced the appearance of the cylinder block 2106-1002011. Apart from the diameter, the presented motor design no longer has any distinctive features.
- During the manufacturing process, specialists give an individual cylinder its own class. Today there are about five names that differ by one millimeter. They are assigned the following symbols - A, B, C, D and E. You can see the conditional class of the motor at the bottom of the base.
- The main head of the motor block with the designation 21011-1005011-10 was left unchanged. To change the overall diameter of the cylinder, manufacturers had to use new gaskets.
- Absolutely all standard and generally accepted pistons have many similar characteristics to each other. The presented engine is equipped with pistons from the 21011 engine, where the nominal diameter is 79 millimeters.
- The new motor model has cylindrical holes, and the volumes have been improved several times. During operation in each individual area, absolutely all pistons will heat up gradually and evenly. This is how it was possible to compensate for possible thermal deformations. Manufacturers also placed temperature-control plates made of high-quality steel in the piston bosses.
How to increase the power of a VAZ 2106 engine and minimize all kinds of dynamic loads on the piston part of the engine? You need to pay attention to the presence of a hole that is intended only for the piston pins.
Overhaul of the engine in a VAZ 2106 car
Before starting a major overhaul of the VAZ 2106 engine, it is required to dismantle it for detailed disassembly of the component elements. This is only possible if you have the appropriate plumbing and measuring tools, as well as new sets of replacement parts.
The procedure for detailed disassembly of the unit is as follows:
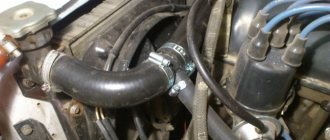
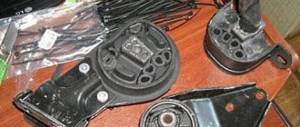
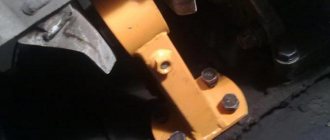
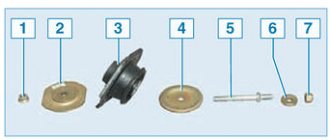
1. Unscrew the frame fasteners. 2. Loosen the clamp on the fuel pump hose and dismantle the product, having previously unscrewed the nuts securing it. 3. Pull out the spacer plate under the fuel pump. 4. Disconnect the high-voltage wires from the spark plugs and dismantle them. 5. Take out the pressing plate. 6. Disconnect the hose from the vacuum-type regulator. 7. Dismantle the distributor. 8. Unscrew the generator fasteners, take out the spacer washer, the belt element and the generator itself. 9. Loosen the clamp fasteners and remove the thermal hose of the intake manifold. 10. We take out the water pump (pump) by removing its fastenings. 11. Disconnect the connecting hoses from the carburetor, breather, distributor and fan. 12. Remove the axial washer of the throttle drive bracket and its rod. 13. Unscrew the oil filter. 14. Unscrew the breather casing along with the dipstick. 15. We take out the oil sensor. 16. We release the crankshaft pulley from the fasteners to the engine block. We dismantle the crankcase fasteners and the product itself. 17. Unscrew the valve cover fasteners and the product itself. 18. We dismantle the cylinder head casing along with the plate and fasteners with a vacuum-type hose. 19. We take out the gasket installed above the cylinder head. 20. Unscrew the fasteners and remove the chain tensioner. 21. Turn the drive shaft sprocket holder bolt together with the crankshaft. 22. Unscrew the camshaft sprocket fasteners. 23. Remove the sprocket along with the camshaft drive chain. 24. We dismantle the fasteners, etc. “shoe” of the chain tensioner. 25. Unscrew all the fasteners of the bearing housing. 26. Remove the bolts holding the head and then remove it along with the gasket. 27. Pull out the flywheel. 28. Together with the fastening, remove the front protection of the clutch housing. 29. Remove the remaining fasteners securing the oil system housing. 30. Pull out the crankshaft oil seal mount from the rear of the engine. 31. Dismantle the oil pump with gasket. 32. Dismantle the drive shaft of additional mechanisms. 33. We take out the distributor drive gear using an awl or a screwdriver. 34. Unscrew and remove the oil separator with the oil drain tube. 35. Unscrew the connecting rod cap of cylinder I and dismantle it using auxiliary plumbing tools. 36. We take out the piston with the connecting rod holder. 37. Repeats this technological operation with the remaining cylinders. 38. Dismantles the crankshaft and then disassembles it. 39. Mark with a marker all the dismountable parts of the motor and place them in a certain order for subsequent assembly.
In the process of overhauling the VAZ 2106 engine after disassembly, it is necessary to replace defective spare parts with updated ones and assemble the power unit.
After completing the entire range of work, the engine overhaul can be considered complete. If repair of the VAZ 2106 block head is required, it is carried out after removing and detailed disassembly of the cylinder head, followed by replacement of all defective parts and components.
Step-by-step instructions for disassembling the internal combustion engine of a car + Video
- Prepare all the necessary tools and drain the oil from the crankcase.
- Firstly, this will be necessary to lighten the weight of the motor, and secondly, it will help to avoid excess dirt on the workbench. Next, unscrew the oil filter. Also unscrew all the bolts that secure the oil pan. The old gasket can be thrown away as it is no longer suitable for further use.
- Now you need to remove the crankshaft pulley. This is not as easy to do as it seems at first glance, since in this case you will need good physical strength. However, no one has canceled the use of a pipe as a wrench extension. Secure the crankshaft from turning by blocking the flywheel. For this, a special device is used, which can be purchased in the store. Next, use a wrench to unscrew the ratchet and remove the pulley.
- Unscrew the nuts securing the valve covers and timing chain, remove it and pull out the gasket. Unscrew the bolts securing the camshaft gears, as well as the shaft that drives the engine oil pump. Next in line is the timing chain tensioner. First, loosen the special cap nut, and then unscrew the other two nuts that secure it to the cylinder head. Do not forget to unscrew the bolt securing the shoe, and then remove the tensioner itself, along with the shoe. Then the pin that restricts the chain is unscrewed, the camshaft and oil pump gears are removed, and the chain is removed.
- Now you need to remove the camshaft. To do this, unscrew two nuts located on its studs in the bearing housing. The housing must be removed and the camshaft carefully pulled out. Before pulling it out, do not forget to also remove the special thrust flange.
- Next, the bolts intended to secure the cylinder head to the block itself are unscrewed. The cylinder head is dismantled immediately along with the manifolds, which are not required to be removed (depending on the type of repair being carried out). After removing the head, it is also recommended to replace the gasket. This procedure will help you, in the future, get rid of repeated removal of this element.
- After this, you need to dismantle the oil pump. To pull it out you need to remove the special thrust flange. After this, remove the roller from the cylinder block, which is responsible for driving the oil pump.
- Using a special removable device, remove the gear that fits onto the engine crankshaft. Then remove the nuts located on the connecting rod bolts. Now remove the connecting rod caps and, using the cylindrical opening, pull out the connecting rods along with the pistons.
Which oil to choose and how to replace it correctly
Among the large and varied selection you can find synthetic and mineral oil. They differ from each other in that the latter is capable of flushing out all unnecessary and excess deposits from the engine.
But in cars of this brand, spare parts are made of nitrile rubber, which can dissolve in high-quality synthetic oil. To completely prevent this process, it is necessary to replace all rubber parts with similar acrylic parts. They will work with any synthetic oil.
After all components have been replaced, you can switch to a synthetic analogue of oil.
Changing the oil in the VAZ 2106 engine is carried out independently or at a service station, where the technicians will simply drain the old mineral oil and fill in new one; or a specially designed detergent for washing (in case of heavily soiled parts).
In the latter case, the 2106 engine will be started for ten minutes so that the filled liquid can wash away all residual deposits from the use of outdated mineral oil.
- This operating process is necessary to ensure that the new synthetic oil does not mix with particles of used mineral oil.
- Otherwise, you may encounter blockage of the oil channels. To change the oil in VAZ 2106 engines you need to have certain knowledge. Otherwise, such intervention will lead to engine damage.
- If the vehicle has been in use for quite a long time, combustion deposits will form on the liners and gaskets. The holes in oil seals and head gaskets can become clogged.
- Particular attention should be paid to the general condition of all internal parts, especially check the seals and gaskets.
- When excessive pressure is observed inside the system when the supply tube is clogged, an oil leak can be expected.
- Therefore, to change the oil, you need to buy a high-quality brand that has been tested for decades.
Tuning
It is possible to tune the 2106 engine because it is a classic engine.
Thanks to this opportunity, you can grind channels, polish intake manifolds, select a carburetor, camshaft, split gears, modify the intake, bore cylinder blocks, select the best options for the piston system, crankshaft, and connecting rod.
It is best to entrust such work as tuning the VAZ 2106 engine to qualified specialists, because this is a serious modification of the engine.
Many motorists want to make their own car more powerful, so they resort to this procedure. To perform tuning of the VAZ 2106 engine, it is necessary to replace specific factory-produced parts with more improved ones. This may include a valve, connecting rod or pistons.
In the process of modifying the car, you can increase the volume in the VAZ 2106 engine. During boosting, it is necessary to take into account the compression and compression ratio of the engine.
Specialists must necessarily assess the current condition of the engine and measure compression. Only after a positive verdict can the volume in VAZ 2106 engines be increased.
DIY tuning in the garage
When a person decides to do tuning with his own hands, he needs:
- Be sure to first check the wiring, which is made of silicone. In almost all cases, it requires urgent replacement. Experts recommend never skimping on wiring and using only high-quality shielded wires.
- Before installation, you need to make sure that the battery and generator have sufficient energy and power.
- To increase engine power, you need to replace the factory generator and rebuild the ignition system.
- You can tune the VAZ 2106 engine at home, but before that you need to watch the lessons and read the relevant manuals. Not every person will be able to assemble the engine correctly and take into account all the details.