What lamps are used on Kalina
The first generation Lada Kalina uses several types of light bulbs and indicator lights.
The location and names of the elements are as follows.
- Distant lights - H1;
- Low beams - H2;
- Front marker light and side direction indicators – W5W;
- Turn signals – PY21W;
- Front fog lights – H11;
- Fog lights at the rear of the vehicle - P21;
- Stop and reverse lamp – P21W;
- License plate backlight – W5W.
Standard illuminators often do not meet the requirements of motorists. They poorly illuminate the road and quickly fail. Therefore, some users replace the low beam bulbs on the Lada Kalina with diode models. To do this, you should select the appropriate elements on the market and modify the optical elements of the car.
Some drivers believe that simply replacing light bulbs is enough. However, it is not. The factory optics of the first viburnum are not adapted to work with such elements and will quickly fail. There is not enough space in the headlight to remove large amounts of heat from the diode, which leads to deformation of the lens and the plastic housing itself.
To tune the device, you must replace it completely. There are many offers and options for optics modifications on the 2020 market. Just select the appropriate option and install it instead of the standard one.
A similar replacement of a 2nd generation Lada Kalina light bulb is not required. The latest generation factory optics are already capable of working with diodes and have the necessary margin for full operation. The manufacturer insists that the most advanced versions of cars are launched on the market with diodes and replacement as such is not required.
Design and functions of headlights
The Lada Kalina car has its own headlights. 2 headlights with three sections are installed here, and each performs certain functions:
- for low beam;
- for distant and side lighting;
- to indicate turns.
When the headlights of the Lada Kalina are not adjusted, many inconvenient moments arise while driving both for the driver and for those who may be nearby at that time. After all Kalina's optics are adjusted, it will be able to illuminate the roadside well and will not blind drivers in the oncoming lane.
The design of Kalina's headlights is such that when using low beam, only the corresponding lamps will be turned on. When high beam is needed, both the low and high beam bulbs light up. The front turn signal sections have transparent lenses, and the turn signal bulbs themselves are bright orange.
The headlight unit for Lada Kalina has an electromechanical drive and is easily adjusted thanks to the corrector.
The regulator is located on the instrument panel, connecting to the electric drive, which is installed in the headlights, using wiring.
When assembling cars, the manufacturer uses headlights from such manufacturers as Avtosvet and Bosch. In order to understand exactly which factory made the lighting fixtures for your car, you need to study the headlight unit.
There should be an icon on it. The “AL” symbol indicates that the manufacturer is Bosch (Russia). This means that polycarbonate was used in the production of products. This model of headlights is produced without a cap on the low beam bulbs, while products from Avtosvet are also made of polycarbonate, but have a cap on the low beam bulbs.
You can disassemble the Lada Kalina headlight unit and find that it contains:
- numerous wiring;
- reflectors and glass;
- plugs and inserts, so-called headlight masks;
- lamps.
Designers are trying to improve the performance of headlights. For Kalina, these products are made using glass, they are neon, and their light transmittance is lower, although this model showed very good results when traveling. Kalina-2 has plastic lights.
Replacing lamps on Kalina with your own hands
The vehicle's optical devices are made according to a modular system. Therefore, replacing Lada Kalina light bulbs is possible without outside help. To complete the procedure you will need.
- Flashlight. Light bulbs are removed from the inside of the lighting fixtures and the fasteners are poorly illuminated. To make work easier, you need to illuminate the workspace. Under ideal conditions, assistance will be required. The second number will only highlight.
- Standard wrenches and flathead screwdriver. Keys free access to required parts. Use a screwdriver to remove the stoppers. You can also use an awl or a special puller. To work with the tidy, you will need a Phillips screwdriver.
- Paper napkins and alcohol, without this, replacing the low beam bulb of the Lada Kalina 1 and other elements will be impossible. If the user accidentally touches the working area of the emitter or headlight, fingerprints and accumulated dirt will need to be wiped clean. Otherwise, grease can greatly reduce the efficiency of the optics and shorten its service life.
- You may also need a fastening compound like VD 40. Some screws are prone to boiling and oxidation, which makes them very difficult to unscrew.
- Set of TORX keys. Some drivers complain that the car uses “stars” that cannot be unscrewed with ordinary keys. It is unknown where such elements come from.
It is also recommended to wash the car before performing the procedure - it is much more pleasant to work with clean surfaces.
Replacing low beam lamps
The standard replacement of the low beam bulb on a Lada Kalina is quite simple. The procedure does not require deep knowledge of auto electrics or the presence of specialized tools.
To perform the procedure correctly, you must prepare all the tools and follow the sequence of actions.
- Place the car on the handbrake and remove the terminals from the battery. It is recommended to drive the car into a well-lit garage or leave it outside, this will make it easier to see small parts and fasteners.
- Remove the plastic block cover. Here you can tighten the element by hand without using tools. In some configurations, the plug can be made of hard rubber (what it depends on is unknown). It is important to consider that the element often dries out and cracks. Therefore, you need to buy it in advance.
- The replacement of the low beam bulb on the 1st generation Lada Kalina continues, at the stage of disconnecting the wiring. The contact group often gets stuck, which forces the master to tense up a little. By rocking the block from side to side, you will need to pull it off its seat. In this case, you need to hold the device body so as not to damage the element. If a part is broken, it cannot be repaired - the entire unit is replaced.
- Next, remove the lamp retaining spring from the hook. Then you will need to move it to the side so that it does not interfere.
Important! You should not completely pull out the latch - it will be extremely difficult to install it in place. The bar simply slides out so that the light bulb can be removed.
- Next, the light bulb itself is pulled out of the socket. You only need to support the emitter by its metal elements; you should not even touch the glass part of the lamp.
- Installation of the new part is carried out in the reverse order. At the same time, it is important to check the reliability of the device. If there is increased vibration, the lamp may fall out of its socket, which may cause an accident.
Replacing a 2nd generation Lada Kalina light bulb is done in the same way. The headlights of the cars are almost identical in terms of design.
Low beam lamp on Kalina. Using a multimeter. Replacing the relay and fuse
MiscellaneousReplacing the high beam lamp on a Lada Kalina
| Sooner or later, the lamps in the headlights begin to burn out, so you may need instructions on how to replace the lamps in Kalina's headlights. This photo report will also be useful if you decide to replace conventional headlight bulbs with LED ones. |
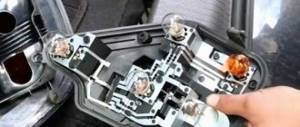
You can replace the lamps without removing Kalina's headlights. For clarity, the replacement process is shown with the headlight removed. Remove the negative terminal from the battery. To replace low beam headlight bulbs you will need:
- Remove the protective rubber cover from the headlight housing by pulling one of its three blades.
- Disconnect the wire ends from the lamp.
- Release the spring clip from its engagement with the two hooks and move it away from the lamp.
- Remove the low beam lamp from the Kalina headlight housing.
Installation of a new low beam lamp (H7) is carried out in the reverse order.
Attention
| High and low beam lamps are halogen. Do not touch their glass bulbs with your fingers, as traces from them will cause the lamp to darken when heated. You can clean the light bulbs with a clean rag soaked in alcohol. |
To replace the high beam headlight bulb you will need:
- Disconnect the wire block from the lamp.
- Remove the latch from engagement by squeezing its ends.
- Remove the high beam lamp from the Kalina headlight.
Installing a new high beam lamp (H1) is done in the reverse order.
To replace the side light bulbs in the headlight, you will need to remove the protective rubber cover by pulling one of its three blades.
- Remove the bulb socket.
- Remove the lamp from the socket.
Installing a new side light bulb (W5W) is done in the reverse order.
- Turn the turn signal socket counterclockwise 45°.
- Remove the socket from the headlight housing.
- Remove the turn signal bulb by pressing it in and then turning it counterclockwise until it stops.
Installing a new turn signal lamp into the headlight is done in the reverse order.
- Remove the socket with the parking and fog light bulb by turning it counterclockwise.
- Remove the lamp from the socket by pressing it and turning it counterclockwise until it stops.
Installing a new lamp in the Kalina's rear light is done in the reverse order.
- The combined parking and fog light lamp has 2 protrusions located at different levels. When installing it, the protrusions must fit into the corresponding grooves of the cartridge.
- The grooves on the flashlight body have different widths; this should be taken into account when installing the lamp socket.
The operations for replacing the remaining taillight lamps are performed in the same way.
- Reverse;
- Brake signal;
- Turn indicator;
- Side and fog lights.
On Kalina cars, the low beam lamp burns out quite often. The reason for this is the need to keep it almost always on. Several years ago in Russia, the law obliged drivers to drive a vehicle with low beams or running lights on. Because of this, the lifespan of LBS has been significantly reduced, so every driver should know how to replace them. All about this is in our article.
[ Expand ] [ Hide ]
Standard light bulb
There may be several reasons why your low beams have stopped working:
- the light bulb has burned out;
- problem in the contact of the device block;
- The light fuse has blown.
Before starting repair work, you need to determine what exactly the problem is. A little research is being done on this.
First, you need to check the fuse of the headlight that is not working. Please note that each headlight has its own separate fuse. In Kalina these are fuses numbered F12 and F13.
Checking its performance is quite simple; any problems can be detected visually. If everything is fine with it, check the condition of the block and the lamp itself. In order to check the condition of the block and bulb, you will need to disassemble the headlight itself. This article will tell you how to do this in the “Guide to replacing low beam light bulbs” section.
Lighthouse and Osram in packaging
If you need a new light bulb, you first need to choose the right one. There are quite a lot of such parts on the car market and it’s easy to make mistakes.
The only good car is the one that is in perfect working order. Even if the car is the most expensive and rare model, it will be of absolutely no use if it cannot work correctly. This is especially true for security. In this case, not only the driver himself is at risk, but also all road users. Below we will look at everything related to low beam lamps on the Lada Kalina - how to select them and install them correctly.
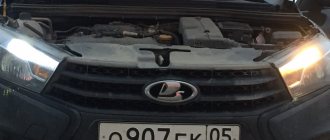
Optics on Kalina
You should think about changing the low beam lamp on the Lada Kalina even if it does not provide the required amount of light. This circumstance can lead to a serious accident.
For some reason, it is generally accepted that most technical problems in the Lada Kalina can only be dealt with by a specialist at a service station. But as for the low beam bulb, almost every car owner can do this process. The main thing is to correctly select the failed element and install it correctly (according to the technical requirements).
It should be noted right away that it is very difficult to reach the headlights in the Lada Kalina. Installing a new low beam bulb is almost impossible by touch.
To make the installation process as simple as possible, you should remove all excess in the headlight area. Please note that replacing the low beam bulb on a Lada Kalina should only be done when the power is turned off. Otherwise it may not be safe. After completing all the preparatory work, you can begin the process of replacing the lamp.
If you are not sure that you will correctly replace the old low beam lamp with a new one on your Lada Kalina, it is better to contact specialists at a service station.
Installation process
If you buy a lamp for bright light in low-beam headlights of a foreign manufacturer, you can simply follow the instructions. Everything is written out very clearly in it, so changing the light bulb in the low beam headlight is not difficult.
Once you have the bulb and the headlight has been removed, you can begin the installation process. Initially, you need to remove the special rubber casing. This can be done with a regular screwdriver. This will make it easier to pry off the edges of the rubber base. The casing is located on the inside of the headlight.
After removing the casing, you can begin to dismantle the old lamp for light. First, remove the terminals from the lamp. At this stage, it is important to remember their original location. Next, you should remove the special metal clips that held the old light bulb. It's very easy to remove. This can be done with virtually no improvised means.
Installing a new light bulb
Only after this can you remove the old lighting fixture and begin installing a new one. Please note that old burnt out lamps must be disposed of.
Before you start screwing the new device into the headlight, you need to make sure that the contacts are intact and only then insert the new bulb.
At the final stage, it is important to correctly install the terminals without mixing up the polarity (plus and minus). After this, you can install the rubber cover back and test the device.
Connecting the low beam bulb
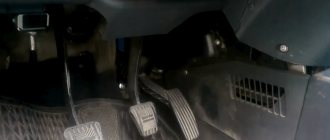
In this case, you will not need any special kit to replace the lighting fixture. All you need is an 8 x 10 wrench. This is due to the fact that the right headlight is covered by the washer reservoir cap. You should be especially careful with the tank itself. To make installation of the low beam lamp as safe as possible, it should be completely removed. This must be done very carefully so as not to spill the liquid.
After completing the replacement, you should reinstall the tank in reverse order and attach all the wires to the control network. At this point, the process of replacing the low beam bulb can be considered complete.
It is not so important which lighting elements you choose. The main thing is to install them correctly and double-check everything at the final stage. Correctly working headlights are the key to your safety on the road.
You should also remember that it is not only about you on the road, but also the health of all other road users. Therefore, repairs and replacement of unsuitable spare parts must be carried out in a timely manner.
Car owners who love innovation and change always make attempts to improve their cars, and Kalina is no exception. They install spoilers, increase engine power, and modify the interior. Car headlights can greatly change the appearance of a vehicle. But before you start tuning the lighting system, you need to find out the characteristics of the standard Kalina lights. This will allow you to understand what replacement options exist and whether it is worth changing anything at all.
Return
Car headlights are devices that are designed to illuminate the road at night or when visibility is insufficient due to bad weather conditions. Headlamp structure (see photo):
- Frame.
- The wire.
- Glass.
- Lamps.
- Reflector.
- Decorative insert.
- Headlight plugs.
The block headlight on Kalina includes three sections:
- low beam;
- high beam and side lights;
- direction indicators.
When you turn on the low beam, only the low beam lamps light up, when you turn on the high beam, the low and high beam lamps come on. Front direction indicator sections
| Number in photo | Name | EEC | Power, W |
| 1 | Low beam light | H7 | 55 |
| 2 | High beam light | H1 | 55 |
| 3 | Front turn signal lamp | PY21W | 21 |
| 4 | Side light bulb | W5W | 5 |
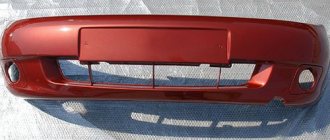
The difference between the headlights in different versions of Kalina:
- sedan, hatchback and cross – rectangular glass with a bend in the upper part;
- station wagon – elongated headlights with increased area;
- sport - has an increased area to illuminate a larger section of the road.
In the “Lux” configuration, the headlights received a modified design and increased brightness.
The manufacturer installed two and Bosch headlights on Kalina. Information about the manufacturer can be found by inspecting the product. If the AL index is marked on the glass, it means the manufacturer is Bosch.
| Sooner or later, the lamps in the headlights begin to burn out, so you may need instructions on how to replace the lamps in Kalina's headlights. This photo report will also be useful if you decide to replace conventional headlight bulbs with LED ones. |
- The combined parking and fog light lamp has 2 protrusions located at different levels. When installing it, the protrusions must fit into the corresponding grooves of the cartridge.
- The grooves on the flashlight body have different widths; this should be taken into account when installing the lamp socket.
- Low beam H7 12v55W
- High beam H1 12v55W
- DRL (Driving lights) 12v W21/5W
- Turn signal 12v PY21W
Low beam
- Low beam lamp - H7 12v/55w
- High beam lamp - H1 12v/55w
- Dimensions lamp - w5w 12v/5w
- Turn signal lamp - PY21W 12v/21w
Low beam
- The combined parking and fog light lamp has 2 protrusions located at different levels. When installing it, the protrusions must fit into the corresponding grooves of the cartridge.
- The grooves on the flashlight body have different widths; this should be taken into account when installing the lamp socket.
- Lamp burned out
- Poor contact of the lamp socket
- Fuse burned out
Low beam
Replacement of dimensions and DRLs
Dimensions are more likely to fail than main optics. Therefore, replacing light bulbs of Lada Kalina dimensions is a more popular procedure. Repairing a breakdown is as simple as repairing other parts of the optics.
- Open the plastic cover of the illuminator and remove the lamp base from its seat. All actions are carried out with extreme caution - despite the external quality factor, the light bulb is quite fragile.
- Next, the standard emitter is removed from its socket and replaced with a new one.
If the cause of the failure is moisture, you can protect the contacts with hot melt adhesive or a similar sealant that is resistant to elevated temperatures. Replacing the running light bulb of the 2nd generation Lada Kalina is carried out in the same way as the first modification.
Replacing light bulbs in the dashboard of Lada Kalina
Cleaning the viburnum is a separate matter. There are a large number of lights, indicators and alarms here.
The procedure is performed like this.
- As usual, set the car to the handbrake and remove the terminals from the battery.
- Next you will need a Phillips screwdriver. Using the tool, remove the two mounting screws. It is important to carry out the change very carefully - the panel is in a visible place and scratches can significantly spoil the appearance.
- After the decorative trim is released, you can carefully pull it out, overcoming the resistance of the latches. The lower part of the panel is equipped with special rollers. The guides must “survive” after repair,
- Under the decorations there is a mount for the tidy itself. The screws are also unscrewed with a Phillips screwdriver and the panel is removed.
- Next, the actual replacement of light bulbs in the Lada Kalina panel begins. To do this, you need to remove the device from the mounting socket and disconnect all contact groups and wires from the device.
- Once the panel is completely removed, you will need to move to a well-lit area to continue the repair procedure.
- Subsequent replacement of light bulbs in the Lada Kalina dashboard is carried out with a thin tool. After finding the required element, it should be disconnected from the socket and removed from the seat. This is done with pliers or special pliers. Grasping the cartridge, you need to turn it clockwise and pull it towards you.
- Next, you need to diagnose the cartridge; if the latter is working, only the illuminator is changed.
- Installation and assembly are performed in reverse order. At this point, the replacement of light bulbs in the Lada Kalina panel is completely completed.
Subtleties of replacing low and high beam lamps on Russian Kalinas
On Kalina cars, the low beam lamp burns out quite often. The reason for this is the need to keep it almost always on. Several years ago in Russia, the law obliged drivers to drive a vehicle with low beams or running lights on. Because of this, the lifespan of LBS has been significantly reduced, so every driver should know how to replace them. All about this is in our article.
Content
[ To uncover]
[Hide]
Why isn't the low beam on?
Standard light bulb
There may be several reasons why your low beam has stopped working:
- the light bulb has burned out;
- problem in the contact of the device block;
- The light fuse has blown.
Before starting repair work, you need to determine what exactly the problem is. A little research is being done on this.
First, you need to check the fuse of the headlight that is not working. Please note that each headlight has its own separate fuse. In Kalina these are fuses numbered F12 and F13.
Checking its performance is quite simple; any problems can be detected visually. If everything is fine with it, check the condition of the block and the lamp itself. In order to check the condition of the block and bulb, you will need to disassemble the headlight itself. This article will tell you how to do this in the “Guide to replacing low beam light bulbs” section.
What lamps are best to install in low beam headlights?
Lighthouse and Osram in the package
If you need a new light bulb, first you need to choose it correctly. There are quite a lot of such parts on the car market and it’s easy to make mistakes.
For low beam on Kalina you need an H7 12v/55w lamp. The first two characters, H7, indicate the type of base to be selected. With it, you can find many different light bulbs on the market today. It is recommended to choose products from well-known companies, as they are usually more reliable. So, for Kalina you can find parts manufactured by Philips, Bosch, Osram and the Chinese Mayak, the cheapest of the options.
Guide to replacing low beam bulbs
LBS without anther
The replacement process is quite simple and is carried out in several basic steps.
- First you need to open the hood. Find the LBS rubber boot under it and remove it.
- Next, simply remove the block and put it aside.
- The lamp is secured with a spring clip. You should simply press down on it, then move it slightly to the side and then lift it up.
- The next step is to remove the old light bulb.
- When dismantling is complete, it's time to install a new part. All installation is carried out in the reverse order indicated above.
As you can see, dismantling the old part and installing a new one can be done very simply in just a few minutes. Once you do it once, you can always repeat it. The task is also made easier by easy access to the headlight in Kalina (the author of the video is the Auto Repair channel).
Features of replacing the high beam lamp
Although, as stated above, the LBS burns out much more often due to the longer operating time, in some cases replacement of the high beam is also necessary.
If you know how to replace the LBS, then you can handle the high beam. The steps in this process are exactly the same: first remove the boot, then disconnect the pad, and so on. There are no special nuances here, since in Kalina the headlights are arranged in the simplest possible way.
Price issue
Video “Replacing the BS lamp”
This video clearly shows the entire process of replacing parts (the author of the video is KalinaAutoChannel)
poll id=”929″]
avtozam.com
Stern maintenance
On a Lada Kalina, replacing the brake light bulbs may be necessary if the headlight is damaged or the element itself burns out. Due to the design features of the car, repairs can only be performed by completely disassembling the rear panel and removing the entire headlight.
- On a Lada Kalina, replacing brake light bulbs begins with dismantling the headlight. To do this, you need to remove the plastic cover from where the seat belt comes out. The second part is attached a little lower - near the belt reel. The nuts are unscrewed with a No. 10 wrench. You should be extremely careful when doing this. If a part flies into the body panel, you will not be able to get it out.
- As soon as the device is freed from its mounts, all lamps will be accessible. You can remove them from the mount by turning the base 45 degrees clockwise.
- Next, the light bulb itself is removed and replaced with a new one.
- Reassembling the headlight is performed in reverse order.