Setting up a radio using the example of Pioneer DEH-1900UB
At the beginning of our article, it makes sense to immediately note that the following method for setting up a radio is designed for an entry-level user, and there is nothing overly complicated in it.
Note also that the quality of the reproduced sound usually depends only 33% on the composition and quality of the equipment components. Another third depends on the correct installation of the equipment, and the remaining 33% depends on the correct setup of the audio system. In this article we will look at how to set up a Pioneer radio. Recommendations for adjustment are discussed using the example of the Pioneer DEH-1900UB model from the 2020 line. They can also be used to adjust other modern Pioneer car radios, since they all have the same menu. The exception is processor devices, the configuration of which is somewhat more complicated.
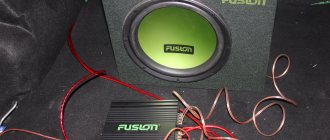
Sound amplifier required
If the car owner still has complaints about the sound, then we move on to the next stage - installing an additional external amplifier. They buy it not for the volume, but for the purity of the sound. When switching to a higher sound level, the internal amplifier located in the standard radio adds errors to the audio path of the system over the entire frequency range.
Recommended article: Clutch is an important part of your car
Thanks to an external amplifier, the sound in the car becomes better and cleaner, providing a wide signal range to the speakers.
The only problem is that standard radios do not have special outputs for an external amplifier. You need to do them yourself. The most basic “passive” method is to assemble a circuit using transformers that will lower the level of the signal output from the radio-electronic device to the required level, and then connect it to an external amplifier.
The cost of such a scheme is from one to two thousand rubles. But frequency errors from the standard audio path are not eliminated and are transferred to an external amplifier. The advantage of this type of connection is ease of installation and a minimum of changes to the head audio device.
You can resort to “active” circuits that “intelligently” process the output signal. These are ready-made devices, the price of which directly depends on the manufacturing plant and varies from 5 to 15 thousand rubles.
The most progressive way to amplify sound is to modify the “native” radio and create linear outputs in it. In this case, it is necessary to disassemble the head unit, find the place of connection to the existing amplifier and output the signal. The cost of work on organizing a linear output is from 7 thousand rubles.
Equalizer
An equalizer allows you to make the sound more even - raise or lower the bass, mid and high frequencies. This is a rather fine adjustment of the audio system. It is not the entire sound range that is regulated at once, as in other menu items, but specific frequency bands. Different models have different numbers of them, depending on the class of equipment. There are five of them in Pioneer radios: 80 Hz, 250 Hz, 800 Hz, 2.5 kHz and 8 kHz.
The equalizer is located in the “Audio” section of the settings menu, EQ item. In it you can select one of the preset standard settings. For those who are not satisfied with these options, there are two sets of user settings (Custom). You can switch between them both from the menu and the EQ button next to the joystick.
To make changes to frequency parameters in a custom setting, you need to select it with the wheel and press the joystick. Then turn the wheel to select one of the equalizer frequency bands. Press the joystick again and set the position from -6 (attenuate frequency) to +6 (increase). By doing this you can make some frequencies louder and others quieter.
There is no universal recipe for setting the equalizer on the radio. It is performed by ear depending on the preferences of the consumer. In addition, different adjustment options are selected for a specific genre of music.
We can only give rough recommendations:
- if heavy music is played, it is worth increasing the bass - 80 Hz (but not too much, +2–+3 is enough). Percussion instruments sound around 250 Hz;
- for music with vocals, frequencies of approximately 250-800+ Hz are needed (male voices are lower, female voices are higher);
- for electronic music you will need high frequencies - 2.5-5 kHz.
Setting the equalizer is a very important step. Using this tool, you can improve the sound quality many times over. Even if the acoustics are not very expensive and of high quality.
Car audio system: speakers, amplifier, circuit for the speaker system.
The price of the idea
Already according to the established good tradition, we begin immediately with the price. You can assemble a normal acoustic system for 25,000 rubles (this is for 2020). This figure implies the “naked” cost of all the necessary components. It does not include the cost of assembly and installation by a specialist (it is assumed that you will do all this yourself). I also don’t take into account the cost of sound insulation (a very necessary thing), much less the cost of having it installed by a specialist. It's just about the price of the components. It is possible to find components cheaper, but we want to assemble a normal(!) audio system that will allow us to enjoy listening, get enough power from it, and so that it will serve us for a long time. This is a basic, starting amount for a good audio system, which will not morally look cheap and only someone knowledgeable in car audio can distinguish it from a higher cost one. If you are interested in the price of a turnkey speaker system, it will be approximately 40 - 50 tr. to infinity. The budget of our above option will include: head unit (approx. 3500 rubles), sound amplifier (approx. 6500 rubles), speakers (approx. 3000 rubles for two), tweeters (approx. 1500 rubles), capacitors for tweeters, if suddenly they are not installed (approx. 100-200 rubles), a subwoofer (approx. 5500 rubles), a fuse for the safe use of all this stuff (approx. 500 rubles), small things (power wires, acoustic, interblocks, terminals) (approx. 1500 - 2000 rubles). The cost of components may vary slightly, this is not a big deal. The main thing is to choose them correctly!
We are selecting components for our audio system!
When purchasing audio system components for a car, you should pay attention to the manufacturer of the acoustic components. So, good, high-quality speakers, subwoofers, amplifiers are produced by the following companies: Pioneer, Alpine, JBl, Kicx, Edge, Alphard, JVC, Sony, Kenwood, Mistery, Supra, there is a wide choice here. Blaupunkt and SWAT also make good audio system amplifiers. Head units are Pioneer, Sony, Alpine, JVC and Kenwood. Acoustic wires and interblocks (tulips) - TChernoff, Kicx, Audio-nova. Speaker wires are usually included with the components, but they do not always provide sufficient signal transmission quality. You should never skimp on wires! The sound quality directly depends on them. Therefore, I advise you to use speaker wires and interconnects from the above companies.
1
It is advisable to purchase a head unit (radio tape recorder) with a built-in sound processor, which will help you set up frequency filters for the speakers. You also need to pay attention to the number of pairs of linear outputs; if you decide, for example, to connect two amplifiers (to amplify four speakers in a car), then the radio should have at least two linear outputs. If you are a music lover and sound quality is paramount to you, then you should also pay attention to the ability of the radio to reproduce hi-res quality formats, these are flac or wav.
When purchasing tweeters, be sure to check whether they have built-in capacitors. Capacitors are necessary to prevent tweeters from playing low frequencies of sound that they are not designed for. If the tweeters reproduce them, this will not only worsen the sound quality of the audio system in your car, but will also contribute to their rapid failure! Of course, we will cut off the lower threshold of reproduced frequencies in the radio settings using its processor or active crossover. But the capacitor will still not be superfluous. Moreover, it costs mere pennies.
Always use a fuse in your speaker circuit! Place it on the power cable, at a distance of approximately 20-30 cm from the battery. It will protect your audio system from unforeseen dangers and, if something goes wrong, it will open the circuit. Always use copper terminals (tips), they are much more reliable than aluminum ones. Be sure to secure them very firmly to the battery! Otherwise, the wiring and even the car may catch fire! Also, always fix the wire in the terminal very well.
Speaker system diagram - assemble it yourself!
When connecting the speaker system, we first connect the radio and power it with the power cable from the battery (not forgetting about the fuse in the circuit on the power cable!), then we power the amplifier and connect it to the radio via the Rem output and interconnect wires (tulips). We already connect the speakers and subwoofer to the audio system amplifier, through speaker wires pre-installed under the interior of the car. The experts from Loud sound will help us more clearly assemble and connect the audio system in the car:
Attention! The videos contain profanity!
I really hope that these recommendations will help you purchase, install and configure the audio system of your dreams! Good luck to you!
High pass filter
Next we find the HPF (High-passFilter) item. This is a high-pass filter that cuts the frequency of the sound supplied to the speakers below their specified limit value. This is done because it is very difficult for standard speakers (13–16 cm) to reproduce low frequencies due to their small diaphragm diameter and low power. As a result, the sound is reproduced with distortion even at low volumes. By cutting the low frequencies, you can get clear sound over a larger volume range.
If you do not have a subwoofer, we recommend installing an HPF filter at a frequency of 50 or 63 Hz.
You can then exit the menu using the return button and check the result. It is better to do this at a volume of 30.
If the sound quality is not satisfactory, or if you are outdoors and want to have a loud disco, you can raise the lower limit from 80–120 Hz or more. It is recommended to use the same level of boundary cut if you have a subwoofer. These measures will allow you to increase the purity and volume of the reproduced sound.
There is also an adjustment for the frequency attenuation rate. On Pioneer it comes in two positions - 12 and 24 dB per octave. We advise you to set this indicator to 24 dB.
Sound in a car: circuits and the correctness of their choice
Creating any car audio system is a rather labor-intensive process, where many different factors need to be taken into account in order to reduce the number of errors, which require time and money to eliminate. Moreover, the difficulties that arise in the process of such creativity have a negative effect not only on your budget, but also create mental discomfort when achieving a result that is far from the desired one.
Therefore, in order not to “break the woods,” determine your goals and financial capabilities at the initial stage. For example, you can buy an inexpensive car radio that will fully meet your requirements, and later, when you decide to install a CD changer in your car, you will be surprised to find that this radio does not have functions for controlling the CD drive.
The beginning of any equipment project is to plan the path for its implementation, so we suggest looking at the layout diagrams of car stereo systems.
Scheme 1 assumes the presence of a head unit (this could be a car radio, CD receiver, minidisc deck), front and rear speakers.
Most often, 13- or 16-centimeter speakers are used as front acoustics, and oval speakers measuring 6 and 9 inches are used as rear acoustics; they are produced by almost all well-known manufacturers. This is the simplest and most common scheme, the main advantage of which is its low price. The sound quality of such a system is usually just as low.
It is quite difficult to achieve good quality in such a system due to the fact that it does not have any adjustment methods other than using the standard tone block of the head unit, which is clearly not enough.
To improve the sound, you can use any component acoustics with separate reproduction of high and mid frequencies as the front, and high-quality acoustics of the PRO or HQ series (for example, Clarion SRF 6981, Kenwood KFC-HQ 691) as the rear).
A good solution would be to use European or American 6 by 9-inch acoustics, which differ from Japanese ones in their softer reproduction of low frequencies and more naturally reproduce the high and mid-range (for example, KEF 690 Q, Centrek SRS 6980, RCF 6910, Boston Acoustic CX 9.3).
Circuit 2 contains a head unit, front speakers (preferably component ones) and an amplifier with a subwoofer. The main difference between this layout is that it is more flexible and allows you to achieve a higher sound level without changing the original components.
At the same time, you do not have problems with what to do with the not very good front acoustics, because you immediately buy a product of a different class. American car audio sales experts say that if you cannot buy “good sound” right away, but would like to have it in the future, you need to install high-quality front speakers with a good subwoofer. At the same time, you will get a fairly clear sound image in the front seats of the car with quite powerful support in the rear - of course, if you use a really good subwoofer (however, subwoofers like the Pioneer TS-WX 80 cannot be classified as good).
This statement can be verified quite easily in any car that is well-made in terms of sound by turning off the rear speakers. Some of the surround effect will inevitably be reduced, but believe me, this option plays much more beautifully than the generally accepted scheme 1.
This is also supported by the fact that at the international sound competitions “Sound Off”, exhibition cars are quite often performed according to scheme 2.
An example is a BMW 5 Series car, which is a winner of the German and Swedish championships, as well as a winner of the IASCA European Championship in the PRO class, with a power of up to 600 W RMS. The car is equipped with a front speaker system (DLS Genesis three-way component system) and three 25-centimeter DLS W-110C subwoofers.
The cost of components is approximately twice as high as in the traditional first option, but at the same time you have the opportunity to step above the average level.
The second layout diagram can be supplemented with a rear acoustic group at any time, and then you will get the familiar option of building a system with front and rear speakers, already having at your disposal a fairly powerful “bass line” in the cabin of your car (diagram 3).
The second arrangement option is also supported by the fact that such circuits, as a rule, place less load on the main acoustics, allowing them to remain operational longer. Remember how many times you “didn’t have enough bass”? You are trying to add “bass”, thereby overloading the acoustics, which are simply not able to reproduce this part of the range with normal output. At the same time, if you have at your disposal a subwoofer with a rated power of 250-300 W RMS (500-800 W MAX), designed to reproduce frequencies from 20 Hz to 1 kHz, it can be entrusted with the task of creating even excess sound in the cabin pressure.
For some car owners, using a subwoofer introduces its own inconvenience in that it takes up a certain space in the trunk, reducing its volume (the volume of subwoofer housings can range from 30 to 80 liters).
If you are not ready to sacrifice some of the volume of your trunk to install a subwoofer, then you can try to improve the first layout. In this case, you can add an amplifier to the system to “drive” the rear speakers (diagram 4).
As such an amplifier, you can use any two-channel amplifier whose rated power is 30-50 W RMS per channel.
As a rule, these are acoustics with a rated power of 60-80 W RMS (180-250 W MAX), and the built-in amplifier of the head unit (30-40 W MAX) is not enough to ensure the normal operation of such speakers.
The effect of “under-boosting” of acoustics occurs quite often in systems with incorrectly matched power of the source and the acoustic system.
At high volume levels, a characteristic “wheezing” occurs in the speakers, which is a manifestation of this effect. When the load increases, the built-in amplifier of the head unit is not able to provide the necessary output; power consumption at its input increases, for which its design is not designed. Therefore, it begins to work with distortions, although there is a common misconception that “the acoustics do not hold up.”
We will discuss the issues of matching the power of the source and the speaker system in more detail in the material devoted to car amplifiers.
In conclusion, I would like to say that a correctly chosen layout scheme allows you to spend your money more rationally on what you want to get for it.
Low pass filter (subwoofer)
After we have dealt with the speakers, we will configure the radio for the subwoofer. For this we need a low pass filter. With its help, we match the frequencies of the speakers and subwoofer.
The situation looks like this. When we removed the bass from the speakers (set HPF to 80+), we got loud and high-quality sound. The next step is to “dock” the subwoofer to our speakers. To do this, go to the menu, select the audio item, and in it we find the subwoofer control section.
There are three meanings here:
- The first number is the cutoff frequency of the subwoofer. Everything here is the same as with the equalizer. There are simply no specific settings, and the range in which you can “play around” is from 63 to 100 Hz.
- The next number is the volume of our subwoofer. We think everything is simple here, you can make the subwoofer louder or quieter relative to the acoustics, the scale is from -6 to +6.
- The next figure is the frequency attenuation slope. Just like in HPF, it can be either 12 or 24. There is also a little advice here: if you set a high cut, then set the slope to 24, if lower, then you can set it to 12 or 24.
The sound quality depends not only on the settings of your audio system, but also on what speakers you have installed. If you want to replace them, we recommend that you read the article “what you need to know when choosing car speakers”
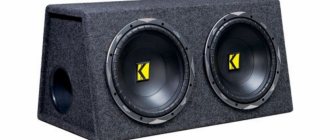
Subwoofer installation
The next step is connecting the subwoofer. Many car owners refuse it, because new high-quality speakers in combination with an external amplifier give excellent sound, very clear, which is quite enough for the average user. For fans of electronic music, a subwoofer will be necessary. We would like to warn you against purchasing a ready-made subwoofer with a built-in amplifier and installing it into a standard system.
Today, various “boxes” and “barrels” are on sale at reasonable prices, which some “specialists” install on their own in the garage. Only, by saving money, you will not get the desired result, which you will then be sincerely disappointed with.
Recommended article: Selection of Mercedes Gelandewagen tuning from leading tuning studios
To ensure that the sounds of music in the car are reproduced beautifully, the subwoofer is connected to the existing speaker system, taking into account the space of the car. And nothing else.
The cost of upgrading a standard audio system along with a subwoofer ranges from 50 to 90 thousand rubles.
Turning off Demo mode
Immediately after purchasing and connecting the radio, you should figure out how to disable the demo mode, intended for displaying the device in the store. It is possible to use the radio in this mode, but it is inconvenient, since when you turn it off, the backlight does not go out, and inscriptions with various information run across the display.
Disabling demo mode is very simple:
- We go to the hidden menu by turning off the radio and holding down the SRC button.
- In the menu, turn the wheel to reach the DEMO item.
- Switch demo mode from ON to OFF.
- Exit the menu using the BAND button.
You can also set the date and time in the hidden menu by going to the System section. The time display is switched here (12/24 hour mode). Then open the “Clock Settings” item and turn the wheel to set the time. In the System section there is also a language setting (English/Russian).
If your settings are reset when you turn off the ignition, the article “how to connect a radio” has the answer to this question