Ball joint VAZ 2110
When a ball joint on a car starts knocking, it is very bad. There have been cases when a ball joint that was not replaced in time flew out while the car was moving and the wheel simply plowed the ground. To prevent this from happening, the ball joints must be changed on time. This instruction, as well as the video, will tell you in detail how to replace ball joints on a VAZ 2110, even in your own garage.
- Ball joint diagnostics
- Choosing a quality ball
- Tools for work
- Replacing the ball joint
- Removal
- Preparing a new ball
- Installation
Ball joint diagnostics
There are several options for this activity:
- The first option is to regularly visit your favorite service station and have the chassis diagnosed there. The diagnostic price is usually about 150 rubles.
- The second option is to do this diagnosis yourself. Here's how it's done.
- Place a jack under the car and lift it so that the wheel comes off the ground.
- Place something under the vehicle - do not work on a jacked vehicle.
- Grab the wheel from the top and bottom.
- Make sudden movements - shake the wheel. Push the top away from you and the bottom towards you and vice versa.
- When the wheel wobbles, a dull knock will be heard.
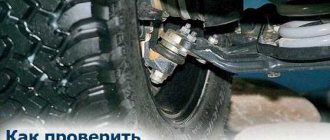
- Ask a friend to shake the wheel, and you yourself place two fingers on the connection between the ball joint and the suspension arm (see Suspension repair - how to do it correctly).
- If the ball joint is out of order, vibration will be heard at the point where the fingers are applied.
Wobble the wheel
Remember. The ball joint does not necessarily change as a pair.
You can also make assumptions about ball wear for the following reasons:
- The car does not move steadily on a flat road. If the ball joints are loose, this is quite possible.
- The rubber on the front wheels shows significant uneven wear. Although it may be an incorrect alignment, it does not prevent the ball joint from wearing out.
- When a car wheel hits a hole, a dull knock is heard - this indicates that the ball joints on your VAZ 2110 have become unusable.
- The steering wheel became harder to turn.
Causes and signs of ball joint failures
Let us list the main reasons due to which the service life of ball joints is significantly reduced. Here they are:
- severe shock loads. This is the main reason for hinge failure. And it is especially relevant if the driver constantly drives on dirt roads or on roads with dilapidated asphalt pavement;
- lack of lubrication. If the driver does not carry out systematic maintenance of the ball joints and does not lubricate them, then the lubricant exhausts its service life and ceases to perform its functions. This usually happens within six months. After this, the destruction of the ball pin is only a matter of time;
- boot breakage. The purpose of this device is indicated by its name. When the boot fails, dirt begins to accumulate in the pivot joint. Over time, it begins to work as an abrasive material, which gradually damages the ball pin.
Now we list the main signs that clearly indicate a broken ball joint:
- suspension rumble. It is heard especially clearly when the driver goes over a speed bump at a speed of 20–25 km/h. If the suspension rattles, it means that the grease has been completely squeezed out of the ball joint;
- When driving at high speed, one of the wheels begins to sway from side to side. This indicates that there is a lot of play in the ball joint. The situation is very dangerous, since the swinging wheel can turn almost perpendicular to the body of the car at any moment. After this, the car is guaranteed to lose control, which can lead to a serious accident;
Choosing a quality ball
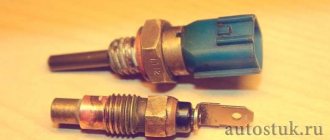
You can buy any ball joint at the nearest store and drive it for quite a long time, but this is a matter of chance. Therefore, let's look at what a high-quality ball should be:
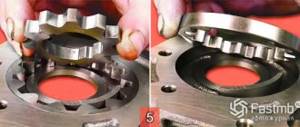
- Ball joint housing. It must be welded in two parts. The seam should be visible on one side, but not on the other.
- Ball joint pin. Must be hardened, gray in color, must have scale and no paint on it. Rolled thread.
- The ball should rotate with great effort, but not bite. It is often very difficult to turn the finger with your hands - you have to take a knob.
- The kit should include a boot and a nut.
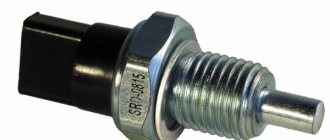
- Remember - most VAZ 2110 owners install Track balls on their car. Also good options are BelMag, Trial-Lux and others.
Ball joint "Track"
Tools for work
Here is a short list of what is needed to replace the ball joint on a VAZ 2110:
- WD-40 or similar rust remover.
- Heads for 17 and 19, wrench and ratchet
- Hammer
- Mount
- Balloon or corresponding socket for wheel removal
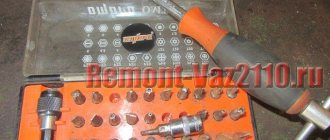
- Ball joint puller
Puller suitable for VAZ 2110 ball
- Litol
- Metal brush
How to check the condition of a part?
A faulty ball joint can be recognized by a dull knock that comes from the vehicle's chassis when driving over uneven surfaces. Strong play and deviation of the car from a straight course are also eloquent symptoms of a breakdown. If the first signs are detected, you must immediately resort to replacing the ball joints.
On cars without power steering, the steering wheel will become much harder to turn in both directions. The same symptom is the nature of the breakdown of the steering rod and tips. But, if the problem is with the joint, then it will be necessary to apply much more force to turn the steering wheel, especially at extremely low speeds, for example, when parking or starting to drive
If a strong squeak occurs when the vehicle turns, then most likely the part is operating without lubrication. The lubricant could leak due to a damaged boot. Such a hinge will not last long; it is best to replace it in a timely manner. Many car owners are also interested in the question: how to check a ball joint without a puller?
Article on the topic: How to check a car alternator with a multimeter
This work is quite simple to do: you need to insert a flat-head screwdriver into the gap between the bipod of the steering knuckle and the lever. Next you need to make an effort and try to disconnect the parts from each other. With this simple action, even minor play can be detected.
Replacing the ball joint
Now let's look at how to replace a ball joint correctly with your own hands.
Removal
Advice! Don't forget to set the parking brake and install wheel chocks.
So:
- On a VAZ 2110, replacing the ball joint begins with raising the car. This is done using a jack and stand.
- Then, using a balloon tool, unscrew the wheel mounting bolts and remove it.
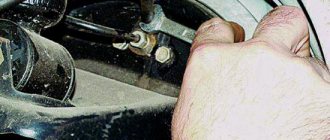
- Take a metal brush and clean the area around the ball joint to make it easier to unscrew.
- Spray the ball pin with HP spray to make the nut easier to unscrew.
- Take a 19mm socket and a long wrench. Unscrew the ball pin nut completely.
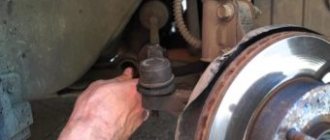
- Now we need a ball joint remover. Place the connection between the suspension arm and the ball joint into the puller and unscrew the rod until the pin comes out of the arm.
Replacement of ball VAZ 2110
Advice! Tap the suspension arm with a hammer periodically - the vibration will help remove the pin.
- If you can’t get such a puller, you can remove the ball joint using a hammer and a pry bar.
- The pry bar must be placed between the lever and the steering knuckle, rest against the fist and press on the lever to create pressure.
- At this time, it is necessary to apply clear and strong blows to the suspension arm with a hammer until the finger pops out.
- Next, using a pry bar, in the same position, you need to bend the lever and move the ball pin away.
- Using a 17mm socket, unscrew the two bolts securing the ball joint to the steering knuckle.
- Remove the ball.
Ready!
Preparing a new ball
You can just install a new ball joint, but it would be better to apply some tips:
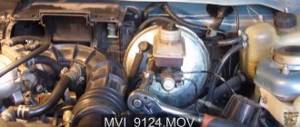
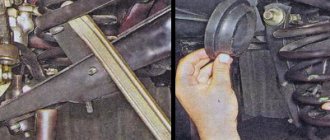
- Lubrication. Clamp the new ball joint into the planks.
- Remove the nut and boot.
- Place a wrench (a small tube of suitable diameter) onto the ball joint pin.
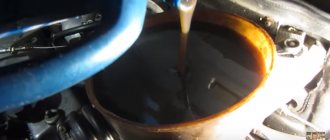
- Take Litol or other lubricant and fill the ball joint housing with it.
- In this case, you should make rotational movements with the finger of the ball joint so that the lubricant is better distributed in the housing.
Lubricate the ball
- Lubricate the ball-to-knuckle bolts.
- Drive the threads on the bolts with at least nuts.
Remember! Do not lubricate the ball pin, because it will rotate when you try to tighten the nut directly on the car.
Installation
- First of all, clean the seat for the ball joint on the steering knuckle.
- Screw the ball back to the knuckle using a 17mm socket.
- Using a pry bar, bend the suspension arm and place the finger of the ball joint into the hole in the arm.
- Tighten the ball joint pin nut.
Attention! If the finger scrolls, then it is necessary to create a load. This is done with the same mount, only the pressure needs to be created in the opposite direction.
- Then put the car wheel back in place.
It doesn't matter on which side of the car you change the ball joint - it's done the same way. In the same way as the replacement of ball VAZ 2110 is done, it is done on other models of this family. Apply these tips from the article, look at the process in the photo and this will make your repair as fast and high-quality as possible!
How to remove a ball joint without a puller
To remove the ball, and generally disassemble the suspension, it is not necessary to have a lift or inspection hole; a small plot of land with dense soil is enough. Before removing the ball joint without a puller, you need to prepare the tool.
You will need a small chair for ease of work.
- Jack, two are better.
- Wheel chocks.
- A good set of tools, both spanners and open-end wrenches.
- Installation, better crowbar.
- Hammer.
Work order.
Preparation.
- We arrive at the dismantling site.
- We place wheel chocks under the rear wheels.
- We place a jack under the car; if necessary, place strong, level supports in the form of boards or strong bricks under the jack.
- Loosen the wheel nuts.
- Raise the car with a jack until the wheels come off the ground.
- We unscrew the wheel nuts, this is the most crucial and dangerous moment. During removal, if the jack is unsteady, the car may fall off it, which can lead to an accident or even greater damage to the car. Yes, and it is difficult to lift the car from this position.
- We remove the wheel and immediately place it under the front beam for safety reasons.
- We take the tool.
- Unscrew and remove the brake caliper. A metal brake disc protection casing can be screwed to the caliper with a small bolt.
- If you do not need to change the pads, move the caliper to the side and secure it to the frame with wire, rope or any other method so as not to damage the brake hose and so that the caliper does not interfere with further work.
- Loosen the tie rod mounting nut by three turns.
- We insert the crowbar so that one end of it rests rigidly, against any metal part, the crowbar itself rests against the rod securing the ball end of the steering rod. We press on the second end of the crowbar in the direction of the exit of the steering rod cone, hitting the steering knuckle on the hub with a hammer, knocking out the steering rod.
- Unscrew the nut securing the rod and move it to the side.
- Unscrew the stabilizer bar link.
- Using a mounting bracket or a second jack, we relieve the tension in the connection between the strut and the stabilizer, and remove the ball strut.
- Unscrew the lower bolt, the upper nuts of the shock absorber and remove it.
Removing the ball.
- Loosen the nut on the upper ball joint.
- We insert a crowbar using the method of knocking out the steering rod; this must be done carefully so as not to damage the rubber boots on the chassis parts.
- We knock on the hub at the place where the ball is attached to the turning shoe.
- Unscrew the ball joint nut completely.
- Unscrew the bolts securing the ball of the upper arm.
- We remove the ball.
- Loosen the nut securing the lower ball joint.
- Remove the protective cover from the hub.
- We remove the retaining ring and the adjusting washer from the outer grenade.
- Place jack No. 2 under the lower arm.
- Raising the lower arm with a jack, we rest the upper swing arm against the upper arm, slightly turning the hub towards the bumper to give access to the lower ball swing arm.
- Continuing to jack up the hub, we tighten the connection between the ball and the hub.
- Without lifting the car with a jack, tap the hub at the connection point with a hammer, knock the ball out of the mounting location and unscrew the ball nut completely.
- We remove the hub, being careful not to lose the washer, which is located between the hub bearing and the grenade.
We put it aside, covering the hole with the bearing with a clean cloth. - We unscrew the four bolts securing the ball and, turning it down and slightly turning it to the side, remove it from the lower arm.
During disassembly, we check the condition of the parts and during reassembly, which occurs in the reverse order, we replace the failed ones with new parts.