Sound insulation on the Lada Priora is of interest to many car enthusiasts, for whom not only safety is important, but also comfort during travel. Being in a car that is treated with high-quality noise-insulating materials, the driver and passengers can enjoy every trip.
Street noise, the knock of worn suspension parts, the sound of a running engine and other factors affecting acoustic comfort become much less noticeable. But in order for the result to meet expectations, and the money not to be wasted, it is necessary to entrust the soundproofing of the Lada Priora to experienced craftsmen.
The desired effect can be achieved only with the proper experience, professional skills and abilities, as well as with the proper selection of materials. If you need a decent result, contact those.
Floor
The floor of a Lada Priora car requires effective sound insulation, since noise from the wheels, transmission, engine, etc. penetrates into the cabin through it. And when driving on country dirt roads and light off-road conditions, dry grass can touch the bottom, which is why a characteristic rustling sound can be heard in the cabin.
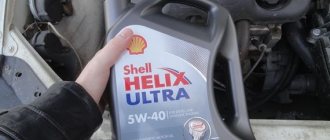
To prevent all this from causing discomfort during trips, we use multi-layer sound insulation of the floor. The elastic and elastic material STP Profi Plus is used for the first layer. STP BlackTon is used as the second (intermediate) layer, and STP NoiseBlock is the third.
This three-component structure guarantees excellent sound absorption quality. An STP Aero+ sheet, cut along a pre-marked contour, is secured under the rear seat cushion.
Do-it-yourself soundproofing of Priora doors
Sound insulation of Priora doors
Soundproofing of Priora doors is done in many cases only for the following reason: this car is domestically assembled, which a priori affects the silence of the cabin and silent driving at speed. Knowing how to soundproof doors on a Priora, you can also improve the situation with acoustic systems with your own hands, which will sound completely different after the operation.
How to “shum” doors
Lada Priora and door sound insulation
Doors remain the most relevant in terms of sound insulation. It is because of their poor insulation that most of the noise from the wheels penetrates into the cabin when driving. In addition, frontal acoustics are often installed on the door - today this is fashionable and justified. If the doors are not “made loud”, the speakers will not play at their full strength.
Note. The process of carrying out noise insulation operations on all cars is the same in almost everything. On the other hand, in each case one should not forget about its subtleties and nuances.
Sound insulation of Lada Priora doors
First of all, the “noise” of the doors begins with the following actions:
- The upholstery material is removed;
- The standard “Shumka” installed by the manufacturer is dismantled;
- The metal surface of the door that opens is thoroughly wiped with some degreaser.
Note. Let us note right away that you cannot remove the anticorrosive agent that covers the bottom of the doors!
Technology of carrying out “Shumka” in layers
Soundproofing doors priors
“Shumka” is carried out in several ways, but the most popular and relevant method is the layered insulation method. This process will take no more than a day if you know all the rules. In addition, you need to stock up on the following materials:
- Vibro material (7 sheets);
- Material Splen (4 sheets);
- Bitoplast (3 l);
- Modelin (3 l).
First layer
Started:
- Several pieces of the desired shape and size are cut out of the vibration (you can use cardboard patterns).
Advice. The larger one piece is, the better. Thus, there will be fewer joints, which will have a positive effect on processing.
Sound insulation of Priora front doors
Let's continue:
- The bituminous side of the pieces is vibrated with a technical hair dryer;
- We apply the pieces to the doors (see Soundproofing doors in layers) and glue them, rolling them out with a special roller (it can be iron or plastic - it doesn’t really matter, as long as the roller is of such a size that it is easy to work with);
- It is recommended to apply another overlap on top of the first vibration layer, in the same way as described above.
Note. You need to know that covering a certain area of the inside of the door with “vibra” depends on the material itself. Typically, this percentage varies between 55-100 percent of the total area of the inner surface of the door.
Second layer
Acoustics in the front doors of Priora
In this case, the operation algorithm is as follows:
- Sound-absorbing and heat-insulating materials are glued on top of the first layer of “vibra”.
Note. At this stage, it is recommended to use the following materials: Splen, Accent and the like. They are perfect for the job and have a self-adhesive backing. This means that installing them will not require any special skills or a lot of time. The entire surface is already covered 100 percent.
Third layer
This layer is installed at will. The point is that all technological holes in the doors are closed with a special vibration material or similar properties.
Note. Difficulties may arise when applying the third layer of insulation. In particular, during the repair of window regulators, if you suddenly need to do this, you will have to remove the third layer again. But what can you do, if you need to make an effective noise, you have to go for it.
Creaks
Discomfort inside the Priora arises not only from noise from outside. Drivers lose a lot of their nerves due to squeaks that occur between the door trims and in various parts. This type of problem can be solved in the following way:
- The upholstery is reinforced with “vibra”;
- Bitoplast is glued on top, which perfectly absorbs sounds. In some cases, we can also recommend modelin.
Advice. At the end, you must definitely change the clips for the door trim with new ones.
How to soundproof doors in a Priora
Remember that high-quality noise insulation with your own hands is a set of measures, and not a single stage of work. The operation as a whole should be aimed at eliminating noise from outside and inside the Priora car in order to achieve ideal silence and comfort in the cabin when driving. Video and photo materials will help reinforce the above information. Other step-by-step instructions will also be helpful. You can entrust the work to specialists at a service station, but the price of the service will certainly not please anyone.
avtozvuk-info.ru
Why choose us
Many car enthusiasts have already used it and are satisfied with the results. There are several reasons for this.
- We specialize exclusively in sound insulation, so we know about this better than employees of wide-profile auto repair shops.
- For our work, we use only certified materials from the premium STP line.
- The interior of each Lada Priora car remains the same, because our craftsmen carefully handle the factory upholstery, seats, plastic elements, etc.
- We complete assigned tasks without delay, informing clients in advance of specific deadlines.
Call us at our contact number or request a call back to ask all your questions.
Soundproofing the floor of Lada Priora.
The floor of the Priora is almost completely covered with standard sound insulation, but it does not adhere to the body at all and, accordingly, does not work, so it only faces complete dismantling.
We clean and degrease the body before installing the materials.
Let's start soundproofing the interior Degrease the surface and begin installing the first layer of vibration insulation Shumoff M3
.
Sealing the front arches and the engine bulkhead as high as possible. To vibration insulate the surface under the rear seat we also use M3
. We take all the sheets already preheated from a special oven and carefully roll them after installation.
This layer will allow us to significantly reduce vibration from the road, increase the integrity and knock-down of the car, and also reduce sensitivity from the road structure itself.
We degrease the floor surface again and begin applying the second layer. We cover the entire floor from the engine bulkhead and under the rear seat with noise and heat insulator Shumoff P4
; This will allow you to achieve higher efficiency and eliminate difficulties when assembling the interior.
The second layer will allow us to reduce noise from the wheels and road surface, as well as significantly increase the thermal insulation of the interior.
Soundproofing Lada Priora - video, instructions, tips
In the video and article you will learn how to properly soundproof the Lada Priora. Everything is shown as clearly and clearly as possible. The demonstration is based on the example of wrapping the trunk and doors.
Soundproofing the trunk of Priora
Removing the trunk trim
Cleaning the luggage compartment
Sticking the trunk
You should start from the extreme places. Judge for yourself, because if you climb inside the trunk, you will certainly get everything around you dirty. You'll have to clean everything again, degrease it - a lot of extra work. The material may need to be heated a little before gluing to give it elasticity.
There is no need to glue the spars - they are already deaf . It is necessary to process parts that make noise. As a result, 6.5 sheets of material were used. A full gluing may require more.
Soundproofing doors Priora
Door disassembly
Degreasing doors
Vibration insulation pasting
Vibration protection is glued on top. A strip of 60x13 cm is cut out. It needs to be cut into two parts of 30 cm each, because it simply won’t fit into the hole alone. Next, a 24x60 piece is cut out and halved in the same way. Next, it is cut in half again - you end up with four 12x30 pieces.
Attention ! There is no need to completely seal the inside surface of the door. 70% is quite enough.
For proper operation, it is better to arm yourself with a flashlight and place it inside the door. Carefully insert the pieces of vibration protection into the holes, having first removed the protective layer of the adhesive side. Press the material against the metal as tightly as possible. There should be no air bags.
Gluing splenium
Here everything is done almost the same way. It is recommended to remember the parameters of the pieces of vibration protection glued at the previous stage.
Getting rid of holes
You need to stick vibration protection on them, it should look something like this:
At this point, the soundproofing of the Lada Priora can be considered complete!
autoremka.ru
Soundproofing a VAZ 2170 panel without removing it
All the crickets in Priora are due to cheap plastic, so our main task is to glue all the joints and contact points of the plastic with anti-squeak. The anti-creaking agent can be modelin (for narrow spaces), or bitoplast 5mm-10mm for large cracks.
First of all, we remove all the plastic from the panel (central trim, instrument cluster, windshield pillar trim, central tunnel, glove compartment, air ducts, mounting block cover, etc.).
First, you can make the plastic elements of the interior a little heavier by gluing vibration material to them. But the most important thing is to cover all the edges with modelin, and in some places with bitoplast. Here is an example of where and how the model is glued: Or this is how you can get rid of squeaks in the instrument cluster:
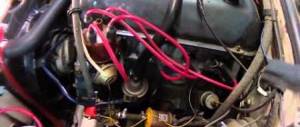
The wires under the Priora panel also add quite a few crickets. If you can reach them through the bottom, then you can try wrapping them in the same anti-squeak. Now all that remains is to reassemble in reverse order.
Soundproofing doors on Lada Priora
To enjoy the ride in the car, I decided to make it completely soundproofed. I will publish soundproofing on the website step by step. Today the first article about soundproofing doors on Lada Priora will be published.
Do-it-yourself soundproofing of doors on Lada Priora:
The first step is to remove the door trim.
The door and trim are full of dust and dirty stains, so first thoroughly wipe everything with a damp cloth and dry it. You can degrease surfaces with spirit.
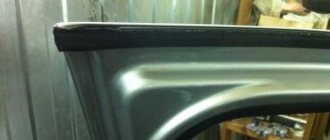
Using a carpenter's knife, we cut off the unevenness of the standard vibration isolation.
We cut the vibroplast into strips 15–20 cm wide. Before gluing, the vibroplast must be heated with an industrial hair dryer. In the absence of such, I used a natural heat source. It warms up very well in the sun!
The door reinforcement beam is in the way, under which you also need to push the vibroplast. Therefore, I did not remove the paper on the strips, but cut it in the middle and removed it already in the cavity of the door.
We glue the strips of vibroplast overlapping.
Then we cut the splen into strips and glue them joint to joint on top of the vibroplast. I removed the film from the splen in advance, but immediately put it back so that it would be easier to tear it off in the cavity of the door. I sealed the joints of the splen with wide tape.
Don’t forget to immediately put the tube on the door lock rod.
Lastly, we seal the technological holes of the door. You can get confused and cover the entire skeleton of the door. It wouldn't hurt to lubricate the window lift drives with grease first.
We glue the casing with bitoplast.
We assemble everything in reverse order.
We soundproof other doors in the same way.
Material consumption rates for both rear doors:
– 3 sheets of vibroplast; – 0.6 sheets of splenium; – 1.6 sheets of bitoplast.
To be continued.
vazgarage.ru