To do this, after removing the steering column covers and disconnecting the wiring harness block from the switch... ...using a Phillips screwdriver, unscrew the two screws securing the switch; for clarity, it is shown on the removed connector of the steering column switches. Remove the left steering column switch from the connector.
Similarly, remove the right steering column switch from the connector. We install the steering column switches in the reverse order.
When installing the steering column casings... ...we pass the self-tapping screws for fastening the casings through the holes in the bosses of the housing of the steering column switch connector. For clarity, it is shown on the removed casings and the steering column switch connector. Removing steering column switches for Renault Logan. The turn signals are turned on by moving the left steering column lever up or down until it locks.
Up to turn right, down to turn left.
When you have completed the turning maneuver and are returning to straight-line motion, you return the steering wheel to its original position accordingly. In this case, the steering column switch will automatically turn off.
You can also turn on the turns for a short time, you just need to slightly turn the lever to the desired position. As soon as the turn signal operates once or twice three times, you should release the switch and it will turn off the indicator and return to its original position.
The right steering column switch on Renault Logan controls the wipers and windshield washer.
How to remove the steering column cover of Renault Logan
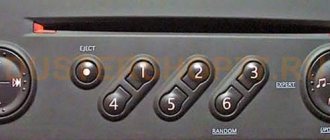
The button at the end of the right electric switch is designed to display data on the on-board computer. The button is shown with a red arrow in the figure below: Right steering column switch The right switch performs the following functions: The washer and wipers operate only when the ignition is on. The wipers turn on when you move the right switch lever.
In the first position, the wipers work intermittently. In the second position, the wipers work constantly, but at low speed. In the third position, the wipers work constantly, at high speed. To turn on the washer, you need to pull the right lever towards you, while jets of water spray onto the windshield.
In order for both the wipers to work and water to flow at the same time, you need to pull the right lever towards you and. Then water will splash and the wipers will work at the same time, thereby clearing the windshield of dirt.
Replacing the steering column cover Renault Logan 2
The other end of the cable is brought out to the protruding lead 3 of the drum 5 of the device and is connected through block 1 to the airbag. The device drum driver fits into the hole in the steering wheel hub. When the wheel rotates, the drum is turned by the leash, and with it the cable strip, which is located in a cylindrical Renault Logan, either at a larger or smaller radius.
From its middle position, the drum with a leash in the device can be rotated in each direction until it stops by three full turns. This prevents the electrical conductor from breaking when the steering wheel is rotated from the neutral position on a Renault Logan, how to remove the steering column housing, rotation in each direction - on a car without power steering, and at a slightly lower number of revolutions - on a car equipped with a power steering.
Before removing the steering column switch connector from the steering column, for ease of subsequent assembly, it is better to block the device drum from turning. To remove the right steering column switch, remove the immobilizer coil. Using a Phillips screwdriver, unscrew the two self-tapping screws securing the right steering column switch. Remove the switch from the connector.
Squeezing the two block latches, disconnect the wire block from the switch connector. Remove the right steering column switch. We install the steering column switches in the reverse order. Installation of steering column covers... Installation of covers proceeds according to the following algorithm:
Replacing the Renault Logan steering column switch: repairing the turn joystick, lights and wipers
To briefly turn on the high beam headlights, regardless of the position of the handle of the central lighting switch and the key in the ignition switch, move the steering column switch lever to.
When the steering wheel is returned to the neutral position, the steering column switch is automatically returned to its original position and the turn indicators are turned off.
Notes from a sober misanthrope practitioner Repair of the Renault Logan steering column switch. Having rummaged through the forums, I found that this is a common...
The turn signals are turned on by moving the left steering column lever up or down until it locks.
Actually, I recommend soldering the wires themselves only when the switch is fully assembled.
From its middle position, the drum with a leash in the device can be rotated in each direction until it stops by three full turns.
This prevents the electrical conductor from breaking when the steering wheel is rotated from the neutral position by 2.25 turns in each direction on a vehicle without power steering, and a slightly lower number of turns on a vehicle equipped with power steering.
Before removing the steering column switch connector from the steering column, for ease of subsequent assembly, it is better to block the device drum from turning.
To do this, if necessary, turn the drum at a slight angle, aligning the depression between the two protrusions of the drum with the groove of the body... ...and insert a wooden wedge.
By pressing the head of the screw along its axis... ...we move the connector from the steering column.
After this, you need to carefully remove the part and mechanism. It is worth considering that the latter is attached to the lever thanks to two grooves and a small spring-type pin. In order to remove it, you need to release the fasteners.
Functions of Renault Logan steering column switches
The functions of the left switch include:
- Turning off and adjusting external light sources;
- Turning on the dimensions, lighting the control panel and license plate;
- Switching between low and high beams;
- Turning on the fog lights (PTF);
- Turning on the rear fog lamp;
- Horn button;
- Switching direction indicators.
The functions of the right element include controlling the windshield wipers and windshield washer, as well as displaying information on the on-board computer.
We recommend: What kind of gasoline does Renault Duster run on?
Due to the fact that the functions and their number of parts differ, the breakdown of the right switch occurs much less frequently than the left one, and accordingly, its repair is not carried out as often.
An important parameter when replacing a spare part is its catalog article - a code, taking into account which the part is purchased for subsequent replacement. The price of a new element is usually high, so car owners prefer not to replace the switch, but to repair it. The most common cause of breakdown is burnout of electrical elements.
Disassembly of parts
The sliders, mechanism and casing are not needed yet; you need to move on to removing the signal button. It is secured with two locks. To remove it, you will need a thin object (for example, a scalpel or knife) that should be inserted into the groove. Having done this, you need to release one of the locks and remove the button from the groove.
Now you can proceed to removing the first slider (this element is responsible for turning on the low beam). It is recommended to place the lever in your left hand, and take the slider with your right hand and pull. This Renault element should come out with a slight crunch.
Important: when pulling out the slider, it can easily be damaged, so you need to act carefully during repairs.
After this, the contact pin along with the wires are removed. It is from this that the wires must be desoldered during repairs. Instead of bad steel wires from Renault Logan, which flew into the trash after soldering, it is best to use 0.5 mm2 copper wires.
During repairs, the wires need to be threaded through the hole and soldered to the contacts. At the end of the process, it is necessary to check for a short circuit with a tester, since molten tin can easily damage the plastic insulation of the contacts.
After the soldering process, everything is assembled in reverse order.
Important: when putting an element such as a light switch on a contact pin, you must act with extreme caution, since there is a high risk of breaking the lever that controls the contact slider.
We recommend: DIY Renault Logan generator repair
As for the wires, it is recommended to solder them when the Logan steering column element is fully assembled. This will allow you to accurately determine the size of the wires.
By following these recommendations, the car enthusiast will be able to solve the problem with the steering column mechanism on Logan.
Then the base of the part must be turned over and the terminal part to which the Renault Logan wires are connected from the lever is removed. There are five castles there.
Check and replacement
Because molten tin could damage the plastic insulation of the contact plates. After soldering, we begin to assemble in reverse order. The main thing is, when you put the light switch on the contact pin, do not break the lever that controls the contact slider!
Then the base of the part must be turned over and the terminal part to which the Renault Logan wires are connected from the lever is removed.
There are five castles there. Inside the element there are two small sliders that turn on the turn signals and headlights. Disassembling the parts The sliders, mechanism and casing are not needed yet, you need to move on to removing the signal button.
It is secured with two locks. To remove it, you will need a thin object, such as a scalpel or knife, which should be inserted into the groove.
Disassembly of parts
The sliders, mechanism and casing are not needed yet; you need to move on to removing the signal button. It is secured with two locks. To remove it, you will need a thin object (for example, a scalpel or knife) that should be inserted into the groove. Having done this, you need to release one of the locks and remove the button from the groove.
Now you can proceed to removing the first slider (this element is responsible for turning on the low beam). It is recommended to place the lever in your left hand, and take the slider with your right hand and pull. This Renault element should come out with a slight crunch.
Important: when pulling out the slider, it can easily be damaged, so you need to act carefully during repairs.
After this, the contact pin along with the wires are removed. It is from this that the wires must be desoldered during repairs. Instead of bad steel wires from Renault Logan, which flew into the trash after soldering, it is best to use 0.5 mm2 copper wires.
During repairs, the wires need to be threaded through the hole and soldered to the contacts. At the end of the process, it is necessary to check for a short circuit with a tester, since molten tin can easily damage the plastic insulation of the contacts.
After the soldering process, everything is assembled in reverse order.
Important: when putting an element such as a light switch on a contact pin, you must act with extreme caution, since there is a high risk of breaking the lever that controls the contact slider.
We recommend: 8 best oils for Renault Logan
As for the wires, it is recommended to solder them when the Logan steering column element is fully assembled. This will allow you to accurately determine the size of the wires.
By following these recommendations, the car enthusiast will be able to solve the problem with the steering column mechanism on Logan.
Then the base of the part must be turned over and the terminal part to which the Renault Logan wires are connected from the lever is removed. There are five castles there.
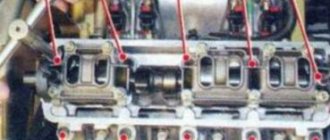
Inside the element there are two small sliders that turn on the turn signals and headlights. There are several wires coming out of the switch.
We need black and red. Because they most often fail. For example, my black wire broke off right at the switch pin. And it was not possible to solder it right away.
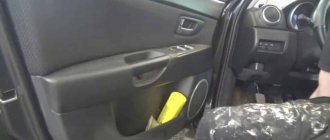
Therefore, we had to completely disassemble everything. In the photo, the wires are already soldered instead of the factory ones - the arrow indicates the location of the breakage. Where the wire broke off. This is what the factory wires look like. We begin to disassemble the switch. Unscrew the two T10 screws (red arrows) and carefully unclip the plastic latches (yellow arrows).
We see the following picture. Carefully pull out the switch along with the mechanism. The mechanism is attached to the lever using two grooves and a small spring pin, indicated by arrows in the photo. This pin rotates when switching lights and dimensions.
And the wires are breaking. Moreover, they are really rigid and not flexible.
Switch Pin To remove the switch pin, you must first disassemble its housing. The figure below shows what needs to be unscrewed and which latches to unfasten: Switch body Then you need to remove the horn button. It needs to be pryed off with something thin and flat, for example, a small flat screwdriver. Carefully insert a screwdriver into the gap between the button and the lever, lift the cap and remove it. Place of removal of the button For clarity, I provide an illustration that shows the removed button.
Repair of the steering column switch RENAULT DASTER
To make it more clear to you how to extract it. Removed button Then you need to remove the end switch, which is secured with latches on the pin. Therefore, it must be pulled off the pin with a strong but gentle movement.
We recommend: Which summer tires are best for Renault Logan: let’s look at the essence
For clarity, we will show the latches: Also on the element itself there is a terminal, by clamping it, it will be possible to pull the element out of its normal place. To determine a fault in Logan, it is advisable to use a tester and check the electrical wiring.
Also, to check for mechanical damage, you need to disassemble the plastic housing of the part; for this you need to: After this, carefully disconnect the plastic latches located on the sides of the housing.
Left steering switch, repair and replacement
You can find many photos and videos online that will tell you in detail about the process. A common problem with the left steering switch is a malfunction of the sound switch: its wires are located on a moving part, so they can fray or become unsoldered. To fix the problem, you need to remove the steering switch. Before removing and disassembling the part, you should prepare the following tools:
- Phillips screwdriver;
- Flat thin screwdriver;
- Keys T10 and T20.
Scheme for disassembling the dashboard and removing the part:
- To repair the steering switch, you should turn off the power to the car, since the work will be carried out on the electronic part of the system, and also turn the steering wheel 90 degrees to the left;
- Afterwards it is necessary to disassemble the steering column casing;
- Using T20, remove the first and second mounting bolts;
- Use a Phillips screwdriver to tighten two screws;
- Next, you should disassemble the lever and carefully inspect the switch and electrical wiring;
The most common cause of joystick malfunction is contacts that are sealed off from the pin. To remove the pin, you must open the switch housing. Figuring out how to solder the elements yourself is not difficult: you need to prepare a couple of more flexible wires, a soldering iron and solder. After soldering, assembly is carried out in reverse order.
Important! When placing the light switch on the contact pin, be especially careful not to break the lever.
If the switch is being replaced, then removing the element does not differ from the process of dismantling during repair, with the only difference being that instead of carrying out repairs, a new part is installed. The right steering column switch is removed in the same way. The cause of element malfunction can also be a stuck relay, which does not operate when the headlights are turned on due to oxidized contacts.
see also
Comments 27
From experience. The original switches on old Logans (in my case, MSV 2007) are arranged differently. At the very first step, everything breaks off, since the cover is not removable, but integral with the body, and the only way to get there is to remove the cover with the wiring connector. The second point is that the horn button does not snap onto the lever body, but onto the central rod. The third point is that the contacts are not mounted on the rod, it is just a piece of plastic. And there are no contacts on the button either, I didn’t get to the signal mechanism itself, since I was hoping to just change the rods (the original switch constantly led to the high beam freezing, then I bought the ORIGINAL switch, which almost immediately stopped automatically discarding the left turn, but recently died horn, which is why I reached into it), but they turned out to be not interchangeable.
Read more: Vehicle registration number
PS: Thanks for the article and photos, it was only thanks to her that I decided to go do it. Unfortunately, I had to do a lot of tinkering, since my switch has horn wires coming right out of the rod body, so I had to melt that place with a soldering iron in an attempt to get to the contacts and solder them directly. Let's see how long they go.
PS2: Does anyone have any guesses as to why the high beam was stuck in the original one? I took it apart a bunch of times, checked everything and cleaned it, but every other day, or even immediately, the switch was stuck in high beam mode again (more precisely, the switch itself was working, clicking as it should, but the high beam was constantly on).
I saw a case where everything melted inside due to higher power lamps instead of standard ones. Maybe you have something similar?
The contacts are clean and look normal. The lenses and bi-xenon are of high quality, everything is connected in general neatly. Moreover, it stood like that for 5 years.
Hello. Something broke for me after the high beam headlights on Renault Logan phase 1 were turned on or off. The switch from low beam to high beam is stuck in one position, it does not want to turn off the headlights and does not want to turn on the high beam, only the headlights are turned on in this position, the high beam The light does not come on in this position and in the dark this means nothing can be seen from the front. It is not possible to turn off the headlights; I disconnected the negative terminal. This is the only way to turn off the headlights (the headlights were turned off). I don’t know what to do next, go to an electrician or see for myself?
Hello. If you can remove and disassemble the switch yourself, then you can try it yourself; if you are not confident in your abilities or do not have free time, go to a workshop.
Bookmark)) Is a 30 watt soldering iron hotter than usual? Ato also soldered on top - quickly covered!
A 30W soldering iron is more powerful than a 15W and weaker than a 60W soldering iron. I don’t know what “usual” is for you)
I'm not an electrician, but the soldering iron I have didn't melt the tin of the switch)
Hello, reader of the blog AAuhadullin.ru! In this article we will look at the repair of Renault Logan steering column switches. Before the repair, let's look at the appearance of the Reno Logan steering column switch shown in the photo below and then get acquainted with the functions.
FIGURE 1. Steering column switch assembly
Replacement and repair of the steering column cable
A cracking sound in the area of the steering switch when turning the steering wheel and the appearance on the dashboard of a signal indicating an airbag malfunction indicates damage to the steering cable. The problem most often occurs due to a damaged tape containing copper wires. To replace an element, you must perform the following steps:
- The wheels are installed in a level position, without blocking;
- The upper and lower steering column casings are removed (3 screws are unscrewed with T20 screwdrivers);
- Afterwards the airbag and steering wheel are removed;
- The contacts going to the horn and to the ground are disconnected;
- Next, you should remove the steering column switches and pry off the round cover with a screwdriver to get to the cable.
Steering column switch Renault Logan
For example, my black wire broke off right at the switch pin.
Repair of the steering column switch RENAULT DASTER
We need black and red. This pin rotates when switching lights and dimensions.
Removing steering column switches for Renault Logan. We carry out work when removing the steering column, instrument panel and…
By following these recommendations, the car enthusiast will be able to solve the problem with the steering column mechanism on Logan.
Replacing the Renault Logan steering column switch: repairing the turn joystick, lights and wipers
The steering column switch for Renault Logan cars is an important part of the vehicle’s electronic system.
The safety of the car directly depends on its performance, since a broken part will not allow the use of the wiper switch and the turn switch.
If the damage turns out to be serious, then the steering column switch will need to be replaced, which you can do yourself.
Attention ! For Renault Logan cars (phase 1 and phase 2), regardless of the year of manufacture (2005, 2006, 2007, 2008, 2009, 2010, 2011, 2012, 2013, 2014, 2020, 2020, 2017) and engine type (1.4 and 1.6 k) the left switch is considered more significant, since it has more functions than the right one.
Functions of Renault Logan steering column switches
The functions of the left switch include:
- Turning off and adjusting external light sources;
- Turning on the dimensions, lighting the control panel and license plate;
- Switching between low and high beams;
- Turning on the fog lights (PTF);
- Turning on the rear fog lamp;
- Horn button;
- Switching direction indicators.
The functions of the right element include controlling the windshield wipers and windshield washer, as well as displaying information on the on-board computer.
Due to the fact that the functions and their number of parts differ, the breakdown of the right switch occurs much less frequently than the left one, and accordingly, its repair is not carried out as often.
Site navigation
To permanently turn on the high beam headlights, you need to turn the handle to position 3 and pull the steering column switch towards you until it locks in this position. At the same time, a blue light on the dashboard should light up, it signals that the high beam is on. To turn on the low beam, you need to pull the electric switch towards you again until the handle is locked again.
In order to turn on the fog lights, you need to set the outermost handle to position 2, then the next one to position 4.
At the same time, the corresponding light in the instrument panel lights up. The rear fog light is turned on by turning the handle in position 5.
The left switch is additionally equipped with a horn button. To remove it, you need to press out one of the two grooves and carefully pull the button out of the left part. After this, you need to remove the lighting slider using a clamp or be careful with your hands, since this element is quite fragile.
In the body of the left part itself there is a so-called contact pin with wires, which also needs to be removed after all manipulations.
There was no need to disassemble the devices.
Repair of the steering column switch RENAULT DASTER
But this was the simplest thing, because it wasn’t me who did it...: Then, having seen enough photos and videos and armed with screwdrivers with an extension cord, I went to the covered parking lot to reinstall the switches. I didn’t take the navigator with me, since he does not have the flexibility of his figure necessary for the operation!
The worst thing is to break the plastic casing around the steering wheel, and the most difficult thing is to unscrew the 2 recessed screws under it.
STEERING POLE SWITCH FUNCTIONS
The left switch performs the following functions:
- All external light sources are turned off.
- Switch for dimensions, illumination of controls and instruments, illumination of license plates.
- Electric switch "far - near".
- Fog light switch.
- Rear fog lamp switch.
- Signal button.
- Electric turn signal switch. (Performed by moving the lever up (right) and down (left)). Therefore, it is not indicated in the figure.
FIGURE 2. Functions of the left steering column switch
- To honk, you need to press the button on the left electric switch, indicated by a blue arrow.
- The dimensions are turned on by turning the electric switch to position 2.
- To “blink” the headlights, you need to slightly pull the left steering column switch towards you and release it. It should return to its original position.
- To permanently turn on the high beam headlights, you need to turn the handle to position 3 and pull the steering column switch towards you until it locks in this position. At the same time, a blue light on the dashboard should light up, it signals that the high beam is on.
- To turn on the low beam, you need to pull the electric switch towards you again until the handle is locked again.
- In order to turn on the fog lights, you need to set the outermost handle to position 2, then the next one to position 4. At the same time, the corresponding light in the instrument panel lights up.
- The rear fog light is turned on by turning the handle in position 5. The corresponding light on the dashboard should light up. Also, when the rear fog lamp is turned on, the front fog lamps also turn on.
- The turn signals are turned on by moving the left steering column lever up or down until it locks. Up to turn right, down to turn left.
- When you have completed the turning maneuver and are returning to straight-line motion, you return the steering wheel to its original position accordingly. In this case, the steering column switch will automatically turn off.
- You can also turn on the turns for a short time, you just need to slightly turn the lever to the desired position. As soon as the turn signal operates once or twice three times, you should release the switch and it will turn off the indicator and return to its original position.
- The right steering column switch on Renault Logan controls the wipers and windshield washer.
The button at the end of the right electric switch is designed to display data on the on-board computer. The button is shown with a red arrow in the figure below:
FIGURE 3. Right steering column switch
The right switch performs the following functions:
- The washer and wipers only work when the ignition is on.
- The wipers turn on when the right switch lever is moved down.
- In the first position, the wipers work intermittently.
- In the second position, the wipers work constantly, but at low speed.
- In the third position, the wipers work constantly, at high speed.
- To turn on the washer, you need to pull the right lever towards you, while jets of water spray onto the windshield.
- In order for both the wipers to work and water to flow at the same time, you need to pull the right lever towards you and down. Then water will splash and the wipers will work at the same time, thereby clearing the windshield of dirt.