How to lift the body of a UAZ
Home » Spare parts and accessories » How to lift the body of a UAZ
Russian all-terrain vehicle UAZ 469
This all-wheel drive all-terrain vehicle, the most popular in our country and abroad, is equipped with an almost indestructible body. The 469 station wagon was produced at the Ulyanovsk plant from 1972 to 1985. The car was later renamed 3151, after which it was successfully produced until 2010.
How the car was created
By the beginning of the 70s, the GAZ-69, produced at the Ulyanovsk Automobile Plant as a military-civilian vehicle, was still running in the country. Its platform adopted a lot from the post-war Pobeda, and many of the structural parts and elements of the vehicle were clearly outdated by 1970.
The introduction of the UAZ 469 into production immediately resolved the issue of updating, without affecting the basic qualities of the 69th. Amazing cross-country ability, relatively light weight, excellent load capacity, similarity of components and mechanisms with other models of the domestic automobile industry - all this has remained at the same level.
Repair
Many owners of this car have personal experience in such a matter as repairing 469. Indeed, the creation of the car plant in Ulyanovsk has such a simple design that it was not difficult to carry out repairs with your own hands.
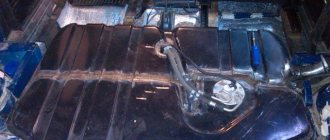
A lift or alteration of the body and suspension is the most common do-it-yourself repair carried out on a Soviet all-terrain vehicle. If the conversion of the UAZ 469 ends up in capable hands, then the domestic UAZ, copied at one time from Land Rover, will show everything it is capable of, leaving “glamorous” foreign models in the dust.
So, it is customary to carry out the UAZ lift with your own hands on the body and suspension. In particular, it is recommended to put good tires on the UAZ, raising the body above the frame in advance. The lift is made using a special body lift technology.
Note. To raise the body above the frame, you will have to install special spacers between the elements (hockey pucks, 2 for each of the 12 fixing bolts, have worked well).
The UAZ 469 suspension lift with your own hands improves the geometric cross-country ability of the all-terrain vehicle. This occurs due to the immobility of the wheels and axle, and the simultaneous raising of everything else when passing through a muddy mess.
Also, after lift tuning 469, it is possible to install larger wheels, and this is a very significant plus.
In addition to its advantages, the elevator also has its disadvantages. So, a suspension lift, for example, will inevitably increase the angles of the universal joints, which will affect their rapid wear. If the alteration operation is carried out illiterately, the cardan may fail at any moment.
Lightening the body
The wings of the UAZ significantly make the car heavier. It will be enough to cut them out and then install wheels from 33 to significantly reduce the weight of the car. In addition, the 469 will have to be completely disassembled, some mechanisms replaced, and new oil and grease added.
Cut out wings cannot be left in this form. It is imperative to coat them with a special composition to protect against corrosion. In addition, it is recommended to strengthen the wings using a 1-inch steel pipe.
Those who actually reduced the weight of the UAZ 469 write that this should be done to the maximum. In other words, if the cutout is insufficient, the 33 tires will snag on the fenders.
It is recommended to cut off not only the wings, but also the sills in order to reduce such a parameter as weight. In addition, cutting out the thresholds gives a chance to increase “off-road” maneuverability, strengthen the body and protect doors from dents.
It is recommended to cut the thresholds as follows: leaving 2 cm down from the lower door hinges.
Attention! When cutting thresholds, the fuel tank must be removed.
A 13-14 cm steel strip with a thickness of one and a half millimeters should be welded onto the cut-off part of the threshold. As for reinforcement, it is better to use a pipe with a wall thickness of 2 mm.
Note. A pipe instead of a threshold is not only brutal, but also convenient. Now putting the car on a jack will not be difficult, and you don’t have to worry about the body.
You can also reduce the weight of the UAZ 469 by cutting the doors. First, you need to cut the inner pocket to the required level, and then fold the remaining fabric inward. The resulting pocket surface is connected to the walls. For this it is recommended to use welding.
Note. It is recommended to arrange special exits for water drainage. We must not forget that the UAZ 469 is an all-terrain vehicle that will drive through swamps and puddles.
Prices for UAZ bodies of the 1st configuration
| Body | Description | vendor code | Price | Weight |
| UAZ 315195 | UAZ 315195 Body for Hunter vehicle (rear hinged door, electrical wiring for injector) | 3151-95-5000008-00 | RUB 382,400 | 590 kg |
| UAZ 31512-061 | UAZ body with awning, hard seats | 3151-20-5000008-61 | RUB 278,200 | 496 kg |
| UAZ 31514-84 | UAZ body with metal roof, soft seats, folding tailgate | 3151-40-5000008-84 | 333 5000 rub. | 587 kg |
| UAZ 31514-85 | Metal roof with hard seats, tailgate | 3151-40-5000008-85 | RUB 332,800 | 587 kg |
Price for UAZ 469 (3151) 3rd configuration
| UAZ 31512 (469) | Boat. A passenger car with a mount for installing an awning. | 3151-20-5000014-91 | RUB 126,600 | 249 kg |
| UAZ 31514 | Boat. UAZ passenger car body with holes for installing a metal roof under the hinged side, Hanter | 315195-5000014-50 | RUB 117,500 | 241kg |
| UAZ 31514 (469) | Boat. Passenger body with holes for installing a metal roof, tailgate | 3151-40-5000014-91 | RUB 122,800 | 249 kg |
Unique educational instructions for repairing and restoring the body of various car models are given on our website. Interesting photos - materials from kuzovspec.ru and articles on body repair - this is a step towards becoming a specialist.
How to pay TWICE LESS for GASOLINE
- Gasoline prices are rising every day, and the car's appetite is only increasing.
- You would be happy to cut costs, but is it possible to live without a car these days!?
But there is a completely simple way to reduce fuel consumption! Don't believe me? An auto mechanic with 15 years of experience also didn’t believe it until he tried it. And now he saves 35,000 rubles a year on gasoline! Read more about this at the link.
kuzovspec.ru
UAZ “loaf” suspension lift: do it yourself
Soviet "loaf"
The UAZ 452, or popularly “loaf”, is very popular on the roads of our country, despite its simplicity, not very comfortable interior and poor sound and vibration insulation. However, the “loaf” was originally produced by domestic manufacturers for military needs, thanks to which the machine is quite versatile and has a large capacity.
Now UAZ is quite often used as ambulances, emergency services and police. The owners of these cars love them for their good cross-country ability, reliability and low maintenance.
Source: https://autofluids.ru/zapchasti-i-aksessuary/kak-podnyat-kuzov-uaz.html
Instructions with photos on how to lift a UAZ loaf
Owners of Bukhanka, when starting to tune this car, first of all ask themselves the question: “How to raise a UAZ loaf?” We will try to answer this question in this article. So, first of all, let's look at the UAZ elevator methods. It could be:
- UAZ body lift
- Loaf Suspension Lift
Both options have both advantages and disadvantages. Thus, the Bukhanka body lift is easier to implement and also has a greater degree of safety. This is explained by the fact that this method of lift only slightly shifts the car’s center of gravity, which helps ensure the Loaf’s stable behavior on turns and other difficult sections of the route.
If we talk about the suspension lift, then there is some danger here due to the increase in the center of gravity. But at the same time, this method significantly changes cross-country ability for the better.
Choosing a kit for the UAZ loaf elevator
As we can see, there are several ways to raise the Loaf. Therefore, it is possible to determine which UAZ Bukhanka lift kit will be needed only by deciding on the choice of lift method. If you plan to do the lift yourself, you can buy a lift kit from a store. Such kits differ in the composition of the parts and elements included in them.
Thus, a kit for a Loaf elevator may contain:
- spring-frame spacers;
- spring-frame spacers
- bolts;
- nuts, etc.
Messages [9]
1 Topic from Topic 03/27/2010 21:09:35
- Subject
- Participant
- Inactive
- From: Astrakhan region
- Registered: 29.09.2009
- Messages: 2299
Topic: How to remove the body from a UAZ
Guys, tell me how to remove the body without hiring a crane?? Can anyone tell me something about this?? Or shouldn’t you worry and hire a crane? and why do you hold the slings if you lift them with a crane??
2 Reply from Evgeny 03/27/2010 21:18:31
- Eugene
- Guest
Re: How to remove the body from a UAZ
Well, you are dark, with your hands, a citizen, with your hands. Four twelve volt ones do this with ease, and they also consume beer.
3 Reply from Topic 03/27/2010 21:23:39
- Subject
- Participant
- Inactive
- From: Astrakhan region
- Registered: 29.09.2009
- Messages: 2299
Re: How to remove the body from a UAZ
Can you lift it with your hands?? how many people do you need??
4 Reply from old man 03/27/2010 22:03:31
- old man
- Participant
- Inactive
- From: Krasnodar
- Registered: 02.01.2009
- Messages: 1380
Re: How to remove the body from a UAZ
building talc is not an option? and straps instead of steel slings.
5 Reply from Evgeny 03/28/2010 06:16:51
- Eugene
- Guest
Re: How to remove the body from a UAZ
Four people and no need to fuss.
6 Reply from Suslik 03/28/2010 08:18:59
- Suslik
- Participant
- Inactive
- From: Krasnodar
- Registered: 29.08.2007
- Messages: 1161
Re: How to remove the body from a UAZ
The simplest option: One person takes the hijack, jacks up the face or rear first, and substitutes the sawhorse. He does the same procedure on the other side. Then he rolls out the frame - ALL.
Reverse the procedure in reverse order.
7 Reply from Topic 03/28/2010 11:33:56
- Subject
- Participant
- Inactive
- From: Astrakhan region
- Registered: 29.09.2009
- Messages: 2299
Re: How to remove the body from a UAZ
OK thanks everyone, I'll try it now! With the hijack, I liked it the most, I’ll start with this idea!
8 Reply from MOHCTPOXOD 03/28/2010 19:09:07
- MOHCTPOXOD
- Participant
- Inactive
- Registered: 03.10.2007
- Messages: 7232
Re: How to remove the body from a UAZ
We also installed the body in four of us. And I filmed it alone! I moved it from the frame onto a 2-wheeled cart so that the center of gravity of the body was approximately above the axle and rolled it with my hands to the far corner of the site.
9 Reply from Savely 03/29/2010 12:38:47
- Savely
- Participant
- Inactive
- From: Anapa
- Registered: 25.09.2009
- Messages: 13185
How to remove the radiator of a UAZ Bukhanka
How to remove a UAZ Bukhanka radiator
Did you know that by the color of the smoke that comes out of the exhaust pipe, you can tell what condition the engine is in? Below we will talk about what color the smoke is and what it says.
Tips for buying a used UAZ. Repair of the UAZ 469 heater radiator. radiator. For a long time I had an idea in my head about how to organize it. What to look and check?
This article tells you what you should pay attention to when buying a used UAZ .
I collected most of the information when I was preparing to buy a UAZ for myself, and then supplemented and corrected the text, taking into account my own rake trips An article about the purchase of a UAZ 3151x, known as the “goat”, however, most of the information is also relevant for lovers of such a wonderful car , like "loaf".
What to ask on the phone
Of course, abortions are not performed over the phone. I mean, they don’t buy a car. But you can decide whether it’s worth going to have your car inspected or not. It is worth considering that the seller’s opinion is often subjective and biased.
As well as the buyer year of manufacture, color, mileage, initial cost condition of the body (corrosion, repainted, anti-corrosion, dents) roof (metal, original, factory installed) type of axles (geared, collective farm, spicer) fuel and engine oil consumption type suspension (fully spring or spring in front) presence of power steering general condition of the car (from the seller’s point of view) modifications by the owner problems with body, frame (chassis), engine numbers number of owners of the car since its purchase place of last registration
possibility of deregistration/registration
Where to look in the parking lot
There are no completely serviceable UAZs, as well as completely broken ones. Most faults can be eliminated without consequences - the only question is the necessary investment of time and money.
Engine
Before the appearance of Hunter, carburetor engines were standard (the higher on the list, the more common they are): UMZ 417 - 2.4 l., lined UMZ 421 - 2.9 l., not lined ZMZ 402 - 2.4 l., lined ZMZ 410 - 2.9 l., lined The Hunter is equipped with a ZMZ 409 - 2.7 l., not lined, injection. You can read more about UAZ engines on UAZBUKE.
The engine should start There should be no blue or black smoke from the exhaust pipe. There should not be a LOT of smoke coming from the oil filler neck (open the cap carefully) and the crankcase exhaust hose (remove from the air filter).
We ask someone to rev it up a couple of times while we look at the exhaust and crankcase gases. We listen carefully (with a smart look) to the engine in different modes. how to lift a UAZ loaf The basis for this tuning loaf transformation was taken from a loaf lift tuning photo of a preserved UAZ.
Valves may knock - thermal clearances are often not adjusted. But in general there should be no knocking or ringing. We look for oil leaks from the bottom of the engine. The dry UAZ engine is fantastic (especially the carburetor one) and a drop on the bottom cover of the clutch housing is an indispensable attribute.
But the drips should not be abundant and there should be no puddles under the car.
We also check: Lubrication system For carburetor engines, oil pressure [1] 4 kgf/cm2 is good, 1.2 kgf/cm2 is minimum. UAZ Bukhanka tuning as “the work of a lifetime.” The oil should be at the upper level, without foam, strange impurities and bubbles (look at the oil dipstick).
Compression It is worth checking if the engine condition is in doubt [2] 1.0 MPa - good, 0.6 MPa - minimum, uniform compression across all cylinders is important.
Cooling system
Replacing a radiator on a UAZ car Selection Purchase Installation Selection Antifreeze and refilling the radiator on a UAZ
Radiator replacement
on a
UAZ
Selection Purchase Installation Selection Antifreeze and refilling
the radiator
on
a UAZ
about everything.
UAZ loaf: removed engine radiator
From the very beginning, as soon as I got this UAZ
, I knew about his main problem (why he got stuck. We check the presence of antifreeze in the expansion tank. The antifreeze should be clean and transparent, without oil stains and streaks. There should be no leaks of antifreeze on the radiator and engine. The engine should warm up to 75- 85 degrees and keep the temperature constant.
Generator
When driving or slightly accelerating, there should be about 14 volts on the battery positive. At XX - at least 12. Usually a display meter on the dashboard is enough. [1] - Oil pressure is measured at a speed of 60 km/h with direct transmission engaged and the oil cooler turned off. How to lift the body from the frame on a UAZ loaf video. At XX, the oil pressure will be lower.
To roughly estimate the pressure, you can simply apply the gas. Usually a built-in oil pressure sensor and indicator on the dashboard is sufficient.
[2] - It makes sense to measure compression if the engine has a long mileage (more than 80 thousand km), if it pulls poorly or troits. How to replace the radiator on a UAZ Patriot.
If the oil pressure is low or the oil pressure gauge/gauge is not working. You can read more about measuring compression and how to interpret the results. How to Remove the Steering Column of a UAZ Bukhanka ~ AVTO. For a UAZ carburetor engine, the compression must be at least 6.65 kgf/cm2 (660 kPa).
The design and operation of the UAZ loaf steering gear exists in How to remove a radiator. The pressure difference in the cylinders should not exceed 1 kgf/cm2 (98 kPa).
Body
The main problem with the body is corrosion. Here a lot depends on the owner.
Places where it rusts stronger and more often: Side pillars running from the floor to the dashboard, especially at the joints with the floor Places for attaching the rear seat (there are swivel brackets - it dies around them) Joints with the rubber seals of the windows, especially the windshield frame Rottenness of the body often manifests itself under the plastic body We can expect holes or severe rust in the floor in the area of the driver's door footrest, under the pedals Thresholds rust from the inside - dirt and moisture accumulate there Rear skirt of the body - look at the body from below under the rear lights Check: Doors - locks work when closing, cracks on top and bottom of the door
UAZ loaf body repair: body and suspension lift, do-it-yourself frame strengthening
UAZ loaf body repair through lifting">
The most popular domestically produced car, the UAZ loaf, has a good body. True, over time, it also requires mandatory restoration, and lovers of all kinds of modernizations simply cannot imagine themselves without tuning this semi-truck. Let's find out how this car is repaired.
Types of repairs
Often the loaf is used as a basic car, unpretentious and, roughly speaking, not to be pitied. It is used mercilessly, and it is ready for various types of alterations, like a whipping bag.
Everyone who is not too lazy is engaged in tuning this domestic car, trying to improve its technical capabilities. All this is commendable, but everything must be done skillfully, otherwise there will be no point.
The most common types of UAZ loaf repairs are the installation of additional equipment, strengthening and modifications to the frame, suspension lift, etc.
Lifting
The chassis is one of the most important components of any car. The UAZ 452 is no exception in this regard. The word elevator implies lifting the car. This work is carried out in 2 ways - modification of the body and modernization of the suspension.
How to install spacers under the body
Body modernization is much easier to carry out, since its results have virtually no effect on the displacement of the center of gravity.
As a result of this, handling does not deteriorate; after tuning, the car behaves steadily when turning and getting on bad roads.
In short, body lifting can be easily done by amateurs, since it is a safer type of modernization.
Lifting the suspension is already a much more complex manipulation. In this case, there is a big risk of overdoing it, thereby worsening the car’s handling. On the other hand, lifting the suspension also gives more effective results, including such as the ability to easily pass difficult sections of roads.
Body lifting
This is done by installing special spacers. They are placed between the frame of the UAZ loaf and the frame. Aluminum spacers have proven themselves well, providing a rigid mounting option for the frame and body. Supports made from other materials, for example polyurethane, are also known.
In the process of installing these spacers, some parts of the body must be trimmed. In particular, the fenders and arches must be trimmed, and then the mudguards must be installed.
High-quality suspension lifting
What do spacers do? They help raise the body from the frame by up to 80 mm, which in turn will allow the installation of larger wheels.
UAZ Bukhanka body lift
No matter how strange it may seem, the UAZ Bukhanka frame is attached to the body using ten furniture bolts, six of which are located in the area of the passenger seats, two behind the front wheel arches, and two more at the feet of the driver and passenger. The bolts are secured at the bottom with second nuts.
Before proceeding with the removal of the bolts, it is necessary to disconnect the battery, disconnect the ground from the engine - behind the hood compartment and raise the car on a lift.
Next, in order, we carry out the following steps:
- Disconnect the wires from the starter;
- Disconnect the radiator mounts from the bottom or top;
- We unfasten the transmission lever drive rods and the brake booster rod;
- Drain all the coolant and remove the hoses that are connected to the UAZ Bukhanka heaters;
- Disconnect the brake pedal linkage to the vacuum booster;
- Disconnect the tube leading to the tank control valve.
The last point may not seem so important, but failure to comply with it can lead to the plate bending under the fastener, as a result of which it will have to be leveled.
Next, we proceed directly to unscrewing the nuts. You should start with the six rear body bolts, then slightly loosen the front bolt nuts.
When lifting a UAZ Bukhanka with your own hands, be careful and careful, since the fasteners on such a car are usually rusty and outdated. If the bolt turns in the body, it will not be possible to hold it. This creates additional difficulties in welding a nut or bolt to it.
To do everything correctly, you need to hold one nut with a wrench, while unscrewing the locknut with your head, and only after that the main nut.
Next, you should lower the car onto its wheels, since there will no longer be a need to perform work under it. We also disconnect the steering column and unfasten the boot on the floor. And you can start lifting the body over the frame. The lifting must begin from the back of the Loaf. The lifting height should ultimately be about 10 centimeters.
It would be a good idea to secure it by placing a wide wooden beam between the frame and the body.
We unscrew the standard bolts and increase the holes for them to 12 mm by drilling. Next you need to do some work with the spacers. An inexpensive and suitable option for spacers are ordinary hockey pucks. The next steps will be to insert spacers, bolts and tighten nuts gradually, starting from the rear of the body, continuing in the middle and ending at the front.