Changing the oil on a Priora
The engine is what keeps the car running. You need to constantly monitor his condition. Particular attention should be paid to the oil level. The general condition of the Priora car depends on its quality. But does everyone know which product is best to use? How much should it cost, and does it even matter?
Manufacturers insist that oil changes should occur every 15,000 kilometers. Using a 16 cl engine in extreme conditions reduces this period by half.
We change the oil and oil filter
Next, changing the VAZ 2170 oil is presented in stages:
- First of all, you need to open the hood and unscrew the oil filler plug (key “17”).
- Next, we go down into the inspection hole and remove the mudguard (engine protection) from the bottom of the engine compartment.
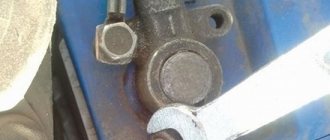
- Place a container to drain the used oil and remove the oil drain plug.
Type of drain plug
Caution: The oil may still be hot. Do not expose unprotected areas of your body to the drain stream.
- Drain the used engine oil.
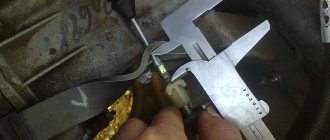
- Next, use a special wrench to remove the oil filter.
View of the oil filter during dismantling
- Fill the new filter with “fresh” oil and install it.
Attention: The filter must be tightened by hand half a turn when the O-ring touches the cylinder block body.
- The sealing ring must be lubricated with clean engine oil and installed in its original location.
- Next, we fill in new oil. You need to fill 3.5 liters. We check with the dipstick.
- Then screw the oil drain plug into place.
In this case, the oil is changed on a VAZ 2170. After changing the oil and oil filter, you need to turn on the engine and let it run for a while. Next, turn off the engine and inspect the filter and drain plug. If oil leaks are detected, the threaded connections must be tightened until the leak is eliminated. We present a video that will help you study this procedure more clearly:
Selection of lubricant brand
From the photos provided you can see that changing the oil on this car model is not particularly difficult. Moreover, performing this operation with your own hands gives every novice motorist significant experience in understanding the technical problems of his car. But not all problems are revealed to you by the proposed instructions. The most important issue remains the selection of the brand of lubricant.
Caution: Be careful when using various oil additives. Always ask the seller for a license for the products offered. Poor quality additives can lead to serious problems.
If the choice of filter brand remains far from fundamental, then the brand of automobile oil in this case is very important. To begin with, let us recall that the main function of lubricants is to protect the working surfaces of car engine parts from wear. That is, the duration of uninterrupted operation of the car and its “health” depend on the quality of automobile oil. To do this, first of all, it is necessary to take into account the type of lubricant. And in this case, the price is no longer important, the result is important. There are several types of motor oils: mineral, synthetic and semi-synthetic. Each operating mode has its own type of oil. Some travel long distances, while others travel not so far and not so often. It is strongly recommended that you consult an experienced professional in each of the above cases.
Lubricant selection
Lada is a popular domestic car. Appearance, price, quality - attracts buyers. While car dealerships are selling cars, stores are actively selling lubricants.
Which product is better to choose, foreign or domestic, natural or synthetic? Not every owner purchases the right product the first time. You can't do without mistakes. But by listening to the advice of experienced people, many nuances can be avoided.
You need to know how much the machine “eats” it. Lubrication should always be normal. Otherwise, repairs with unplanned expenses cannot be avoided.
You can and should use synthetic oil in your car. Although there is an opinion that oil seals can leak, all synthetics will burn out. It's a delusion. High-quality synthetics behave well even in severe frosts. All lubricants are characterized by a viscosity index. The lower the number next to W, the lower the temperature it will withstand. You can check with the manufacturer of 16 cl Priors which temperature regime of the lubricant is suitable for the car. Moreover, it is imperative to have this information. After all, the climatic conditions in which transport is operated affect its operation.
Replacement process
On average, about 3.7 liters of liquid need to be poured into a Lada Priora car. Necessary tools for work:
- The key is 17.
- A capacity of at least five liters for waste liquid.
- Oil filter.
- New replacement product.
All work is carried out on an overpass or inspection pit. You can learn how to properly check the oil level and replace it by reading the article below:
What kind of scratch remover is this?
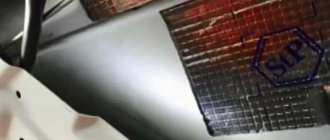
We constantly receive questions in the comments about what kind of “liquid glass” products this is, and in general what a bunch of auto-related advertising is now on the market. As a result, we decided to test in practice how true this is. Let's just say we used 3 means. One product proved to be so-so; after application, a burnt spot remained in this place. The second product, when applied, showed no effect at all.
The third product, SILANE GUARD, at first it was also felt that there would be no effect. but nevertheless, after the solution remained on the surface for several minutes, the effect was excellent. Of course, everything is not as beautiful as advertised.
We had a discussion at a local service station, they said that the products are effective, but they should be used only according to the instructions. And not as anyone pleases.
- replacement takes place on a preheated 16 cl engine. It should be in working order for 10-15 minutes;
- a container is placed under the hole on the pallet into which the waste liquid will drain;
- Use a wrench to unscrew the plug and drain the lubricant. This must be done carefully, it may be hot;
This will complete the main work. How much fluid is poured needs to be checked thoroughly again. Normally, on the dipstick it is between the maximum and minimum marks.
Replacing lubricant in Lada Priora
On a 16 cl Lada engine, you can pour lubricant yourself, without going to a car service center. After the work has been done, the car starts and idles for 10-15 minutes. At this time, it is worth keeping an eye on the oil pressure light. After starting the car, it goes out after a few seconds. If this does not happen, then mistakes were made. Try to find out the reason yourself, or contact a service station. Specialists will eliminate all problems.
Step-by-step instructions for changing the oil in a Lada Priora engine with your own hands
Attention! This work is carried out on a lift or inspection pit.
1. As in any car, before changing the oil, the engine must be warmed up to operating temperature; to do this, it is enough to let it idle for about 10 minutes.
2. Place an empty waste oil container under the drain hole located on the pan.
3. Using a key set to “17”, unscrew the drain plug of the engine sump, then carefully drain the oil, be careful it may be hot.
4. When the oil has completely drained, tighten the plug and begin replacing the oil filter.
5. To replace the Lada Priora oil filter, you need to unscrew it. For this it is better to use a special key. If you don’t have one, you can try with your hands; if the filter doesn’t work, there are two options for resolving the issue: buy a special key or use the “old-fashioned method.” The latter involves piercing the oil filter housing with a screwdriver, after which the screwdriver serves as a lever with which you can actually unscrew the filter.
6. Take the new Lada Priora oil filter and prepare for installation. To do this, fill the new filter about halfway with oil and lubricate the rubber gasket. Oil is poured into the filter in order to prevent oil starvation, that is, in other words, so that the engine does not run “dry” until the filter is filled with oil.
7. Next, install the new oil filter and tighten it by hand, not very tightly.
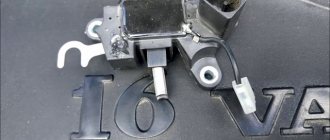
8. Now you need to change the engine oil; to do this, unscrew the filler neck, which is located under the hood (see photo). Fill in about 3.5 liters of oil, then check the oil level using the dipstick, it should be between o and “max”. Tighten the oil filler plug.
9. Start the engine and let it idle for about 5-10 minutes. Keep an eye on the oil pressure light; it should stop lighting 2-3 seconds after starting the engine.
10. While the engine is running, carefully inspect all the places you worked on, make sure there are no leaks in the area of the oil filter, as well as the drain hole in the pan.
11. Stop the engine, let the oil drain and check the oil level again, its level should be as described above, if necessary, add oil to the engine.
Congratulations, changing the oil and oil filter of the Lada Priora is completed! If you liked the article, comment and share it with your friends on social media. networks and add to bookmarks, we will be very grateful.
In the specifications for the car, how to change the oil of a Lada Priora, the recommended mileage is indicated, after which it is better to change the oil. The Priora should “run” no more than 15 thousand kilometers, ideally - already at 10 thousand kilometers. Auto mechanics recommend carrying out this procedure on “old ladies” every eight thousand kilometers, because in Russia there are frequent temperature changes, dusty roads, as well as the total amount of dirt that gets into the car. In order not to frequently spend money on car service and chassis repairs, you can master this procedure yourself; fortunately, no special tools are required for this.
Common Misconceptions
Before choosing any particular type of product, you need to familiarize yourself with the misconceptions. They are often found among car owners:
- The oil on the 16 cl Priora engine has darkened - the first sign that it should be changed. This is wrong. It may change color due to the fact that the detergent components do not completely dissolve the products due to incomplete combustion of gasoline.
- The lubrication level is easy to determine by eye. Replacement is carried out strictly with recommendations, and not without permission.
- The best products are expensive. Not true. Even expensive components can be harmful.
- You can mix mineral and synthetic oil. This will be reflected first of all on the Priora engine. Only in extreme cases is this allowed. In this case, lubricants must be produced by the same manufacturer.
- The substance is supplemented with additives. You shouldn't do this. Manufacturers select their own compositions. Adding third-party elements will interfere with the full operation of the transport.
You should definitely listen to the advice of manufacturers. Do not pour low-quality products. While the engine is not turned off, inspect all the places you just worked on. Make sure there are no fluid leaks on the 16 cl engine. Turn off the car and allow the remaining solution to drain. Then check the lubricant level again. There should be as much left as was poured. If necessary, you can pour a little more. This will complete the replacement.
Useful tips
It is often impossible to unscrew the oil filter by hand. Either it is very twisted, or there is not enough space, which causes inconvenience. To help, you can use a special key of the required size.
It is not always at hand, so you can use a folk remedy. Carefully pierce the housing with a screwdriver. The only downside is that the liquid will start to flow and your hands will get very dirty.
After replacing the product 5-6 times, the engine is washed. There are 2 options for this: flushing (five minutes), flushing liquid. No matter how many methods there are for this, each of them is effective. To replace valves, as well as to flush, it is worth monitoring the level of the substance.
Lada car owners spend a lot of time searching for quality products. But it is better to stick to one product, especially if the car worked well on it. It doesn’t matter how much replacement lubricants cost for a 16 cl car. Not always expensive, but quality.
Instructions for replacing engine lubricant
Preparing to change the oil and oil filter
The cost of an oil change service center is small, but nevertheless, most car owners prefer to perform this operation themselves. First you need to prepare:
- Buy motor oil.
- Buy an oil filter.
- Have clean rags on hand.
- Open-end wrench “17” (preferably a box wrench of the same size).
- Special wrench for removing the oil filter.
- A container for receiving used oil with a volume of at least 4 liters.
In the future, changing the oil in a VAZ 2170 involves warming up the engine. The engine is heated to the design temperature - 85°C. In this case, the machine must already be installed on the inspection hole. Then the engine is cooled to a temperature of -40°C. In this case, the oil will drain as much as possible into the engine crankcase, and at this temperature, it can be replaced without fear of getting burned.
Changing the oil and oil filter on a Lada Priora (VAZ 2170)
This article will discuss changing the oil and oil filter on 8 and 16 valve Lada Priora engines. Note that the oil is changed in the same way on cars of the Samara, Kalina and Grant families.
The oil is changed every 10-15 thousand kilometers or every year, whichever comes first.
To replace, we will need - from the main tool:
- Key “17” (preferably head “17”)
- Empty canister (can be replaced with a five-liter bottle)
- Work clothes
- Knife
- Work gloves
From the additional tool:
- It is better to have a universal puller for oil filters. As an alternative to a puller, all you need is a long screwdriver and a hammer
- If your garage floors are concrete or steel, it is advisable to have a sheet of plywood for underlayment.
- Wire brush
- Rags
- Oil 4 liters
- Oil filter
- Flushing oil
To change from one type of oil to another (from mineral to synthetic, etc.), it is better to use flushing oil. It cleans the engine well, but does not completely drain when changing. And part of the flushing remains in the new oil.
To switch between different brands, but one type (semi-synthetic, etc.) or with very dirty oil (it hasn’t been changed for a long time), it is better to use the “five-minute” option. It is poured into old oil, after which the engine is started for 5 minutes (according to the instructions on the package).
If the oil is changed regularly every 10-15 thousand kilometers to the same make and model, then flushing is not necessary. You just need to warm up the engine.
A change in a garage WITHOUT a pit and a lift will be demonstrated.
1. Using a knife, cut out the side surface of the canister and make a “bath”, as shown in the figure.
2. We jack up the left side of the car so that we can “crawl” under the car. We substitute any block or stand. We lower the car onto the stand. NEVER work under a vehicle that is only supported by a jack.
3. If the floors are cold, place a sheet of plywood/wood under the car.
4. If we use flushing oil or a five-minute flush, follow the instructions on the package.
When changing the oil without flushing agents, start the engine and wait for the cooling fan to operate (about 90 degrees Celsius). Then we turn off the engine.
5. We put on gloves. We move under the car, taking with us the canister and the “17” key. If the car has a crankcase protection, there should be a cutout under the oil plug.
If the cork is heavily soiled, first remove the dirt with a wire brush and wipe with a rag. Unscrew the drain plug. It is recommended to make only a few turns with the key. The plug has a conical thread and should be freely unscrewed by hand. Before final unscrewing, we place the “bath” under the plug. CAREFULLY. The oil is hot. Make sure you can quickly remove your hand with the plug. Drain time is 5-10 minutes. Then we wrap the cork.
6. If flushing oil is used, then fill it in and repeat the heating/draining procedure (check according to the instructions).
7. Place a rag under the filter to avoid staining the garage floors with oil. It is located on the rear side of the engine, to the left of the exhaust manifold.
If you cannot unscrew the filter by hand, use a puller. If there is no puller, we punch it through with a screwdriver. It is more convenient to punch while being on top of the car and slightly to the left of the middle of the filter, so as not to get into the thread. Using a screwdriver as a lever, unscrew it.
8. Fill the new filter halfway with oil. BE SURE to lubricate the rubber seal with oil. We wrap the filter by hand until it touches the engine. Then turn it 3/4 of a turn.
9. Open the oil plug on engine 2111 (8 valves):
On engine 2112 (16 valves):
10. Fill with oil. To control, we use the oil level indicator (“dipstick”) on the 2111 engine:
On engine 2112:
It is better to fill close to the “MIN” level, since the car is not in a horizontal position (about 3.5 liters fit into the engine).
11. Start the engine and wait until the oil warning light on the instrument panel goes out. We make sure that there is no leakage from under the plug or filter. We turn off the engine.
12. Remove the car from the stand.
13. Check the oil level. If necessary, bring to o.
Please rate the article
When I don't have a hole, I do it a little differently: 1. While the car is on four wheels, loosen the oil filter. If it does not unscrew, screw the belt on by hand. 2.Remove the RIGHT wheel. The drain plug is in front of us. After the plug is unscrewed, release the jack a little so that the right side is slightly lower than the left. Additionally, 100-150g of oil is poured.
Check for leaks
. Leave the engine running. And once again we check the places of possible oil leaks. From under the drain plug and oil filter. If everything is ok. We turn off the engine. Let the oil sit for a few minutes. And check the level. Now you need to measure the oil level again. It may not be enough. And if necessary, top up.
It is not advisable to overfill the oil level. Excessive level will create additional pressure in the engine crankcase. And this will create leaks from under the seals and seals. If the oil finds its way somewhere, it will no longer be possible to stop it. Only by replacing the oil seals and seals with new ones.
The oil change in the Priora engine has been completed. There is no need to delay the next service. The Priora engine runs 300,000 km. But maybe more. In addition, hydraulic valve compensators are a vulnerable part of the engine. They suffer first. Wear of expansion joints is expressed in a characteristic knocking sound. The engine starts to stall. And replacement usually leads to nothing. Loss of pressure on compensators. Reduces oil pressure throughout the engine. Low oil pressure increases engine wear. Its service life is reduced.
Changing the oil in the Priora engine: how much oil and what kind to pour?
The Priora operating manual states that new oil must be added every 15 thousand kilometers. Professionals recommend replacing every 10 thousand kilometers, especially if the Priora is constantly used in urban environments. Changing the oil in a Priora engine is a fairly simple process, so even a novice motorist can do it. The material also describes in detail how much oil to pour and what working fluid is best to choose.
Along with the oil, you will need to replace its filter - this is a must, since working fluid remains inside the consumable. It should not mix with the new lubricant.
Oil selection parameters
We had a separate detailed article about choosing the right oil for the Priora gearbox, but with motor lubrication everything is somewhat different. The main characteristic of a liquid is viscosity - an SAE parameter.
If the packaging indicates 10W-40, then 10W indicates how the lubricant retains its viscosity parameters and characteristics at a temperature of -30 degrees. The lower the parameter next to the letter W, the lower the temperature threshold at which the oil can be used. After the dash, the high-temperature oil viscosity threshold is indicated: the higher the number, the greater the possible maximum temperature above zero. You can find out which lubricant is best suited from a consultant in the store or by studying the Priora operating manual. Be sure to take into account the climatic conditions of the region in which you operate the car.
- 5W-30, operating temperatures from minus 25-30°C to plus 20-25°C;
- 5W-40, operating temperatures from minus 25-30°C to plus 35-40°C;
- 10W-40, operating temperatures from minus 20-25°C to plus 35-40°C;
- 15W-40, operating temperatures from minus 10-15°C to plus 35-40°C.
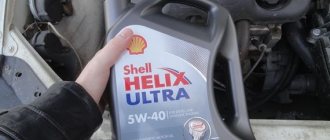
You can choose lubricants from brands such as Shell, Castrol, Mannol, Mobil or less expensive domestically produced oils such as Lukoil or Rosneft.
So, how much oil is in the Priora engine? In total, it holds about 4 liters of lubricant, and when replaced, it will hold a little less - about 3.7 liters. You will also need a new oil filter. For example, it will fit from the VAZ 2108, which is perfect for the Priora.
How much oil should you pour and which one should you choose?
To find out how much oil to pour, we again turn to the Priora manual - from 3.2 to 3.4 liters should be poured into the system. First, 3.2 liters of new oil is poured. After this, the power plant should run for about five minutes. Next, you need to find out the level using a dipstick. If the mark is between the MIN and MAX values, then the level has been met. If necessary, you can add working fluid. The main thing is that the oil does not exceed the MAX level. You need to purchase 4 liters of oil .
Replacement is carried out with the same brand that is filled in the system. We know the basic information about the engine - it is a 16-valve petrol unit. Samples with the following parameters are suitable for the Priora power plant:
- 5W-30, operating temperatures: from -30 to +25°C.
- 5W-40 – from -30 to +40°С.
- 10W-40 – from -25 to +40°С.
- 15W-40 – from -15 to 40°C.
The process of checking and adding oil to the Lada Priora box
So, to check the oil level in the Priora gearbox, you need to place the car on a flat surface. The level must be checked 5-10 minutes after the car has been driven. This is due to the fact that the oil must be heated and have time to drain from the shafts and gears.
- For convenience, move the air filter housing to the side
- We find the dipstick. It can be seen near the battery, on the left side of the engine compartment
- Raise the dipstick and wipe it with a rag. Put it back in and take it out. Let's see how much the level shows. If the indicator is between “minimum” and “maximum”, then everything is fine.
- If the level tends to about 0, then it is necessary to add 200-250 grams of liquid.
- We insert the dipstick back and fix it tightly. Now the oil level is checked and fluid is added if necessary.
Changing the oil in the Priora engine
What will you need?
Now we know how much oil to pour, all that remains is to replace it in the engine. You will need:
- The key is "17".
- Filter removal tool.
- New oil.
- Oil filter.
- Container for draining old fluid.
- Clean rags.
Replacing the lubricating fluid in 16 and 8 valve engines is carried out in the same way on an inspection pit or on a lift. It is recommended to wear thick gloves and a long-sleeved robe.
Changing the fluid in the engine should be carried out immediately after the trip, while the Priora’s power plant has not cooled down. If the engine is cold, start it and wait until the engine reaches operating temperature. Be careful, the old oil will be hot.
Step-by-step instruction
- We warm up the engine and let it run for 10 minutes, then turn it off;
- You need to place an empty container under the drain hole - we will pour the old lubricant into it;
Guide to filling a different brand of oil
If you decide to pour another lubricant for the Priora, then you need to flush the system. For this, special washing solutions are used, but you may not have them on hand. Then use the oil that you will pour:
- After draining the old oil, fill in new oil up to the lower indicator on the dipstick. Check that the level is at MIN.
- Start the engine and let it idle for a few minutes.
- Drain the liquid completely and screw the filter securely.
- Now you can fill in new oil; the level should reach the upper mark.
Video instructions for changing the oil yourself:
- Do-it-yourself replacement of hydraulic compensators on a Priora
- Signs of malfunction, replacing the speed sensor on a Priora
- What kind of oil should I pour into the Priora 16 valve? Select by criteria
I recently got my license and purchased a Priora. I try to take care of the car and change everything on time! Thanks to this article, it became clear how to change the oil. It turns out there is oil for summer and winter, I didn’t even know! I'll try to replace the IASL myself this weekend.
I always use 5w40, both in winter and in summer. Synthetics are better on Prior! Pour to almost max. marks but not maximum!
Changing the oil on a Priora (engine)
| We change the engine oil in accordance with the maintenance regulations every 15 thousand km. We carry out the replacement with the engine not running, preferably immediately after the trip, before the oil has cooled down. |
You will need : drive the car into the inspection hole, prepare a 17mm wrench, an oil filter remover or a screwdriver.
First you need to drain the Priora engine oil :
- Unscrew the oil filler cap on the engine.
- Loosen the drain plug from the bottom of the car using a 17mm wrench, having previously cleaned the oil pan near the plug from dirt.
Place an oil container with a capacity of at least 4 liters.
Drain the Priora oil (within 10 minutes) by unscrewing the plug all the way by hand. Be careful, the oil is hot. Wipe the cork and then screw it back. Remove all oil leaks from the engine oil pan. Now you need to remove the oil filter ; to do this, place a container under it. If you are afraid of damaging the wiring, it is recommended to disconnect the block with wires from the crankshaft position sensor. Unscrew the oil filter counterclockwise using a puller. If there is no oil filter remover, then you can pierce the filter housing with a screwdriver (closer to the bottom, so as not to damage the engine fitting), and unscrew the oil filter, using the screwdriver as a lever.
Before installing the oil filter , fill it with new engine oil to approximately half its volume. Then lubricate the oil filter O-ring with engine oil. Screw in the oil filter by hand until the O-ring is in contact with the cylinder block. After this, tighten the oil filter another 3/4 turn.
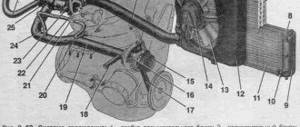
Now we fill new engine oil into the Priora through the oil filler neck. You will need 3.2–3.4 liters of oil. Screw on the neck cap and start the engine for 1-2 minutes. Make sure that there are no leaks from under the plug and the oil filter, and wait until the engine oil pressure indicator on the instrument cluster (No. 15) goes out.
Examination . Stop the engine, and then after a few minutes, when the oil has flowed into the sump, check the oil level using the dipstick. If necessary, add engine oil to the specified level.
Changing the oil in a Priora engine is carried out without an assistant within 15 minutes. The procedure is simple, however, doing it yourself may void your warranty.
By the way, before changing the oil in Priora, you should choose the right engine oil.
Keywords:
- engine grants
- motor oil grants
Changing the oil in the Lada Priora gearbox
This does not require any special expensive tools or special skills. Any car enthusiast who has an inspection hole in his garage can carry out this replacement independently. There is only one circumstance that can prevent this, the warranty period of the new car and warranty service. A car enthusiast who independently changes the transmission oil in his car during the warranty period may be deprived of the manufacturer's warranty.
Changing the automatic transmission oil
The working fluid in the automatic transmission is filled by the manufacturer for the entire service life of the vehicle. That is, we change the oil in the automatic transmission of a Lada Kalina 2 or Grant only when repairing the gearbox, replacing oil seals and gaskets, removing wheel drives, etc. It is recommended to check the level and change the oil in the automatic transmission (if necessary) at a manufacturer-certified PSSS. If you decide to change the automatic transmission oil yourself, then follow these instructions:
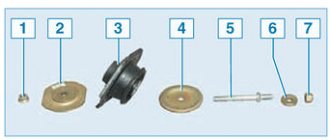
- Unscrew the drain plug (No. 2) and the overflow tube (No. 3) using a “19” wrench and a “5” hexagon.
- Drain the transmission oil into an empty container, install the overflow plug in place, and then tighten the drain plug and install a new O-ring on it.
- Pour about 1 liter of new oil into the dipstick hole.
Checking the oil in the automatic transmission should be done on a warm engine (at an air temperature of 20C, you need to drive for about 10 minutes for the oil to warm up to a temperature of 50-80C). Place the vehicle on a level surface, and then:
- With the engine running, move the gearbox lever from position “P” to “1”.
- switch from position “1” to “P”, holding the lever for 5 seconds in each intermediate position.
- remove the dipstick, wipe it and reinsert it into the automatic transmission until it stops.
- Remove the dipstick again and check the transmission oil level, which should be within the hot oil section “A”.
- if necessary, add oil.
Recommended AvtoVAZ oil for Lada Priora
Not all car enthusiasts know, but the oil in manual transmissions also needs to be changed at a frequency clearly indicated by the manufacturer.
Of course, unlike automatic machines, where deviation from the scheduled replacement dates is fraught with the appearance of problems quite quickly, mechanics are more resistant to untimely renewal of the lubricant.
However, abuse of timing for changing transmission oil will at a minimum lead to a reduction in the service life of manual transmission parts, and in severely advanced cases can cause serious damage.
What kind of oil should be poured into the gearbox of a Lada Priora? Under factory assembly conditions, different oils were poured into the manual transmission at different times. The main criterion by which it was selected was the class according to technical conditions (or GOST).
For Priora, the manufacturer recommends using TM-4-12 class lubricant. This gear oil has successfully passed all tests in the factory laboratory and has been approved by the manufacturer as suitable for use in manual transmissions.
How to replace it yourself?
You can change the oil in the gearbox of a VAZ Priora 16-valve 2020 and other model years with your own hands.
Tools and materials
The procedure for changing the substance occurs using:
- wrench 17;
- fresh lubricant;
- a syringe with a connected transparent tube;
- containers into which you will drain the “working off”;
- clean rags.
You can learn about changing the lubricant yourself and all the nuances that the car owner will encounter during the task from the video shot by user ValeRiaN.
Stages of work
How to drain and fill fresh oil in a Priora gearbox:
- The car is driven into a garage with a pit, onto a lift or onto an overpass. This is important because you will have to gain access to the underside of the car.
- Depending on the fasteners, use a screwdriver or wrench to unscrew the engine mudguard fastenings. Set the splash guard aside.
- Locate the drain hole on the vehicle's transmission. Place a container under it. Unscrew the plug of the control or filler hole, if there is one, or remove the dipstick from the neck, this will reduce the pressure in the lubrication system when draining the “working off”. If access to the dipstick is difficult, remove the air filter housing and move it to the side.
- Using a wrench, unscrew the drain cover. Be careful when unscrewing. At first, the oil will come out of the system in a thin stream, but after the plug is completely unscrewed, it will begin to flow under great pressure. Use gloves. It is advisable that when draining the fluid the engine is not cold, due to this the substance will be more viscous and will drain out of the transmission faster.
- While the oil is draining, visually assess the condition of the drain plug. If it is too dirty, clean it of debris and wear and tear. Check the condition of the seal; if it is badly worn, it is recommended to replace the part. Otherwise, you may encounter a problem with lubricant leakage.
- When the liquid has drained, assess its condition. If the gearbox is functioning properly, it should be free of metal dust and other impurities. The presence of deposits indicates contamination of the unit, so it is recommended to wash it. To clean the transmission, the filler hole must be closed and flushing is performed using a special product. There is a large selection of such liquids; the product is purchased at a car store. To flush, pour about 1.3 liters of cleaner into the gearbox housing. Then the front part of the car must be hung, for this the wheels are placed on a jack. Start the engine and engage first gear, press the gas. Due to the fact that the front of the car is raised, you can drive in first gear for several minutes. After this, the procedure for draining the waste fluid from the system is repeated. If the flushing oil is too dirty after cleaning the unit, the procedure must be repeated. After this, wipe the drain and fill plug again.
- Remove the dipstick from the inspection neck to check the level.
- Now you can fill it, it is done through the control hole. You must pour fresh oil into the transmission using a syringe with a connected pipe, otherwise you will not be able to refuel the unit. One end of the hose is inserted into the control hole, on the other side the liquid is supplied into the system using a syringe. About 3.1 liters of oil is poured into the gearbox, the volume of the substance is controlled by the dipstick.
- When the filling procedure is completed, install the meter in place. Reinstall all previously removed components in reverse order. When the process is complete, take a test drive of the machine and check the lubricant level again.
The process of checking and adding oil to the Lada Priora box
So, to check the oil level in the Priora gearbox, you need to place the car on a flat surface. The level must be checked 5-10 minutes after the car has been driven. This is due to the fact that the oil must be heated and have time to drain from the shafts and gears.
- For convenience, move the air filter housing to the side
- We find the dipstick. It can be seen near the battery, on the left side of the engine compartment
- Raise the dipstick and wipe it with a rag. Put it back in and take it out. Let's see how much the level shows. If the indicator is between “minimum” and “maximum”, then everything is fine.
- If the level tends to about 0, then it is necessary to add 200-250 grams of liquid.
- We insert the dipstick back and fix it tightly. Now the oil level is checked and fluid is added if necessary.
Changing the gearbox oil
Do-it-yourself priors will require preliminary preparation from the motorist. First of all, having purchased everything you need, you should park the car in a garage equipped with a pit, on a lift or overpass. After access to the bottom of the vehicle is gained, using a screwdriver or wrench it is worth dismantling the fastening of the power unit mudguard.
After removing the cover from the transmission drain hole, the motorist should place an empty 5-liter tank under it, which will help contain all the waste that comes out. Removing the control hole plug will help optimize the process. By pulling out the dipstick, the car owner will reduce the pressure in the structure. Sometimes at this stage it is necessary to dismantle the air filter housing.
If a motorist has decided when to change the oil in the box, he must first familiarize himself with all the theoretical information. In particular, prepare the tools, because without a “17” wrench it will be impossible to unscrew the cap covering the drain hole. It will take 10 - 15 minutes for the glass to lubricate the transmission, during which time it is advisable to start cleaning the plug. It is important to remove absolutely all wear products from it. At the same stage, the seal should be checked and, if necessary, replaced to eliminate the possibility of leakage.
After completely draining the lubricant, you need to check its condition; a normally functioning substance should be indicated by a light color, a burning smell, and the absence of impurities and debris. If there are any complications, the structure needs to be cleaned. With the filler hole closed, a special product is poured into the unit. There are many cleaners on the market today; you can choose any according to your capabilities. For cleaning you will need about 1.5 liters. substances. As soon as the liquid enters the unit, the front of the vehicle should be positioned so that the wheels are raised, this can be done using a jack. When the power unit is activated, the first gear is turned on, and you need to drive with a gentle pressure on the gas pedal for a couple of minutes. The next step is to drain the substance again. If the contamination is severe, the procedure is repeated.
After the dipstick leaves the control neck, you can begin to supply fresh lubricant into it. The peculiarity of the Lada Priora is that it will be possible to fill in new lubricant only using a syringe with a transparent pipe. In this case, one part of the hose should be in the control hole when the second is replenished with a syringe. It can take quite a long time to fill the 3.1 liter tank. oils In any case, the volume of liquid supplied must be regulated by the dipstick.
Once everything is done, the meter should take its place. Previously dismantled parts of the system have been reinstalled. Correct operation should be checked by a test drive and the opportunity to make sure that the level of the new fluid is in the required range.
Changing the oil in manual transmission and AMT
About the volume of oil in the gearbox . Depending on the type of manual transmission, different amounts of gear oil may be required:
- Manual transmission with traction control drive - 3.1 liters.
- Manual transmission with cable control drive or AMT (robot) - 2.25 liters.
You will need : a set of keys, new gear oil, an empty container, a funnel and a hose. Warm up the oil in the gearbox (drive 5-10 km) so that it becomes less viscous.
Procedure:
- We find the drain hole on the gearbox housing from the bottom of the car and unscrew it using a “17” wrench.
- We drain the old gear oil into an empty container, which we place under the drain hole.
- We fill in new transmission oil through a hose that we insert (depending on the type of manual transmission): instead of a dipstick (for convenience, the air filter housing can be unscrewed and moved to the side), or instead of the reverse switch, which we unscrew with a “22” key.
Add oil to the gearbox
conveniently through the yellow plug. It is necessary to remove only the air resonator (for Lada Vesta/XRAY). The plug itself is attached to one bolt with a TorX head, which can also be unscrewed with a regular head (photo author):
Attention! If the oil drained from the gearbox is dark in color and metal particles are visible in it, the gearbox should be washed. Pour 1-1.5 liters of special flushing oil into the box crankcase. With one of the front wheels hanging, start the engine and shift into gear. After 5-7 minutes, drain the flushing oil and fill with clean transmission oil.
Video on changing the oil in a Renault manual transmission
by car Lada Vesta:
Depending on the type of manual transmission, checking the oil level in the gearbox is carried out:
- using the dipstick (the oil level should be between the MIN and MAX marks).
- through the inspection plug (the oil level should be at the lower edge of the inspection hole).
Replacement frequency and lubricant selection
The manufacturer has determined that oil changes in the Priora gearbox are required at intervals of 75 thousand km. This is a fairly large gap, designed for the fact that synthetic-based oil will be poured into the box. The conditions in which the vehicle is operated often dictate a reduction in this interval. For example, the car constantly “walks under a trailer” or with increased loads on the transmission.
Then it is better to remove the oil level dipstick as often as possible and monitor not only the lubricant level, but also the technical condition: contamination and fluidity, especially if the service mileage is more than 50 thousand km. Another reason for early replacement of the lubricant in the box can be buying a car second-hand without marks in the service book. The answer to the question of what kind of oil to pour into the Priora transmission should be sought first of all in the car’s operating instructions.
Traditionally, AvtoVAZ recommends products for use. Lubricant produced by the same company is poured into the gearbox of new VAZ cars; it acts as a break-in and flushing lubricant until the first maintenance; after replacing it, you can select a product from another company. Here are brief recommendations on how to choose the right gear oil for the VAZ 2170.
- The viscosity grade must correspond to that specified in the operating instructions.
- It is not recommended to use mineral based oil. The service mileage determined by the manufacturer is accepted for synthetic or semi-synthetic oils. When pouring mineral water, you will not be able to correctly determine the service interval, because the mineral base deteriorates faster than the synthetic one.
- It is preferable to purchase liquid lubricants from official dealers located in your city. This may also be useful in an unusual situation, when you need to add oil to the gearbox due to a leak. A sales representative will help you choose the right brand of oil for topping up.
- You should not add various additives and additives to your gear oil. As a rule, all the necessary additives are already present in the lubricant; nothing else is needed.
- Before purchasing, you should read reviews about this product. This can be done on the Internet, filtering out rave reviews from agents selling lubricants.
We present the types of all-season gear oils according to the SAE classification in the table.
How to change the oil in a Lada Priora box - step-by-step instructions
To change the oil in a Lada Priora box, you will need several ordinary keys, which probably everyone has:
- Threaded on “17”.
- Watering can with a 30-50 cm hose (here you will have to “collective farm”, or buy a ready-made watering can in the store. I got out of the situation by using the floor of a plastic bottle and a piece of hose taped to its neck with electrical tape).
- Preferably straight “arms” and a “bright head”
- Transmission oil.
- Container for draining used oil.
Let's move on to the process itself. The procedure for changing the Priora gearbox oil will look standard:
- First, the control plug is not completely unscrewed;
- Unscrew the drain plug, placing a free container under it;
- The used oil is drained and the plug is tightened;
- After unscrewing the filler plug, replace the oil, then install all the parts in place.
Before replacing, it is recommended to warm up the old oil. It will be enough to drive the car for about 2-3 km, trying to vary the engine speed.