valve adjustment vaz 2110 8 cl price
The cost of such a device is about 500 rubles.
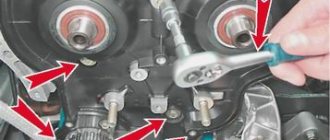
- We place marks on the camshaft and crankshaft as shown in the photo and check the timing belt tension. If necessary, tighten it. Turn the camshaft 2.5 teeth clockwise.
- Now we put our mark and count the teeth: 11 - put a mark, 10.5 - put a mark, 11 - put a mark.
- Using a feeler gauge, determine the gap.
- Now we take out the adjusting washer and look at its size. Using a special adjustment kit, we select the required washer.
- Data on thermal clearances of the 8-valve VAZ 2110 engine
- The thermal gap is regulated by selecting the thickness of the adjusting washers. Using a micrometer we determine its thickness. After this, using the formula H = B + (A–C), we find out what thickness of the new adjusting washer is needed.
Adjusting valves VAZ 2110
- A – measured gap;
- B – thickness of the removed washer;
- C – nominal gap;
- N – thickness of the new washer.
The thickness of the adjusting washer is indicated on its surface. Install the washer so that the marking is on the bottom. After installation, measure the gap. It should be such that a probe with a thickness of 0.20 or 0.35 mm can move freely.
By turning the crankshaft half a turn, we adjust the valves according to the table below.
| Angle of rotation of the crankshaft from the alignment of the marks, degrees. | Fists | |
| exhaust (gap 0.35 mm) | inlet (gap 0.20 mm) | |
| 40–50 | 1 | 3 |
| 220-230 | 5 | 2 |
| 400-410 | 8 | 6 |
| 580-590 | 4 | 7 |
Valve adjustment is not performed on 16-valve VAZ 2110 engines, because hydraulic compensators are installed on them. Thus, when characteristic knocking noises appear, we replace them.
Valve adjustment video
How to adjust valves on a VAZ 2110
There is no need to purchase shims in advance. They are relatively expensive. Initially, you have to establish the size of the gaps and only then buy the required number of washers with the exact dimensions. It is better to carry out work in a garage with good lighting. The roof and walls will protect from unwanted wind and rain, which can carry dirt into the open camshaft.
Attention! Before adjusting the valve mechanism on the VAZ 2110, the engine must be cooled.
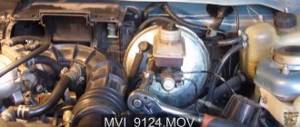
If everything is ready, then we proceed to the first part of the repair - dismantling the parts:
- disconnect the terminal from the battery;
- remove the air filter housing (on a carburetor engine);
- disconnect the crankcase gas hoses and the throttle cable bracket from the valve cover;
- unscrew the bolts of the timing case. Remove the cover and gain access to the pulley;
- unscrew the spark plugs (this will make it easier to rotate the crankshaft to find TDC and BDC);
- Unscrew the valve cover nuts and remove it.
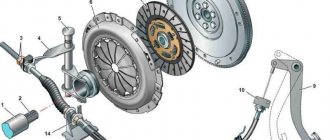
Before direct tuning, you should remember the mechanism of operation of the timing belt. Namely, the operating order of the valves (in our case, a VAZ 2110 with an 8-valve injector).
The sequence of adjusting the gaps in the valve mechanism
The procedure for adjusting the valves on a VAZ 2110 with an 8-valve engine must be performed in the same sequence as in the table. As for installing valves on a VAZ 2110 with 16-valve engines, the diagram looks completely different.
Adjustment
After removing the valve cover, it is necessary to remove any remaining engine oil near the tappets. This can be done with a medical syringe or a rubber bulb. If there is a retaining rod, you should install it on the two outer studs intended for fastening the cylinder head cover.
Then, we proceed to the second part of the repair and do the following:
- We set the top dead center by aligning the marks of the camshaft pulley and the inner timing case. There are two ways to do this. Hanging and rotating one front wheel. Use a spanner wrench (head) to rotate the camshaft by the pulley mounting bolt, but this operation is dangerous due to breakage of the mounting bolt;
- After finding the top dead center, turn the camshaft slightly so that the pulley moves 40-50° from TDC (this is 2.5-3 teeth). We put our mark, from which we will then rotate the camshaft several more times, making additional marks;
- We measure the thermal clearance of the first valve (exhaust) by slipping one of the feeler gauges (0.35/0.4/0.45 mm) between the camshaft cam and the pusher. Nominal clearance 0.35 mm;
- if the first probe passes freely, then take a larger size (0.4 mm). The pitch is 0.05 mm;
- if the 0.4 or 0.45 probe does not pass, then it is necessary to replace the adjusting washer;
- We turn the pusher with the groove towards us, press it with the lever of the locking rack and take out the used washer with tweezers. Its inner side contains numbers with the original size;
- to calculate the required value, you must use the formula H = B + (A - C). Where:
- H—thickness of the new washer, mm;
- B—thickness of the used washer, mm;
- A - measured gap, mm;
- C—nominal gap, mm.
- The resulting result H is written down in a notepad. You will have to buy a washer of this exact size for the repair valve, rounding up the value;
- according to the table, we move on to the third valve (intake), its nominal clearance is 0.2 mm;
- measure the gap by inserting feeler gauges in order: 0.2/0.25/0.30 mm;
- write down the size of the probe, which is not included in the thermal gap;
- take out the washer and calculate the repair size using the above formula;
- then, according to the table, we turn the crankshaft several times to the indicated degrees and perform the operation with all the valves;
- We go to the store and buy the required number of adjusting washers of the required thickness, according to calculations;
- We install the washers in the pushers, according to the notebook;
- all valve clearances on the VAZ 2110 should be restored to the nominal sizes of 0.2 and 0.35, thanks to the use of adjusting washers;
- checking new thermal gaps;
- after replacing the washers, it is necessary to put the dismantled parts in place;
- we start the engine and observe its operation.
It is recommended to replace the cylinder head cover gasket on a VAZ 2110 (8 valves) with an injection engine, after adjusting the valves.
Adjusting thermal clearances in the valve mechanism of VAZ 2110-2111-2112
We measure and adjust the gaps on a cold engine.
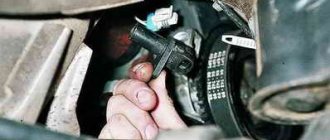
We remove the end of the throttle valve drive cable from the bracket.
Using a “10” wrench, unscrew the two nuts securing the VAZ throttle valve cable bracket to the receiver (only for the VAZ-2111 engine)…
...and remove it.
Using a Phillips screwdriver, loosen the clamps securing the two exhaust hoses for crankcase ventilation and remove the hoses from the valve cover fittings of the VAZ 2110.
Using a Phillips screwdriver, loosen the clamp securing the crankcase ventilation supply hose and remove the hose.
Using a 10mm wrench, unscrew the two nuts securing the valve cover.
Remove the valve cover...
Rubber sealing bushings are installed in the valve cover holes.
Remove the valve cover gasket of the VAZ 2111.
Remove the front timing belt cover (see Replacing the timing belt on VAZ-2110, -2111 engines).
The procedure for checking and adjusting the gaps in the valve drive mechanism of the VAZ 2112 is as follows.
Turn the crankshaft clockwise until the installation marks on the camshaft pulley and the rear timing belt cover align (see Replacing the timing belt on VAZ-2110, -2111 engines).
Then we turn the crankshaft another 40–50° (2.5–3 teeth on the camshaft pulley of the VAZ 2110). In this position of the shafts, we use a set of feeler gauges to check the gaps at the first and third camshaft cams.
The gap between the camshaft cams of fret 2111 2110 and the adjusting washers should be 0.20 mm for the intake valves and 0.35 mm for the exhaust valves. The clearance tolerance for all jaws is ±0.05 mm.
If the gap differs from the norm, then install a device for adjusting the valves on the studs of the camshaft bearing housings.
We introduce the “fang” of the device between the cam and the pusher.
We rotate the pusher so that the slot in its upper part faces forward (along the direction).
By pressing down on the lever of the device, we recess the pusher with the “fang” and install a clamp between the edge of the pusher and the camshaft of the VAZ 2111, which holds the pusher in the lower position.
- Fixing valve tappets when replacing the adjusting washer
- 1 – latch
- 2 – adjusting washer
Raise the lever of the device to the upper position.
Use tweezers to pry the adjusting washer through the slot and remove it.
If you do not have a device for adjusting the valves, you can use two screwdrivers.
Using a powerful screwdriver, leaning on the cam, press the pusher down. By inserting the edge of another screwdriver (with a blade at least 10 mm wide) between the edge of the pusher and the camshaft, we fix the pusher.
Use tweezers to remove the adjusting washer.
The gap is adjusted by selecting the thickness of the adjusting washers. To do this, measure the thickness of the washer with a micrometer. The thickness of the new adjusting washer is determined by the formula:
- Н = В+(А–С), mm
- where A is the measured gap
- B – thickness of the removed washer
- C – nominal clearance
- N – thickness of the new washer.
The thickness of the washer is marked on its surface with an electrograph.
We install the new washer in the pusher with the marking down and remove the lock
Check the gap again. When adjusted correctly, a 0.20 or 0.35 mm feeler gauge should fit into the gap with slight pinching.
Consistently turning the crankshaft half a turn, we adjust the clearances of the remaining valves of the VAZ 2112 in the sequence shown in the table:
| Angle of rotation of the crankshaft from the alignment of the marks, degrees. | Fists | |
| high school graduation (gap 0.35 mm) | inlet (gap 0.20 mm) | |
| 40–50 | ||
| 220–230 | ||
| 400–410 | ||
| 580–590 | ||
With a fairly high mileage of your VAZ 2110-2112, you sometimes have to adjust the valves to avoid pinched or, conversely, knocking valves. Of course, this only applies to 8-valve engines, since 16-valve engines are equipped with hydraulic compensators, which eliminate any adjustment of thermal clearances.
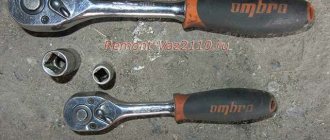
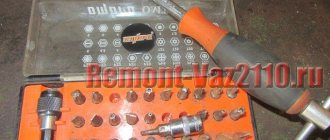
If you decide to adjust the thermal clearances between the camshaft cams and valve lifters with your own hands, then you will need at least the following tool:
- rack for adjusting valves of VAZ 2110 (model for 2108) with stop
- tweezers or long-nose pliers
- thin flat screwdriver
- 10 mm socket and knob
- set of probes from 0.05 to 1 mm
Since this procedure is quite capacious in terms of presenting information, I decided to make a detailed video report on the work done and post everything in this article. You can view it below.
Device
In order to understand why there is a need to adjust the valves, you need to understand a little about the operation of the VAZ 2110. So, when the engine is cold, there is a gap between the cam and the pusher.
It is needed for the so-called compensation of thermal expansion. Simply put, we all know that when heated, all objects tend to expand.
So that there is room for expansion, and the component parts do not break or bend, there are gaps. However, they must be of a strictly defined size, otherwise instead of benefit we will get harm.
Engine device
Adjusting valves VAZ 2110 8kl
If you have the instructions for repairing and operating the car at hand, the location is also explained there.
Nominal clearances
As for the installed clearances between the camshaft cams and valve tappets, they should be as follows:
- For intake valve = 0.2 mm (+- 0.05)
- For graduation (0.35 mm) (+- 0.05)
Checked at engine temperature close to 20 °C. That is, the engine must be cold.
Calculation and selection of the thickness of new adjusting washers
If, when measuring the gap, it turns out that some of the adjusting washers need to be replaced with new ones, with greater or less thickness, then you need to know the following simple formula:
H=B+AC
- where A is the value of the measured gap, B is the thickness of the old washer, C is the nominal gap, H is the thickness of the new washer
Again, the instructions above explain all this in more understandable language.
After adjusting the valves on a VAZ 2110-2112, you must install all the removed parts in the reverse order of removal and start the engine. Listen for knocking noises while the engine is running, both when the engine is cold and when it is hot. Also, pay attention to starting the engine so that there are no problems with this. If there is still a knock or other symptoms, it is necessary to re-measure the gaps of the non-problem valves.
Any mechanism wears out over time and needs debugging. The same can be said about the valves on the VAZ 2106. Initially, their thermal gap is set correctly. However, as the engine operates, its value gradually changes.
Over time, the gap may become smaller or larger. When the clearance decreases, the valves tighten, which leads to a loss of tightness. With large gaps, the valves are not able to open completely.
If there is a problem, you will hear it. The engine will begin to make a characteristic metallic ringing sound coming from the top. People simply say about this unpleasant sound: “valve knocking.” In the video you can clearly hear what it sounds like:
Experts recommend adjusting the valves in a timely manner, without waiting for problems to arise. The VAZ 2106 valves are adjusted after 30,000 kilometers. It would not hurt to do this after repair work on the engine. This is especially important to do if the cylinder head has been removed.
You can check the gap every 10,000 kilometers.
Step-by-step instruction
The procedure for adjusting the VAZ 2106 valves is as follows (table below):
The valve numbering order is from the windshield towards the radiator.
In the initial position, valves 6 and 8 are adjusted.
Then the crankshaft is rotated 180 degrees and the next pair of valves is adjusted.
Then another rotation: 360 degrees to adjust the next pair.
And the last rotation is 540 degrees to adjust the last pair.
The work itself is carried out as follows:
- Park the car on a level, bright place. You should have enough space on either side of the motor. You will have to work for a long time, so the conditions must be comfortable.
- Wait until the engine cools down. It should not exceed the air temperature around.
- While the engine is cooling, prepare a set of tools: a set of wrenches, a dipstick, a crankshaft wrench, a flathead screwdriver, a new valve cover gasket.
- Check the timing belt tension. If necessary, adjust the belt tension.
- Open the air filter cover and remove the filter itself.
- Disconnect all pipes from the filter
- Remove the choke cable.
- Remove the accelerator linkage
- Remove the cylinder head cover.
- To make it more convenient to work, it is also better to remove the ignition distributor cap.
- Typically, when the timing belt is properly tensioned, the marks on the pulley and on the oil seal should match. Check it. There should be a pulley mark near the longest mark on the distributor. The mark on the camshaft should coincide with the protrusion on the VAZ valve cover. If this is not the case, rotate the crankshaft until the marks align. This will ensure that the piston is positioned in the fourth cylinder during the compression stroke.
- We place the dipstick under the camshaft a little higher above the rocker. The probe should not penetrate easily. If it fits easily, then you need to loosen the nut 17 on the rocker. Then the nut at 13 is loosened. The nut at 17 is tightened and a new measurement is taken using a probe. The feeler gauge should fit tightly into the gap, but not bend.
- We adjust the remaining pairs of valves using the described method. (adjustment order and crankshaft rotation angles)
- Finally, you need to crank the crankshaft using the starter and measure all the gaps again. If the adjustment is made correctly, tighten the nuts.
- Reassemble in reverse order and replace the valve cover gasket.
Important Tips
- To make the correct adjustment, you need to use special probes that are designed for Zhiguli engines. They differ from ordinary ones in their large width. Since standard feeler gauges for modern engines are small, they cannot measure the entire width of the gap. As a result, you will lose the opportunity to correctly measure the size of the gap.
- If it is difficult for you to remember the adjustment order and crankshaft rotation angles, look for a diagram in the dipstick cover. Typically, manufacturers apply it directly to the probe, which makes work easier. If you are unlucky and could not find the diagram, you can simply print this article and take it with you to the garage.
- The most suitable temperature for correct adjustment is 20 degrees Celsius. If the adjustment is carried out in winter, the engine can be slightly warmed up to the specified temperature.
- Some people use a distributor slider for convenience during adjustment. To do this, they remove the cap and monitor the slider on the distributor. The degree of rotation of the slider is different here. Each subsequent pair of valves is adjusted after turning the slider by one quarter (or 90 degrees). You can make your own marks with paint or chalk.
- If you use gas as fuel, then the gaps need to be set a little larger than usual.
This is how you can easily and naturally adjust the valves on a VAZ 2106 with your own hands. And although most car enthusiasts entrust this work to service station specialists, you can adjust the valves yourself. An engine with adjusted valves will run quieter and more efficiently. The procedure will take some time, but will save a significant amount of money if you do it yourself.
For 8th grade VAZ engines periodically require adjustment of valve thermal clearances. To make adjustments, you will need a special set of washers of different thicknesses and a set of feeler gauges. It can be purchased at almost any auto store.
All measurements and adjustments should be made only on a cold engine.
Valve adjustment instructions
- Open the hood. We find the bracket with the throttle valve drive cable. We remove its tip and use a 10mm wrench to unscrew the two fastening nuts.
- Then remove the bracket.
- Using a Phillips screwdriver, loosen the clamp and disconnect the crankcase ventilation outlet hose from the valve cover fitting.
- Using the same screwdriver, loosen the clamp and remove the crankcase ventilation supply hose.
- The valve cover is secured with two nuts. Unscrew them.
- Having unscrewed them, we remove our cylinder head cover.
- Be careful, there are rubber seals (fungi) in the holes of the valve cover, do not lose them.
- After this, remove the valve cover gasket. If it was placed on the sealant, then carefully clean it from the surface to prevent chips from getting inside the valve mechanism.
- Next, you will need to remove the front timing cover and install the first cylinder at TDC. To do this, align the marks on the camshaft pulley and the rear timing belt cover.
- Now we turn the crankshaft another 40-50 degrees, which corresponds to 2.5-3 teeth on the camshaft pulley. In this position, using a set of feeler gauges, we measure the gaps at the first and third camshaft cams. The gap at the intake valve should be 0.20 mm, at the exhaust valve - 0.35 mm with an error of 0.05 mm.
- If the gap does not fit within the norm, then install a device on the studs of the camshaft bearing housings to adjust them.
- We insert the “fang” of the device between the pusher and the cam.
- After this, we unfold the pusher with a slot in its upper part forward in the direction of movement of the car and, pressing the lever of the device, install a clamp between the edge of the pusher and the camshaft that will hold the pusher in the lower position.
- Fixing the valve pusher is clearly shown in this figure.
- Now we raise the lever, holding the valve pusher with a device.
- Using tweezers, remove the adjusting washer from the pusher and install a new one, which will fit within the thermal clearance standards.
- If you suddenly don’t have a device at hand, then you can try adjusting the valves on a VAZ 2110 without tools. To do this, you will need two powerful screwdrivers (one with a tip of at least 10 mm). Using one screwdriver, leaning on the cam, press the pusher down. By inserting the tip of another screwdriver between the edge of the pusher and the camshaft, we fix the first one.
- And using tweezers, remove the adjusting washer.
Setting procedure
The first step is to put the adjusting device in place, then by turning the crankshaft, align the mark on its pulley with the protrusion on the cylinder block. In this case, the mark on the camshaft gear should also align with its protrusion. In this position, the piston of the first cylinder is at the very top (TDC), which can be easily checked with a screwdriver through the spark plug hole.
Then proceed in the following sequence:
- Check the tension of the timing belt by turning it around its axis as far as possible. A well-tensioned belt will not turn more than 90°. If you find any slack, tighten the belt using a pulley, otherwise further adjustment will be difficult.
- Using a wrench, turn the camshaft slightly clockwise so that the gear moves 2.5 teeth relative to the protrusion. Scratch your own mark on the gear with a sharp metal object - it will be useful to you in the future.
- Use feeler gauges to check the clearances in valves No. 1 and 3; they should be 0.35 and 0.2 mm, respectively. When the gap is set correctly, the feeler gauge moves in it with some effort.
- The size of the gap is adjusted with washers. If it is too small or large, remove the installed washer with tweezers and look at the markings where the thickness is electrographically applied. To be sure, it can be measured with a micrometer.
- Select the total thickness of the washers to maintain the specified gaps, check them with feeler gauges.
- Counting 11 teeth from the first mark, place the second, after 10.5 teeth - the third, and after another 11 - the fourth.
- Turning the camshaft clockwise and aligning your marks with the protrusion, repeat the valve adjustment in accordance with the table:
| Number of teeth between new marks | 0 | 11 | 10,5 | 11 | |
| Intake valve number | Gap 0.2mm | 3 | 2 | 6 | 7 |
| Exhaust valve number | Gap 0.35mm | 1 | 5 | 8 | 4 |
Upon completion of the adjustment, remove the device, replace the plastic timing belt shield and reassemble it. Next, start the engine and check its operation by ear and while driving.