Dimensions of the engine compartment of the VAZ 2110
The question arose about replacing the TV (s/o) with a VAZ-2110, as there was great sadness. Like everyone else, in order to save money, as well as gain experience, it was decided to do it yourself. The question arose about the geometric dimensions of the engine compartment. I found a couple of diagrams on the Internet
Comments 18
I also need sizes to check, so which ones to use!
I made it approximately according to my measurements
You probably haven’t been here for a long time) I’ve already done and sold the car! I won’t edit the blog anyway!
Yes, I already made mine too. But this recording will still be useful to someone
Wow, I should try to measure it)
Didn't take any measurements? Otherwise, in just a week I’ll go on vacation, and I’ll start doing shamanism a little
Not yet, I won’t get around to it, but I’ll definitely write back if I intend to)
I would be very grateful
Vitaly Kakhovka on YouTube did the 10th family in the video everything is there
Thank you. Let's take a look too
A1=119.5 A2=119.5 B=127 B1=46 B2=46 D1=49.5 D2=49.5 D=96))) my TV is further welded
Thanks Slav. We will still wait for at least a couple of measurements to choose the “golden mean”, so to speak.
Thank you for your quick help in measurements pandaaaaaaaaaaa And so here are his measurements: A1=118.5 A2=118.5 B=127 B1=44 C2=44 D1=48.5 D2=48.5 D=95.5 Thanks to him It seems that the dots are not seriously gone, +- 0.5 cm
Thanks for the sizes, I couldn't find them anywhere. According to these dimensions, they are one to one + -5 mm (as they measured with a tape measure) But between the glasses (shock absorber rod), according to the book there should be 1103 mm, but for me it is 1003 mm. I don’t understand how this happens((
I won't even give you a hint.
Thank you for your quick help in measurements pandaaaaaaaaaaa And so here are his measurements: A1=118.5 A2=118.5 B=127 B1=44 C2=44 D1=48.5 D2=48.5 D=95.5 Thanks to him It seems that the dots are not seriously gone, +- 0.5 cm
Is this the exact size?
Depends on what. You can choose a middle ground. There is generally little information about the VAZ-2110
I'll write first. My sizes may differ radically from yours, since I measured the points as I currently have them. And so: A: I couldn’t measure it because of the installed 3 liter receiver. B: 126.5 cm. B: left - 45 cm, right - 45 cm. (right and left, as look at the picture) D: L - 48 cm, R - 48.5 cm. D: 95.5 see. Feel free to write measurements, I really need them. It took me a maximum of 1 minute of my time. Thanks everyone for your help
Cars coming off the assembly line have strictly verified body dimensions. As a rule, no one pays much attention to this when buying a new car.
However, the need to measure and check the geometric dimensions of the VAZ 2110 body with the instruction manual may arise in the following cases:
- you buy a car second-hand and are not sure that it has not been in an accident. It is because of this that, as a rule, the geometry of the VAZ 2110 is most often violated;
- you yourself got into an accident, even ran into a stone, curb, etc., causing the car to receive a serious blow.
Basic reference dimensions of attachment points for components and assemblies
VAZ 2110 engine, photo, device, characteristics of the VAZ 2110 engine injector, carburetor
The VAZ 2110 engine uses gasoline from AI-92 to AI-95 as fuel. The design of all VAZ 2110 engines differs, both in the technical characteristics of the power system and in volume. Today we will tell you in detail about all the main engines that can be found under the hood of the VAZ-2110. Initially, the “ten” was designed on the VAZ-2108 platform, so many components and assemblies are identical. The first 2110 engines were very similar to the VAZ-21083 engines with a displacement of 1.5 liters with 8 valves and a carburetor. However, there were some differences in the engine settings. A photo of the 8-valve carburetor engine of the VAZ 2110 under the hood of the car is just below.
Actually, visually the motor is not much different from the “eight-wheel” motor.
Many parts are interchangeable. It was these engines that the Lada 110 received at the start of sales in 1996. The engine was installed on the car until 2000. The inline 4-cylinder engine had a cast iron block and an aluminum cylinder head. A belt is used as a timing drive. In this version of the engine, if the belt breaks or jumps, the valves do not bend. The camshaft has an overhead position.
The four-stroke carburetor engine was not distinguished by its environmental friendliness, moderate fuel consumption and high reliability. The carburetor had several advantages: maintainability, simplicity of design, the possibility of self-repair and omnivorousness. But there were also disadvantages, such as unstable operation, problems during cold starts, increased fuel consumption and other problems with carburetor power units. Below are detailed characteristics of the VAZ-2110 engine.
Engine VAZ 2110 1.5 l. 8-valve carburetor
- Working volume – 1499 cm3
- Number of cylinders – 4
- Number of valves – 8
- Cylinder diameter – 82 mm
- Piston stroke – 71 mm
- Power – 72 hp (53 kW) at 5600 rpm
- Torque – 104 Nm at 3800 rpm
- Compression ratio – 9.9
- Power system - carburetor
- Acceleration to 100 km/h – 14 seconds
- Maximum speed – 164 kilometers per hour
- Average fuel consumption – 7.6 liters
The next engine that appeared under the hood of the VAZ-2110 was an injector. Essentially this is the same engine with a displacement of 1.5 liters, but without a carburetor. The engine received the VAZ-2111 index. All the main parts of the power unit, the connecting rod and piston group, the lubrication and cooling system, remained the same, but a distributed fuel injection system, a different air filter, and spark plugs appeared. Photo of the injection 8-valve VAZ-2110 engine below.
The use of injection added some power to the engine, making it more economical and environmentally friendly. The same belt remained in the timing drive, and if it broke, the valves did not bend. Detailed characteristics of the VAZ-2111 injection engine are below.
Engine VAZ 2110 1.5 l. 8-valve injector
- Working volume – 1499 cm3
- Number of cylinders – 4
- Number of valves – 8
- Cylinder diameter – 82 mm
- Piston stroke – 71 mm
- Power – 76 hp (56 kW) at 5600 rpm
- Torque – 115 Nm at 3800 rpm
- Compression ratio – 9.9
- Power system - distributed injection
- Acceleration to 100 km/h – 14 seconds
- Maximum speed – 167 kilometers per hour
- Average fuel consumption – 7.2 liters
After the introduction of the injector at AvtoVAZ, they decided to develop 16-valve engines, which were supposed to further increase the power, efficiency and dynamics of the VAZ-2110. This is how the 2112 engine appeared. From the previous two 8-valve 1.5-liter engines, this 16-valve engine was distinguished by a more complex cylinder head design, and two camshafts appeared. Replacing the timing belt has now become more complicated, because there are now two camshaft pulleys, as well as rollers (tensioner and bypass). It was necessary to connect all the elements according to the marks with pinpoint precision. See below for a photo of the design of the timing belt drive of the VAZ-2112 engine.
The main disadvantage of this “tens” engine was that when the timing belt broke, the valves bent! Sometimes the belt simply jumped due to poor tension, and this also led to bent valves and very expensive repairs. Therefore, it was the 1.5-liter VAZ-2112 power unit that received a lot of unflattering reviews from drivers who were faced with the problem of bent valves. But if you look at the technical characteristics of the engine, they are much better than those of their 8-valve counterparts.
Engine VAZ 2110 1.5 l. 16-valve injector
- Working volume – 1499 cm3
- Number of cylinders – 4
- Number of valves – 16
- Cylinder diameter – 82 mm
- Piston stroke – 71 mm
- Power – 93 hp (68 kW) at 5600 rpm
- Torque – 128 Nm at 3800 rpm
- Compression ratio – 10.5
- Power system - distributed injection
- Acceleration to 100 km/h – 12.5 seconds
- Maximum speed – 180 kilometers per hour
- Average fuel consumption – 7.2 liters
The most successful in design were the VAZ-2110 engines with a displacement of 1.6 liters. Today, their modifications are installed on almost all Lada models that are currently sold. These are the 8-valve VAZ-21114 engine and the 16-valve VAZ-21124 engine. Actually, the same 1.5 liter engines became the basis for these units. The creation recipe turned out to be quite simple: increasing the height of the cylinder block by only 2.3 mm and increasing the piston stroke from 71 mm to 75.6 mm. At the same time, the diameter of the cylinder, and therefore the pistons, turned out to be the same 82 mm.
But to avoid valve damage, special recesses have now been made in the 1.6-liter pistons. Therefore, if the timing belt breaks, the valves of 1.6-liter engines do not bend. Some competent car owners, when overhauling a 1.5 liter engine, install new pistons with recesses from a 1.6 liter engine. The piston is the same size. This solves the problem of bent valves, but the compression is slightly reduced due to the different shape of the piston crown. Photos of the piston with recesses for the valves of the VAZ-2110 engine are attached.
Characteristics of the 1.6 liter “tens” engines below.
Engine VAZ 2110 1.6 l. 8 valves (16 valves) injector
- Working volume – 1596 cm3
- Number of cylinders – 4
- Number of valves – 8 (16)
- Cylinder diameter – 82 mm
- Piston stroke – 75.6 mm
- Power 8 kl. – 82 hp (60 kW) at 5600 rpm
- Power 16 cl. – 89 hp (65.5 kW) at 5600 rpm
- Torque 8 cl. – 125 Nm at 3800 rpm
- Torque 16 cl. – 131 Nm at 3800 rpm
- Compression ratio – 9.6 (10.3)
- Power system - distributed injection
- Acceleration to 100 km/h – 13.5 (12) seconds
- Maximum speed – 170 (185) kilometers per hour
- Average fuel consumption – 7.5 (7.2) liters
The data in parentheses is for a 16-valve engine. Our story would not be complete if we did not mention the 2-liter engine under the hood of the “tens”, this unit was installed on a limited edition VAZ-2110, the unit itself was foreign-made Opel index C20XE ( power 150 hp). A rotary piston engine was also developed specifically for the domestic car, but these engines were not widely used.
myautoblog.net
Factory dimensions
All linear dimensions of the VAZ 2110 body can be found by looking through the instruction book or rummaging around on the Internet.
But the main dimensions are:
- if we take the end points of the front and rear bumpers, then here we have 4265 mm;
- length between the centers of the front and rear wheels, the so-called. wheelbase is 2492 mm;
- from the center of the front wheel to the extreme point of the front bumper - 829 mm;
- from the center of the rear wheel to the end point of the rear bumper - 944 mm.
The height of VAZ 2110 is 1420 mm.
Factory dimensions for length and width
- in front at the extreme points of the “factory” mirrors – 1875;
- front excluding mirrors (purely hardware) – 1680 mm;
- distance between the centers of the front wheels – 1400 mm;
- the rear of the car has a width between wheel centers of 1370 mm.
Geometric dimensions of the VAZ 2110 body according to control points
Geometric dimensions of the VAZ 2110 body and how to remove them»>
How to remove body dimensions of a VAZ 2110 according to instructions
The geometric dimensions may be violated if the car has been in an accident. A car accident may involve the crash of two vehicles colliding together, a collision with an obstacle, or a wheel falling into a hole. From the article you will learn how to measure the geometry of a “ten” body, what methods allow you to give an accurate conclusion about deformations and damage, and much more.
Body geometry and its diagnostics
The most important components of body geometry are called control points. It is the knowledge of their location and the ability to correctly measure the distances between them that determines the structure of checking the body for deformation. You can learn more about control points from the technical documentation for each car model.
VAZ 2110 body dimensions
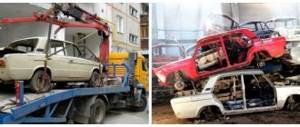
After identifying damage, the integrity of the body is usually restored in special workshops. Experienced straighteners bring the body back to normal in the shortest possible time, if only the deformations are of moderate or minor severity. A body that has been in a serious accident and has received a lot of deformation is usually easier to replace with a new one.
What deformations can occur on the VAZ 2110?
VAZ 2110 control body dimensions
The “Ten” involved in the accident will have certain deviations from the standard positions marked at the factory. And destruction in this case means the following:
- Deviations in terms of the standard wheel arrangement, as evidenced by poor vehicle stability and increased tire wear;
- The diagonals, again, standardly installed at the factory, are violated. Doorways, pillars and other areas of the body, one way or another, associated with the impact zone are especially often affected.
In most cases, the destruction of functional elements is associated with the appearance of folds in the floor or other components of the body. In addition, external impacts cause a significant increase in the part in areas far from the point of impact.
Note. Such structurally weak areas include empty spaces between welds, side members and other elements where free mutual movement of metal sheets is observed.
Several ways to check the body for deformation
You can determine the deformation of a body that has been in a moderate accident at first glance. On the contrary, if the blow was weak, then it can be extremely difficult to determine the damage by eye. In this case, you have to carefully carry out diagnostics, measure compliance, and so on.
VAZ 2110 body geometry dimensions and tools
A hydraulic jack helps to carry out an initial inspection of the car. Thanks to the lift, you can examine the condition of the floor, feel those parts of the body that are inaccessible for inspection with the normal position of the car, for the presence of folds. After detecting the latter, as a rule, they are marked with a marker, which makes it possible to easily find deformed areas during subsequent stages of work.
If such a check does not give any results, proceed to the next stage of the examination, which involves checking the wheels. It is no longer a jack, but a special stand that helps carry out the check. Using such equipment, it is easy and faster to carry out the second stage of diagnostics. Check the front and rear wheels of the car at control points using calipers with a special profile shape.
Geometry and body dimensions of the VAZ 2110: measuring setup
Checking the compliance of the control points of the “shoes” of the car involves verification (comparing) the wheel coordinates located on one side of the car with the coordinates on the other side. Body deformation becomes obvious if measurements show significant deviations from specified standards.
Another method of diagnosing damage to the “tens” body is to compare the diagonals. The exact coordinates of the main diagonals are given in the table below. This diagnosis is considered the most correct, since it is carried out using a symmetry check.
Body geometry VAZ 2110 dimensions via computer
Modern technologies allow this to be done using various tools. A computer on which appropriate measurements are carried out helps a lot in this matter. The option of checking using template tools and mechanical measurements is also used.
As a rule, at home on a VAZ 2110 you can remove the geometric dimensions of the body yourself using a standard tape measure. But at the service station, a special telescopic ruler is already used for the same purpose, which gives more accurate results.
VAZ 2110 body dimensions and geometry
But both of these measurement methods have a significant drawback. Thus, they do not make it possible to measure spatial deformations. The latter can only be diagnosed using template or computer methods. This will give a complete picture of the deformations, which will allow the damage to be eliminated most effectively. Although, the price of such a check will be many times higher.
The car body is an intricate and complex structure that has a number of values required for normal operation. Their violation causes significant deviations, the configuration of the entire body changes. By measuring the geometry of the body, the car owner has the opportunity to detect even the most minor defects, which can lead to big problems in the future.
Body geometry dimensions of the VAZ 2110
Factory body dimensions of the VAZ 2110
| Length | if we take the end points of the front and rear bumpers, then here we have 4265 mm; length between the centers of the front and rear wheels, the so-called. wheelbase is 2492 mm; from the center of the front wheel to the extreme point of the front bumper - 829 mm; from the center of the rear wheel to the end point of the rear bumper - 944 mm |
| Height | 1420 mm |
| Width | in front at the extreme points of the “factory” mirrors – 1875; front excluding mirrors (purely hardware) – 1680 mm; distance between the centers of the front wheels – 1400 mm; the rear of the car has a width between wheel centers of 1370 mm |
Geometry body dimensions VAZ 2110
Dimensions of the diagonals of the VAZ 2110 body
| Diagonal of the front door opening from the extreme point of the threshold from below to the top of the pillar (long diagonal), mm | 1345 |
| Diagonal of the front door opening from the extreme point of the bottom of the front window to the bottom of the door pillar (short diagonal), mm | 900 |
| Diagonal of the rear door opening from the extreme point of the threshold from the bottom to the top of the pillar (long diagonal), mm | 1040 |
| Diagonal of the front door opening from the extreme point of the bottom of the rear window to the bottom of the door pillar (short diagonal), mm | 1050 |
| Hood diagonal, mm | 1490 |
| Trunk lid diagonal, mm | 1090 |
| Front window diagonal, mm | 1365 |
| Rear window diagonal, mm | 1215 |
Geometry of the motor VAZ 2110 body
Several recovery methods
body "tens", in most cases, includes 6 types of work in the following order:
- Diagnostics of the body, checking it for deformations and their nature, severity, and so on;
- Work aimed at eliminating surface damage. They are also called tin works;
- Straightening and pulling of deformed parts, including the presence of special equipment such as a slipway;
- Removal of excessively damaged components of the body and its attached parts;
- Replacement of body parts with original elements;
- Painting and paint restoration.
In this video you can see how a body part is pulled out using a slipway.
Body features of the “tens”
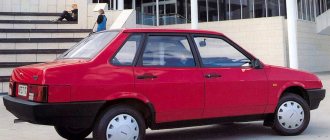
The VAZ 2110 or simply “ten” is equipped with a load-bearing structure body. This is a 4-door front-wheel drive sedan that has adopted some features from its predecessor, the VAZ 21099.
Note. This does not mean at all that the “ten” does not have individual traits. On the contrary, like any creation of the VAZ automobile industry, the model is distinguished by a set of characteristics unique to it.
Control dimensions of the VAZ 2110 body
In fact, the VAZ 2110 was predicted as a modification of the G8 back in 1983. Later, this base was used for the manufacture and production of a completely new car. In the meantime, the designers decided to modify the VAZ 2108 into 21099, leaving the idea of creating a VAZ 2110 for the future.
Note. According to rumors, the work at that time to create the “ten” required major changes in the design and structure of the body, which inevitably led to higher prices. At that time, AvtoVAZ was not yet ready for this.
VAZ 2110 station wagon
The “ten” entered mass production only in 1991. The production of the new sedan, which, unlike its relatives, does not, oddly enough, have its own name, was continued at VAZ in 1995. Three years later, they started producing a station wagon.
Note. The VAZ 2110 at that time was the only model whose body was sold in three ways.
By 1996, the VAZ 2110 was losing its popularity, which can be explained by significant progress in the global automotive industry. A modern and progressive car, once technologically advanced, represented by the VAZ 2110, ceases to be such and loses its attractiveness. Although, on the other hand, this would not have been said at that time about the sedan, which still sells well to this day.
Bare body of VAZ 2110
It was in 1996 that the “ten” began to be mass-produced in a sedan body type. The designers modernized a number of body elements and introduced various innovations. For example, one of the innovations is the introduction of gas stops into the hood of a car.
The VAZ 2110 was considered an expensive car at that time. And this is not surprising, because the engineers of the domestic automobile industry tried to modernize this car as best as possible. They even included the possibility of installing an air conditioner in the cabin. The trunk turned out to be a sight to behold – large and roomy.
True, the sedan could not compete with the station wagon in terms of luggage compartment capacity, but the same cannot be said regarding ease of use. So, due to an unsuccessful design, the hinges on the station wagon took up a considerable part of the useful volume of the trunk. In addition, the inconvenience of loading things into the trunk of a station wagon was added by the overly inflated wheel niches.
VAZ Premier and its dimensions
In the sedan, on the contrary, the trunk is well designed. The space for the spare tire stands out especially clearly. The wheel rim can be placed here upside down, which allows you to compactly load various things and tools into yet another free space.
As for the next modification of the “ten” called VAZ Premier, it is an exact copy of the VAZ 2110, only with an elongated body. The production of this model implied the use of an original set of body parts. They do not fit the sedan body. In addition, when designing the Premier body, engineers took care of giving it additional rigidity.
The floor was primarily reinforced. The suspension has been modernized and is more rigid than the sedan's. The total weight of the car has increased by 65 kg. As for painting, it was carried out in the same way as on the VAZ 2110 sedan.
We hope that the information provided in the article will help in your specific situation. If you will be checking the geometry and restoring it yourself, we recommend that you carefully study the photos and videos.
Instrumental check by checkpoints
And yet, things are not always so simple. And even an experienced eye will not always notice small “inconsistencies”. With proper body repair, the geometric dimensions can only be checked by taking measurements. Professionals use special meters for this.
But to carry out this procedure at home, an ordinary tape measure is sufficient. You need to find special control marks that are located on the bottom of the VAZ body. It is from them that measurements should be taken. How and in what sequence can be found in the operating instructions for the VAZ 2110.
If, say, you need to make sure that the linear dimensions of your particular car (for example, you changed the wings, door, etc.) match, then you should not always trust even the operating instructions; sometimes you can find errors there too.
As control dimensions of the body, use the dimensions you personally took from the side of the car where no replacements or straightening were carried out.
Check points on the body and underbody
It is necessary to take measurements at the following points:
- Diagonal. Before measuring body dimensions using reference points, you can take just two measurements that will help clarify the picture. Drive the car onto an overpass or pit and use a tape measure from below to measure the dimensions diagonally. They must match, as they say, neck to neck. Match up? Great, but don't stop there;
- Racks. You definitely need to check the racks. First - from the unbeaten side (if such is known), then - from the bat. In principle, in this case you can choose any body points (the main thing is that they are the same on both sides). For example, from the pillar to the edge of the bend on the rear doors. Also on the front ones. The sizes match - great. Let's move on;
- Roof. To make sure that the roof of the VAZ 2110 does not “sink”, you need to measure the dimensions of the door diagonals - from the lower rear corner diagonally to the upper front corner. Naturally, the dimensions on both sides should be the same. In addition to this, it is advisable to measure the diagonals of the roof itself;
- Windshield. For some reason, many people believe that if the windshield “fits” normally, then control measurements are not needed, they say, the geometric dimensions of the body are in order. This is mistake. You need to measure - moreover, diagonally, and choosing points at the same distance on both sides.
Photo No. 52. Detailed front view of the VAZ -21110 car.
⇐ PreviousPage 10 of 14Next ⇒Photo No. 53. Detailed front view of the VAZ -21110 car.
The operating mode of the VAZ-21110 engine at the time of the collision.
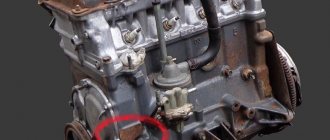
Photo No. 54. Photo of the engine compartment of a VAZ-2110 (2110).
This photo shows that the VAZ engine is located across the engine compartment. In this case, the camshaft drive and timing belt, covered with a protective plastic casing, are located on the right side of the engine compartment (indicated by a wide red arrow)
When the engine is running, the belt has a very high linear speed. Even at engine speeds of about 1500 rpm, its linear speed is approximately 6 m/sec.
As mentioned above, the collision of the cars occurred on the right sides of the bodies and, as can be seen in the photo, the impact on the VAZ car was so strong that during the initial contact of the cars, the engine of the VAZ-21110 car, its right (along the way movement) part, namely, the timing drive. The steel engine side shield was deformed and the plastic timing belt cover was destroyed. Moreover, both the lower casing and the upper one.
Photo #55. Detailed front view of the right side of the engine compartment of the VAZ-21110. Front view.
Photo No. 56. Top view of the right side of the engine compartment.
In view of the destruction of the timing belt casing while the engine is running, it would be logical to see long longitudinal marks on the belt left by the destructible structure on the belt rotating at high speed.
Even with a quick stop of the engine, measured in tenths of a second, the timing belt will advance a distance measured in tens of centimeters. Considering that the penetration of destroyed structures into the engine compartment is measured in only a few tens of milliseconds (see the results of the examination of a Citroen car given above), accordingly, the longitudinal marks on the belt will be approximately the same length.
However, there is nothing like this on the outside of the timing belt.
Photo No. 57. Top view of the timing belt of a VAZ-21110 car.
As we can see, there are completely no traces of belt advancement when the structure of the outer casing is destroyed. And moreover, due to the impact on the top cover (see photo No. 55, indicated by an arrow), the belt took a curved path on the camshaft drive gear that is not typical for a rotating belt (see the displacement of the belt during the run-up and run-off of the belt on the gear wheel).
Now let's look at the destroyed front part of the drive.
Photo No. 58. Front photo of the engine compartment of a VAZ-21110. View of the destroyed timing belt casing and the belt itself.
Photo No. 59. Detailed photo of the outer surface of the timing belt from the front impact side.
There are no elements of plastic casings on the front side.
And there are completely no longitudinal risks on the front of the belt.
It can be seen that the belt has been torn by the collapsing structure penetrating into the engine compartment (blue arrow). Namely, it is torn, since the penetrating cut has uneven boundaries. We also see that there is a round-shaped penetrating belt breakdown on the timing belt. It is located opposite the gear tooth (red arrow).
Its point nature, and the fact that all the defects are located on the front toothed belt and on the surface under which the camshaft drive gear is located, clearly confirms that the VAZ-21110 engine was turned off at the time of destruction.
And this obvious fact confirms the previously drawn conclusion from the point of view of physics: the VAZ-21110 car was not moving at the time of the collision.
The position of the gear selector handle of the VAZ-21110 gearbox at the time of the collision of the BMW X5 and VAZ 21110 vehicles
Photo #60. General view of the destroyed VAZ-21110 after the structure was turned over.
In this photo, where the general destruction of the engine compartment is once again clearly visible, the red arrow shows the gearshift lever.
Photo No. 61. Kinematics of the handle movement when selecting a gear in the gearbox.
Let's consider the device of the gear shift unit, located in the cabin between the driver and passenger seats. For clarity, the outer casing has been removed.
There is a socket on the floor of the car where the lower end of the handle with a ball at the end is fixed. Thus, the gearshift lever has a degree of freedom to move determined by the ball joint at the base of the lever.
⇐ Previous10Next ⇒
Subtleties of body repair
Body repairs are most often carried out after an accident, but also if some parts are rusty. But you should still try to avoid welding and other work that involves thermal heating of the metal.
Small scratches and chips can become a source of corrosion in the future. In order to avoid this, it is best to tint small defects. Details: https://vazweb.ru/desyatka/obschee/kak-podkrasit-skolyi-na-mashine-samomu.html
If possible, try not to remove bezels. This can also lead to changes in body geometry. And after any repair work related to the body, be sure to check its linear dimensions.
1. we need control dimensions of the engine compartment for the VAZ 2110-12. Question from: Ilya Koloskov 2. Who knows how to connect an additional output, thick black wires on the Centurion 20 signaling Question from: Ivan Morozov. Dimensions of the engine compartment of the VAZ 2110.
Similar articles
10 comments on “Dimensions of the engine compartment of the VAZ 2110. We need reference dimensions of the engine compartment for the VAZ 2110-12”
2. These are the power input and output of a normal open relay (built into the unit), if you connect ground or “+” to one wire, respectively, when this channel is activated, ground or “+” will appear on the second wire
VAZ 2110 sensors, detailed technical description of sensors with photographs
The VAZ 2110 sensors, which the “ten” abounds in, have different functions and are designed to make the driver’s life easier. But in reality, the opposite situation happens, when some VAZ 2110 sensor fails, this interferes with the normal operation of the car. The presence of a large number of sensors in this car is associated with widespread automation in the design of the domestic car. We offer a detailed technical description of the sensors with photographs and their functionality.
Let’s say right away that there are significantly more sensors in the injection “ten” than in the carburetor version. After all, an injection engine simply cannot work without the presence of certain sensors.
Temperature sensor VAZ 2110
The temperature sensor of the VAZ 2110 performs two main functions - in the event of engine overheating, it turns on the cooling radiator fan, and in the event of a cold engine start, it gives a command to enrich the working mixture so that the engine does not stall when cold. In carburetor engines, this function is performed by the so-called “choke”, which opens the damper to increase the air supply. If the temperature sensor malfunctions, problems begin with starting a cold engine and the power unit may overheat if the fan does not turn on in time. So this VAZ 2110 sensor is very important for the stable operation of the engine. Photo of the sensor below –
The operating principle of the coolant temperature sensor is as follows: when the temperature changes, the electrical resistance begins to change. The lower the resistance, the higher the temperature. You can check the functionality of the sensor using a thermometer, a container of hot/cold water and a conventional electrical probe. A working temperature sensor shows approximately the following values:
- At a temperature of 100 degrees the resistance is 180 ohms
- At a temperature of 80 degrees the resistance is 330 ohms
- At a temperature of 60 degrees, the resistance is 670 Ohms
- At a temperature of 30 degrees, the resistance is 2240 Ohms
- At a temperature of 10 degrees the resistance is 5670 Ohms
You can find the coolant temperature sensor under the hood of the injection VAZ 2110 between the engine and the air filter housing; it is screwed into the inlet pipe of the cooling system.
Speed sensor VAZ 2110
The VAZ 2110 speed sensor is installed on the gearbox, more precisely on the speedometer output shaft. If the sensor is faulty this can cause the car to stall at idle in some cases. When the spirometer needle begins to move abnormally (intermittently) on the instrument panel, this should alert you. After all, this may indicate a malfunction of the speed sensor. The sensor itself looks like this, look at the photo.
The principle of operation of the “tens” speed sensor is based on the Hall effect; when the gearbox shaft rotates, the sensor transmits a pulse signal. The higher the rotation speed, the higher the frequency of the pulse signal. This is how the speed of the car is measured. Two types of sensors were installed on the VAZ-2110, one has a square connecting block, the other has a round one.
Idle speed sensor VAZ 2110
The VAZ 2110 idle speed sensor or idle speed regulator is installed on the throttle mechanism of the injection “ten”. The task of this sensor is to maintain stable idle speed and prevent the power unit from stalling. The actual design of the sensor or idle air control allows, with the throttle valve fully closed, to supply the required amount of air to the engine to maintain stable operation. Photo of the sensor below.
Having received a signal from the electronic engine control unit, the idle speed regulator extends a rod with a cone at the end, closing the air flow, or, on the contrary, obeying the controller, retracts the rod, opening more air flow for the engine. Thus, even without pressing the gas pedal, the required engine speed is automatically maintained. If the engine stalls and does not maintain speed on its own, then it is worth checking this sensor first.
VAZ 2110 air sensor
VAZ 2110 air sensor or mass air flow sensor is located between the air filter housing and the rubber pipe. Actually, under the hood of dozens it is not difficult to find it, since the air sensor is located in the most visible place. In the photo assembled it looks like this.
The air sensor measures the amount of air passing by, thereby estimating its volume. Let’s say right away that the mass air flow sensor is very sensitive and even a few specks of dust can damage it. It is worth taking this into account when removing or replacing it.
The principle of operation of the VAZ-2110 air sensor is as follows - there are heating elements inside that are cooled by the flow of air passing by. The more energy spent heating these elements, the more air passes by. This is how the sensor calculates mass fuel consumption.
The topic of VAZ-2110 sensors is very extensive, so we will continue the story about these wonderful devices in the next more detailed article.
myautoblog.net
Sidebar text widget
To independently solve the problem of restoring parts of a VAZ 2112 car, you need to have the geometric dimensions of its body. In professional workshops, these properties must be taken into account, and they are individual for each machine model. Violation of body geometry must be eliminated, because it significantly reduces the safety of driving such a car.
From this article you can learn important information about the indicators on which high-quality repair of the VAZ 2112 body depends.
VAZ 2110 injector device - photo, description on VAZ-2110.net
1. Design, purpose and principle of operation of the system unit unit.
Injection device (sixteen-valve)
Lost spark on injectors of VAZ 2110, 2112, 2114, 2115.
Re: where to connect the coolant for VAZ 2110.
Selling, VAZ 2110 for spare parts or for restoration, the engine is in good working order, 8 valve...
The drum of the VAZ 2110 is ringing.
educational-posters-on-the-installation-VAZ-2110.
Cooling system for VAZ 2110 injector - pictures and photos.
VAZ 2112: we fix the injector malfunction ourselves.
Replacing timing belt 2110 8 valves Automotive.
Catalog of educational posters on the design of the VAZ 2110.
The design of the injection (sixteen-valve) engine LADA (VAZ) 2110,…
Relay VAZ 2110 injector where is the photo.
The VAZ is in good technical condition. It doesn’t require any investment in the chassis, it’s just...
Engine cooling system on VAZ 2110 VAZ 2111 VAZ 2112 cars: 1 -…
Refinement of VAZ engines in St. Petersburg.
Diagram of fuel supply to the injector of a 2110 car.
engine Engine control system VAZ 2110, VAZ 2111, VAZ.
VAZ 2110 two-way valve photo device.
device of sixteen valve cylinder heads of the VAZ 2110.
VAZ2110 fan switching diagram.
20. Electrical diagram of the inverter pro arc-160 download electrical diagram...
Ignition timing angle for VAZ 2110 injector.
Announcement about the sale of ICE 2110 injector 8 cl in the Komi Republic on Avito.
Idle speed sensor VAZ 2110 injector.
Oil volume in the VAZ 2110 engine.
Stands “Principal diagrams of vehicle mechanisms...
What is a fuel pump and how does a car's fuel system work?
Elements of the power supply system of the injection engine of the VAZ 2107 car: 1 - in...
Encyclopedia of modifications to the VAZ 2110.
Cooling system for VAZ 2110 injector.
Car driver.
Cooling system VAZ 2110 injector 8 valves.
On VAZ-21083-20 vehicles in a variant version with engines running...
replacing washer nozzles on VAZ 2110.
Cooling system. car, engine
Design of the VAZ-2110 cooling system.
The engine compartment of the car.
Differences between fuel systems
Stands “Principal diagrams of vehicle mechanisms...
Electrical diagram of VAZ-2110 cars with an injector.
Car device.
There are injectors. piezoelectric.
The design of the injection (eight-valve) engine LADA (VAZ) 2111 2110.
Injector VAZ-2110 dv1.6 8 valves.
Kia manual transmission oil. VAZ injector cleaning injectors.
Design of car systems.
photo of the VAZ 2110 injector Photo-Bazar.ru.
“Heated seats VAZ 2110.
vaz-2110.net
Impact of body geometry on handling
During the operation of a VAZ 2112 car, at some point deformation of body parts occurs. Safety on the road and ease of operation depend on the level of their wear.
VAZ 2112 has been produced since 1999. The car body of this model is similar to the 2110 modification, the difference is that the first one is slightly shorter than the second one.
The geometric properties of the 2112 made it possible to equip the car with many additional functional capabilities.
Sharp braking or an untimely start provoke, at first, damage to the bumper.
It combines the winning parts appropriate for the “ten”, as well as the rear seat of the station wagon from the 2111 model, which made the car much roomier and more maneuverable. The ability to transform the rear seat allows, if necessary, to significantly increase the volume of the interior. Improved maneuverability properties have simplified the process of entering a turn, which has significantly increased the level of safety for road users.
The VAZ 2112 has several modifications, for example, model 21123 is characterized by an unusual design of the hood and bumper, which allowed the car body to become popular among many car enthusiasts. After some time, the VAZ 2112 had a new grille model, and the hood took on a standard look.
Repair of the front suspension, checking and eliminating noise and knocking in the suspension of the Lada 2110 with your own hands, stages of replacing the protective cover of the ball joint of the Lada 2112, the procedure for removing and installing the shock absorber strut of the VAZ 2111, VAZ 2112, VAZ 2110. Maintenance and repair of the chassis of the Lada 2111. Instructions for operation of the chassis components of fret 2110. Checking the rear and front suspension of fret 2112.
Front suspension 1 – ball joint 2 – hub 3 – brake disc 4 – protective cover 5 – swing arm 6 – lower support cup 7 – suspension spring 8 – telescopic strut protective cover 9 – compression buffer 10 – upper support cup 11 – upper support bearing 12 – upper strut support 13 – rod nut 14 – rod 15 – compression buffer support 16 – telescopic strut 17 – nut 18 – eccentric bolt 19 – steering knuckle 20 – front wheel drive shaft 21 – hinge protective cover 22 – outer shaft joint 23 – lower arm Front suspension - independent with telescopic hydraulic shock absorbers, coil springs, lower wishbones with braces and anti-roll bar. The basis of the VAZ 2110 suspension is a telescopic hydraulic shock absorber strut 16. Its lower part is connected to the steering knuckle 19 with two bolts. The upper bolt 18, passing through the hole in the rack bracket, has an eccentric collar and an eccentric washer. By turning this bolt, the camber of the front wheel of the VAZ 2111 is adjusted. The telescopic strut is equipped with: a coil spring 7, a polyurethane foam compression stroke buffer 9, as well as an upper strut support 12 assembled with a bearing 11. Front suspension (bottom view) 1 – suspension arm extension 2 – anti-roll bar 3 – suspension arm The upper support is attached with three self-locking nuts to the mudguard strut of the VAZ 2110 body. Due to its elasticity, the support allows the strut to swing during suspension movements and dampens high-frequency vibrations of the body. A bearing pressed into it allows the rack to turn along with the steered wheels. Parts of a telescopic hydraulic shock absorber are mounted in the strut housing. If it fails, you can install a cartridge in the rack housing. Please note that the strut body of the VAZ-2110 is slightly shorter than that of the VAZ-2108, so using a cartridge that looks similar from the VAZ-2108 is impossible. The lower part of the steering knuckle 19 is connected to the lower suspension arm 23 through a ball joint 1. The support is secured with two “blind” bolts (the hole in the steering knuckle is not through). When unscrewing these bolts, be careful: with significant force they often break, so before disassembling, tap their heads in the axial direction. Braking and traction forces when the car is moving are perceived by longitudinal braces connected through silent blocks to the lower arms and front suspension beam of the VAZ 2112. At the connection points (at both ends of the brace), washers are installed to adjust the longitudinal inclination of the turning axis. A double-row angular contact ball bearing of a closed type is secured in the steering knuckle with two retaining rings. The VAZ 2112 wheel hub is installed in the inner rings with interference. The bearing is tightened with a nut on the shank of the outer wheel drive joint housing and is not adjusted during operation. The wheel hub nuts are the same, with right-hand threads. The anti-roll bar is a spring steel bar. In its middle part there is a bend to accommodate the exhaust pipe. The ends of the VAZ 2112 stabilizer are connected through struts with rubber and rubber-metal hinges to the lower suspension arms of the VAZ 2111. The bar in its middle part is attached to the body with brackets through rubber pads.
Geometric dimensions of the “two-piece”
This is a sports model, it stands out from others, which are monotonous in terms of the geometric dimensions of the body. The design features of the VAZ 2112 coupe allowed the model to become suitable in its time. But after the production of 10 thousand copies of the 2112 coupe, the creation was completed, so it is considered a rare model. Several modifications of the VAZ 2112 were equipped with hatches, which increased the comfort of the driver and passengers on the road by an order of magnitude. The body length of the 2112 is 4170 mm, the volume of the luggage compartment is 400 liters..
- length – 4170;
- width without mirrors – 1680;
- height – 1435;
- width with mirrors – 1875;
- rear door opening diagonal – 1320;
- small diagonal of the rear side window frame – 230;
- the distance between the center of the upper beam of the rear door opening to the middle of its lower beam is 1050;
- the long diagonal of the rear side window frame is 710.
VAZ 2112 is one of the most popular models among the cars produced by the Russian auto industry. It is relatively affordable, has a good design and different body styles. The main geometric dimensions of the body of this car are as follows (in mm): The rarest body type of the 2112 is a coupe, or 3-door hatchback.Thanks to these changes, the unit is easier to control compared to the tenth model. The steering wheel allows you to make turns easier and faster. The 2112 model is characterized by a sporty character.
Repair manual for VAZ 2110, 2112, 2111 (Lada 110)
Vehicle Specifications
1.1. Overall dimensions of the VAZ-2110 car
1.2. Overall dimensions of the VAZ-2111 car
1.3. Overall dimensions of the VAZ-2112 car
Small class cars VAZ-2110 (export name Lada 110) with a four-door five-seater sedan body (class C according to the international classification) are equipped with engines of 1.5 and 1.6 liters, with a power of 58–68 kW (79–92.5 hp). c.), located across the engine compartment.
Previously, cars at the factory were equipped with 1.5 liter engines: first with carburetor engines, and then with a distributed fuel injection system. Currently, cars are equipped only with engines with a displacement of 1.6 liters: eight-valve VAZ-21114 and sixteen-valve VAZ-21124 with distributed fuel injection systems and three-component exhaust gas catalysts with feedback. The engines meet Euro-2 and Euro-3 standards.
The body is load-bearing, all-metal, of welded construction with hinged doors, front fenders, hood and trunk lid. The VAZ-2110 car is the first sedan in Russia with a hatch that can be opened from the trunk leading into the cabin, which allows you to transport long items.
Part of the production modification 21103 with a 16-valve VAZ-2112 engine is equipped with air conditioning, and since the end of 2002, on request, power steering from ZF.
This modification differs from the basic one by a hood with an integrated radiator lining of a more modern shape and a front bumper, as well as original headlights. The rear lights, moldings and interior details have also been changed.
In 1998, production of the VAZ-2111 car (export name Lada 111) with a station wagon body began. According to the layout, engine, transmission, chassis, body equipment, this car is identical to the VAZ-2110 car. It features a redesigned rear end with a large tailgate. The trunk of this car is the most spacious in the family: 490 liters with the rear row of seats raised and 1420 liters with them folded.
Production of the VAZ-2112 car (export name Lada 112) with a hatchback body began in 2000. The layout of this car is the same as that of the VAZ-2111, but the body has a large rear angle. The engines are used only with a distributed injection system, both 8-valve and 16-valve. The rear seat folds in a 2:3 ratio, which increases trunk capacity from 415 to 1270 liters. The interior, like other models of the family, is equipped in “standard”, “norm” and “luxury” trim levels. The latest equipment includes fog lights, headlight cleaner and washer, 14-inch alloy wheels, three-way catalytic converter (Euro 2), internal bonnet lining, door security bars, immobilizer, on-board monitoring system, velvet seat upholstery and soft upholstery doors, central electric door locking, electric windows. By additional order, an on-board computer, electric front seat heaters, electric outside rear-view mirrors, anti-lock brakes, an airbag and a sunroof are installed.
1.4. Layout diagram of the VAZ-2111 car: 1 – engine; 2 – spare wheel; 3 – muffler; 4 – rear suspension strut; 5 – drum brake; 6 – rear suspension beam; 7 – fuel tank; 8 – resonator; 9 – disc brake; 10 – shock absorber strut; 11 – steering mechanism
The layout diagram of all three cars is almost the same, so it is shown using the example of a VAZ-2111 car in Fig. 1.4.
1.5. Engine compartment of cars with engine mod. 2111 (top view): 1 – engine; 2 – adsorber for the gasoline vapor recovery system; 3 – receiver; 4 – brake master cylinder; 5 – expansion tank; 6 – washer reservoir; 7 – battery; 8 – air filter; 9 – ignition module
1.6. The engine compartment of all cars is from below (engine protection removed): 1 – engine; 2 – starter; 3 – front suspension cross member; 4 – gearbox; 5 – stretching; 6 – exhaust pipe; 7 – anti-roll bar; 8 – front suspension arm; 9 – wheel drive; 10 – engine oil sump; 11 – generator
1.7. Engine compartment of cars with engine mod. 21124 (top view with the decorative cover removed): 1 – intake manifold with receiver; 2 – throttle unit; 3 – reservoir of the main brake cylinder; 4 – expansion tank; 5 – washer reservoir; 6 – inlet pipe; 7 – battery; 8 – air filter; 9 – ignition coil; 10 – timing belt protective cover; 11 – adsorber; 12 – tailgate glass washer reservoir (on cars with station wagon and hatchback bodies)
1.8. Engine compartment of cars with engine mod. 2112 (top view): 1 – engine; 2 – adsorber for the gasoline vapor recovery system; 3 – receiver; 4 – brake master cylinder; 5 – expansion tank; 6 – washer reservoir; 7 – battery
1.9. Controls: 1 – front door glass blower nozzle; 2 – side nozzles of the interior ventilation and heating system; 3 – glove box cover; 4 – clock (electronic or quartz); 5 – display unit of the on-board control system; 6 – radio socket cover; 7 – cigarette lighter; 8 – front ashtray; 9 – lining of the floor tunnel; 10 – control units*; 11 – parking brake lever; 12 – gear shift lever; 13 – accelerator pedal; 14 – socket for connecting a portable lamp; 15 – brake pedal; 16 – clutch pedal; 17 – ignition switch; 18 – steering column adjustment handle; 19 – hood lock drive handle; 20 – sound signal switch; 21 – mounting block cover; 22 – trunk (tailgate) lock drive switch*; 23 – mounting block lock button; 24 – headlight hydraulic corrector; 25 – lever for switching direction indicators and headlights; 26 – external lighting switch; 27 – front fog lamp switch*; 28 – control lamp for turning on fog lights*; 29 – instrument cluster; 30 – indicator lamp for turning on the rear fog light; 31 – rear fog light switch; 32 – control lamp for heated rear window; 33 – rear window heating switch; 34 – instrument lighting switch; 35 – immobilizer warning sensor*; 36 – switch lever for windshield wipers and washers; 37 – central nozzles of the interior ventilation and heating system; 38 – recirculation switch; 39 – air conditioner switch*; 40 – control lever for heating system dampers; 41 – controller of the automatic heating control system; 42 – alarm switch; 43 – switch for headlight cleaners and washers*; 44 – windshield blower nozzle
1.10. Instrument cluster: 1 – indicator lamp for turning on the parking brake; 2 – warning lamp for insufficient oil pressure; 3 – backup warning lamp; 4 – control lamp for turning on the side light; 5 – coolant temperature indicator; 6 – tachometer; 7 – control lamp for turning on the left direction indicators; 8 – control lamp for turning on the right direction indicators; 9 – speedometer; 10 – summing counter of the distance traveled; 11 – fuel reserve warning light; 12 – fuel level indicator; 13 – control lamp for turning on the high beam; 14 – warning lamp for turning on the hazard warning lights; 15 – warning lamp for emergency condition of the working brake system; 16 – button for setting the daily mileage counter to zero; 17 – daily mileage counter; 18 – control lamp “CHECK ENGINE” (“check engine”); 19 – battery charging indicator lamp
Body parts more susceptible to deformation
If it is insignificant, then during repairs it is possible to achieve the features of standard geometry. In the presence of complex deformations, this is unrealistic, so it is easier to replace the damaged body part with a new one.
If the owner of the car does not take sufficient care of the condition of the body, then those parts that have close contact with the road surface are quickly eaten away by corrosion. And repairing the hood, doors and covered body parts instead of timely prevention is already more difficult and expensive.
Linear dimensions of Lada Granta
Dimensions of Lada Granta door connectors
Dimensions of the engine compartment of the Lada Granta car
Dimensions of the windshield frame of the Lada Granta car
Dimensions of the rear window frame of the Lada Granta car
Dimensions of the trunk door opening of the Lada Granta car
Dimensions of the underbody of the Lada Granta car
Control points of body geometry of VAZ 2110, 2111, 2112
| Cars that have just rolled off the assembly line have strictly verified body dimensions. With these dimensions at hand, you can determine whether the car has been involved in an accident. Also, control dimensions of the body will be useful in case of repair and restoration work after such an accident. |
A significant part of the repair work on cars, especially those arriving after road accidents, falls on body repairs. In most cases, when repairing a body, it is necessary to check the geometry of the attachment points of components and assemblies of the vehicle chassis. Geometry of the body and engine compartment of the VAZ 2110-12 in the diagrams:
If the body is heavily damaged, it is recommended that all interior trim be removed to facilitate measurement, inspection, and installation of hydraulic and screw jacks to correct distortion and damage to the body. Protrusion of the front surfaces and removable parts relative to adjacent panels is eliminated by fitting and adjusting them.
Where is the ECU located on the VAZ-2112?
Finding the electronic control unit on the VAZ-2112 will not be difficult, because it is located directly behind the instrument panel, and more specifically in the lower part near the left foot of the front passenger.
It is hidden immediately behind a plastic cover, which is very easy to remove using only a Phillips screwdriver.
After dismantling, we put it aside.
When the protection is removed and a bunch of wires and a block with relays and fuses are revealed in front of you, the ECU controller is located directly above us in a horizontal and tightly fixed state on a special mounting plate.
Tool for work
To ensure that the work on dismantling the ECU does not take much time, prepare all the necessary tools in advance:
- Ratchet key.
- Socket head at "10".
- Crosshead screwdriver.
Step-by-step procedure for removing the ECU
- First of all, we ensure that the car is parked on a flat surface and put the handbrake on.
- Then open the hood of the car and disconnect the negative terminal from the battery.
- Next, we move into the interior and, with careful movements, disconnect the block with the wiring harness from the ECU, having previously unfastened the latch.
The latch is indicated by an arrow.
- Using a wrench and a “10” socket, we remove the two nuts that secure the ECU in place.
The nuts are clearly visible after dismantling the wiring harnesses.
- When they are unscrewed, we move the bar a little to the right so that it comes out of the engagement point.
- After completing these works, you can carefully remove the ECU from its place.
- The installation procedure is carried out strictly in the same order as removal.