Connection methods
To connect an electric stove in an apartment, use special connectors designed for stoves, or use a direct connection, when the cable comes out of the wall and is connected directly to the terminals of the device without a socket or plug.
The second method is used when several kitchen appliances are connected to one powerful line. In this case, one powerful cable is pulled from the switchboard, put into a special box, machines are installed according to the number of connected equipment, and power lines are laid from the machines to each electrical appliance.
Some manufacturers immediately connect the wire for the stove (power cord). It is connected to the terminal block on the rear panel. If the first connection method is selected, a suitable plug is connected to this cord. If the second, then the factory cord is removed (this does not affect warranty service) and a wire coming directly from the switchboard or machine is connected to the terminal block.
Plug and socket
As already mentioned, an electric stove is an energy-intensive appliance that consumes current up to 50 A, so a regular socket and plug are not suitable for connecting this device. Special power components are required.
When choosing a plug and socket for a stove, proceed from the characteristics and power of the electrical appliance. The stoves come in both single-phase and three-phase and have energy consumption indicators from 4 kW/h to 8 kW/h, depending on the selected model. Data on energy consumption are indicated in the data sheet for the device.
Socket mounting location
When choosing the location of the socket box and the socket itself, follow the electrical safety rules. The socket, like any auxiliary equipment, is not mounted directly behind the device. A suitable location is determined either next to the equipment or above it at a distance of about 10-15 cm.
Important! Sockets are not installed near the floor. Especially in the kitchen and bathroom, where there is a high risk of water leaks and flooding. The recommended distance from the floor is about 90 cm.
Terminal block
Electrical connection plates directly through terminals is the preferred method of connecting to the network. Contact with the electrical network in this case is more reliable, as it is ensured by clamping screws.
Important! A significant disadvantage of this method is the difficulty of disconnecting from the network. To do this, you need to remove the top panel, unscrew the bolts and pull out the cord. Therefore, this option is used provided that a circuit breaker is installed.
When connecting to the terminal block, the wires stripped of insulation are inserted under the metal plates and the contact is tightened with clamping bolts (screwdriver). At the same time, considerable effort is made to ensure reliable contact.
The power cord wires are connected to the block in accordance with the markings: phase wire - opposite the phase wire from the panel, neutral (zero) - opposite zero, earth - opposite the ground wire.
Self-connection of an electric stove
Before starting any work on connecting electrical equipment to the network, you need to carefully study the technical data sheet of the product, which must be attached, as well as familiarize yourself with such regulatory documents as PUE 7th edition and PTEEP.
Step-by-step instructions for connecting electric stoves electrolux ekc (electrolux), zanussi (zanussi), hansa (hansa), gorenje (burning), bosch (bosch), ariston (ariston), beko (eyelid), hotpoint, indesit (indesit), greta, kaiser (kaiser), aeg, nord ep, samsung to power supply:
Step 1 - Power Cables, Circuit Breaker and RCD
The power supply to the electric stove must be carried out by an independent cable going directly to the apartment's distribution board. To lay the cable from the switchboard to the socket, you can use cable brands: VVG; VVG-ng; PVS; SHVVP. And from the outlet to the stove, it is better to connect with multi-core wires, for example PVA or KG, which are more resistant to breaking when repeatedly bent during operation.
The cable cross-section depends on the network voltage, the number of phases and power consumption. Knowing these parameters, you can select the appropriate cable from the table. It is better to take the conductor cross-section with a margin of one order of magnitude larger.
Table: selection of cable cross-section
The connection must be made from a separate circuit breaker. The rated current of the machine must be one rating higher than the current consumption of the electric stove.
All characteristics of the electric stove can be found in the technical documentation that is included with the purchase, and they are also indicated on the body. The time-current characteristic of the circuit breaker must be group C.
It is also advisable to install a residual current device (RCD), which will protect a person from electric shock if he accidentally touches faulty equipment. The RCD is installed next to the circuit breaker and connected after it. Its denomination should be an order of magnitude less than the machine. Ground leakage current is no more than 30 mA. All screw terminals must be tightly clamped, as large current will pass through them.
Step 2 - Installing the Outlet
Not every apartment has a power outlet in the kitchen, designed to connect powerful equipment that consumes more than 3 kW. This is usually a single-phase power outlet that is rated at 32A or 40A.
We suggest you consider how to choose and install the right socket for an electric stove:
- The socket must be made of high-quality materials and provide reliable electrical contact.
- The number of contacts must correspond to the number of wire cores. Do not connect wires together by connecting them to the same terminal.
- Use only copper cable to connect the outlet.
- The cable cross-section must correspond to the table above.
- The socket is installed on a flat, non-flammable surface.
- If you have a brick wall, it is advisable to install the overhead socket on a special lining; this will prevent the base of the socket from cracking during installation.
- Do not install the socket too close to hot surfaces, washbasins, iron pipes, window or door openings.
- When replacing an old outlet, make sure that the wire insulation is not damaged and there are no signs of cable overheating.
- The colors of the wires must match the purpose of the wires, both in the socket and in the plug.
- All screw terminals must be properly secured. Stranded wires should first be soldered with a soldering iron at the point where they are attached to the socket contacts.
- After installing the socket, make sure the wires are connected correctly. Use a multimeter to check for short circuits.
Turn on the circuit breaker in the apartment's distribution panel. Use a multimeter to check the presence of voltage at the phase contacts of the socket.
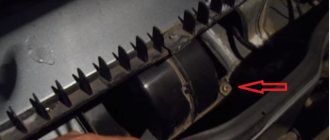
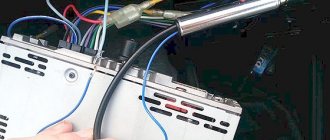
Step 3 - Open the back panel of the cooker
To connect the cable to the electric stove, on the back side you need to find and unscrew the small cover that covers the terminals for the wires.
Rear wall of a domestic stove
Step 4 - Securing the Cable
After you have removed the cover, you need to secure the cable. This is done in order to avoid accidentally pulling the cable out of the plate. Insert the cable and secure it to the stove body in a special clamp.
Hole for ZVI cable wiring
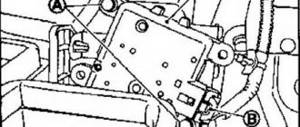
Step 5 - Installing Copper Jumpers
Depending on the number of power phases, the wires are connected differently. In order to properly coordinate the connection of the stove to various power networks, special copper jumpers are included with the terminal block. According to the diagram you have chosen, install jumpers in the block and tighten the screws where the wires will not be connected.
Connecting wires to a household stove
Step 6 - Connect the Wires
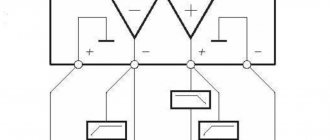
It is very important to connect the wires on the terminal block correctly! In the documentation and often on the case itself, near the lid, there is a connection diagram with different types of power supply. According to the diagram that suits your case, connect the wires to the terminals. The color of the wires must match the connection in the plug and socket. The ground wire is connected first - yellow-green, then the neutral wire - blue. Then the phase wires, brown and two black. The main thing here is not to mess anything up so as not to damage the equipment.
We connect the isolated neutral and ground with a jumper
Step 7 - Closing the Panel
After connecting all the wires, check the connection diagram again to make sure there are no errors. Tighten the clamp screws well. But remember: in all plates the connector is made of fragile material, do not use much force, otherwise you may damage it. Now you can close the cover and tighten the fastening bolts.
Final connection of wires to a household electric stove
Step 8 - Connect to the Network
Before connecting the oven to the network, make sure that the circuit is assembled correctly and all live parts are closed. Turn on the machine and the RCD, check for voltage in the outlet. Plug in the electric stove. According to the instructions, make sure that all its functions work correctly.
Video: video instructions for connecting an electric stove https://www.youtube.com/watch?v=EQkmo6NzIGY
Selecting a circuit breaker
Before connecting a new electric stove, oven or powerful hob, examine the general condition of the electrical wiring and check for the presence of an automatic safety switch (circuit breaker).
When connecting a single-phase stove, an automatic switch is installed on the line, designed for a current of 32 A. Such a switch is installed if the rated current of the input switch is 40-50 A.
After installing the machine, a residual current device (RCD) is connected in series, with a rated current of 32-40 A and a differential current of up to 30 mA. Instead of a machine and an RCD, it is permissible to install a difavtomat that combines the functions of both devices.
For a three-phase connection, a three-pole circuit breaker is installed, designed for a rated current of 16A, and a four-pole RCD is installed for 25 A rated current and 30 mA differential.
General requirements for connecting electric stoves
Despite the abundance of different models and brands of electric stoves (hansa, combustion, etc.), the general requirements for their connection are almost the same. A slight difference exists only in connecting 220 and 380 volt stoves.
Regardless of the brand, the connection diagram for all plates is the same
So, here are the basic requirements for connecting an electric stove:
- a separate electrical wiring line must be laid for it, equipped with a safety circuit breaker;
- the stove should be connected to the power supply either directly or through a terminal block or a special socket;
- the connection must take into account such parameters as “phase”, “zero” and “ground”.
Let's consider each of the above points in more detail.
Cable and its parameters
Before connecting an electric stove, be sure to check which cable is connected to the installation location of the device. There are increased requirements for supply wires and grounding, as a powerful electric current can burn through weak wiring and cause a fire.
What cable is needed to connect an electric stove? To connect the device to the network, two types are used: a three-core cable with a cross-section of 4 sq. mm from the machine to the power outlet and a flexible cable with a cross-section of 3 by 4 mm (PVS or KG) from the outlet to the stove.
When connecting contacts, the ends of the cable are protected from oxidation by tinning them with a soldering iron and cutting off the excess after giving the desired shape. Instead of tinning, crimping with brass sleeves is also used.
Reference. According to GOST, soldering of wires is used when such a connection is provided for by regulatory documentation. If the RCD and machine terminals are made in the form of sockets, the ends of the wire are not soldered - they are securely crimped.
Instead of soldering, crimping is also used. A stranded flexible wire must first be tinned, then inserted into the machine or crimped, and then inserted.
The power cord from the outlet to the stove is placed in free access at a distance of no more than 2 m from the stove. The wire must be double insulated.
In the case of a three-phase connection, a five-core cable is used (three phases: L1, L2, L3, zero - N and grounding - PE) of 2.5 sq mm cross-section for copper.
Thus, when choosing a cable cross-section for an electric stove with an oven, the cable is guided by the power of the device and the type of connection.
What cross-section of wire is needed for an electric stove with an oven power of 9 kW? The cross-section must be sufficient for the power consumed by the device - 5 * 4 sq. mm of five cores with a cross section of 4 sq. mm each. In a single-phase network, a 3 * 6 sq. cable is used. mm with three cores, each with a cross-section of 6 sq. mm.
Connecting a powerful electric stove
The power of an electric stove with an oven and four burners is usually 7 kW or more. For this reason, its connection is somewhat different from the process already discussed for less powerful equipment. Since four-burner electric stoves are generally connected to a single-phase electrical network, many models are equipped with a power cord already attached to the stove. In this embodiment, the task is simplified and comes down to connecting an electrical plug, which has a special design.
It allows the contacts of the plug connector to safely pass the operating currents of this electrical appliance. But if you make mistakes when installing the cable, and as a result the contacts turn out to be unreliable, an accident with insulation melting and even fire cannot be ruled out. If the installation of the socket has not been done before, and the wires for connecting it stick out from the wall, they also need to be installed properly.
To obtain reliable contact at the points of connection with the plug terminals, the stranded cores of the network cable must be tinned. To do this, the veins are prepared by twisting tightly with pliers. This is done in order to fix the wires and the shape of the core. After twisting, it is bent in the form of a loop to obtain a large contact surface.
After trying the loop on the screw with the clamping bracket, it is made flatter by squeezing it with pliers:
Since the hinges will be tinned, they should fit into the bracket screw with clearances that allow for the solder layer.
If you need to mount a socket and connect the wires of a cable laid from the switch to its terminals, you must definitely check how the wires are connected to its terminals. They should not be attached in the same way as the self-tapping screw that imitates the core in the image below. This is the easiest way to connect the core. But due to the small contact surface, high currents will heat up the contact, and an avalanche-like process of increasing contact resistance will begin. As a result, both the wire and the socket will be damaged at best. But a fire may also occur...
For good contact, the solid wire should be bent around the clamping screw and slightly flattened. It is recommended to add a little special contact paste to the terminal.
In our case, the socket cable has multi-wire cores. For good contact, we form them in the form of a fork. To do this, we perform the following steps.
- Taking several wires, starting from the insulation, we tightly wrap them around the remaining wires, forming a “leg”.
After this, we mount the plug and socket with the addition of copper paste.
Proper installation of an electric stove is a guarantee of safe and long-term operation. Don't skimp on the quality of contacts to simplify your work - it will cost more!
>
How to connect an electric stove to a 220 V network
After a cable of suitable cross-section is connected to the installation site of the stove, the device itself is connected to the network.
The power cord is connected to the terminal block on the rear panel of the device. To do this, remove the protective panel. Under the cover there are terminals with connected multi-colored wires. For a single-phase 220 V network, three jumpers are installed at the terminals: two between the phases (first, second and third output) and one between the fourth and fifth output.
The wires from the cord are connected as follows:
- a phase (wire with brown insulation) is connected to the third output;
- to the fifth output - neutral (wire with blue insulation);
- to the zero output - grounding (wire with yellow-green insulation).
The wires are connected to a three-pin plug as follows: on the top pin - a yellow-green wire, on the right - phase brown and on the left - zero blue.
To determine the phase in an outlet, use the following tools:
- indicator screwdriver (works only in old-style sockets);
- tester;
- multimeter
Connection to a three-phase 380 V network
When connecting an electric stove to a three-phase 380 V network, use an automatic machine and an RCD for a three-phase network. The cable and power cord use a five-core cable. A power plug and socket are also needed for five contacts. The process of connecting to a 380 V network is similar to that described above, the only difference is in the number of wires.
When connecting the wire to the output terminals of the electric stove, install only one jumper - on pins 5 and 6. Three phases are connected according to the color marking on terminals 1, 2, 3. Terminals 4 and 5 are connected with a jumper and connected to the neutral wire, and terminal 6 to the ground wire .
Wiring Requirements
Important! Before you begin any manipulations with wires and electrical appliances, turn off the electricity supply to your house or apartment.
Modern models of electric stoves are usually sold without a cord included. There is a reasonable explanation for this: safety regulations require that such devices be connected using high-quality terminal blocks, i.e. according to the so-called rosette-free method. With this connection option, you can increase the length of the power cord, and instead of a machine for more powerful models, you can install a fuse-link.
Common connection errors
We list several common mistakes when connecting an electric stove, which lead to failure of the device, fires and electric shocks:
- Connection via a regular socket and 16 A plugs. For devices with a power of more than 3.5 kW, special power components are used.
- Connection through a simple automatic circuit breaker with a thermal release without the use of an RCD or automatic circuit breaker.
- Using an undersized cable. This error leads to overheating of the wiring and its burnout.
- Connecting the stove to a common distribution box without a dedicated power line from the panel.
- Missing phase jumper on one of the terminals. As a result, half of the burners may not work, or the stove may not turn on at all, if this contact was responsible for supplying voltage to the control.