When buying a car, I noticed that the damper for changing the air supply from the cabin and from the street does not move and is in one position, even with great effort this cannot be done! The question is why and how to fix it? Is it necessary to remove the torpedo lining?!
Thank you all, I removed the center console and sprayed it into the cable and into the switching mechanism itself) it worked out)
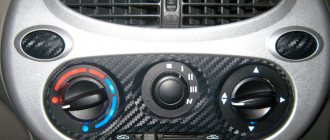
Even in winter, I began to notice that the switch handle began to turn a little stiffly. And the further it went, the worse it got, sometimes it seemed like it was about to break off. I mainly use 2 modes, but they somehow still switched, so I left the solution to the problem until it warmed up, because... In the cold, plastic breaks very quickly. And finally I got around to it))) After reading various BZs, I realized that it was necessary to remove the “beard” and lubricate the switch mechanism. But, I went further, and the first thing after removing the “beard” was to pour WD-40 into the shirts of the switch cables. And everything worked as it should, the switch began to rotate easily in both directions. At the same time, I lubricated the cable and the mechanism of the heater faucet switch (although there were no problems with it, but it’s not bad as a preventive measure). I filled the mechanisms with CV joint grease. I also lubricated the gearshift lever hinge with it. When I studied the system of operation of the flow switching mechanism, I noticed that one cable was dangling at the point of attachment to the rod. I wound a thick thread around the edge of the tooth on which the end of the cable is attached, thereby reducing the backlash and pressing it to the base of the tooth.
Now I’ll tell you how I removed and installed the “beard”. Although this topic is hackneyed, I will describe the process as it happened for me. (will not be superfluous) 1.
Open the ashtray, unscrew the 4 fastening screws and take it out.
2.
We put our hand into the hole formed, disconnect the pads from the emergency gang buttons and 2 more to the left and right of it.
(if plugs are installed instead of 2 buttons, then push them out from the inside). As a result, we see screws in the niches of the buttons/plugs that need to be unscrewed. 3.
Take out the radio (if installed), disconnect the block and the antenna plug from it.
4.
Remove the handles of the air flow switch and the stove faucet.
(we just pull ourselves). 5.
Remove the plastic chip from the air recirculation mode switch.
(we also pull on ourselves). 6.
Next, we begin to carefully and smoothly remove the “beard”, pulling it towards ourselves, starting from the bottom.
It is secured with 4 latches on the sides at the top. There are also 2 more spring plate latches at the very top, but they pop out on their own. 7.
After you have managed to disconnect the “beard” from the “torpedo”, you need to disconnect the pads for the heated rear window buttons, the air conditioner (if any), the fan speed switch, and the 2 backlight pads to the left and right of it. (Attention, the fan speed switch block has a lock, you need to tighten it when removing it). Now the “beard” has been completely removed. The process may take about 10-15 minutes without rushing. Everything is installed in reverse order. But there are difficulties, and installation took much more time. (I had to change one backlight, I still don’t understand why it stopped lighting, although it worked on the other side). So, when installing a “beard” there are small pitfalls. The first thing I want to draw your attention to is that it is very easy to scratch the panel with the plate clamps, those that are located in the upper part (be careful with them). Having connected all the pads in place, it is better to take the fan speed switch out together with the pad (it will be more convenient). When installing the “beard,” the nozzle will rest against a partition with holes for the backlight and speed switch pads. If you look from the side, you will see what is in the way, and the main thing here is that the pads do not fall off the backlight lamps. And the recirculation switch lever will also need to be pryed so that it fits into the slot. After these manipulations everything should fall into place)))
Replacing the heater tap Lada Kalina
You unlocked the car and started it to drive to work. It's cold outside, we turned on the heater and noticed that coolant began to flow into the cabin. The Lada Kalina stove faucet has fallen into disrepair again. The solution that localizes the problem is to move the tap under the hood. To do this you need:
- Lengthen the drive rod.
- Replace the pipes to the heater radiator.
It's easier to change in the future. If the tap starts leaking again, but not into the interior. So, where is the stove tap on Kalina? It is located under the dashboard at the center console level and is easy to find. Unfortunately, it cannot be repaired, the assembly can only be replaced. And this is the only reliable option related to replacement. We recommend installing the ceramic one instead of the factory version.
The ceramic element guarantees reliability, high wear resistance, and smooth operation. When installing the faucet, it is advisable to treat the installation site with rubber sealant. It is more convenient to do it on a pit or overpass. But, if such options are not available, then you can drive one wheel onto the curb.
What is the damper responsible for?
While the engine is running in the cooling system, the heated liquid moves through the heater radiator, while it heats the air flowing through it. The volume of air passing through the radiator and outside it is controlled by the main heater damper. Depending on how the temperature control knob is located on the dashboard, the amount of incoming air will depend.
You can distribute air movement throughout the cabin by turning the handle that regulates the position of the damper. But there are cases when the damper jams and it is impossible to properly regulate the flow of heat into the Kalina’s cabin.
If the problem is only with the valve, then you can correct the situation quite simply by tightening its cable. If after these actions the situation has not changed for the better, then you need to conduct a visual diagnosis of the condition of the mechanism and perform a number of simple steps.
When is it necessary to replace the heater valve?
Repairing the heater valve on a Lada Kalina car is required in two cases:
- The faucet “sours” or “sticks.”
- The product leaks at the joints.
No matter what caused the problem, the product should be replaced. Otherwise, the consequences will be more serious. Signs of a faulty faucet:
- There is a smell of coolant in the cabin.
- We noticed traces of coolant on the floor of the car.
- The stove was turned on, but there was no heat.
A leaking heater faucet is considered not just another nuisance that will flood the interior, but a danger to the car’s ECU. If you notice traces of liquid under your feet, immediately carry out an inspection to find the possible cause of the leak. Use additional lighting or a flashlight to quickly inspect the heater valve. In addition to the faucet, the cause of antifreeze leakage may be damage to the pipes or radiator. You now know where the stove tap on Kalina is located. If you identify the source of the leak, which turns out to be a faucet, then you need to urgently replace it.
Checking heating system elements
If the heater on the Lada Kalina does not work - it blows cold air - it is better to look for the reason, starting with the simplest thing. You should not immediately disassemble complex components. Typically, most problems arise from minor problems.
temperature sensor
If only hot or, conversely, only cold air blows from the air duct nozzles, regardless of the position of the damper, the cause of the malfunction is the interior temperature sensor. It is located in the ceiling, in the lampshade. The problem is solved by replacing the sensor.
Heating fan
If switching modes and air flow speed does not produce anything (a whistle or crackling sound is heard, the fan begins to make noise), the malfunction is related to the electric fan. To check this, you need to do the following:
- Set the temperature control knob to the extreme blue zone position.
- After that, use the switch to change the fan speeds from first to fourth.
Procedure for replacing the stove faucet.
Change the heater valve on a cold engine. Place a rag under your feet to absorb any spilled liquid. We will replace the stove valve without removing the dashboard. All we need is to get to the place where the heater valve is located on Kalina.
- Remove the air filter housing.
- Remove the ignition module.
- Unscrew the bolt and drain the antifreeze
- We unscrew the nut in the place where the stove pipes go into the cabin.
- Remove the upper heater pipe from the thermostat.
- Remove the lower pipe.
- Let's go to the salon.
- Disconnect the gas cable from the pedal.
- Remove the gas pedal along with the bracket.
- Unscrew the heater radiator cap.
- We bend the metal part, which is located to the left of the stove body.
- Partially unscrew one handbrake mounting bolt, and completely unscrew the other. Now you can unscrew the tunnel screws.
- Disconnect the cigarette lighter plug and the fuse box.
- We unscrew and disassemble the front console. Everything is visible and accessible, nothing is complicated.
- We remove the ashtray. In place of the emergency button there are two plugs. When you pull it out, you will see screws under them.
- Label and number all chips and wires. Then there will be no complications during assembly.
- Pull out the electronic control unit (ECU) as far as the wires will allow. Place it in a safe place, most importantly, away from the heater.
- Now you will have to unscrew all the bolts that you encounter during disassembly. Only then will it be possible to completely dismantle the front console.
- Remove the dashboard panel, move the radiator to the side, and then take out the air duct. You have reached the place where the Kalina stove tap is located.
Remove the old faucet, install the new one and reassemble everything in reverse order. We also recommend changing the pipes going to the radiator from the faucet.
Possible heater malfunctions
Your stove is not working or is not heating well. Look for the cause of the problem. The fan does not work or the heater radiator is leaking - obvious breakdowns that occur at any time.
Stove control unit:
- The engine was warmed up, but warm air did not enter the cabin.
- The damper drive cables may have come off. The only solution is to remove the console.
Dampers . Partially open or close. The rubber seal has come off in the air duct or foreign objects have gotten into it.
Antifreeze circulation . Start the engine and check the level in the expansion tank, and also check for any disturbances in the normal flow of antifreeze. Possible reasons:
- Pump. Cannot be repaired, only replaced.
- The cooling system is clogged. Clean or rinse.
Checking the thermostat . Warm up the engine to 75°C. If the upper pipe is cold, then the thermostat does not work correctly and does not allow coolant to move in a large circle. Replace the device.
Air lock . Remove the plug from the vehicle's engine cooling system.
Temperature sensor . Constantly blowing cold or hot air. If cleaning the contacts does not help, then replace the non-working temperature sensor.
Air filter . If the air flow is weak and there is no desired temperature, then replace the filter. Be sure to check the heater resistor, which controls the rotation of the fan and is located under the glove compartment.
Electric fan . The device does not turn on regardless of the selected mode. Check the fuse that controls operation. If the fan is turned on and its operation is accompanied by strange sounds, clean or replace it.
Dampers . It is difficult to determine the breakdown unless you replace the dampers themselves.
The cause of a heater malfunction may be a depressurization of the car's engine cooling system. The types of breakdowns described above cause malfunctions in the operation of the Lada Kalina car's stove. Such breakdowns do not require special knowledge; they are easy to understand and repair.
Lada Oka frankenstein › Logbook › WARMTH IN A CAR (part 1) - getting rid of the heater tap, etc.
Hello Vsemushki)
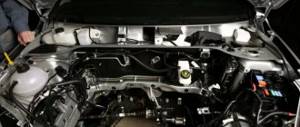
Well, I’m writing again about the cigarette butt repairman) I already wrote earlier about the fact that the heater faucet is running in the car (this creates a lot of problems, such as the smell of antifreeze in the cabin, the constant addition of antifreeze, dirt in the lard, and less heat in the car! And one more thing Based on the experience with a penny, I decided that I would just remove the tap and install a copper pipe! Since during the entire time I was driving the cop, I almost never closed the tap, even in the summer! It’s all in the air, if you turn off the air supply, the heater radiator does not heat up the street air and does not warms the interior! This system is also used on our LADA KALINA. Where the faucet is not installed from the factory. Let's get to work) - first of all, I drained the antifreeze and removed the air intake casing from the engine compartment (held on by four screws) and saw a bunch of leaves, dirt and etc., but the worst thing was that there was a lot of rust hidden under the casing!
-Then I removed the tube and tap from the radiator and washed it under water with shampoo)))
Then I took and put the radiator back in place for fitting) I saw that the new pipe was almost touching the body of the car, and the engine compartment gasket did not match the pipes) Well, I took a round file and adjusted everything as it should)
Something like this) Put everything back in place! and I’m glad) now in the car the tap won’t run))) and I’ll adapt the remaining tap opening regulator somewhere else) But that’s not all! To be continued) thank you all and bye =)
Recommendations
Comments 36
The thermostat from which car costs from 2110 or from 2108?
It’s worth the tenth, but I don’t have time to post it in the BZ)
I put it on all my eyes, except Chinese and grants, I even put it on 21099, the effect is stunning
Well, I don’t know how with the oversized thermos) it didn’t work for me when I bought it) I immediately installed the tenth one and I like it!)
... “By the way, this place is rotting because water and snow entering through the air intake do not completely drain out, and splashing on the body ruins it))))” ... There should be a plastic casing that prevents water from getting there if it is installed CORRECTLY. And drainage from this casing occurs through a rubber valve. And if this valve, I would even say the valve, is clean from dirt and leaves, then there will never be rust there. Moreover, rotting.
Well, I won’t argue, of course) but I have this casing and it doesn’t fit tightly to the left side of the air duct (if you stand facing the soot), that is, water gets between the air duct and the small casing.
When reinstalling, the casing must be placed BEHIND the air duct
He stood there, I also stuck him in)
It seems like ceramic taps are on sale now, maybe it was worth trying? but the usual ones, yes, they constantly leaked. Most likely because we rarely use them, it sours, sticks and then breaks down and leaks.
I see the heater radiator is original, it should be warm if it’s not clogged with pieces of sealant.
Well, I put in a ceramic one for a penny, it seems to be normal, but I don’t use it at all) and on the perch I washed the radiator, it seems to be normal), but the bad thing is that aluminum has worse heat transfer than brass, so it heats worse in the okha than in the cop.
It’s normal and the aluminum heats up. When I had a new one, my eyes were already drying out. Then, as if I didn’t keep my own thermos, I started putting others in and that’s it, the warmth was no longer the same. I got fed up with this and stupidly went and bought a new stove radiator. Kraft, it was just the one that was in stock. When I took mine off, I also wanted to wash it, but pieces of sealant flew out of it. In general, I installed a new radiator and... there was still no heat, although I rebuilt the thermos on the 10th, my hand does not tolerate the hose that goes into the cabin, but there is no heat. and now, 4 years later, I recently changed it on 12k and let’s read the reviews, it turns out that you need to install the same DAAZ that is installed from the factory. It has the densest packing of heat sink plates and it’s like a labyrinth, it’s not visible to the light in short. Here it is it really blows boiling water, it hurts my hand, my nails curl up)
and I set the ceramic faucet to 2105. But it didn’t completely shut off the antifreeze. So I sold it.
I've never heard of such things as roditors! To be honest, when I bought the thermos, I didn’t open it at all, I just installed the tenth one and it’s also not possible to hold the tube, but it only heats so-so! Well, the faucet closed normally, I just helped it close with my second hand.
I myself flew by 700 rubles. I think I bought a new radiator, which means it will be hot. But that’s not the point. The radiator is not the same as the radiator. Just go to the store yourself, where there is a choice of 3-4 things, lay them out next to each other: Pramo, Luzar, Kraft, DAAZ and look at the honeycombs. Visually, in one there will be rare cracks, like in a fence). Of course, the air will fly through it and will not have time to heat up. Moreover, you look at the light and it can be seen. And in DAAZ it’s like small labyrinths, how the air winds through it. it's long, but understandable))
Well, I definitely won’t buy a new one just yet)
I've never heard of such things as roditors! To be honest, when I bought the thermos, I didn’t open it at all, I just installed the tenth one and it’s also not possible to hold the tube, but it only heats so-so! Well, the faucet closed normally, I just helped it close with my second hand.
Did you blow out the 10th thermos in the store? they are there too, 1 is normal, holds, and the other 3 let a large circle pass, because the design is somehow incomprehensible. The tin does not press tightly.
Common faults
The stove itself on Kalina is well conceived, but due to the poor quality of the elements and parts, various troubles constantly happen to it. Even the latest models with climate control have various “diseases”.
The list of the most common faults looks like this:
- The heater core is leaking;
- the heater damper is jammed or does not open completely;
- failure of the fan or control unit;
- gear motor failure;
- the temperature sensor or heater resistor has become unusable;
- The cabin filter is clogged.
To find out where this or that element of the heating system is located, you should look at the operating instructions; there will definitely be a corresponding diagram there.
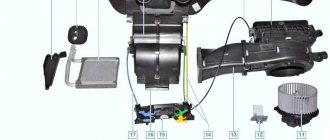
The design of the Kalina stove without climate control is such that the air sucked in by the fan passes through the air filter and enters the heater radiator. There it is heated and supplied to different areas of the cabin through adjustable grilles and openings. The dampers are controlled and the fan speeds are switched manually. This heating system is more reliable because it does not contain any electronics.
On a Lada Kalina with climate control, the rotation of the dampers is controlled by a gearmotor at the command of the electronic unit. The latter receives signals from a temperature sensor located inside the car and reacts accordingly to changes in the microclimate. The controller interacts with both the heater and air conditioner.
How to adjust the heater damper on a Lada Kalina?
- The first step is to adjust the heater valve.
- Remove the bracket that holds the cable sheath to the faucet body.
- Remove the cable from the faucet lever.
- Open the tap to the maximum.
- Unhook the cable from the lever block.
- Remove the old cable.
- In the future, the tap may not be closed at all.
If you don’t like the method described above, you can use another one:
- Adjust the length of the sheath and cable so that in the extreme right position of the lever on the block the tap opens completely.
- Secure the cable located in this state using a latch.
- Then we proceed directly to adjusting the heater damper.
- Remove the bracket that holds the cable sheath on the heater body and feel for the yellow galvanized lever located on the left.
- Pull the lever towards you - this will be the maximum open state.
- Adjust the length of the cable so that in the right position of the long lever on the lever block the valve is open to the maximum.
- Lock it in.
- Do not forget that with the help of one lever both dampers are simultaneously controlled: both the tap and the large one.
Definitely, the heater in the Lada Kalina heats much better than in previous models of the VAZ automobile industry line.
But incorrect operation of the heater dampers, unfortunately, is a very common “disease” of the Lada Kalina. Therefore, after purchasing, try to prepare in advance for the heating season, especially since you can do this yourself quite quickly and easily.
Read more: What is better than the Lada Granta Daewoo Nexia
Depending on the configuration, the layout of the Lada Kalina stove may vary. In one case, the design of the ventilation and heating system is simple and reliable, in the other, temperature control in the car interior is based on automation and electronics. Let's look at the operating principle of the Lada Kalina heater in different modifications.
Diagnosis and troubleshooting
The easiest way to resolve the issue is regarding the cabin filter. For the first time, thorough blowing of the element will be enough, but then it is better to replace it. The real problem is a leaking radiator or a broken fan; an expensive replacement of the unit cannot be avoided. An equally high price will have to be paid for a new control unit.
It will be somewhat cheaper to install a new temperature sensor, gearmotor or resistor for the Kalina heater. Moreover, the malfunction still needs to be correctly diagnosed, which can be quite difficult. A burnt resistor is easily identified - the fan only runs at maximum speed.
It is more difficult to check the sensor hidden in the lighting shade. Symptom of a malfunction - a hot or cold stream flows from one or more grilles, regardless of the position of the regulator handle.
It is more difficult to detect how well the mechanical heater regulator is functioning. To do this, you need to get to it by disassembling part of the front panel. In the same way, the proper operation of the air dampers is determined.
To carry out diagnostics, it is better to start searching for problems with the most accessible elements, and only then start disassembling.
Checking ventilation and stove Lada Kalina
Car owners claim that Kalina’s heater heats much better than previous VAZ models. It sometimes breaks down and requires repair. Do a full system diagnostic to ensure it's working properly.
- We start the car engine.
- Turn the left handle counterclockwise and place it in the blue zone.
- We place the fan speed switch in each of the 4 positions one by one. If the fan does not rotate in one of the positions, then check the power supply circuit of the device.
- Turn the speed controller to maximum.
- Using the right handle (damper control) we check the redirection of air flows. If we notice that there is no change, then the damper drive needs to be repaired.
- Warm up the engine to 90°C. Turn the left handle to the extreme position of the red zone.
- The air that comes out of the panels should blow warm air.
- Return the left stick to the blue zone. Cold air will come out of the nozzles again.
- If the temperature of the air flow does not change due to a change in the position of the regulator, then the control of the central damper drive is faulty.
How to change a radiator
The operation is very labor-intensive, for which the car service center will charge you a hefty sum. But there is another, slightly barbaric, but fast and widely practiced method. The work flow diagram is as follows:
- Drain the antifreeze, disconnect and remove the battery, and then disconnect the hoses from the heater pipes.
- Unscrew the nut located near the fittings in the engine compartment. It holds a steel plate that will interfere with the removal of the heater.
- Remove the gas pedal and pull out the steel brake pedal shaft. Unscrew the decorative panel and behind it the plastic panel covering the stove radiator.
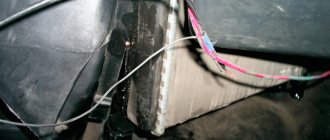
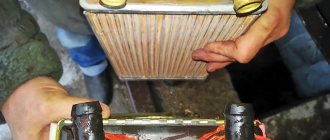
- To remove it, cut an opening in the plastic frame that allows you to pull the radiator towards the driver.
- Install the new element and reassemble in the reverse order. The cut opening can be sealed with plastic and decorated in any suitable way.
When performing the operation, it is worth moving the controller located directly under the stove to another place. Antifreeze dripping from it can damage sensitive electronics. Also, with the radiator removed, it is easy to change a faulty heater valve or gear motor, because access to them will be open. The gearbox is a single unit with a damper position sensor and can also be changed entirely.
Fan replacement
The most convenient way to get to the unit is from the passenger seat, which will have to be dismantled so that you don’t have to do acrobatics inside the cabin. The chair runners are held in place by 4 13 mm nuts; unscrewing them is not difficult. Further work on replacing the fan is carried out in the following sequence:
- Remove the cabin filter and remove dirt and dust from the opening.
- Unscrew 4 screws located on the back wall of the glove compartment, and another one under the right heater grille.
- Remove the plastic cover from the stand and unscrew the 2 screws that secure the panel and the blower unit.
- Remove the blower unit, lift the plastic panel and loosen the 2 fan mounting nuts underneath it.
- Move the dashboard as far back as possible and secure it. The turbine must be removed from below, from a lying position.
You should not rush to change the fan when it only works at speed 1 and the heater switch is at maximum. This is a sure sign that the resistor located below the glove compartment has failed. The part is a small green plastic panel with a connection connector. Replacing the heater resistor is carried out without any disassembly; you just need to disconnect the connector and unscrew the 2 screws that secure it to the body.
Basically, troubleshooting the Kalina stove is not a difficult job, but very labor-intensive. To change a small part, you need to spend time disassembling to get to it.
Interior ventilation of LADA Kalina
Exhaust deflectors are built into the body panels under the rear bumper. The interior is heated by a heater installed under the instrument panel.
1 - air supply ducts for passengers in the rear seat. 2 - side nozzles for supplying air to the driver and passenger on the front door or on the windows of the front doors. The air flow is controlled by grilles (in the vertical direction and flaps in the horizontal direction. 3 - glass blowing nozzles. 4 - windshield blowing nozzles. 5 - upper air supply nozzle. 6 - central supply nozzles to the cabin.
