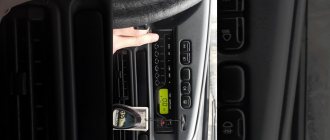
Stove VAZ 2110 perhaps the most problematic and capricious mechanism in the entire car design. You cannot do without a stove or a faulty interior heater radiator on a VAZ 2110, given our cold climate. If in the summer a non-working stove may not bother you, then with the onset of the cold season it often turns out that the stove on the VAZ-2110 blows cold air
Note from the author of the article: On the VAZ of the 10th family, which includes the VAZ 2110-2112 models, the designers used an electronically controlled interior heating system, thanks to which the temperature set by the driver is maintained automatically.
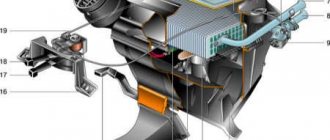
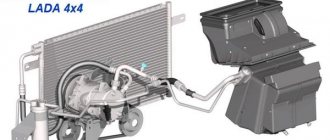
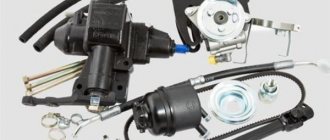
The device of the stove VAZ 2110 - 2112
Periodic malfunctions in the operation of the heating system for the VAZ 2110 are an ordinary and common thing. Therefore, the owners of this model from the Russian automaker have to dig around in their own garage every now and then or send the car for repairs to specialists from service stations.
To understand exactly how to carry out repair and preventative measures, you first need to familiarize yourself with the diagram of the stove and its components.
| Element | Peculiarities |
| Electric motor | A fan is mounted on it. Both elements contribute to the injection of heated air into the cabin |
| Radiator | The entire operation of the heating system is based on this component. Remove the radiator and the heater will not work. Interestingly, the new model stove does not have a valve that shut off the flow of coolant through the radiator. Older devices have a faucet. The faucet was removed in order to avoid leaks, which were common on old stoves. Plus, they got rid of the tap for faster and more efficient heating of the interior. Although many owners of new tens do not agree with this decision, therefore, during repairs, they install a faucet on the stove |
| Dampers | In total, the stove has three of them. The first is responsible for air intake recirculation, the second is for opening and closing the heater duct, and the third is intended for control and is considered the most important |
| Resistor | This element is responsible for the speed of blowing hot air into the cabin. |
All elements, including additional valves, shields, fittings, are combined into a single unit. It, enclosed in a housing, is located in the engine compartment near the dashboard.
Why does the stove blow cold air? Causes of malfunction
In the interior of the VAZ 2110 you can quite often see that the heater simply does not respond to the temperature regulator. The answer immediately suggests itself - one of the elements of the system has simply failed. We start looking for him.
Problems with the interior temperature sensor
First of all, we check the interior temperature sensor. It is located on the ceiling, near the interior lighting. If the temperature regulator is turned to the extreme right position, and the stove reacts to this, then the sensor needs to be changed. If everything is fine, we look further.
Problems with the heater damper
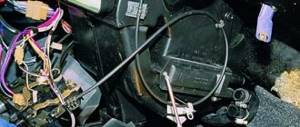
The heater damper may oxidize and jam. Many experienced owners of these cars install an aluminum damper, which better distributes air and retains heat in the cabin. But you can only get to it from under the hood.
If the stove on a VAZ 2110 blows cold air, but is itself heated to a temperature of 90 degrees, then the reason is hidden in the standard air ducts. Most likely, they are either damaged or have fallen off from the stove itself. And to get to them you will have to disassemble and remove the entire panel. If you still cannot restore them, you can simply replace them with corrugated hoses purchased from building materials and install them. And seal all joints tightly and thoroughly with polyurethane foam or modelin.
The heater radiator is clogged
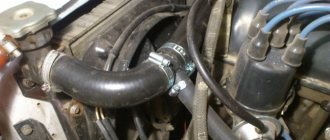
If the stove on a VAZ 2110 blows cold air, then there is only one reason - the stove radiator is clogged. If the engine is cooled with water, then rust can form in the radiator, and at high temperatures, scale can also form. Small pipes in the radiator can become clogged if you (accidentally) mix antifreeze with antifreeze, this mixture will simply curdle. In addition, some short-sighted car enthusiasts add a special radiator sealant to the coolant, which also clogs the radiators from the inside. It's quite easy to check. You need to warm up the engine to a temperature of 90 degrees, turn on the heater and check the inlet and outlet pipes of the heater by touch. If the temperature on them is different, then the radiator is simply clogged and must be replaced. But the process of replacing it is quite labor-intensive.
The heater fan is broken
The stove fan may fail. Both he and his fuse are checked.
The gasket between the head and the engine block may be broken, allowing coolant to enter the cylinders. As a result, the coolant level may drop. If thick white smoke comes out of the pipe, then the gasket is definitely broken and requires immediate replacement.
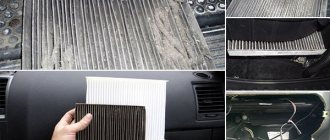
If the cabin filter is clogged with dust, then there is no or almost no cold air intake to the fan of the VAZ 2110 stove. It must be immediately taken out, cleaned, and if that fails, then replaced with a new filter.
There may be a low level of antifreeze or antifreeze and there is simply not enough for the stove due to air locks in the cooling system. When the pump squeezes out and expels this plug from the system, you must add liquid.
Thermostat failure
The most common reason why the stove on a VAZ 2110 does not heat with hot air is the thermostat. It just starts to stick in the upper or lower position over time. If this happens, then you just need to replace it. But the same situation can happen to a new one. So what should we do then, change it again? There is a proven way to bring a stuck thermostat back to life.
To do this, you will need to park the car on a slight slope. In this case, the front wheels must be 25–35 cm higher than the rear wheels. The engine must be running. You need to open the hood and prepare a small wooden (precisely wooden, to avoid damaging the thermostat) stick, or the handle of a shovel. Now, once you get behind the wheel, you need to change the gas 2-3 times. Immediately go out and tap the thermostat with the butt of a stick. After this, touch all incoming and outgoing pipes near the thermostat. Such manipulations need to be carried out 3 – 5 times, after which the thermostat will work like new again.
Cracks in pipes and pipes
Another serious malfunction of the stove is coolant spilling out under your feet. There are usually two reasons. A leak in the radiator or a crack in the pipes. It is best to replace both elements, since repairs and sealing them will cost longer and more expensive.
Notes
Since changing a VAZ 2110 stove is a fairly lengthy process, it is recommended, if necessary, to combine it with other operations that are performed only with this removed product, for example, installing sound insulation. You can also make it easier, and also significantly, to change the air filter.
When the procedure is completed, the required amount of liquid is poured in, and the functionality of the newly installed product is checked. If there is no noticeable heating of the radiator pipes, then the most likely reason is the presence of air pockets in the cooling circuit or an insufficient amount of coolant. You need to make sure that this system is not clogged.
If the unit does not heat well, you can replace the cabin filter to extend its service life by installing protection on the air intake.
When everything is done correctly, the flow will become noticeably warmer, but the liquid level in the tank will not fall. Also, the stove installed on the VAZ 2110 can be modified, which will significantly increase its efficiency.
Which heating radiator to choose?
The main source of heat in the car interior is the radiator, which modern manufacturers produce from two materials - copper or brass, and aluminum. Which heater radiator is better - copper or aluminum for a VAZ 2110 - 2112 remains to be seen, since not only the efficiency of the heater, but also comfortable driving in winter depends on this choice.
Advantages of an aluminum radiator
To find out which heater radiator is better to install on the seven, let’s make a comparative comparison. To do this, you need to find out all the advantages and disadvantages of the two types of stove heat exchangers. First, let's figure out what the pros and cons of aluminum units that are installed on classics from the factory.
- Cost is one of the main advantages of such devices, since it is precisely because of the low price that many choose models made of aluminum alloy. The price difference between copper (brass) and aluminum devices can be up to two times.
- Large selection - these models are more popular, despite some of their disadvantages. The reason for this popularity is their price, but you often have to make sure that it is better to buy a copper unit for the stove. Among the advantages, heat transfer should also be noted, however, practice shows that heat transfer rates are significantly inferior to brass devices.
It is important to know: For “ten and twelve” manufacturers do not produce three-row heat exchangers made of aluminum, which actually causes low heat transfer. Only two-row ones are produced.
Advantages of copper heater radiators VAZ 2110 - 2112
Now let’s find out why a copper stove radiator is better than an aluminum one. The advantages of these units include:
- Thermal conductivity - even if we take into account the fact that copper ones are only called such, since they contain much more brass than copper, they have high thermal conductivity. It is this indicator that is fundamental when choosing a heat exchanger from which you can get more heat to heat the interior.
- Easy to repair - even the slightest mechanical damage can be repaired at home. Moreover, after soldering work, the unit can last a long period of time (which also depends on the quality of the soldering). The entire radiator is made entirely of plastic without the use of plastic.
- Not only are the plates made of copper, or rather a brass alloy, but the body itself is also made of a similar material. This is a big advantage, because due to this design, operational parameters are increased.
Three-row versions of radiators are produced. This brings more heat into the cabin. With so many advantages, one wonders if these devices have any disadvantages.
It is necessary to note some disadvantages of the copper heat exchangers under consideration. They also exist, and sometimes play a decisive role in choosing the appropriate units. The main disadvantage is the cost, which is 2 times higher than the price of aluminum analogues. It is precisely because of the big difference in price that most car owners give preference to aluminum competitors, having never experienced copper heater radiators on a VAZ 2110 - 2112
Product installation
The VAZ 2110, 2112 stove is assembled in the exact reverse order, but before installation, all parts must be inspected and cleaned. Also, the assembly of this product has a number of features:
- 1. The heater fan housing is installed so that the pedal fits exactly into the corresponding groove;
- 2. When assembling, do not leave excess fasteners (screws, nuts), otherwise a tight fit of the parts will not be ensured and there is a high probability that on the VAZ 2110 the heater damper will not be able to change its position using a micromotor gearbox - the heater will again not heat the interior.
Self-repair of the VAZ 2110 stove
The temperature in the vehicle interior is adjusted by using the VAZ-2110 heater damper, which often fails. Let us consider in detail how to repair and replace the VAZ-2110 heater damper with your own hands, as well as other elements of the heating system
Adjusting the heater damper VAZ 2110 - step-by-step instructions
- In order to adjust the heater damper VAZ 2110 - 2112, perform the following steps:
- An old-style damper control unit with a vertical lever arrangement.
- Thrust of the damper “to the legs” - “to the chest”.
- The place where the damper rod is attached is “in the chest” - “on the glass”.
- The end of the rod had to be bitten off with side cutters, because... it rested against the body when the lever was positioned “at the feet.”
- This is what the control of the new type of dampers with a horizontal lever arrangement looks like.
- Unregulated traction.
- The direction of movement of the screwdriver to press out the four latches in the new damper block.
How to replace a VAZ 2110 stove fan - step-by-step instructions
In order to replace the VAZ 2110 - 2112 heater motor, do the following:
- First of all, you will need to get to the motor, it is hidden under a trim that is located under the windshield, and inside this trim, the motor is still placed in a casing, so you will have to remove a lot of decorative elements, in more detail how to do this is described in the article entitled: “Replacing the cabin filter on a VAZ 2110” and by the way, the trim that is located under the windshield cannot be removed without removing the brush, and when you lift it, pay attention there will be a tee under it (see the large photo for the location where it is located) , disconnect the hose from it that is connected at the bottom (see small photo) and the trim can then be removed from the car.
- We go further, as soon as all the elements that prevent access to the casing in which the motor is located are removed, find the wires coming from the motor, or to be more precise, one “Plus” wire and one “Minus” wire, so here is the minus (Indicated by a green arrow) secured to the nut (Indicated by a blue arrow), you unscrew it, but the plus (Indicated by a yellow arrow) is connected to another wire through a wire block and a connector (see small photo), disconnect them from each other.
- Then use a flat-head screwdriver to pry out the four latches (They are indicated by arrows) that fasten two casings together, on one of which the heater motor is attached, be sure to replace all latches that will be broken during their removal with new ones, when reassembling, it is recommended that all latches install up to one in its place to prevent the housings from moving between each other.
- And finally, unscrew all the screws that hold the casings together, there are only about 8 or 10 of these screws (We could be wrong), when they are all unscrewed, the cases can be separated (see small photo), but just remember where which screws are screwed in, because they have different lengths and you won’t be able to wrap the long ones where the short ones should be located and vice versa.
The stove motor can be removed assembled with the casing, or you can immediately take it out separately, it’s up to you how to do it, but having taken out everything assembled, it will be much easier to disconnect the motor (since it will be more convenient), and the motor is separated in the following way, you will only need just remove two wires (minus wire and plus wire) from the hole into which they are threaded in the casing and that’s it!
Replacing the VAZ 2110 stove fuse (instructions)
In order to replace the fuse for the VAZ 2110 stove, follow these steps:
- Turn off the ignition and remove fuse F18. To do this, the designers have provided space on the mounting block for special pliers, which are convenient for removing firmly seated fuses.
- We evaluate the condition of the low-melting thread. It is most convenient to work with fuses in a transparent case. If in doubt, check the integrity of the fuse link. To do this, check the fuse for a short circuit with a tester or a multimeter.
- If the fuse is blown, replace it.
Remember: it is undesirable to deviate from the recommended 25 amperes, either higher or lower. Installing a fuse with a lower circuit breaking current will cause it to burn out faster. A fuse with a larger number of amperes may not protect the heater electronics during a power surge.
How to replace the radiator of a VAZ 2110 stove - step-by-step instructions
We replace the heater radiator as follows:
Replacing an old-style heater core
To replace the old-style VAZ-2110 heater radiator, the windshield trim with rubber seal is initially dismantled. To remove it, first unscrew the lining mounting bolt under the brake cylinder and the four bolts for its upper fixation on the passenger side. Next, the clamps with which the pipes and hoses are secured are dismantled.
Then be sure to disconnect the fan electrical wires from the vehicle body. After carrying out such manipulations, access to two fasteners on the driver's side of the windshield trim will open. They need to be dismantled, after which you can move the frill slightly forward. You don't need to remove it completely. Then the remaining nuts and bolts that hold the windshield trim are unscrewed. After this, the plastic lining between the windshield and the engine compartment can be completely removed.
Next, it is important to disconnect the terminal of the sensor, which indicates the coolant level, and remove the steam drain hose from the expansion tank. Subsequently, you will have to remove one by one the windshield washer hose, windshield wipers, fasteners on the heater housing, the front unit of the fan housing, the fan, the cabin air purifier, the remaining part of the fan housing and all the hoses of the heating system. After this, you can easily pull out the radiator housing.
The next stage of work is replacing the failed heat exchanger with a new part and installing all dismantled elements in their original places. When assembling, concentrate on installing the plastic fan housing. It is important that the pedal fits into the appropriate slot, otherwise the vehicle heater will not function.
It is also necessary to check the condition of the cabin filter; it may also need to be replaced. If there are visible defects on the pipes and hoses, they must be replaced. Make sure that all connecting clamps and fasteners ensure a tight fit of the parts, otherwise you will not get any heat in the vehicle interior. At this point, the replacement of the stove radiator can be considered complete.
Replacing a new heater radiator
Replacing the radiator of a new VAZ-2110 stove has features related to the method of connecting the heat exchanger to the vehicle body. In order to dismantle the part, you will need to unscrew the central bolt in the lower segment of the windshield. Then unscrew two nuts above the intake manifold and one near the cabin filter on the left. The next step is to remove the air filter, which is attached to the stove with four screws.
The modified heater is formed from two parts, which are connected by three self-tapping screws. You need to unscrew the large self-tapping screw and two additional bolts that connect the components of the stove. After this, the right component of the stove is moved to the right to its maximum possible position. Holding the left segment with your hand, you need to stretch the right side, turning it towards you and lifting it up. Next you can remove the left side of the stove. A hose for removing steam is led through the passage of the soundproof shield.
The right segment of the stove is divided into two more components. To separate the right side, you need to remove the mounting brackets. The right side of the stove can then be opened without significant effort. The heater dampers will open to view, and it is also advisable to replace them. The best option for this would be aluminum valves, which are wear-resistant and less subject to deformation.
The last stage of work is installing a new part and assembling all elements of the heating system in the reverse order. Make sure that all connections are well tightened, as this will significantly affect the functionality of the interior heating system.
Replacing the VAZ-2112 heater radiator (new model)
The procedure begins with dismantling the stove, which is attached to the car body with two nuts on the side of the intake manifold, a screw in the windshield area and a nut near the cabin filter. It is also necessary to remove the rear window washer barrel.
The sequence of actions is as follows:
- Remove the air filter.
- Unscrew the screws from the outside of the stove.
- The heater body, consisting of two halves (left and right), must be separated and the steam exhaust hose released.
- Remove the old radiator, clean its seat, and then install the new element.
- The right half of the heater should be disassembled, which also consists of two elements fastened with metal brackets. Now the stove damper is freely accessible, and if necessary, it can be cleaned or replaced.
- The new heater damper must be in a position where the heater radiator is closed.
- The temperature sensor is set to the minimum mode, after which the ignition is turned on. This is necessary in order to correctly install this sensor, since after this it must take its initial position.
- You can reassemble the heater in reverse order.
After replacing the heater radiator, you will need to replenish the coolant level in the system and test the performance of the heater. If everything is done correctly, all heater elements are in working order, and cold air begins to blow from the deflectors in the cabin, which means that the system has become airy. After eliminating it, the stove will work as before, and maybe even better.
