What rods are included in the rear suspension?
The Chevrolet Niva is equipped with a spring-dependent rear suspension that controls the vibration of the car body.
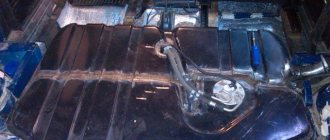
The beam and the body are connected by 4 longitudinal and 1 transverse reaction rods:
- a cross bar keeps the body from swaying from side to side;
- longitudinal ones are designed to transmit braking and pushing movements.
The rods are attached between the body bracket and the beam. The end of each rod is equipped with lugs; silent blocks are built into them, which prevent knocking in the suspension.
The rods differ in length. The longest of them is transverse. The diameter of the hole at the end of the elements is the same. Long rods do not allow the bridge to move, as a result of which the silent blocks do not twist, even if the suspension displacement is the full step of the shock absorber.
Types of breakdowns and their causes
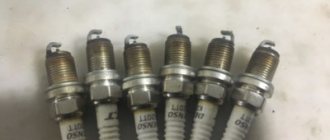
The thrust rod is made of durable metal and rarely wears out. Most often, the element is damaged near the bushings and welds.
Causes:
- The suspension is constantly subject to shock and vibration, especially when used in severe conditions. This area is the weakest point of the assembly, which wears out over time. Often the bushings become unusable and cause extraneous noise and knocking.
- The second reason is that the rods are located under the bottom, which is constantly exposed to moisture, salt, and dirt. As a result, corrosion forms on the element. After a while it corrodes the metal. The traction loses its strength and functionality.
To avoid this situation, it is necessary to constantly monitor the degree of wear of the suspension elements and carry out an inspection approximately once every six months. If there are cracks or various deformations, the element must be replaced with a new one.
A malfunction of the jet rods on a Niva Chevrolet car can be determined by the behavior of the vehicle. During long-term use, the bushings break and the rod ceases to perform its functions:
- the car leans more when turning;
- You can hear dull knocks coming from the rear suspension of the vehicle, especially when starting, braking or changing gears.
For an accurate determination, it is necessary to install the car on an inspection pit or overpass and inspect it for the presence of cracks on the rods, especially in welding areas. You also need to check the condition of the rubber bushings.
Then, by shaking each reaction rod, check the play. If one element malfunctions, all rods must be replaced, because The load is distributed evenly on the rear suspension.
If the rod is rotten or broken off, it will drag along the ground. The car will have problems with control. In such a situation, you need to tie the rod with a wire to the stationary part of the suspension and go to the repair site at low speed.
Is it worth doing the repairs yourself?
Any repair requires not only experience, plumbing skills and a standard set of tools. Most operations are performed on an inspection pit or overpass.
To replace ball joints and silent blocks, pullers are required, and checking and adjusting the alignment angles of the front wheels is carried out only on special stands.
Repairing a car yourself is worth it only if you have the necessary equipment and tools. It is often cheaper to go to a service station than to buy pullers or keys for a one-time job.
Suspension repair is a serious process on which your safety on the road depends. If you are not confident in your abilities or do not have the necessary tools, it is better to turn to professionals.
Which jet thrusts are best installed on a Chevrolet Niva
In city auto stores, as well as online, there are many options for torque rods from different manufacturers for the Chevrolet Niva:
- NIVA EXTRIME are the most reliable and durable rods; they are preferred by off-road driving enthusiasts. The main disadvantage of this manufacturer is the high cost, amounting to about 5,000 rubles.
- SC - have a rectangular shape and a decent thickness of metal, high quality and reliable. The price is about 3500 rubles.
- UG – parts from this little-known company are also installed for off-road driving. According to reviews from car owners, they are of good quality. They can be purchased for 3,000 rubles.
- Niva Urban - the manufacturer produces inexpensive but high-quality traction bars for the Chevrolet Niva and all VAZ models, costing from 2,500 rubles.
- Sitek – rods with polyurethane or rubber silent blocks. They are light in weight and have too thin metal walls; if the car is often used for off-road driving, it is not recommended to install them. For use on asphalt roads only. Price – from 2200 rubles.
Replacing longitudinal rods on a VAZ 2121 Niva car
With longitudinal reaction rods, everything happens exactly the same by analogy, and the same tool is needed. The only thing that can be noted is that you will need to unscrew the lower shock absorber mounts when removing the long cross rods. This is necessary in order to remove the long rod mounting bolt.
Also everything is done, we put two keys on both sides and unscrew the fastening nuts:
Then we knock out the bolt through a wooden block, the photo below clearly shows it, only without the block:
We carry out all work on replacing jet rods one by one, replacing first two long ones, for example, and then changing short ones, or vice versa.
The mileage exceeded 60,000 and on bumps a knocking sound began to be heard in the rear suspension. At TO5, the entire set of rods was sentenced to be replaced due to torn rubber bands, but I decided to save money. Instead of buying a new set of rods for 1,500 rubles, I bought a set of rubber bushings for 300. Since I don’t drive through mud often, this option is acceptable to me, otherwise it’s better to take a more expensive set of reinforced rods. On sale there are sets of rubber bands for kopeks and for fields. In the penny set there are large elastic bands with long pulls and small elastic bands with bones and panara, in the Niva set they are all large. Any set will do; a cheap one comes from the factory; I bought myself a Nivsky one.
Read more: What is a limited slip differential
I found a good video on the Internet on replacing rods and was guided by it: www.nofollow.ru/v >
It is better not to remove more than one jet thrust at a time!
I unscrewed all the nuts without any problems with WD-40, but they can become very sour.
First you need to make a “bullet”, for which this bolt was found:
You will need a set of new rubber bands, soapy water, a vice, and socket heads as mandrels. I also took a puller for them from my brother, but for some reason it didn’t fit, I only used its mandrel.
Using a bullet we drive out the metal sleeve
As you can see, there is nothing complicated, but there is still one point: when removing the panhard rod, its right bolt will rest against the spring cup. To remove it you need to either load the right rear corner of the car or jack up the right panhard bracket:
After replacing the rubber bands, the suspension works perfectly, nothing rattles)
Tie rods are important parts of the Chevrolet Niva suspension. They limit the movement of the rear axle, preventing it from moving forward or backward.
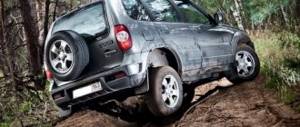
When driving off-road, the rods are subject to a high load. This may cause their deformation, wear of the silent blocks or breakage of the fastening.
As a result, the position of the rear axle is disrupted, the car begins to pull to the sides and tire wear accelerates. Therefore, you need to monitor the condition of the torque rods and silent blocks of the rear suspension.
Reinforced traction
If the jet thrust breaks at high speed, the car can be thrown sharply to the side, which can cause people to get hurt. Therefore, reinforced rods are produced. Parts are made from steel with additional alloying substances, resulting in increased wear resistance, and the metal does not corrode.
The reinforced rods are made in a diamond shape and have good welds connected to the eyes.
They differ from the usual ones in the following characteristics:
- strong welds;
- high-quality paintwork;
- increased resistance to stress, compression and tension;
- increased weight of the product due to the thickness of the metal.
If the car is operated in urban conditions on asphalt roads, there is no point in installing reinforced elements. They are designed for extreme off-road driving.
Do-it-yourself replacement of jet rods
When replacing jet rods on a Niva Chevrolet, you will need the following list of tools:
- set of open-end wrenches or sockets:
- metal brush for cleaning rust;
- mount;
- WD-40 liquid for easy unscrewing of threaded connections.
Step-by-step instructions for replacing rods:
- Place the car on a viewing hole or overpass, set it to speed, put the handbrake on.
- Unscrew the lower shock absorber fastenings - this element will interfere with dismantling the rod.
- Using a wire brush, thoroughly clean the threaded connections from dirt and rust.
- Treat all threaded connections with WD-40 and wait a while for the lubricant to eat away the rust.
- Take a wrench or socket of the required size and unscrew the nut, which is extremely difficult to unscrew. Therefore, you need to take a wrench with a long lever and treat the connection again with WD-40.
- After unscrewing the nut, remove the bolt.
- Unscrew the nut and pull out the bolt on the other side of the rod.
- Using a pry bar, remove the jet rod.
If you cannot unscrew the nut, use a grinder to cut the bolt and knock it out of the eye.
Installation of elements is carried out as follows:
- Install the rod eye into the front bracket.
- Insert the bolt through the bracket into the eye and tighten it well with the nut. Before doing this, lubricate the bolt with nigrol or lithol.
- Install the rod on the other side into the rear bracket.
- Insert the bolt, lubricate it with nigrol and tighten the nut.
- Replace and tighten the lower shock absorber mount.
When dismantling the rod, the rear axle moves, so when installing the rod in place, it is necessary to guide it using a pry bar or crowbar so that the bolt gets into the eye.
If the metal elements are in good condition, it is not necessary to change them. It will be enough to replace the rubber bushings in the rods.
To do this you will need:
- dismantle the rod;
- fix it in a yew and knock out the rubber element; for this you can use a special puller;
- press in new rubber bands and bushings; to facilitate pressing, use dishwashing detergent; it does not corrode the rubber;
- install jet thrust.
It is not recommended to weld cracks on the rod - the weld may not withstand the load and will soon burst. A rod with cracks will only need to be replaced.
Useful video about checking the Shniva suspension after 38 thousand mileage
We will tell you how to properly perform tuning modifications in this material.
Do-it-yourself elevator - drawings, diagrams, sizes, types of kits. Lifting varies in the degree of intervention in the standard structure. For some, it is enough to raise the SUV by a few centimeters, and for others by as much as 20.
Extreme tuning – maximizing cross-country ability for traveling on severe off-road conditions.
- Regular jack
- Hijack jack
- Spring puller
- Balloon wrench
- Ratchet socket set
- Set of open-end wrenches
- Mount
- Wooden deck (stump)
It is advisable to perform such work with a partner. First of all, it's safer. Secondly, some lifting work is performed with four hands. Let's take the front suspension as an example.
Raise the front end. You can safely cling to the standard bumper, only the jack is installed under the pipe securing it. By removing the wheel, we get full access to the lever and spring. The front suspension 21214 is made using a double wishbone design, which simplifies the task.
The lever travel is limited by the shock absorber. Unscrew its fastening and move it to the side. Next you need to free the suspension from the anti-roll bar. The mounting bolts may become stuck due to corrosion, so we will use a penetrating liquid (such as WD-40). The stabilizer silent block clamp can be pryed off with a pry bar.
Then disconnect the hub from the lower arm. To do this, you need to jack up the suspension and fix the steering knuckle of the wheel. You can tie it with wire. Then unscrew the 3 mounting bolts and release the ball joint.
We fix the spring with ties and lower the jack. We remove the old elastic element. In some cases, it is enough to simply lower the lever with your foot, and the spring will come out without the use of ties.
Remove the upper support rings from the old springs. With their help, the elastic element is centered in the cups.
They come together easily with a hammer and screwdriver. We install the rings on new, longer springs. We put the elastic elements in their regular places and jack up the lower arm until it is completely aligned with the lower cup. At the same time, an assistant centers the shock absorber eye and moves the steering knuckle to the mounting location of the lower ball joint. We tighten the ball “triangle” and attach the shock absorber mounting axis.
By manipulating the jack, we “catch” the mounting holes for the stabilizer bar clamp. With its bolts it should get into the normal place without distortion. After such modernization, the clearance increases by 30-50 mm. This is enough to install wheels of larger diameter, and the bottom will still rise above the ground.
The rear axle of the Niva can be lifted by installing spacer supports of increased height. When using a size of up to 50 mm (according to changes in front end height), no modifications to the rear axle are required. By lifting the rear axle, maintenance can be carried out on the axle and brake system.
Also interesting: Replacing a half shaft bearing in a Chevrolet Niva
The handbrake cable may need to be replaced. It is lengthened by a couple of centimeters. Otherwise, the Niva lift will lead to increased wear of the brake pads in the rear drums. Disconnect the lower shock absorber mounts and lower them until the springs stretch.
We take out the elastic elements and knock off the support rings from them. We clean the upper cup and carry out anticorrosive treatment. We install new supports of increased size and seat the springs using a jack. We fasten the shock absorbers, assemble the axle, and mount the wheels.
Such a lift will not arouse suspicion among traffic police inspectors, and the cross-country ability of your NIVA 2121 will improve. No drawings, much less homemade parts, are required. You buy new springs and about the rates, the rest is a matter of technology. Labor costs for an elevator of one NIVA are two people/one day off.
Making a Niva-2121 elevator with your own hands, the drawings, the dimensions of which are freely available, will not be difficult. Thanks to such a trick, you can make your car more stable on the road and overcome a lot of obstacles with it. Of course, to bring a truly high-quality Niva elevator to life with your own hands, you will have to work hard.
The process will take time and require effort, because even the easiest elevator requires a significant immersion in the technical aspects of the issue. However, the end result will live up to all expectations, allowing the modest Niva to show its exceptional side.
For lovers of hunting, fishing and country travel, as well as those eager to try themselves and their own “Niva” in driving a vehicle in difficult-to-pass places, we have the opportunity to offer an increase in ground clearance, which increases the cross-country ability of your car.
Niva tuning – suspension lifting.
At the moment, there are at least 6 types of suspension lifting for Niva and Sh/Niva, each is interesting in its own right and is negotiated during the preparation of the car for “off-road” at the request of the visitor, taking into account the distinctive features of the operation of his car and the sizes of wheels and tires he uses wants to put it on his car.
We often use a kit from the Russian club 'Korovka' as a base. This lift kit was made at the factory and was tested at competitions in Russia. The ground clearance increases by 5 centimeters, which actually makes it possible to install R15 235/75 or R16 235/70 tires (on the right wheels). In addition, this will provide a rise of another 4 centimeters.
In total, the increase in ground clearance will be 9-10 cm! In this version, “NIVA”, without loss of comfortable qualities, has the ability to be used both on paved highways and off-road, being in no way inferior to foreign-made SUVs.
Consequently, at the lower point of the RZM the clearance is 25 cm, and at the cut of the threshold - 44.5 cm.
Front suspension lift.
The lift is performed by installing targeted washers under the lower spring pad (they create a sufficient angle for the front spring). Under the upper arm (between it and the ball) another spacer washer is placed (i.e., we unload the arm).
The levers of the steering knuckles are swapped and the tips of the control rods already go from top to bottom (since subsequently the work done before, when the rod is fully turned, they will rest against the stabilizer, although at the request of the visitor it is possible to leave it as it was by changing the fastening of the stabilizer).
During lifting work, it is often necessary to change shock absorbers, springs, and resins on request. spacers, internal CV joint boots on tuning suspensions modified for this type of lift and create adjustments. spring bumpers.
Lifting the Niva suspension at the rear.
The lift is carried out by installing new rear spring cups, which are bolted on top of the standard ones, and brackets for moving the mounting points of the rear shock absorbers up 5 centimeters (bolted).
The short upper rods of the rear axle are lengthened or made adjustable (for easy rotation of the shank, so as not to bite the crosspiece), the reaction rods of the rear axle are either reinforced with an angle or installed double; at the request of the visitor, a rear axle stabilizer “Tehnomaster” (Tolyatti) is added, although it will be needed adjust to the elevator machine, digest.
Similarly, it is preferable, on lifted cars, to use a rear CV joint. Those who begin to lift old or worn-out cars need to remember about the internal CV joints (the balls leave their place) and will need to prepare for their replacement. The solution to this difficulty is quite possible by reducing the drive angle by untying the front axle.
The outer CV joints are too little susceptible to this, it will be worse for them if the wheel becomes larger in offset, width and weight, and then they can “crunch”. Although even then the hub bearing has a hard time, especially if it had play before.
Although we have avoided this problem, since we install steering knuckles with 2 ball bearings (from the rear axle shaft), they do not need to be adjusted; they are tightened all the way, although it is much better with a torque wrench. The unit comes out maintenance-free, the hub is unloaded, rolling is easier and the dynamics of the car are much better. Steering knuckles are naturally of domestic production and with a guarantee.
And also interesting: LADA 4×4 3 doors. from 523,710 rub. – Prices and configurations – Autocenter Vladimir on Rokadnaya: LADA dealer in Vladimir (Vladimir region)
When installing wide wheels after a lift, you will need to keep in mind the ball ones (when the weak ones “fly”), the pendulum will also be able to fly, and the installation of the latest gas shock absorbers results in a stiffening of the upper bracket of the lane. shock absorber (otherwise it tears, especially when the front end is heavier), the mounting of the rear shock absorbers can also be strengthened. It is preferable when lifting, replace the suspension with p/urethane instead of rubber.
Economical Niva suspension lift of 1.5-2 centimeters. In such a situation, we resort to replacing the rubber spacers for the springs with tuning ones (of greater thickness), installing washers, spacers for the upper ball joints and adjusting the spring bumpers (at the visitor’s request). In this implementation, the Niva gets wheels (correct) in size R15 215/75.
Why are jet rods needed, which ones to choose for the Chevrolet Niva and how to replace them with your own hands?
Tie rods are important parts of the Chevrolet Niva suspension.
They limit the movement of the rear axle, preventing it from moving forward or backward. When driving off-road, the rods are subject to a high load. This may cause their deformation, wear of the silent blocks or breakage of the fastening.
As a result, the position of the rear axle is disrupted, the car begins to pull to the sides and tire wear accelerates. Therefore, you need to monitor the condition of the torque rods and silent blocks of the rear suspension.
Signs of trouble
Chevrolet Niva suspension parts are designed for different service life.
The levers, beam and anti-roll bar do not need to be changed even after 100-200 thousand kilometers.
Also interesting: Niva Chevrolet speed sensor - Auto magazine MyDucato
But rubber-metal hinges, boots and bushings gradually lose their properties even while parked.
VAZ-2123 owners have to deal with the following malfunctions:
- Wear of silent blocks, ball joints.
- Damage or cracking of anthers.
- Reduced performance of shock absorbers.
- Breakage of jet rods.
In addition to replacing faulty parts, it is necessary to regularly check and adjust the angles of the front wheels.
Otherwise, the car's handling deteriorates, and the tires begin to wear out rapidly. Wheel alignment is checked every 10-15 thousand kilometers and after very strong impacts when falling into road potholes.
Some problems can be identified by hearing while driving. Worn ball joints or silent blocks, faulty shock absorbers or broken rods knock, squeak or ring when driving on uneven roads.
In addition to extraneous sounds, suspension malfunctions manifest themselves as follows:
- Rocking or jumping of the body when driving over uneven surfaces.
- Pulling the car to the side.
- Increased braking distance.
- Deterioration in controllability.
- Accelerated or uneven tire wear.
What links are included in the rear suspension?
The Chevy Niva bridge is held in place using five parts. To prevent longitudinal and transverse displacement, four longitudinal rods (two each: front and rear) and one transverse rod are used. At the ends of the products there are eyes into which silent blocks are inserted to prevent knocking in the suspension. One end of the rod is attached to the bridge, the other to the car body.
The parts have the same diameter and differ only in length. The longest is the transverse thrust. The length of the elements ensures vertical mobility of the rear axle. Thanks to this, the silent blocks do not twist, even if the suspension moves by the full stroke of the shock absorber.
Types of breakdowns and their causes
The parts are made of high-strength alloy steel, so they are practically not subject to deformation.
The jet rod can only bend as a result of hitting large stones or tree stumps off-road.
More often, car owners have to deal with other problems:
- Cracks in the welds between the rod base and the eyes. If a breakdown is not detected in time, the part may fall apart while moving.
- Corrosion of rods. A rusted base loses strength and is easily deformed or broken.
- Wear and damage to rubber bushings of silent blocks. Over time, rubber dries out and cracks. This process is enhanced by physical activity. As a result, play appears in the connection of the rod with the bridge and the body. This worsens the car's directional stability and can lead to the lugs coming off.
Important: the appearance of a knock in the rear suspension may indicate wear of the torque rod silent blocks. If the malfunction is not corrected in time, the lugs will quickly come off under the influence of increased shock loads.
Replacing jet rods
The work is carried out on an overpass or inspection ditch. To replace jet rods you need to prepare:
- hammer;
- a pair of spanners 19;
- metal brush for cleaning threads;
- mounting blade;
- WD-40 liquid.
Reaction rods need to be changed in the following sequence: transverse, front, rear. You should not lift the rear axle with a jack, otherwise there will be difficulties in aligning the holes of the silent blocks and mounting brackets.
Read more: VAZ 2107 injector replacement of heater tap video
Work order:
- Clean threaded connections with a wire brush and spray with WD-40.
- Unscrew the lower mounting nut and move the shock absorber to the side so that it does not obstruct access to the transverse link nut.
- Unscrew the threaded connections holding the silent blocks and remove the transverse rod.
- Install a new rod and screw it on the top side.
- Align the holes in the silent block and the bracket, insert the bolt and tighten the nut.
Attention: to protect the threads from corrosion, use gear oil or Litol. If you do this, it will be much easier to unscrew the nuts next time.
- Unscrew the fasteners, remove the front rod and replace it with a new one.
- Repeat the previous step for the remaining front and two rear links.
Tip: the fastening bolts firmly adhere to the bushings of the silent blocks. Use a hammer to move them out of place. This must be done carefully so as not to damage the thread.
If the rods have not rusted or bent, or cracks have not appeared on them in the area of the welds, you can only get by by replacing the rubber-metal bushings. In this case, you can save on buying new rods and get by only with silent blocks.
To replace the bushings you will need a vice, a thick screwdriver, a pair of tubes and a special tool for pressing. The diameter of the first tube is 60-80 mm. The thickness of the second should correspond to the diameter of the metal bushing of the silent block.
The pressing device is a metal rod, the thickness of which is slightly less than the inner diameter of the rubber part of the silent block.
There is a thickening on the rod that presses on the rubber bushing. The diameter of the thickening must correspond to the outer diameter of the silent block.
Replacement of bushings is carried out on removed rods.
You need to start by dismantling the old silent blocks. Press the tubes on both sides into the hinge: the thin one into the metal bushing, and the thick one into the rubber bushing. Clamp the structure in a vice and tighten it. The metal bushing will come out of the silent block and the rubber will be easy to remove from the eye using a thick screwdriver.
Before installing a new silent block, it is necessary to clean the inner surface of the eyelet and lubricate it with a solution of soap or detergent. Oil, which is recommended for use in some assembly instructions, will shorten the life of rubber bushings.
After this, all that remains is to insert the pressing device into the rubber bushing of the hinge, lean it against the eye of the rod and compress the structure in a vice.
The metal sleeve is pressed in with the same device. To facilitate installation, it must be treated with a soap solution.
Replacing silent blocks alone takes more time than replacing the assembled jet rods. However, if the condition of the rods is not satisfactory, you can leave the old ones. In the absence of extreme loads, they can travel 100 thousand kilometers or more.
Which ones are better?
There are parts from several manufacturers on the market, among which the following options can be distinguished:
- Cross and Detal-Resurs are two budget brands that produce suspension parts for the Niva. Price - from 1600 rub. per set.
- Sitek - budget spare parts with rubber or polyurethane silent blocks. They are distinguished by their small wall thickness and low weight. Suitable for those whose route mainly runs on asphalt. Price - 2200 rub.
- Niva Urban - inexpensive high-quality spare parts for Niva Chevrolet. The manufacturer produces rods for the entire VAZ family. Price - 2600 rub.
- UG is another budget rod from a little-known company. Like Sitek, they are not intended for active off-road running. Price 3000 rub.
- SC is a more expensive model, characterized by a rectangular cross-section. Judging by the mass, the manufacturer did not spare the metal. The quality of the seam does not cause any complaints from car owners. Price - 3400 rub.
- Niva Extreme - reliable, durable suspension parts that are preferred by fans of extreme racing. The only drawback is the price, which is almost 5,000 rubles.
Note: the high price of Niva Extreme parts is due to their non-standard design. These are enhanced traction.