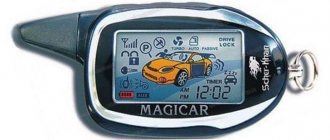
Disabling the alarm
So, if the key fob is lost, broken, or the battery is dead, and it is not yet possible to replace it with a new one, you need to manually disable the security. To do this, you need to find the button to turn on the service mode (valet). It is highly advisable to find out its location in advance, before such an “emergency” event occurs. Otherwise, if the remote control is lost before the car is disarmed, you will have to look for this button to the accompaniment of the howling of the siren.
The valet button is usually hidden by installers in the depths of the panel, sometimes under the steering column or in the area of the fuse box. With its help, you can perform a variety of actions: register new key fobs, program various settings, and also completely disconnect the system from the car.
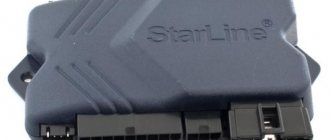
For different manufacturers, this action occurs in different ways, but the button itself and the ignition key are always used directly, or rather, turning it on and off. For example, to turn off Starline car alarms, you need to turn on the ignition, press the button three times within 20 seconds (for some models - four times) and then turn off the ignition. If everything is done correctly, the siren will squeak twice and the turn signals will flash several times. The alarm is now completely disabled.
The LED indicator should be constantly on and not blinking.
However, some alarms can be disabled using a PIN code to improve anti-theft properties. It represents a certain sequence of signals entering the main unit. To disable such a system, do the following:
- Turn on the ignition
- Press the valet button on the first digit
- Turn off and turn on the ignition again
- Enter the second number using the button
- Turn off the ignition.
The code may be different for different companies (Starline has -1111), but the sequence of actions is approximately the same.
Is it possible to restore the key fob?
Below we will look at what to do if the alarm key fob breaks.
Keychain repair
You can try to repair the control panel by checking the condition of the internal elements. To do this, you need to open the case, which is connected with screws and latches. You need to be careful when opening the device, as the latches break easily. The printed circuit boards inside should be free of plaque, dirt and oxidized areas. If the board is severely damaged, then a rational solution would be to replace the remote control with a new one.
To independently check the integrity of the alarm key fob elements, the user must have good knowledge of electrical engineering.
The check looks like this:
- Clean the surface of the board with a stiff brush. Using detergents on your own is not advisable because it can damage the elements (capacitors).
- Check the integrity of the circuits with a multimeter, first of all, the power circuits and elements with a different color from the rest.
- Ring the circuits of the buttons and the control diode, if it is included in the remote control design.
- If a break is detected, solder the damaged track or replace the damaged element. Electronic components can only be replaced using special soldering equipment, which is available at service centers.
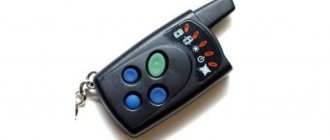
Below are photographs of the soldering of the tracks of the Pandora key fob. The owner had complaints about the range and slow response of the system to button presses, but after repair the defects disappeared.
If the buttons on Starline and other models fail, you can try to repair the device yourself.
The step-by-step instructions are as follows:
- Open the battery compartment and remove the battery.
- Unscrew the fastening screw located under the battery.
- Using a knife or thin screwdriver, separate the halves of the housing. The back part must be removed.
- Remove the printed circuit board and inspect the buttons. Place the torn one aside.
- Place the board with the display down and carefully glue the torn button back to its original location using cyanoacrylic glue. The key is glued to the standard plastic legs; the contact parts must be clean.
- Solder the four contacts of the button with a low-power soldering iron. If necessary, additionally solder the pins of all buttons.
- Place the board in the upper part of the case, snap the lower part into place and tighten the fastening screw.
When struck, elements on the boards may bounce off, but you can install them in place yourself. Often, after a fall, damage to the inductor occurs.
Sequence of repair actions:
- Remove the battery compartment cover and remove it from the remote control.
- Unscrew the screw securing the halves and separate the housing.
- Remove the electronic boards and analyze them for torn elements.
- Solder the parts into place and secure them with hot glue. It is recommended to replace torn elements with new ones, since tearing off damages the conductive parts.
- Reassemble the product.
If the remote control has stopped responding to button presses or has lost connection with the main unit, then you can try setting it up. In the design of old-style alarm remote control panels (pre-2005-2007), there is often a trimmer capacitor that you can try to adjust.
To do this you need:
- Enter programming mode (in accordance with the instructions for this alarm).
- Check the operation of the button. If there is no signal, then you need to turn the capacitor regulator a few degrees (up to 5).
- Perform settings. If the system does not respond to the key fob, turn the knob again. It is recommended to try adjusting the capacity several times.
If setting up the key fob does not help, then the owner has no choice but to buy a new remote control or make a copy of the existing one.
Where can I make a duplicate?
If the main or auxiliary key fob is lost, you can try to find and select a control panel from a similar alarm model. You should not rely on your own knowledge when using this device; it is better to seek the help of a specialist.
Key fobs are sold by specialized stores of automobile security systems and installation centers. You can try to order devices for a number of alarm systems (Starline, Pandora) through official representative offices or the manufacturer’s website.
Linking a new key fob
When replacing an alarm key fob, pay special attention to its manufacturer. The ideal option would be if it is the same company and the same model as it was. Now in online stores you can find many remote controls from different companies from Chinese manufacturers at attractive prices. It, of course, can be functional and even perform its functions, but the guarantees of its full compatibility are very conditional and in the event of a defect, you can waste time on subsequent searches for a truly high-quality product. Therefore, it would be better to spend a slightly larger amount on a branded and reliably working device.
So, after you have the new key fob in your hands, you need to bind it to the system, without this it will not work. How to restore the connection between the control panel and the main unit? To do this, you will again need the ignition key and the valet button. The procedure (using Starline as an example) is similar to the process of disabling the system with the addition of new items:
- Turn on the ignition
- Press the button 7 times to enter the programming mode (the siren will beep seven times) and after that the screen backlight on the remote control will light up
- On the key fob, you must simultaneously press buttons 1 and 2 (disarming and arming)
- One beep from the siren will confirm that the remote control is linked.
- Turn off the ignition.
After this, you can check the functionality and functions of the alarm. The LED indicator should go out and flash only after arming.
How to reprogram the alarm key fob yourself
The radio transmitter, also known as the key fob, is the main device for commanding the alarm. The signal from it is sent to the control unit in the car, being a unique code. Thus, out of thousands of combinations, the system reacts only to the correct one. Our instructions will tell you how to reprogram the alarm key fob to create a new code. Why do you need to reprogram?
If you buy a new car and install a new alarm system, you may not need to re-set the code further (unless there is a family disagreement).
A more problematic case is when you buy a used car and it already has an alarm system. The former owner solemnly hands you one or two keychains and waves his hand. And where is the guarantee that he doesn’t have a couple more remote controls lying around and no one will come at night to disarm your car and quietly drive away with it? After all, the basic set of keychains could have as many as four! Cases are different, so the best solution would be to reprogram the alarm key fob. After this, all “doubtful” remote controls completely lose their power.
The main rule: each alarm model comes with its own remote control and cannot be used for another model.
And one more thing: if you had several remote controls in the kit, they will also need to be programmed, all at once, otherwise they will not work with the control unit.
As a rule, linking a key fob to an alarm system is not such a difficult task for most systems, but some difficulties may arise.
Each manufacturer and model has its own instructions for the key fob, as well as step-by-step manuals for programming it. But they all start with using the Valet or Overread button. Where is she located? If you are not the first owner of the car and don’t know anything about its whereabouts, let’s start searching.
It is a switch and is usually installed in a secluded place, but with access. The most common location is the fuse box inside the passenger compartment. In foreign cars it is usually located under the panel with the inscription “Fuse”. Remove the cover and inspect the block for a button. If it is not there, we examine all the places under the instrument panel and steering column, checking all removable plugs and pockets. We carefully inspect the glove compartment. If nothing is found, perhaps it was not installed at all or is located next to the alarm control unit, which is very difficult to get to without the help of a specialist. If it is not provided by the system, then its role will be played by the ignition switch.
So, the first thing we do is switch the alarm to service mode (Valet mode). It allows you to carry out maintenance of the car alarm, forcefully disable it, program new functions and connect key fobs. To switch to this mode, a special combination of button presses is used, also known as a security code. This is done to avoid unauthorized access to management. Once a code has been activated, unless it is entered correctly, programming the alarm will not be possible. The instructions usually indicate the factory code and, if it was not changed intentionally, then this makes the task easier. If it does not fit, you need to contact the service.
Let's say the code works. Next, we program each key fob in turn; there can be no more than four of them in total. As reference material, excerpts from the instructions of the most common models from five manufacturers are taken: Sheriff, Tomahawk, StarLine, Cenmax and Scer-Khan Magicar 5.
For convenience, we will assign a number to each button on the remote control. Security activation button – “1”; disarming – “2”; programmable channel ch2 – “3”; channel ch3 – “4”; control button for remote control signals – “5”.
Programming Sheriff alarm key fobs
General rule: each subsequent operation is performed within 5 seconds after the previous one. If the interval is exceeded, the system exits the setup mode. The same thing will happen if you turn off the ignition. The signal to stop programming is one short and then one long siren sound.
- Turn off the alarm, get into the car and turn the ignition key.
- Press the Valet button 3 times. A single signal will confirm that the control unit is ready to program the transmitters.
- Repeat the operation, the siren will emit several short beeps and one long beep.
- Hold down the “1” button on the first remote control until the siren notifies you with a long signal that programming has been completed.
- Repeat the operation for all other transmitters.
- To exit the settings mode, turn off the ignition or wait more than 5 seconds.
How to program a secret code into a Sheriff alarm key fob
- Disarm the car and immediately enter the secret code using the Valet button.
- Turn the ignition on, off, and then turn it on again.
- Use the same button to enter the first digit of the code and turn the ignition off and on again.
- Enter the second digit, repeating the same thing again. The system will confirm the correctness of the entered code with a sound signal.
- By triple pressing the button, enter the service mode. The siren will emit several short beeps, then one long beep.
- At the first transmitter, press button “1” and the system will confirm with a sound signal that the new code has been successfully recorded.
- Do the same with the remaining transmitters in turn.
Remember that by setting a new code, you automatically delete the old one, which means that the system will not be able to work with key fobs that have not been updated.
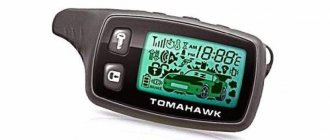
How to program a Tomahawk alarm key fob
Similar to the previous one, this system stores up to four remote controls in memory. We connect key fobs of models TW-9010 and TZ-9010:
- Turn the ignition on without starting the engine.
- Keep the Valet button pressed.
- After waiting for four siren signals, we release. We have entered programming mode.
- We simultaneously press the buttons to open the trunk and control the sound of the remote control. Hold until the siren sounds: 1 time for the first key fob, 2 times for the second and so on.
- When memorization is complete, wait more than 5 seconds for the system to exit the settings mode.
In this case, key fobs that have not been programmed will be deleted from memory.
Write key fob code for TOMAHAWK Z-5, TZ-9030, TW-9030, X-5
With the ignition off, press the Valet button 7 times. We turn on the ignition and hear 7 siren beeps, which means entering the key fob programming system. Hold down buttons “1” and “2” on the new key fob until a signal sounds. One for the first remote control, two signals for the second and so on. Turn off the ignition and the parking lights flash 5 times, which indicates exit from the service mode.
If no action is performed within 10 seconds, the setup mode is disabled.
Write key fob code for Tomahawk X-3
Turn the ignition and hold the secret button for 6 seconds. The system will notify you with four beeps that the entry has been completed. Press and hold buttons “1” and “2” until a confirmation signal appears. As usual, 1 time for the first, 2 times for the second, etc.
The programming system will shut down if there are no commands for at least 15 seconds.
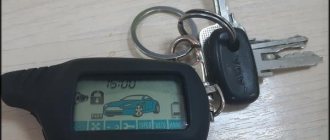
How to register the StarLine alarm key fob
- We disarm the car.
- Press the hidden button 7 times.
- Turn on the ignition. 7 siren signals and LED lights on the remote control indicate that you have entered the system.
- Simultaneously press “1” and “2” buttons and hear one beep. Key fob #1 is programmed.
- The recording of each of the subsequent key fobs is confirmed by the required number of signals.
After 10 seconds of inactivity, the system automatically turns off, as indicated by 5 flashes of the side lights.
Recording key fob code for StarLine Twage A6, A8, A9
- We turn on the ignition.
- Press and hold the service button for 6 seconds and wait for four sound signals.
- On the key fob with an LCD display, press the “1” and “2” buttons together until a sound signal appears. An additional key fob without a display is recorded in the same way, but by pressing the “3” and “4” buttons.
- Repeat step 3 for the remaining key fobs. The number of sound signals is equal to the key fob number.
- Turn off the ignition.
To exit the setting mode, you need to wait more than 6 seconds, after which the side lights will blink 5 times.
As before, unprogrammed key fobs lose contact with the control unit.
Programming the alarm key fob on Scer-Khan Magicar 5
The Shere Khan system remembers the codes of only three key fobs. If you enter the fourth key fob, the code of the first one is automatically erased. If you need 4 key fobs, it is recommended to program two of them with the same serial number.
There are two algorithms for registering a key fob: without using a secret PIN code and with it.
Method 1 (without PIN code):
- Within four seconds, turn the ignition key three times from the “Off” mode to the “On” position and turn it off. Flashing dimensions will tell you that you have entered the programming system.
- No later than 4 seconds later, press the button on the first key fob. In response, the alarm lights will blink 1 time.
- Similarly, enter the codes for the second and third key fobs. After the second, the lights blink once again in response, and after the third, twice, which indicates that the programming mode is over.
If you do not take any action after the first step, the hazard lights will flash 2 times and the system will go into Valet service mode.
Method 2 (use personal PIN code 1):
- We perform it similarly to the first method.
- Over the next four seconds, turn the key in the same way, but in accordance with the first digit of the PIN code. The alarm will blink, now enter the second digit in the same way.
- No later than four seconds, press the button on the key fob. The system will flash once to confirm.
- We carry out all other keychains in accordance with method 1.
To automatically exit the service, wait more than four seconds.
Knowledge of reprogramming a key fob helps out in an emergency situation, for example, when the connection between the key fob and the control unit is suddenly lost. This happens, especially in low-cost systems. In order not to become a hostage to a screaming car somewhere in a supermarket parking lot, every driver should know where the Valet button is in his car and what to do in this case.
Source
Incorrect operation of the key fob
As already mentioned, the full functionality of the key fob is influenced by its origin. Only a proprietary device can provide full feedback and control of the system. The second reason why new (and old ones too) remote controls do not work correctly or even refuse to receive and send signals is a simply dead battery. It is forgotten much more often than one might imagine. Therefore, the first thing to check when the car does not open with the alarm key fob is to check the power supply to the remote control.
A car alarm is a rather complex system with a lot of settings and capabilities. In order to always control your car, it would be a good idea to carefully study the instructions for it in order to know the specifics of how to turn off the alarm on your car so that it does not present surprises at the most unexpected moment.
Lithium batteries
Advances in technology have led to the introduction of lithium batteries. They are distinguished by a low level of self-discharge (no more than 2% per year) and the ability to function in a wide temperature range (-30 to +60).
The capacity of lithium energy sources is almost 2 times higher than the capacity of elements designed for 12 Volts. For example, the capacity of a CR2032 battery is 210 mAh . At the same time, the size of the disk elements is significantly smaller than their finger and little finger counterparts.
Using an average car alarm transmitter, you can compare the main characteristics of different power sources. In the case of a twelve-volt battery, the actual life time will be 3-4 months, the operating time when the button is pressed is 2 hours. A lithium-based element will withstand at least a year of real operation and several tens of hours of continuous operation.
After comparison, it becomes clear that using lithium-based batteries in an alarm key fob is more profitable. Such batteries require replacement no more than once a year. The exception is situations when the device operates in continuous mode for a long time (for example, when pressed accidentally). In such a case, you need to have a spare power source for replacement.

