In modern fuel-injected cars, the ignition module is an unchanged engine component. This device is responsible for generating a high voltage electrical pulse. The impulse is subsequently transmitted to the spark plugs to cause a spark in the cylinder and ignite the fuel mixture. But often problems may arise in the operation of this device and it may require replacement. Also, many off-road conquerors are not satisfied with the standard location of the device in the lower part of the engine, where water can get on it and there is a need to move it to another place.
The ignition module consists of a pair of windings and a commutator, which determines the direction of current flow through the coils. The operation of this component is fully regulated by the vehicle's electronic control unit. The ECU is also responsible for collecting and analyzing information coming from the unit. At the output of the module there are 4 sockets into which high-voltage wires leading to the spark plugs are connected.
The pulses inside are generated in such a way as to produce a paired discharge at the output. First, contacts numbered 1 and 4 are activated, then 2 and 3. This is necessary to synchronize with the operation of the corresponding cylinders in which a spark should occur.
There are 4 contacts suitable for the device, which are marked on the connector. The first 2, designated A and B, receive pulses that are responsible for redirecting contacts from one coil to another. Pins C and D carry power and ground. The letter designations must also be duplicated on the device body.
How to check the Niva-Chevrolet ignition module
The ignition module (IM) of the Niva-Chevrolet car is highly reliable and, most often, provides sparking over many tens of thousands of kilometers. However, if it fails, it is difficult to diagnose due to the lack of obvious signs. The decent cost of a module does not always allow it to be replaced with a new one, which is called “blindly”. First you need to reliably verify that the old one is faulty. Read the article about how to check the ignition module of a Niva-Chevrolet.
Description of the camshaft sensor on Niva Chevrolet
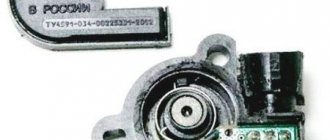
Where is it located: in engines with a gasoline power system, the DPRV is installed on the camshaft pulley. In an engine with a diesel power system, the control system is somewhat different. Where the upper and lower position of the piston in each cylinder is fixed.
On engines with a carburetor fuel system, the role of the DPRV is played by the distributor. The design of the injector is different, the system was parallelized, injection and ignition were done in pairs.
During systematic operation, the household equipment wears out and becomes unusable. The process of self-replacement is not at all difficult. The task is feasible for a car enthusiast without technical equipment maintenance skills.
Repeated restart of the engine is the first sign of a malfunction of the DH (DPRV).
To determine which cylinder is on stroke, the electronic engine control unit controls the position of the camshaft using DPRV (SMR)
Data from the sensor is extremely important for setting and dosing fuel, sparks in the combustion chamber, and injectors. The camshaft sensor directly affects fuel consumption, acceleration dynamics, and the amount of emissions in the exhaust gases.
In cars, including Niva Chevrolet, magnetic and Hall effect sensors are preinstalled. Both types are designed to read and transmit data to the electronic engine control unit.
The latter, based on the analysis of indicators, adjusts the fuel supply, ignition timing, and spark frequency.
- The magnetic controller produces its own alternating current. The design has two contacts;
- The Hall effect controller has one contact, powered from a third-party source.
Signs of DPRV malfunction:
- Unstable engine operation at idle speed;
- After stopping, the engine starts again;
- Increased fuel consumption;
- Power reduction;
- Passive acceleration dynamics;
- On the dashboard there are system error indicators (see photo);
- The gearbox can be locked in one position until it comes to a complete stop and the ignition is turned off. Single or cyclic action;
- The car moves jerkily;
- The maximum speed of the car is limited to 65 – 85 km/h;
- Periodically the engine stalls;
- Misfires when turning on the ignition;
- Inability to restart the engine.
Frequent causes of premature wear of the controller:
- Natural factor due to long-term use;
- Mechanical damage to the controller housing;
- Open circuit;
- Short circuit of contacts;
- Sensor breakage due to impact, accident;
- Malfunctions of the electronic engine control unit.
| Name / catalog article | Price in rubles |
| Automega 150097810 | From 800 |
| JP group 1191400200 | From 800 |
| EPS 1953071 | From 800 |
| Delphi SS10814 | From 800 |
| Meyle 3148000038 | From 800 |
Also interesting: Chevrolet Niva starter relay where it is located
Preparatory stage:
- Key to "10";
- New controller;
- Rags;
- Phillips screwdriver;
- Additional lighting is optional.
Step by step guide:
- Open the hood;
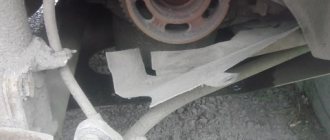
- We release the metal clamp - the tie from the rubber pipe of the air duct. We extract it;
- At the top of the block we find the controller, remove the terminals, unscrew the bolt to “10”;
- We remove the sensor and replace it with a new one;
- We put on the terminals and install the air duct pipe.
The controller replacement is complete. We start the engine and check the serviceability of the equipment.
Ignition: late and early
Which ignition is better?
An experienced motorist or expert will immediately say: optimal. And in itself, late or earlier ignition is already extreme, capable of giving the car owner a lot of headaches. The stability of the operation of an injection engine directly depends on proper adjustment of the ignition system. This will help increase the power of the internal combustion engine, reduce fuel consumption, and improve efficiency.
Ideally, on a 4-stroke internal combustion engine, the fuel assembly should ignite at the end of the compression stroke. This means that the fuel must ignite at the very moment when the piston reaches TDC. This process is due to the nuance that the fuel assembly needs a specific time to burn, after which the resulting force will push the piston down.
So, late or early ignition implies a delay or advance in the operation of the above process. In other words, the ignition system is configured so that a spark is formed and ignites the fuel assembly not at the optimal moment for this. This happens sooner or later.
It is not difficult to determine if the ignition setting is not optimal. Engine malfunctions observed periodically are evidence of this. You can also study the main signs that determine an incorrectly set ignition.
- If there is unstable operation of the power unit in idling mode.
- Starting the internal combustion engine is clearly difficult.
- Fuel consumption has increased.
- The responsiveness of the accelerator pedal is not as impressive as before.
- The engine often overheats and detonation occurs.
- The power of the power unit decreases, it loses throttle response.
In addition, an incorrectly set OZ leads to popping noises that radiate into the intake system. Further operation of a vehicle with a crooked OZ is impractical and leads to more serious problems with the power unit. This is especially dangerous if detonation is noticeable.
| Symptoms and signs of pre-ignition | Symptoms and signs of late ignition |
| Excessive detonation (piston defect, destruction of connecting rods). | Loss of power. |
| A clearly audible knocking sound in the engine (increased wear). | Poor starting (which causes the battery to suffer). |
| Loss of power (especially noticeable at low speeds). | Increased fuel consumption. |
| Increased fuel consumption. | Engine overheating (may even seize). |
The difficulty of determining ignition on fuel-injected internal combustion engines is due to the fact that everything depends on the electronics. In this case, the problem must be solved not by mechanical intervention, but by configuring and programming the ECU.
It is noteworthy that on used cars, various errors accumulate in the ECU memory over time. The latter can lead to firmware failures and improper functioning of the engine and ignition systems. To identify and reset detected errors, you will need, as mentioned above, to use special software.
Briefly about the design
The main purpose of any MZ is to convert a low-voltage signal into a high voltage sufficient for normal sparking in the cylinders. Therefore, structurally, the Niva-Chevrolet ignition module is a pulse transformer. A signal from the electronic control unit (ECU) is supplied to its input, and a voltage of about 20 - 30 kV is removed from the output. The module has a connector for connecting the low-voltage part and four sockets into which the so-called armored wires are inserted.
High voltage is supplied to two cylinders at once. In this case, 90% of the energy is spent on the formation of a spark where the compression stroke ends. The working mixture in it is under high pressure, which means it has high conductivity. Thus, the module consists of two independent ignition coils.
Terminology
The ignition distributor is an electromechanical device that ensures timely supply of high voltage pulses to the spark plugs. It is often called a distributor.
Contact and non-contact distributors for rear- and all-wheel drive carburetor VAZ carsContact and non-contact distributors for rear- and all-wheel drive carburetor VAZ cars
Ignition advance is the ignition of the working mixture in the cylinder before the compression stroke ends.
Ignition timing (IAF) is the angle of rotation of the engine crankshaft from the position corresponding to the appearance of a spark on the spark plug until the piston reaches top dead center.
Contact ignition system - a system in which switching of the ignition coil is provided by a mechanical breaker.
Non-contact ignition system - a system in which switching of the ignition coil is provided by an electronic module controlled by an electronic crankshaft position sensor - for example, a Hall sensor (VAZ-2108) or magnetoelectric (GAZ-2410).
The ignition system breaker is a mechanical switch in the distributor directly connected to the primary circuit of the ignition coil.
The slider is a distributor element that alternately transmits high voltage from the ignition coil to high-voltage wires connected to the engine spark plugs.
Contact closed angle (UCSA) is a value indicating how long the contacts of a mechanical breaker should remain closed. For classic Zhiguli cars, the UZSK is approximately 55 degrees. A correctly selected UZSK gives the ignition coil the opportunity to gain the necessary energy and completely transfer it to the spark plugs.
Read news about the new Niva
- Gearbox Lada Niva Chevrolet manual transmission
- VAZ 2131 5 doors. SUV, 82 hp, manual transmission, 1995 — the fuel pump does not pump gasoline
- Niva Chevrolet and Niva 2121: the main differences between owning these cars
- Power bumper for Niva: buy or make it yourself
- Fuses Niva 21214 injector
- The design of the instrument cluster (instrument panel) and the location of light bulbs and sensors on the devices of Niva Chevrolet - Niva Chevrolet (VAZ 2123, Chevy)
- Power bumpers for Niva in Irkutsk |
Where is the Ministry of Health located?
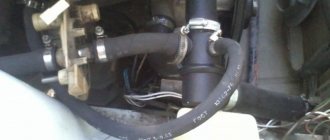
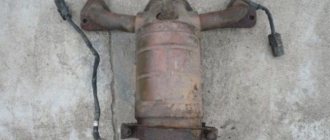
The location of the Niva-Chevrolet ignition module was not chosen very well. It is attached to the bottom of the cylinder block. Thus, the module is exposed to two negative factors at once:
- Corrosion. This is facilitated by the low location. During operation, moisture often gets into the MH.
- High temperature. Mounting the module on the cylinder block forces it to operate at temperatures close to 100 degrees.
The second factor is the most critical for MH. The manufacturer guarantees normal operation of the device up to 120 C°. This kind of temperature under the hood is rare. But constant exposure, even to lower values, significantly reduces the service life of the MH. Therefore, conscientious owners move the module to a place with more benign conditions. Most often, on the partition of the engine compartment.
Varieties
During its production, Shniva was equipped with two types of modules.
- MZ from a VAZ 2112 car. Installed until 2006. It includes a spark control system.
- The module is from a VAZ 2111. It is controlled by signals from the ECU, therefore, in essence, it is a regular ignition coil.
Please note that the modules are not interchangeable. This is due to their different designs. You can determine which ignition module on a Niva-Chevrolet by its appearance. The old one has large dimensions and weight, and most importantly, unlike the new one, there are not three, but four contacts on the primary winding connector. At the same time, the process of checking the Niva-Chevrolet ignition module will be considered using the example of a new module.
Instructions for setting the ignition
Installing the ignition on a Chevrolet Niva is done using a strobe light.
The order of work is as follows:
- First you need to disconnect the vacuum regulator.
- Ignition timing (ITT) is checked by connecting the positive clamp to the positive terminal of the battery, and the ground clamp to the negative terminal of the battery.
- Next, you need to remove the tip of the high-voltage wire from the spark plug of the 1st cylinder. It should then be connected to the strobe sensor.
- Then the rubber plug is removed from the clutch housing hatch.
- Next, you need to start the engine and direct the flow of light from the strobe into the hole in the clutch housing.
- MZ can now be displayed. If it is set correctly, the mark on the flywheel should be between the previous scale mark and the middle mark. If this is not the case, the MH needs to be adjusted.
- To increase the ignition timing, the sensor housing must be turned clockwise. To decrease the angle, the sensor must be turned counterclockwise.
- When the alignment is completed, you need to tighten the sensor mounting nuts. Next, you need to check the correctness of the set MH. If necessary, the procedure should be repeated.
The ability to make adjustments yourself makes it possible to save money on service stations and improve the quality of car operation.
Sorry, there are no surveys available at this time.
Symptoms of a problem
As already mentioned, symptoms of a faulty ignition module are also typical for many other components of the car. There are almost no signs that directly indicate MH. This significantly complicates repairs. However, with experience, conclusions about a malfunction of the Chevrolet Niva ignition module can be drawn from the following symptoms.
- Two cylinders are not firing at once. This is the only sign that, although not always, indicates MH. The likelihood of this increases if cylinders 1 and 4 or cylinders 2 and 3 are not working at the same time.
- Idle speed “floats”.
- Diagnostics shows misfires in all cylinders.
- As the engine warms up, its power drops and interruptions appear.
- The CHECK ENGIN alarm comes on.
Also interesting: Niva Chevrolet speed sensor - Auto magazine MyDucato
It should be noted that a complete failure of the motor, in which the engine does not start at all, happens very rarely. Basically, this symptom of a malfunction of the Niva-Chevrolet ignition module indicates damage to the low-voltage part of the wiring.
Often the cause of problems with the Niva Chevrolet ignition module are breaks in the second winding, because it is this that generates the high voltage pulse. This mainly happens due to the fault of car owners:
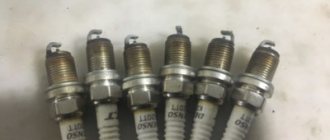
- in case of untimely replacement of failed high-voltage wires
- installing spark plugs that do not match the car model.
- moisture ingress due to improper washing
Also, the cause of burnout may be delamination of the solder due to increased vibration during frequent use of the engine at high speeds or during frequent temperature exposure - engine overheating.
Also, if the integrity of the winding of high-voltage wires is violated, extinguishing occurs due to the secondary winding. The charge finds the nearest exit point and enters the place where the wires are thinnest, leading to their destruction.
Problems with the ignition module can be determined in advance, since two coils do not fail at the same time, so car owners will still have the engine start, but with some difficulties:
- it takes a long time to gain working momentum
- floating idle speed
- excessive engine vibration
- jerking while driving
But these problems may be associated not only with the ignition module, so before replacing it is recommended to check its condition
How to set the ignition of a VAZ 2106 with your own hands - step-by-step instructions
1. Unscrew the spark plug of the 1st cylinder, then use a finger or a rubber plug to close the spark plug hole.
2. Using a special key, rotate the crankshaft until the compression stroke begins in the first cylinder, that is, when the piston begins to move upward. You can tell by the way the rubber plug flies out; if you hold it with your finger, you will feel it being squeezed out.
Also interesting: Do-it-yourself insulation of Niva
3. Turn until the mark on the crankshaft pulley matches the mark on the timing cover. If you drive on “92” or “95” gasoline, combine with the middle mark, but if on “72” or lower, combine with the long mark, which corresponds to the “0” advance angle.
4. Unfasten the latches, then remove the ignition distributor cap.
5. After turning the crankshaft, the distributor rotor should rotate to a position in which its outer contact will be directed towards the 1st cylinder on the distributor cap.
6. When the marks are aligned, pay attention to the distributor, try to draw an imaginary line through the cover latches, it should be parallel to the axis of the engine, if this is not the case for you, then do the following:
7. Unscrew the distributor fastening nut, then turn the distributor up. Rotating the rotor axis, align it parallel to the engine axis.
8. Place the distributor, tighten the fastening nut without tightening it completely.
9. After this preparation, you can proceed directly to the ignition adjustment procedure.
10. Connect the “control” as follows: one end to the terminal of the ignition coil connected to the low-voltage wire of the distributor, the other end is connected to ground.
11. Turn on the ignition. Slowly turn the distributor clockwise until the control lamp goes out. If it doesn’t burn anyway, then you don’t need to do anything.
12. Next, you need to rotate the distributor counterclockwise, at the moment the control lamp lights up, fix the position of the distributor, then tighten its fastening nut.
13. Now you can turn off the ignition and put the distributor cap back in place.
After the ignition is set, it is necessary to check the correctness.
1. To do this, start the engine and start driving.
2. Accelerate the car to 45 km per hour, then turn on the fourth gear and sharply press the gas.
3. After this, after about 2-3 seconds, detonation will occur (popping, ringing of “fingers”), disappearing as the car accelerates.
4. If detonation occurs and does not disappear as the car accelerates, we can assume that the ignition is “early.” If you do not experience detonation at all, the ignition is “later”.
In case of early ignition, turn the distributor clockwise by approximately 0.5-1 division. If you have the opposite later, turn it 0.5-1 division counterclockwise.
When the ignition adjustment is completed, mark with paint on the distributor body the position of the middle mark of the scale relative to the block.
Now that the ignition timing of the VAZ 2106 has been set, you can collect everything and rejoice at the job successfully completed.
Causes of damage
Most often, the Niva-Chevrolet ignition module fails due to overheating caused by its poor location in the engine compartment. This simply leads to a break in the secondary winding of the pulse transformer. However, this can happen for other reasons, namely:
- use of faulty high-voltage wires;
- use of spark plugs other than those recommended by the manufacturer;
- checking the spark by shorting the armored wire to the car body;
- manufacturing defects.
Thus, one of the main reasons for module failure is the notorious “human factor”. The reason for this is incorrect diagnosis and operation of the MH. Test methods that are acceptable for the ignition coil of a carburetor engine are most often not suitable for modern modules and will most likely cause failure.
Check procedure
First of all, you will have to get a multimeter. There is no need to look for any high-precision and expensive instruments. The usual Chinese one will suffice. The main thing is that it has a digital display, this will greatly simplify the measurement. The optimal multimeter in terms of price and functionality is the DT 830 and its numerous modifications. This is one of the most common and easy to use devices. The verification process will be discussed using his example.
First of all, you need to make sure that the primary winding of the Niva-Chevrolet ignition module is intact. For this:
- the switch on the front panel of the device is set to the 200 Ohm position;
- disconnect the connector from the module, remove the high voltage wires;
- sequentially measure the resistance between the middle and extreme contacts of the terminal block;
- The device readings should be within 0.5 Ohm.
And also interesting: No charging for VAZ 21213 reasons "
The accuracy of a multimeter, of course, is not enough to measure such small quantities, but to check the primary winding for an open circuit, this is quite enough.
The next step is to measure the resistance of the secondary. Sequencing:
- set the range switch DT-830 to position 20 K;
- The probes of the device must first be placed between the high-voltage terminals of cylinders 1 and 4, then between 2 and 3;
- the device display should display 5.4 kOhm.
It should be said that it is possible to diagnose a malfunction of the Niva-Chevrolet ignition module only if the readings differ significantly from the norm, or, more often, if “1” lights up on the device indicator. This means an infinitely large resistance, in other words, a winding break.
First you need to check all the contacts, both those suitable for the block and the high-voltage wires going to the spark plugs. To do this, simply disconnect the wires several times and reconnect them. If this does not bring positive results, you need to move on to the next steps.
To do this, they usually use a multimeter connected to contacts D and the second one connected to ground. The device itself is switched to 20 volt mode. In this case, the readings on it should be 12 volts. Then, using the same scheme, check contact C in ohmmeter mode. The reading should be less than 1 ohm.
Contacts A and B are checked in voltmeter mode. Their readings should not exceed 0.3 Volts. If at least one of these indicators is outside the normal range, you need to look for problems in the coil.
If you find damage to the soldering of the contacts, you can try to fix them yourself using a soldering iron. If the coil is damaged, the ignition module must be replaced.
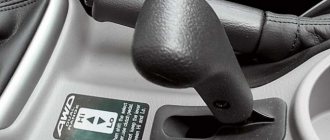
Ignition switch and features of its replacement
Chevrolet Niva cars are equipped with a system with an anti-theft locking device that blocks the starter when intruders try to steal the car. If the engine is not running and there is no key in the lock, the steering lock operates. In position “1” - the lighting system, windshield wiper, engine control, instrument panel, and door power windows operate. In position “2”, the starter starts.
Replacing the Niva ignition switch consists of the following sequence of actions:
- First, you should turn off the power to the car by removing the negative terminal from the battery.
- Next, remove the plastic casing from the steering column and the rubber seal around the lock.
- Then you need to disconnect the block with wires from the wiring harness. Next, the block with the 3Z wires is disconnected from the relay.
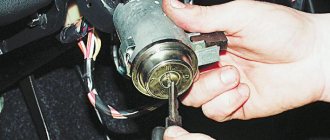
- The next step is to unscrew the 4 bolts with cut-off heads.
- Now you can remove the ZZ.
Dismantled ZZ from Niva
You can repair the ZZ or replace it. Installation is carried out in reverse order. In this case, you need to recess the rod of the anti-theft device by inserting the key into the lock and moving it from the zero position (the author of the video is Chevy Niva repair).
How to check the ignition module?
There are several ways to check the ignition module:
- The simplest is to replace it with a similar, known-good device. However, it should be taken into account that the donor device may not fit and burn out when installing it on a car for testing.
- The second method is the main one. To carry it out you will need a tester. The method consists of measuring the resistance on the secondary winding of the ignition coil, which is part of the module design. The ignition coil is checked without removing the device. The engine must be turned off during measurements. The tester is set to ohmmeter mode.
Checking the device with a multimeter
You need to measure the resistance at the paired high-voltage outputs of the ignition module of cylinders 1 and 4, cylinders 2 and 3. The resistance should be the same, about 5.4 kOhm.
If the resistance is low, this indicates a breakdown, if high, this indicates a winding break. In this case, the device needs to be repaired or replaced.
Operating principles of the ignition module on a Niva Chevrolet
The ignition module in modern cars is responsible for generating high voltage pulses. Like all vehicle components, these devices are prone to failure and may require repair or replacement of the device. Before you begin these steps, you need to accurately diagnose the problem.
The ignition module structurally consists of two coils, in which the current is alternately redirected from one to the other. The electronic control unit system is responsible for the operation of the module. In addition, the ECU is responsible for collecting and analyzing data from its operation.
The pulse generated by the Niva Chevrolet ignition module comes out of four sockets, to each of which high-voltage wires are connected to transmit current to the spark plugs.
The pulses are generated in pairs, providing current simultaneously to the 1st and 4th terminals, then to the 2nd and 3rd. This is done specifically to match the specific cylinder operation.
Ignition adjustments for vases according to any requirement
After assembling the engine and installing the distributor, you need to set the ignition. This operation can be performed using a strobe light following the attached instructions. Also, setting the ignition timing (for a contact ignition system) can be done with an ohmmeter (present in a multimeter) or using a test lamp (you can use a car carrier).
To check and adjust the ignition using an ohmmeter, do the following:
- Remove the negative terminal from the battery
- Set neutral gear
- Remove the distributor cover
- Turn the crankshaft clockwise until the distributor slider reaches about 30 degrees to the contact in the cover numbered “1”
- Next, one ohmmeter probe is connected to the distributor bolt (where the wire from the ignition coil is connected), and the second ohmmeter lead is connected to ground. In this case, the resistance on the ohmmeter scale should be zero.
- Then the crankshaft is slowly turned until the lower marks align. If, when the marks coincide, the resistance shows infinity, then the ignition is set correctly. If the resistance begins to increase until the marks coincide, or remains at zero, then you need to adjust the ignition timing by loosening the distributor and turning it in one direction or another
- The crankshaft is turned using an X38 mm wrench. As a last resort, in its absence, you can turn on speed 3 or 4 and slowly (with an assistant) move the car, which is really not very convenient when adjusting
Also interesting: Car fasteners for Chevrolet - clips, caps from the company KrepAuto
A similar ignition adjustment can be performed using a control lamp, but care must be taken since this operation is performed with the ignition on. One wire from the lamp is connected to ground, and the second wire is connected to the distributor bolt, as is the case with an ohmmeter.
Further everything is the same as using an ohmmeter. The correct installation of the ignition is checked during a test drive. To do this, the engine is started, warmed up to operating temperature and a test drive is made to check and adjust the ignition. The following steps are performed:
The car accelerates to 50 km/h and the gas pedal sharply sinks into the floor. If everything is set correctly, you should hear 3-4 finger clicks. If the clicking of the fingers is longer, then this indicates that the ignition is set early; if there are no clicks at all, then the ignition is late.
With early ignition, the distributor must be turned clockwise, and with late ignition, counterclockwise and repeat the tests again.
Next, look at the video to see what electronic ignition looks like on a VAZ 2101, 2106, 2107 and contact:
All these installation and inspection work, ignition adjustments are carried out provided that the timing chain or belt is tensioned with the correct tension. And you also need to make sure that the engine valve clearances are adjusted, right.