As you know, the purpose of power steering, be it electric or hydraulic, is to provide more comfortable rotation of the steering wheel. Currently, almost all models of manufactured cars are equipped with power steering or electric steering, and in those cars in which the manufacturer did not provide for their presence, you can install the amplifier yourself. In this article we will look at how to install hydraulic power steering and electric power steering on a Niva and whether this makes sense.
[Hide]
Operating principle of EUR and power steering
Before installing the amplifier in the VAZ 2121 with your own hands, let's look at the operating principle of the systems, starting with the power steering. When the steering wheel is in the central position, it is fixed using centering springs. In this position, the liquid circulates through all elements of the system, provided that the distributor is positioned correctly. In this case, the power steering pump operates in enhanced mode, which is due to the need to pump fluid through the system. Moreover, it always functions, regardless of whether the steering wheel is turning or not.
When the steering wheel is turned, the spool moves, as a result of which the element blocks the drain lines and liquid begins to flow into one of the cylinders. In this case, the piston, as well as the rod, are exposed to oil under pressure, which leads to the rotation of the wheel, as well as the housing, in a certain direction. The spool overtakes the device body when it stops moving, which indicates that the driver has completed the turning maneuver. In this case, the spool returns to its original position, and then the hose opens to drain the liquid.
As for the principle of operation of the electric power steering, the amplifier itself is mounted on the steering shaft of the vehicle. Its component parts are connected to each other using a torsion shaft, with an installed engine speed reading controller. When the driver turns the steering wheel, the torsion shaft twists, which is detected by the torque sensor. In accordance with the information received from the torque, speed and engine speed controller, the control module determines the compensation force, as a result of which it sends a command to the amplifier electric motor.
Modification of parts, installation of pumps and hoses
The bipod for the power steering should also be modified. Using a circular electric saw, it is cut off by 3-5 mm in part of the front stop, placed on the lower shaft of the power steering bipod, a lock washer is installed, the fastening nut is tightened, and the nut is locked by bending the antennae of the lock washer.
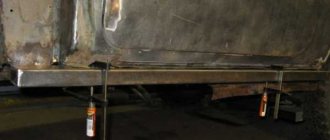
The power steering assembly with bipod is installed with the steering wheel in the middle position, when the mark on the end of the steering shaft (hydraulic booster) coincides with the corresponding mark on its body. The amplifier is located on the spar using three bolts from the kit, the nuts are tightened with a force of about 35-45 Nm (you will need a wrench and a socket head “17”, a torque wrench). Next, the junction of the car body and the hydraulic booster is sealed with silicone or polyurethane foam. The ball pins from the steering rods are returned to the holes in the bipod, tightened with castle-type nuts and secured with cotter pins.
Buy only original parts
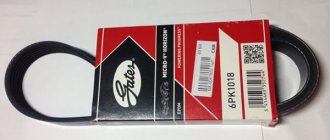
Installation of the power steering pump begins with installing the drive pulley and securing it with a special bushing to an extended nut. Next, the power steering pump bracket is installed, the cylinder head is secured through the upper platform of the bracket, and the pump itself is installed. A V-belt is put on the pump drive pulley on the crankshaft, as well as the pump pulley, which must be tensioned by moving the pump through the grooves of the bracket and tightening the fastening bolts to a torque of about 22 Nm.
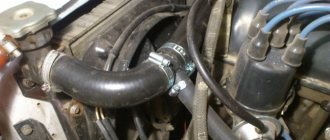
When we install power steering hydraulic hoses, we need to remove the transport plugs in such a way as to ensure that no debris gets in there. The high pressure hose is connected to the supply hole in the pump and, at the same time, to the power steering high pressure hole through a hollow bolt. All bolts are tightened, the hose is positioned so that it does not touch other parts of the car. Next, we install the low-pressure pipe, drain and low-pressure supply hoses, reinstall the removed components, fill the amplifier with oil (it is strictly forbidden to start the engine without oil!), and check the operation of the systems.
As you know, the purpose of power steering, be it electric or hydraulic, is to provide more comfortable rotation of the steering wheel. Currently, almost all models of manufactured cars are equipped with power steering or electric steering, and in those cars in which the manufacturer did not provide for their presence, you can install the amplifier yourself. In this article we will look at how to install hydraulic power steering and electric power steering on a Niva and whether this makes sense.
The feasibility of installing EUR and power steering
Does it make sense to install an electric or hydraulic booster on your car? The only, but most important thing that such an installation can provide is to provide more comfortable driving. But you need to take into account that installing such a system is a rather complicated task that not everyone can cope with. At the same time, its cost is quite high, and if you cannot install the unit yourself, you will also have to pay a substantial amount for installation. Therefore, you need to decide whether it is profitable for you to install an amplifier from an economic point of view (the author of the video is Gennady Martynyuk).
Detailed instructions for installing electric power steering on a Niva
The procedure for installing the EUR with your own hands is as follows:
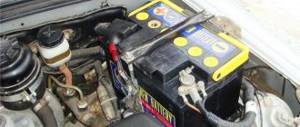
- First you need to disconnect the battery.
- Then the plug is removed from the steering wheel, the fixing nut is unscrewed, and the steering wheel itself is dismantled. You also need to unscrew the four screws and remove the plastic cover.
- The mounting bolts are unscrewed and the instrument panel is dismantled. Disconnect the steering column switch plug, unscrew the bolt that secures it, and then remove the device.
- Then the ignition switch wiring is disconnected, the device itself is removed, to do this, unscrew the two mounting screws and turn the key to position I.
- The next step is to dismantle the steering column; to do this, you need to unscrew the steering shaft screw, as well as several mounting screws and nuts. Please note that Nivas use screws with shear heads, so the best option would be to apply notches using a chisel and unscrew them with pliers. Next, the column itself must be lowered down and then dismantled.
- After this, unscrew the nuts on the mounting blocks with fuses and remove them. Also remove the relay cover located under the instrument panel.
- The interior and engine compartment are separated from each other by a partition; it has an elastic plug, which must be removed. The EUR wire is pulled through the hole. Make sure that the installed wire does not come into contact with moving components of the wiper motor.
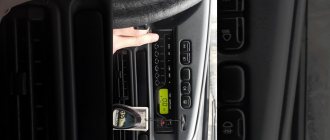
- Under the dashboard itself, to the left of the steering wheel, there is an 8-pin connector, two gray wires are connected to it. The yellow-blue one from the EUR should be connected to this connector. Then, to the red block, which comes from the tidy, you need to connect the orange and blue-pink wires from the electric amplifier. Here, behind the instrument panel, you can find a ground bolt; you should connect the minus to it.
- An amplifier bracket is installed under the tidy; the wiring from the ignition switch should be threaded into it.
- Next, an intermediate shaft should be installed on the splines of the amplifier itself; remember that a ground should be connected to it in advance. The shaft itself should be securely fixed to the steering gear shaft and the EUR should be attached to the bracket. The shaft must not be pinched or too tight.
- The assembly itself is fixed to the plate using two bolts and two studs; it is advisable to install nuts under them.
- Next, the power and information connectors are connected to the amplifier.
- In fact, the installation procedure can be considered complete. Now you need to reinstall the ignition switch and steering column switch. To install the steering column trim, it will need to be cut, for example, with a hacksaw. The steering wheel and dashboard are put in place. Then the wiring is pulled from the EUR to the battery. Please note that in the existing plug in the partition between the engine compartment and the passenger compartment, it will be necessary to increase the size of the hole. Perform a functional check of the equipment and check all connections again.
Photo gallery “Installation Help”
Removal
Over time, the power steering wears out or breaks, so it needs to be replaced, but to do this it needs to be removed, this can be done as follows:
- The first step is to remove the belt that drives the power steering, as well as the protection of the pan with mud flaps of the engine compartment.
- We pump out all the liquid from the tank
- We take a screwdriver and stop the pulley, loosen the bolts that secure it to the flange
- Unscrew all the bolts and remove the pulley
- Drain the remaining liquid
- Disconnect the hose
- Unscrew the bolt fitting
- Seal the hose tip with a special washer
- We unscrew all the existing fasteners, including the top bolt, and remove the pump.
After the pump is removed, it can be repaired.
Read news about the new Niva
- How much oil is in the Niva 21214 engine
- Chevy Niva: off-road tuning, how to increase engine power with your own hands, tuned Chevrolet Niva, suspension, interior reupholstery, internal combustion engine tuning
- What to choose Chevrolet Niva or UAZ Patriot
- Buy Lada Bronto (Lada 4Х4 Bronto) in Kirov: price, in stock, car showroom, official dealer Inkom-Avto
- How to remove the crankshaft pulley of a VAZ 2114 yourself: instructions, photos and videos - Automaster
- Chevrolet Niva camshaft sensor
- Repairing fuel tanks - the most effective methods
- Where is the knock sensor Niva - Your auto repairman
Features of installing power steering
Briefly about the features of installing power steering on the Niva:
- First, the central nut of the steering wheel is unscrewed, after which it is dismantled. A puller may be required to remove the nut. The universal joint is also removed from the steering wheel.
- Then the fan strap is loosened.
- After installing the hydraulic booster, you need to fill the system - to do this, unscrew the expansion tank cap and fill the system with oil to the required level. After this, the steering wheel should be turned to its extreme positions several times with the engine turned off, this will get rid of the air lock in the system.
- When bleeding the system, it is recommended to jack up the front of the car or disconnect the steering rod from the bipod. Next, the engine is started and the required amount of liquid is added to the system. If you notice that after adding the oil it begins to foam, this indicates that air has entered the power steering hoses. Then you will need to turn off the engine and wait a while until the bubbles stop coming out.
- The procedure is carried out almost identically to installing the EUR, only there are some nuances. Before you begin the process, carefully read the service book that comes with the kit (the author of the video is the Andrew Humm channel).
Story
I have already said many times that I do not do tuning or modifications for the sake of the process. Only if there are problems. In this case, it all started with the “collective farmers” of AvtoVAZ. For a very long time, the plant installed German ZF power steering pumps on the assembly line, and then suddenly the Russian version came into use. As usual, the plant was not going to give any explanations, so I had to turn to another source, the manufacturer ZF.
A technical seminar was held in St. Petersburg, organized by this company, and I asked the German a question about this situation. Directly at the lecture (that is, the official position), the German specialist said that this is a trade secret. And during the lunch break, when I addressed him in German, he straightened up and said the following. Quote.
Along with the supply of pumps, we gave a recommendation to AvtoVAZ on what SHOULD be poured into the system. At first, the plant filled in an approximate analogue of the liquid that we recommended, and then suddenly it began pouring green Pentosin. The result was not long in coming - leaks and a humming sound when turning. But the funny thing is that all these “supposedly” warranty cases were transferred to the shoulders of ZF.
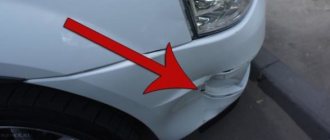
Also interesting: How to remove scratches on a car body with your own hands using polishing and other methods, how to work with minor and deep damage
The German said that we “butted heads” with the plant a little, did not get clear answers from the managers and management and simply stopped supplying this spare part. End of quote. Now we come to a simple conclusion: in order to get a working unit, as intended by the designers, we need to flush the system and fill it with what is recommended. The fluid is simple, good synthetic dextron, but along with it I recommend replacing the low pressure hoses.
The nuances of adjusting the steering wheel position
As for the adjustment, it is usually performed if the driver is not satisfied with the height position of the steering wheel. To adjust the EUR, you need to grind off the edges of the shaft to the required dimensions or install a gasket between the mechanism body and the plate.
Price issue
As for the price, it depends on the type of amplifier, as well as the store where the kit is purchased. The cost of an ESD kit today averages about 27-32 thousand rubles. As for the hydraulic booster, on average the installation kit will cost the buyer from 31 to 40 thousand rubles. You can assemble a power steering system from different parts from different cars, for example, install a column from an Opel or Nissan, and a pump from a BMW or other car models. But you will have to tinker, since you will need to perform more than one alteration.
Loading …