Any driver of a passenger car with an internal combustion engine must be able to recognize the signs of wear on the oil seals, since otherwise the wear and hardening of the valve seals is fraught with a whole series of consequences. If you identify the problem in time, you can without any problems purchase a desiccant remover and replace the rubber-metal parts even without removing the head.
How valve seals work
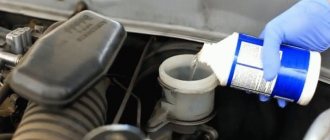
Over time, the valve seals dry out, causing engine oil to leak, forcing you to top it up to normal levels.
Valve seals, as they are popularly called, are installed directly on the valve stems and are a combination of a rubber cage and a steel bushing designed to increase structural rigidity. When the valve opens, the cap closes it, preventing oil from flowing into the cylinder. Of course, a certain part of the lubricant still gets under the seal, but this is the norm - the unit is naturally lubricated. Over time, the elasticity of the part decreases, it dries out, and an increase in the volume of leaking liquid is observed. As a result, the oil “leaves”, forcing you to top it up to normal more and more often.
Signs of wear on valve stem seals: how much oil does a 1.8 engine take?
The initial and main symptom of hardened, worn valve seals is excessive consumption of engine oil. True, for some engines the regulations allow noticeable deviations from the generally accepted norm of 200-300 ml per 1000 km. Thus, turbocharged 1.8 engines installed on models of the Volkswagen AG automaker (Volkswagen, Audi, Skoda, Seat) on legitimate grounds require adding lubricant to 500-700 ml for every thousand kilometers. A similar situation arises with PSA Peugeot Citroën engines, developed jointly with BMW (also installed on Mini models) - these data sheets indicate a “norm” of 1000 ml of engine oil, which must be added to the engine every 1000 km.
Things like this highlight the importance of knowing your oil consumption. If the power unit consumes significantly more than the recommended values between service operations, then this is a serious reason to think about replacing the valve stem seals.
Another sign of oil leaving the cylinders due to the caps losing their condition is bluish-gray smoke from the exhaust pipe, which can be clearly seen in the first minutes of engine operation and further when changing gears, while pressing on the accelerator pedal. Also clear evidence of the above problem are oil deposits on the threaded portion of the spark plug. When pressure increases in the combustion chamber, the mixture supersaturated with oil is partially squeezed out through microscopic gaps. For example, through the thread of a candle, where the gap is not much 0.3 mm. Under the influence of high temperature, gasoline evaporates from the mixture, leaving behind a significant “reserve” of lubricant. Indirectly indicates the end of the caps and dark deposits on the electrodes.
Reliably the same soot appears on the cylinder walls. And if you ignore the problem, then one fine day the valve will simply burn due to plaque.
Decarbonization and its meaning
During engine operation, a layer of carbon deposits forms on the piston grooves. It reduces the elasticity of the rings. This leads to even more wear.
There are several options for cleaning these places:
- Incomplete decarbonization. A mixture of kerosene and acetone is prepared in equal proportions. The spark plugs are unscrewed from the engine, then this mixture is poured into the holes. Then it takes 9 hours for the carbon deposits to dissolve. After the time has passed, the spark plugs are screwed in and the engine starts. You need to drive 15 km as usual. The oil and filter are being replaced. This procedure allows you to clean only the internal surfaces of the piston group.
- Hard decarbonization. This cleaning requires special means: First, the engine warms up to operating temperature.
- The candles are unscrewed. By turning the crankshaft, the pistons are set to the middle position.
- A special product is poured through the holes, the candles are screwed in, and rest is given until the next day.
- The candles are taken out again. The starter rotates the crankshaft to remove hard pieces of plaque.
- The candles are put in place. The engine should run for 1 hour at idle speed.
- The oil and filter are being replaced.
This is interesting: Technical inspection of Renault Logan by mileage: maintenance regulations
Decoking mixtures contain special oxidizing agents that soften carbon deposits and remove them along with the exhaust.
How to understand that the caps need to be replaced and not the engine piston system
It is very easy to confuse the signs of drying out valve seals and the deterioration of the cylinder-piston group. In both cases, the problem matures after 200,000 km; it often occurs on used cars that were purchased without proper diagnostics. Moreover, fat burning and blue smoke are characteristic of both diseases. But the hardened valve stem seals do not affect the compression ratio, which usually drops when the piston rings, the walls of the pistons and cylinders themselves wear out. If the car consumes too much oil (from 1 liter per 1000 km), but the compression in the cylinders is normal, then 90 out of 100, it’s the caps.
An additional check is carried out with the engine running with the oil filler cap unscrewed: an engine requiring repair of the CPG should exhibit smoke from the neck, while used caps do not cause this.
Consequences of driving with worn valve stem seals.
If you missed the moment of failure of the valve seals, then most likely it will lead to the following consequences:
- increased oil consumption, which, firstly, will not have the best effect on your budget, and secondly, will provoke periodic oil starvation, leading to increased wear of parts and the need for premature engine overhaul;
- oiliness and eventual failure of spark plugs;
- burnout of valves - carbon deposits will form wherever there is oil, including on the cylinder walls, which over time will interfere with the closing of the valves and lead to their burnout.
To prevent all this from happening, carry out timely replacement as soon as you notice the first signs of wear on the valve stem seals.
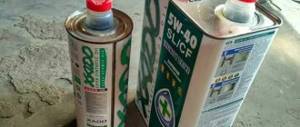
The price of the “cracker” remover for Toyota, Volkswagen, Audi and the principle of its operation
An integral attribute of replacing valve stem seals on any engine, be it a Lexus or a VAZ, is the so-called desiccant. This is a proprietary or universal (suitable for engines of various brands) tool for clamping valve springs, without which repairs are not possible. The principle of operation of the cracker remover is quite simple: the cracker is attached to the engine body by support points, and with the support of mechanical pressure on the plate, the valve return spring is clamped, which allows you to remove the crackers.
Experienced car owners recommend paying special attention to the safety of crackers, as they tend to get lost and get inside the engine.
It should also be taken into account that universal pullers are often not so multi-tasking - some designs are suitable for engines with the ONV, ONC, HV layout, others are designed specifically for servicing Opel SOHC engines, etc. You should clarify this point before purchasing a tool.
Desiccant price:
- for overhead valve engines - from 3,500 rubles;
- for OHV, OHC, CHV engines – from 2000 rubles;
- a comprehensive set of tools for desiccation on Toyota Camry, Volkswagen Golf, Mitsubishi Lancer, etc. engines – RUB 20,000.
The desiccant, as in the photo, is an essential attribute of replacing valve stem seals on any engine.
Consequences of wear of valve stem seals
As soon as the listed signs of wear on the valve stem seals begin to appear, you should start checking the gas distribution system of the car, and special attention should be paid to the valve stem seals. Experienced car enthusiasts do this on their own, while less experienced ones go to a service station, where diagnostics are carried out by experienced specialists.
It should be noted that operating an engine with worn oil seals is strictly not recommended. As practice shows, if you ignore this defect and do not eliminate it, then it is almost inevitable:
- The power of the power unit will decrease;
- At idle, it will begin to stall periodically;
- The revolutions will begin to “float”;
- Compression will drop significantly;
- Carbon deposits will appear on the cylinders, pistons and valve seats.
As for carbon deposits, its appearance is indeed a very serious “bell”, since its formation may well lead to a very expensive overhaul of the power unit.
Replace without removing the head: cost of repair kit Ford, Mazda, Nissan
In official service centers, specialists usually insist on the option of replacing the caps, which involves removing the cylinder head. This way, dismantling/installing oil seals is much easier, and everything spent on fiddling with the cylinder head is paid for by the client. Thus, a decent amount of money accumulates. But if you don’t go as far as removing the “head”, then you will need less nerves, and you won’t have to spend money on a cylinder head gasket and new bolts. When you have access to a desiccant (you don’t have to buy it - you can, for example, temporarily borrow from a friend), the matter remains small. It is necessary to purchase a set of branded or non-original valve stem seals.
Cost of the original repair kit (valve seals):
- Toyota Camry 2.4 – 1300 rubles;
- Ford Focus 1.8 – 1500 rubles;
- Volkswagen Golf 1.6 – 1800 rub.;
- Nissan Qashqai 2.0 – 1500 rub.;
- BMW X3 2.5i – 2200 rub.;
- Mazda 6 1.8 – 1600 rub.
Replacing MSC for Mitsubishi Lancer IX 1.6
Let's consider step by step the process of replacing valve seals on the ninth generation Mitsubishi Lancer 1.6 without removing the cylinder head.
- The ignition coils are dismantled, after which the spark plugs are unscrewed.
- After unscrewing the six bolts, the valve cover is removed. The hoses are disconnected.
- To prevent hydraulic compensators from falling out, they can be secured with wire or plastic clamps.
- It is necessary to unscrew 13 bolts securing the rocker arm axles. The axles are removed as an assembly without turning over (to avoid oil leakage from the compensators).
- To prevent the crackers from falling into the pan, the engine holes are clogged with foam rubber and clean rags.
- With the support of the marks on the pulley and head, TDC is set in the first and fourth cylinders.
- One part of the cracker remover is attached to the valve head body, the other rests against a plate, which allows you to release the crackers and remove them with tweezers.
- After removing the plate with the spring, access to the cap is available.
- Removal of the cap itself should ideally be done using a special removable device. But in the absence of one, you can get used to working with pliers. However, if you are not careful, you can easily damage the valve guide.
- Before replacing the old and new caps, it doesn’t hurt to check the valve itself for play.
- The oil-lubricated new cap is pressed using a suitable mandrel - you can use a 10 mm nut head.
- The spring and plate are returned to the point, using tweezers and a puller, the crackers are put back.
- Replacement of the MSK in the remaining two cylinders is carried out after turning the pulley according to the marks and setting TDC.
- It is highly advisable to tighten the rocker arm axle bolts with a torque wrench in compliance with the values recommended by the car manufacturer (50 Nm).
Step-by-step instructions for replacing rings and valve stem seals
The decarbonization process removes small deposits. In case of severe wear, a complete replacement of all piston rings and valve stem seals is required:
- The necessary parts are selected in accordance with the make of the machine. You should give preference to original spare parts so as not to bother again later.
- The spark plugs are unscrewed, the cover is removed, and then the entire cylinder head (cylinder head). The oil is drained and the oil pan is unscrewed. Next, the connecting rod caps are unscrewed and the pistons are pulled out.
- Use a puller or a screwdriver to remove the old rings. Using old pistons, the landing grooves are cleaned. It is done carefully with an unnecessary ring. Their installation should be carried out only after connecting the piston to the connecting rod.
- Of all the piston rings, the oil scraper rings are installed first. All operations must be done by hand. On box-shaped ones with a spiral spring, the expander lock rotates 180° relative to the ring lock. For composite ones, the spring is installed first, then the lower plate and the upper one. The plate locks rotate 180° relative to each other.
- After installing the remaining rings, it is necessary to evaluate the appearance of the cylinders. In case of severe wear, boring and honing are performed.
- Place the pistons in their places, screw on the connecting rod caps and the oil pan.
Valve seals also play an important role in retaining oil. They remove excess from the valves. The caps are replaced either with or without removing the cylinder head.
- In the first case, the crankshaft is turned with a wrench until the first pair of pistons is set to the top dead center (TDC) position. This is done to keep the valve from falling into the cylinder.
- The axles of the intake and exhaust rocker arms with hydraulic compensators are removed. In many models they can fall out - nylon clamps are useful for this.
- Using a special puller, you must simultaneously compress the valve springs and remove the crackers with tweezers. They are needed to compress the spring relative to the valve axis. An assistant will come in handy here.
- After removing the worn cap, install a new one in its place. It should be remembered that they are divided into inlet and outlet.
- The crackers are installed in reverse order. Next, you should rotate the crankshaft to the TDC position of the other pair of pistons. Everything is done the same way. If you replace the caps and remove the cylinder head, you can pull out the valves and assess their condition. The resulting carbon deposits must be cleaned off.
- After installing the valves and springs in place, reinstall the rocker arm axles.
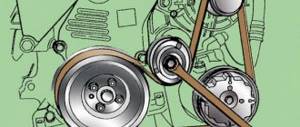
- Along the way, you can check the tension of the timing belt, and also use the marks to establish the correct ignition. This will protect the CPG from wear.
- Install the cylinder head cover. It will require a new gasket.
- Install a new filter and fill with oil.
- Connect all devices, start the engine.
Starting operation of the unit with new parts will require their grinding in. Unnatural sounds and whistles are possible. Smoke may pour out of the exhaust pipe, and the engine may stall. For the first 500 - 1000 km, you should not increase the speed much.
Replacing rings: where to start?
So, new parts have already been purchased, then you can proceed directly to the process of replacing them. The first thing that needs to be done next is dismantling all components, as well as mechanisms. This will provide full access to the necessary parts, or rather, will allow you to easily replace the oil scraper piston rings.
What is included in the dismantling work package?
- The air filter should be removed, followed by the fuel pump.
- Don't forget about the distributor in the ignition system. In order to dismantle the drive housing, it is necessary to disassemble the bolted connection.
- After this, you should remove the negative terminal from the battery, as well as the pulley (toothed) from the camshaft. At this point, part of the work can be considered successfully completed.
- Next, in order to better get to the cover located on the head of the block, it is necessary to remove the mass drive.
- The last thing you can do is unscrew the nuts that secure the camshaft bearing housings.
This is interesting: Car maintenance: daily, periodic, seasonal maintenance
Second stage of dismantling work
In order for the replacement of rings and valve stem seals to lead to proper engine operation, general diagnostics of the vehicle is necessary. As a rule, at this moment the wear of other parts and their good fit are checked. Under no circumstances should the position of the camshaft keys be ignored. If during the dismantling process it is noticed that they are not seated too tightly, then they should also be removed. This must be done to avoid loss of the part while the vehicle is moving.
After everything was done, access to the camshaft was completely opened, which must be pulled out along with the oil seal. Next, in order to remove the oil scraper rings, you should install the spare part in a position where the piston will be at TDC. Having pulled out the candle, you need to insert a rod into the resulting hole. If this is not done, the valve will easily fail.
Next, you need to use a special tool to compress the springs located on the valve and pull out the two crackers. You can get them out using tweezers. After this, using a special tool, you should press out the rings. This completes the dismantling work.
Installation process
Now let's talk about how to properly complete the installation process. This work will consist of several stages:
- First, the springs should be removed from the new parts. This must be done extremely carefully to avoid damage.
- Next, you need to coat all elements with engine oil. After this, you can press the engine itself and return the springs to their intended place.
Important: oil scraper rings are replaced in strict accordance with the sequence. The detailed removal process is described above. Be careful that the sides are where they should be. Otherwise, this may cause a sharp increase in the amount of oil consumed.
Features of replacing caps on a 16-valve VAZ Priora
To gain access to the caps on the Priora, you will first have to unscrew the spark plugs from the wells, remove the ignition coils, and also reset the throttle assembly. After this, you can unscrew the valve cover bolts to remove the rocker arms and actually replace the MSC using a puller. In one piece, the situation is the same as in the case of the Lancer: TDC is set in the cylinders, crackers and springs are removed, new seals are installed, and reassembly is underway. As a rule, the entire complex of work takes the performer from 8 to 12 hours.