The best improvement to the standard UAZ Hunter heater is its replacement with a more advanced and efficient heater produced by NAMI. It has more advantages than disadvantages, the main one of which is the high price. If you want to save money, then you can increase the efficiency of the standard heater with the help of some simple modifications, which will be discussed below.
Refinement and improvement of the UAZ Hunter heater design.
You should start by sealing the heater housing. To do this, it must be removed from the car and all corners and joints of the body parts must be sealed from the inside using automotive sealant. And then, preferably, also from the inside, cover the walls of the box with thin, 2-3 mm, sheets of automotive noise and vibration insulation. All this together will eliminate air leaks, slightly increase heat transfer and somewhat reduce the overall noise of the heater during operation of the electric motor.
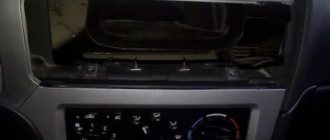
The next step is to try using any available method, for example by gluing a window seal around the perimeter, to seal the lower rectangular outlet hatch of the heater housing. This is necessary in order to eliminate air leaks when the hatch cover is closed, thereby increasing the strength of the air flow that will flow through the corrugated hoses to the windshield or through the lower side air distributors.
Well, in conclusion, you need to remove or simply bend to the left the rectangular protrusion located from the inside of the heater housing and partially covering the left outlet pipe supplying air to the windshield. The general purpose and functionality of this protrusion in the design is not entirely clear, but the fact that without it the force of air supply into the left corrugated hose increases, and therefore the force of blowing the windshield on the driver’s side increases, is a fact.
Rain water leaking from the UAZ Hunter heater housing into the passenger compartment.
Despite the plastic box installed under the air intake hatch, some of the rainwater, when the hatch cover is closed, can still get into the UAZ Hunter’s interior when parked. Initially, as a result of inspection and control during the rain, it seemed that water droplets were entering the cabin somehow through the drain hose of the box.
It was then assumed that the plastic box itself was damaged. In fact, it was precisely determined that water enters the cabin through the joint of the upper internal iron heater box, which exits to the outside of the body. There it forms a small side on which the lower seal of the hatch is installed.
Rainwater flows under this seal, then goes into the gap between the protruding side of the box and the body itself. And from there it immediately gets inside the heater housing and then flows through leaks under the feet of the driver or front passenger. That is, it does not initially fall into the plastic box, but bypasses it.
Therefore, the lower rubber seal of the hatch must be removed, treated well with body sealant around the joining seam that has become visible, and then put the seal in place. No more water will flow into the cabin through the heater.
Installing a door seal on the air intake hatch cover of a UAZ Hunter.
In any case, whether a plastic box is installed on the car above the heater radiator or not, the natural entry of water and dust into the heater, and then into the passenger compartment when the air intake flap is closed, must be prevented. A plastic cover installed on top of the hatch will best cope with this task. You just need to find out in advance whether it is suitable for the UAZ Hunter with a lower windshield wiper arm or not.
If you don’t want to drill additional holes in the car body to install such an overlay, then there is a simpler and cheaper method. It consists of replacing the standard rubber seal on the air intake flap cover with a seal that is installed from the factory on the inner door opening of the UAZ Hunter, its catalog number is 3153-6107018 or 3153-6107019. But in fact, this is an ordinary door seal from VAZ 2101, 2102, 2103, 2104, 2105, 2106, 2107, which goes under the numbers 2101-6107018, 2101-6207024, 2101-6207025.
There are no particular difficulties when installing such a seal. The only thing you need to pay attention to is that during installation the cover is raised as high as possible, as far as its adjustment holes allow. Now, when closed, the air intake hatch cover is maximally sealed around the entire perimeter and water ingress into the interior is practically excluded, even during very heavy rain.
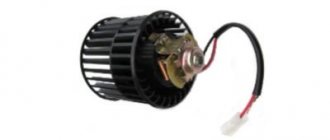
Selecting and replacing the electric heater motor of the UAZ Hunter.
As standard, the UAZ Hunter heater is equipped with an ME236 electric motor with a power of 25 Watts. Its capabilities are frankly not enough to properly draw air through the radiator. The low performance of the ME236 also greatly affects the quality of windshield blowing.
Finding a more powerful electric motor to replace the ME236 is not difficult. For example, these could be electric motors 19.3730, 191.3730, 192.3730 and 194.3730 with a power of 40 Watts, or 197.3730 with a power of 60 Watts, or 51.3730 and 511.3730 with a power of 90 Watts. The main thing is that the diameter of the output shaft of the electric motor is 8 mm, so that a standard impeller can be installed without modifications, and also that it has suitable studs or threaded holes on its body for mounting it in the heater.
In addition, it would not be superfluous to take into account the load that, during operation, this electric motor will create on the on-board network and, accordingly, the generator. Thus, the current consumption of the 90-watt electric motor 511.3730 is 15 Amperes, versus 5 Amperes for the standard ME236. Therefore, perhaps the golden mean would be to install an electric motor 197.3730 with a power of 60 Watts and a current consumption of 8 Amps.
UAZ stove fan design
It just so happens that on most modern vehicles, an electric motor is used to drive the fan impeller, which is initially a completely autonomous engine that is adapted to work in tandem with the fan impeller. In the UAZ, this pair is structurally made into a single bundle, the purpose of which is to ensure the supply of outside air to the heater radiator and then through the air duct system into the passenger compartment. The heater motor is controlled from the climate control panel with a regulator that allows you to turn the fan on/off, as well as change the rotation speed of its blades, regulating the volume of air entering the cabin through the deflectors.
The impeller itself is a plastic form in the form of a hollow cylinder, the walls of which have slots with internal curved ribs. Thus, this is not the usual design with three or four blades - rather, such a fan resembles an aircraft engine turbine. This form is considered more reliable when operating at very high speeds of rotation of the drive shaft. Strictly speaking, there is nothing special to break here if the impeller is completely sealed (except for the bearing), so most of the malfunctions occur in the electric motor that drives the fan.
However, there is no need to talk about perfect tightness, and therefore, over time, dirt accumulates on the impeller blades, which leads to increased load on the engine with all the ensuing consequences and an increased likelihood of the device jamming.
A significant portion of fan malfunctions are caused by problems in the electrical part, consisting of the following components:
- generator/battery, which is the power source for the motor. The battery is rarely used in this circuit, after the ignition is turned on and until the power unit starts. Since the fan electric motor consumes a lot of electricity, you should not abuse it in this mode - the battery may become so low that you will have problems starting the engine;
- the ignition switch itself;
- fuse that protects the motor from current surges;
- motor shaft rotation speed switch;
- an additional resistor, through which a reduction in the rotation speed of the electric motor is achieved, which can rotate only at one, in this case maximum speed;
- the UAZ heater motor itself.
All SUVs coming off the assembly line of the Ulyanovsk Automobile Plant are equipped with a motor of its own production, the average lifespan of which, unfortunately, is very mediocre: after a thousand hours of operation, various problems are observed in its functioning. Therefore, many owners strive at the first opportunity to replace it with a more reliable one, but one that does not require a large number of alterations. Most often, I use Sanden or Delphi electric motors as analogues - these are well-known brands whose products are widely represented in the retail network.
UAZ farmer installation of a second stove
Uuuuuuuh... this was a hemorrhoid, honestly, although, during the debriefing, it became clear that we could easily reduce 2 hours of time.
Let's begin. Ulyanovsk Automobile Plant - SPECIFIC bad people! No, install the stove right away, they kindly made the holes for the pipes, but the stove itself - to hell with you. In short, they are radishes.
We drilled through the floor, installed the stove in its rightful place, and it is holding tight. The antifreeze was drained. Then the fun began. There are two pluses and one minus coming from the stove. They did it wisely. A switch was brought out for each plus, everything was powered up, a hole was drilled into the torpedo and... a test launch. And what do you think ? The stove didn’t have two speeds, and it was blowing REVERSE! We dug through all the electrics, no errors were found, disconnected everything, powered the stove directly to the battery - the same story: the stove does not blow out air to the delight of the interior, but sucks it in. We changed the plus with the minus (one plus remained dangling) - it blew out as it should. We disassembled the stove down to the screw: they re-soldered it, they say. factory jamb, crooked craftsmen. Collected and turned on. AND AGAIN THE OVEN SUCKS! There was already a slight stupor, shaitan-construction, Schaub it :((( Experiments began, which also took a lot of time, the device of the stove was not found on the Internet, except for very positive reviews that when it works, on the street - 20 , and in the cabin + 45. Using trial and error and a complete lack of understanding of what they wanted from us, we turned the stove motor 180 degrees, and, lo and behold, it went where it needed to be! After nervously smoking, we began to put the stove back. We installed it , antifreeze was poured in, testing began.
Yes, be good to the steam room heated up in the car, but at the last moment the marriage party surfaced. Microcrack in one of the tees. Antifreeze dripped. If it's really on your fingers, the tee turned out to be full of holes (at the seam). Well, this is already the tenth thing, I got home, in the morning I will change the tee, add antifreeze and provide a detailed photo report.
source
Let's just say that the standard stove is kind of softer... in short, the standard stove blows like CRAP! :((It’s cold, damn it, especially considering that the beast warms up to operating temperature in 15-20 minutes.
It takes me 30 minutes to walk to work, but I’m stupid, ideological)))))
So this is what was purchased: interior heater "PAZ, GAZ, UAZ" 159-8101010, 3 meters of hose, 2 tees, 8 clamps, a pack of wires (10 meters), two four-pin relays with chips and a toggle switch for the VAZ 21-NOLwool heater ) Antifreeze, as always, is always in stock)
Fan removal
If the reasons for the inoperability of the UAZ heater motor do not lie in the power supply plane, then disassembling it cannot be done without. As a rule, the failure of an engine or impeller begins with the appearance of extraneous sounds, which are obvious evidence that this unit may soon fail. Sensible SUV owners do not wait until this moment, proceeding to disassemble the fan as these acoustic warning signals appear. In many cases, the unit needs cleaning, after which it continues to work like new. In any case, assessing the condition of the stove motor requires its dismantling. We will tell you how this is done using the example of the UAZ Patriot:
- as usual, when repairing equipment connected to the on-board electrical network, remove the negative terminal of the battery;
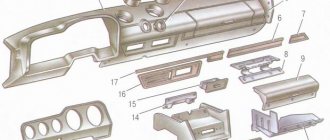
- open both glove boxes and empty them of their contents
- to dismantle the lower glove compartment, open the upper one and unscrew the two lower screws;
- you need to unscrew the four screws in the bottom drawer and remove it by disconnecting the backlight plug;
- unscrew the remaining 4 screws in the upper glove compartment, carefully pull it out, disconnect the connector and put it aside;
- Now you can begin to remove the air duct, which is secured with self-tapping screws;
- we move to the engine compartment, where we dismantle the washer reservoir, since it will interfere with us in the future;
- We do the same with the additional pump - unscrew it from the bracket, moving it to the side, but without disconnecting the connector;
- unscrew the bolts holding the heater radiator housing without removing the pipes, move the heat exchanger box to the side;
- and only now do we gain access to the stove motor, which allows us to dismantle it;
- disconnect the power connector;
- Using a flat-tip screwdriver, disconnect the clamps and remove the block assembly.
Now you can check its performance, and if the problem really lies in the fan itself, clarify the diagnosis, on the basis of which a decision is made on further actions: cleaning, repairing or replacing the device with a new one.
If the reason for disassembling the UAZ heater fan was the appearance of an irritating whistle, we can conclude that the bushings or bearings of the motor or impeller are worn out - they are the main cause of extraneous sounds. If you started repairs when the fan has already “died,” most likely, worn brushes are to blame, although the armature winding may also burn out. In the latter case, there is no question of any repairs unless you are a highly qualified electrician (repairing an electric motor on the outside is in most cases impractical - the costs are comparable to purchasing a new motor, but there will be great doubts about the quality of the new winding).
However, in about half of the cases, a whistle coming from the area where the stove is installed may indicate contamination of the impeller. Her condition can be assessed immediately after the ventilator is removed. If there is a lot of dirt and debris, cleaning the fan blades and inside may solve the problem. To check this, you can connect power to the motor directly from the battery. If the squeals disappear, you can hope that the bushings and bearings are intact. The drive shaft crank can be diagnosed manually. Although this method is not considered reliable, if there is more or less significant wear, you will certainly feel it.
Not only the impeller can become dirty; dirt often gets into the bearings of the electric motor drive shaft.
In this case, you have two options to solve the problem:
- cleaning. If, when turning the shaft manually, it moves with noticeable resistance, unevenly, without inertia and with rapid attenuation of torque, even if characteristic sounds are not heard, it makes sense to clean the unit. To begin with, we vacuum the motor itself, then wash both bearings with WD-40, wipe the shaft itself from dirt, and then lubricate the bearings. Most often, such prevention is enough to get rid of unpleasant sounds, the engine life is restored almost to its original value;
- Repair or replacement of bearings is carried out if the shaft rotates only when significant forces are applied, or if it is completely jammed. You should resort to such repairs if you already have experience in carrying out similar restoration work, since you will have to disassemble the motor using non-standard tools and techniques.
Arguments in favor of self-repair are the high cost of the unit (from 5 thousand rubles). However, you can find offers at half the price, but it’s worth thinking about the quality of such products.
Algorithm for disassembling and repairing the UAZ stove motor:
- First of all, unscrew the impeller cylinder, which is attached to the engine shaft with a nut. Let us note that you should not be zealous when trying to pull out the fan - it is plastic, and the plastic is not of the highest quality, and is quite fragile. If all else fails, you can try dipping the impeller (but not the motor!) into water heated to 60-70 degrees: if silicone glue was used when installing the fan, it will soften a little, which will allow the operation to be completed;
- Now you can start disassembling the motor itself. To do this, you need to disconnect its cover, which is attached to four latches-clamps, reminiscent of the fastening of a Zhiguli distributor;
- We take out the motor and assess the condition of the bearings. They may simply be dirty, or they may be damaged - in the latter case they need to be replaced. Problems may arise with removal, especially for inexperienced motorists - a proven guide will come to the rescue. Having an equipped garage (in particular a vice) will greatly facilitate your task;
- As for choosing suitable new bearings, the most important thing here is compliance with the dimensions, and not only the internal ones. An important nuance: it is better to buy domestic products rather than products of unknown origin;
- we put them on the drive shaft and check how freely they rotate;
- Separately, it should be said about worn brushes - access to the brush assembly without removing the motor is very limited, almost impossible, so in any case, evaluate their wear and, if possible, replace them with new ones;
- The fan is reassembled in the reverse order.
Right choice
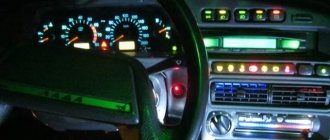
In winter you want comfortable warmth in the cabin
To insulate the interior of the UAZ 469, it is recommended to replace the existing heater with a more powerful analogue. You can buy such a radiator from Zhiguli. This will require some modifications, including the faucet.
Installation of an additional heater in the rear of the cabin of the considered models is allowed. The choice of stove depends on the personal preferences, tastes and finances of the owner of a UAZ 469 or UAZ Hunter. In any case, the heater configuration changes. It can serve as:
- KITB.3221-8110010;
- heater NAMI-4 or NAMI-7,
- stove from Zhiguli.
Auto mechanics recommend installing a NAMI-4 autonomous heater on this model, which will run on gas fuel. It is taken into account that, regardless of the choice made, the stove must have a power of 2-4 kW. The advantage of such a system is autonomous temperature control in the cabin. Disadvantage: complicated installation.
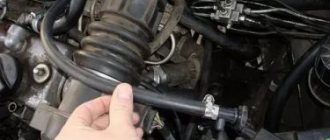
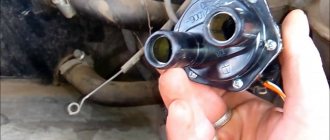
Before you start tuning the UAZ Hunter, you need to take into account that the crane also needs to be replaced. This is due to its inconvenient location and tendency to leak. The correct solution in this case is to insert a new unit into this system. The tap is installed closer to the stove.
You need to install the corner tap inside, otherwise it may become clogged with dirt. In this situation, one fitting is led into the box, and the second is connected to a similar radiator element. An important point in this matter is the correct choice of part. It is recommended to install an adjustable tap.
You can give preference to the solenoid valve from the BMW 5 Series. It must be mounted in the gap between the outlet and inlet pipes of the stove radiator. This part is not disassembled. To modernize it, you will need to drill 4 rivets in the cover. In this case, you will get a collapsible structure that will be easy to clean. Screws are used to assemble it.
Modification of the UAZ Hunter heater
The best improvement to the standard UAZ Hunter heater is its replacement with a more advanced and efficient heater produced by NAMI. It has more advantages than disadvantages, the main one of which is the high price. If you want to save money, then you can increase the efficiency of the standard heater with the help of some simple modifications, which will be discussed below.
Refinement and improvement of the UAZ Hunter heater design.
You should start by sealing the heater housing. To do this, it must be removed from the car and all corners and joints of the body parts must be sealed from the inside using automotive sealant. And then, preferably, also from the inside, cover the walls of the box with thin, 2-3 mm, sheets of automotive noise and vibration insulation. All this together will eliminate air leaks, slightly increase heat transfer and somewhat reduce the overall noise of the heater during operation of the electric motor.
The next step is to try using any available method, for example by gluing a window seal around the perimeter, to seal the lower rectangular outlet hatch of the heater housing. This is necessary in order to eliminate air leaks when the hatch cover is closed, thereby increasing the strength of the air flow that will flow through the corrugated hoses to the windshield or through the lower side air distributors.
Well, in conclusion, you need to remove or simply bend to the left the rectangular protrusion located from the inside of the heater housing and partially covering the left outlet pipe supplying air to the windshield. The general purpose and functionality of this protrusion in the design is not entirely clear, but the fact that without it the force of air supply into the left corrugated hose increases, and therefore the force of blowing the windshield on the driver’s side increases, is a fact.
Rain water leaking from the UAZ Hunter heater housing into the passenger compartment.
Despite the plastic box installed under the air intake hatch, some of the rainwater, when the hatch cover is closed, can still get into the UAZ Hunter’s interior when parked. Initially, as a result of inspection and control during the rain, it seemed that water droplets were entering the cabin somehow through the drain hose of the box.
It was then assumed that the plastic box itself was damaged. In fact, it was precisely determined that water enters the cabin through the joint of the upper internal iron heater box, which exits to the outside of the body. There it forms a small side on which the lower seal of the hatch is installed.
Rainwater flows under this seal, then goes into the gap between the protruding side of the box and the body itself. And from there it immediately gets inside the heater housing and then flows through leaks under the feet of the driver or front passenger. That is, it does not initially fall into the plastic box, but bypasses it.
Therefore, the lower rubber seal of the hatch must be removed, treated well with body sealant around the joining seam that has become visible, and then put the seal in place. No more water will flow into the cabin through the heater.
Installing a door seal on the air intake hatch cover of a UAZ Hunter.
In any case, whether a plastic box is installed on the car above the heater radiator or not, the natural entry of water and dust into the heater, and then into the passenger compartment when the air intake flap is closed, must be prevented. A plastic cover installed on top of the hatch will best cope with this task. You just need to find out in advance whether it is suitable for the UAZ Hunter with a lower windshield wiper arm or not.
If you don’t want to drill additional holes in the car body to install such an overlay, then there is a simpler and cheaper method. It consists of replacing the standard rubber seal on the air intake flap cover with a seal that is installed from the factory on the inner door opening of the UAZ Hunter, its catalog number is 3153-6107018 or 3153-6107019. But in fact, this is an ordinary door seal from VAZ 2101, 2102, 2103, 2104, 2105, 2106, 2107, which goes under the numbers 2101-6107018, 2101-6207024, 2101-6207025.
There are no particular difficulties when installing such a seal. The only thing you need to pay attention to is that during installation the cover is raised as high as possible, as far as its adjustment holes allow. Now, when closed, the air intake hatch cover is maximally sealed around the entire perimeter and water ingress into the interior is practically excluded, even during very heavy rain.
Selecting and replacing the electric heater motor of the UAZ Hunter.
As standard, the UAZ Hunter heater is equipped with an ME236 electric motor with a power of 25 Watts. Its capabilities are frankly not enough to properly draw air through the radiator. The low performance of the ME236 also greatly affects the quality of windshield blowing.
Finding a more powerful electric motor to replace the ME236 is not difficult. For example, these could be electric motors 19.3730, 191.3730, 192.3730 and 194.3730 with a power of 40 Watts, or 197.3730 with a power of 60 Watts, or 51.3730 and 511.3730 with a power of 90 Watts. The main thing is that the diameter of the output shaft of the electric motor is 8 mm, so that a standard impeller can be installed without modifications, and also that it has suitable studs or threaded holes on its body for mounting it in the heater.
In addition, it would not be superfluous to take into account the load that, during operation, this electric motor will create on the on-board network and, accordingly, the generator. Thus, the current consumption of the 90-watt electric motor 511.3730 is 15 Amperes, versus 5 Amperes for the standard ME236. Therefore, perhaps the golden mean would be to install an electric motor 197.3730 with a power of 60 Watts and a current consumption of 8 Amps.
The impeller of the electric motor of the UAZ Hunter heater and the height of its installation.
If you do not take into account global alterations, then there are no easily accessible alternatives to the standard impeller. The efficiency of the impeller is greatly influenced by the height of its installation on the electric motor shaft.