Fuel pump characteristics
In order to understand how a working pump works and check its operation, you need to know its characteristics:
- The rod length should be 82.4 mm.
- The rod should protrude 0.8 - 1.3 mm above the gasket.
- The thickness of the very first gasket should be 0.3 mm.
- The rod stroke is 2.5 - 2.8 mm.
Some useful tips:
Please note that on vehicles that have a return line, the problem may be caused by the vent hole being too large, as most of the pressure is released by the return line. If the pump installed on your car cannot be adjusted, it will have to be replaced
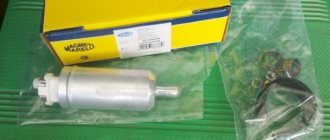
Today, the market sells a wide variety of models of pumps for VAZ from various manufacturers. Approach your purchase very responsibly so as not to purchase a fake. Choose a branded store and a reliable manufacturer. Buy only those models of fuel pumps that are recommended by the VAZ plant. The best option would be to contact an official VAZ spare parts dealer in your region. This will allow you to quickly get the part you need without worrying about it being of poor quality. This way, you don’t have to look for and buy another gasoline pump.
Edition Removing and replacing the fuel pump for VAZ 2108, 2109, 21099 injector, carburetor
Removing and replacing the fuel pump on VAZ 2108, 2109, 21099 (injector, carburetor)
Window tinting on VAZ 21099-2109-2108
Hello, from this article you will learn how to replace the fuel pump on injection and carburetor VAZ 2108, 2109, 21099. The fuel pump is usually changed if there is little pressure in the fuel system, or the pump does not pump at all fuel.
First, let's look at replacing a fuel pump on a carburetor car. In fact, in the case of a mechanical fuel pump, a situation such as pump leakage is likely, i.e. when it starts to drip, and if your fuel pump on a carburetor car starts leaking, under no circumstances drive it, gasoline will drip directly onto the hot outlet. Automotive stores sell repair kits for mechanical fuel pumps, but usually repairing a fuel pump has a short-term effect, so it is better to replace it with a new one.
https://youtube.com/watch?v=hmSz0_8zluU
How to repair a fuel pump, or is it the fuel pump itself?
Gearbox Gearbox VAZ 2108, 2109, 21099
1) First, you need to remove the fuel pump itself from the car engine. (see “Removing the fuel pump”)
2) Next, when the pump is already removed, clamp it with a vice, and at this time unscrew all six screws that secure the lower and upper pump housings.
If you don’t have a vice nearby, then perform the entire operation while holding the pump in your hands!
3) After unscrewing all the screws, separate the upper pump housing from the lower one.
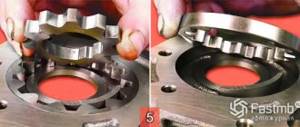
4) Then, pressing the central metal ring of the diaphragm assembly with three or four fingers, turn it clockwise 90°, and as a result, the diaphragm assembly will be removed.
5) After you have removed the diaphragm assembly, grasp it with your hand and then remove it from the lower pump housing.
After removing the diaphragm assembly, a small spring will remain on the lower pump housing, which also needs to be removed!
6) Next, visually inspect all the diaphragms of the “diaphragm assembly”; the presence of ruptures, various types of abrasions and hardening of the diaphragms is not allowed. (For clarity, the photo below shows all the components of the diaphragm assembly, and the diaphragms themselves are indicated under the number “4”)
If you find defects on at least one diaphragm, then it is recommended to replace it with a new one!
Replacing diaphragms in the diaphragm assembly of the fuel pump:
To repair the diaphragm assembly and replace the diaphragms in it, after removing it, perform the following operations with it:
1. First unscrew the top nut that secures the assembly stem.
2. After unscrewing the nut, remove the central metal ring of the diaphragm assembly.
3. Next, from the diaphragm assembly, remove the two diaphragms.
4. And then remove the inner and, together with it, the outer spacer.
5. At the very end of the operation, remove the last remaining diaphragm from the rod.
1) When reassembling, the first thing to do is check the functionality of both valves of the upper pump casing by pressing both valves lightly with a screwdriver; when pressing, there should be no jamming, the valves should work clearly, otherwise replace the valves, or upper pump housing for a new one.
The second valve is located on the other side of the pump housing!
2) Next, when you get to installing the diaphragm assembly, install it on the pump in such a way that the small protrusion that is located on the diaphragm is strictly oriented with the side of the pump, as shown in the figure:
3) Upon completion of the operation, always remember that all holes that are located in the remote gasket should be located as far as possible from the exhaust pipe of the vehicle muffler when installing the fuel pump in its place.
1) When assembling the diaphragm assembly, make sure that all the outer holes coincide with the holes on the lower pump housing!
2) Replace all metal parts of the fuel pump housing with new ones if chips and cracks appear on them!
Hello, I would like to know that my upper fuel pump housing has started to come apart at the seams, what should I do? Is it possible to drive like this?
In theory, you can drive, but it’s better to replace the upper housing of the fuel pump with a new one, because the fuel pump is the kind of thing that can cause anything to happen in the engine, including a fire!
Tell me, how important is the stroke of the pusher? I just have this situation: when the engine warms up well, the car starts to twitch and sometimes even stalls
Which pusher exactly are we talking about? If it’s about the one that is located in the heat-insulating spacer, then when fully protruding it should extend out of the spacer by 0.8-1.3 mm; if it does not reach the specified value, then everything is regulated by selecting the thickness of the outer spacer, otherwise the car will not develop full power and It may stall, depending on the engine temperature!
Correct procedure for disassembly and replacement
To remove the fuel pump, you need to perform the following sequence of actions:
- Buy a repair kit right away, its price is cheap
- Remove the air filter and its housing
- Disconnect the fuel supply and return hoses from the pump fittings
- Unscrew the nuts that secure it
- We remove it carefully, as there is a possibility of damaging the gaskets.
- Then you should inspect all the parts for cracks, check the tightness of all its valves
- Make sure that the discharge and suction fittings do not rotate in their sockets
- Diaphragms should not have peeling or ruptures
- The filter must be undamaged and absolutely clean
- Wash all its parts with gasoline and then blow them out with a compressor
- After checking, replace all damaged parts; it is recommended to change the pump gasket as well.
- When installing the gasket, apply lubricant like Litol-24 to its surface
- If the housing is damaged or the main parts are irreparably damaged, replace the pump completely
- Then you can proceed to installing it back
- In this case, immediately adjust the feed using shims
- And for this we measure the protrusion of the pusher
- Since with a strong protrusion, increased gasoline pressure will be pumped, which will easily break the carburetor shut-off valve
- In the case when the distance is lower than necessary, when the load increases and the vehicle speed increases, an insufficient amount of gasoline will flow into the carburetor
- The procedure for installing the pump is the reverse of removal.
- Also make sure that the arrow located on the body points towards the carburetor
- When installing the diaphragm unit, it is important to place the holes in its gasket away from the muffler pipe
Here we have outlined more detailed instructions for removing and disassembling the fuel pump to make it easier for you to do it yourself if a fuel pump malfunction occurs on your VAZ 21093. We conclude here, there should be no difficulties; in addition, you can, of course, watch a video lesson on this topic.
Checking the condition of the fuel pump
First, we check whether the supply system of our car is functioning normally.
We carry out the following actions:
- Remove the fuel supply hose from the initial (discharge) fitting;
- Then you need to pump some fuel there; to do this, press the hose several times;
- If a copious stream of fuel flows through the fitting, we conclude that our pump is fully operational;
- Otherwise (the stream is very weak or not noticeable at all), the pump needs repair.
Preventative actions in case of pump malfunction
- We disconnect the hose from the swallowing fitting; it turns out that both hoses are disconnected from their fittings.
- We plug the fitting with our finger and pull the lever to autonomously pump fuel. If your finger begins to get sucked inside, then this mechanism is working normally and the problem should be looked for either in the tank or in the lines. If you do not feel suction, then the fault is in the fuel supply mechanism, and you will have to completely disassemble the device.
Leak test
- Place your index finger on the injection fitting and press the automatic fuel pumping lever two to three times.
- If the system is working properly, a sharp stream of air should push your finger away from the valve; if this does not happen, then the tightness of the hose is broken.
- There are two solutions to this breakdown: you can disassemble the pump and look for a problem in it, or buy a new unit. Fortunately, you can buy it at any specialized car parts store, and the price is quite reasonable.
What to do if the filter is damaged or foreign objects get into it
- Remove the protective cover from the fuel pump and remove the filter from there. We run clean fuel through it, then blow it with compressed air. If you are the owner of a Pekar pump and its modifications, then you do not need to remove the cover, you can only unscrew the suction fitting.
- After this, we check the filter for mechanical damage; if it is significant or the main components are damaged, then repair is not enough and you will have to replace the damaged filter with a new one.
Damage to the pump diaphragm
If fuel leaks are detected on the pump parts and a fuel smell in the engine oil, it clearly indicates a diaphragm failure. However, these signs may not be present, so you should check the diaphragm anyway, just in case.
We do the following:
- We remove the upper part of the housing and remove the required unit.
- Unscrew the rod nut and remove 3 diaphragms.
- We check each of them for damage. If a faulty part is found, we replace the part.
- We assemble the diaphragms into the diaphragm assembly in the reverse order.
The Pekar pump is designed differently; it contains only one diaphragm. To dismantle it, open the outer cover and turn the diaphragm assembly exactly 90 degrees. It is advisable to check the condition of the sub-diaphragm spring; to do this, remove the upper part of the housing and remove the diaphragm. If you find that the spring is inoperative (that is, deformed or simply broken), be sure to replace it.
Problem with the intake or exhaust valve
- Remove the lid and take out the mesh filter.
- Visually assess the condition of the internal cavity of the pump and valves.
- If a leak is detected in at least one of the valves, it is worth replacing the entire pump, otherwise the efficiency of the car will drop significantly, and accordingly it will consume more fuel.
- If the valves are clogged, you can blow out the housing with a stream of compressed air.
Pusher failure
Often the cause of poor car performance is a faulty pusher; in this case, an experienced driver always has special instructions prepared:
- We remove the pump along with the stud, but first unscrew the nuts.
- We manually turn the crankshaft so that the pusher is in the maximum extended position.
- We measure the distance from the top point of the pusher to the gasket. The optimal value for this indicator is 0.8-1.2 millimeters. We adjust the protrusion to this value by laying a spacer of a suitable height. As a rule, spare gaskets are found in repair kits, although it is not difficult to make them yourself. To make it, you only need a small piece of paronite.
Checking the fuel pump of a carburetor car (mechanical)
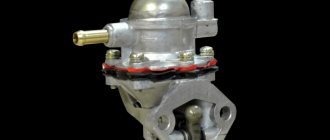
Mechanical fuel pump - diagram
To check the operation of the fuel pump, you should:
- Remove the fuel hose from the carburetor inlet fitting.
- Immerse the hose in a specially prepared transparent bottle. By actively using the pumping lever manually, we notice how strong and dense the fuel is supplied. Air impurities should not be visually noticeable.
Read more: Homemade motorcycle panniers
Delayed jet output is not a sign of a breakdown, especially if the car has been parked for a long time. As a rule, diaphragms eight and nine are the main cause of malfunction.
Be that as it may, you need to inspect both the strainer and the inlet/outlet valve.
Even if the gaskets are replaced, fuel may leak. In this case, the problem lies in the tightness of the fuel pump housing due to deformation during repairs.
Let's summarize:
The causes of fuel pump problems, both electrical and mechanical, are varied, and the need to find/fix a breakdown may take you by surprise along the way. By following the above recommendations, you will be able to independently carry out the entire necessary set of measures to diagnose this device. And you should start with the power supply (if it is an electric fuel pump) and the operation of the diaphragm when checking a mechanical fuel pump. Very often, the unstable operation of a fuel pump is not due to its breakdown, but to related parts - a filter, check valve or injectors.
When considering the fuel system, you should definitely mention the VAZ 2109 injector fuel pump. The injection system consists of several components, which are basic. On our website you can also find information for newer VAZ models, for example, 2110. Nines are also equipped with electric fuel pumps that supply gasoline under a certain pressure to the ramp. Moreover, the pressure must be constant, otherwise the operation of the engine will be unstable. So, what is the injection nine fuel pump and how does it work.
Replacing the fuel pump VAZ injector
If the fuel pump malfunctions, the car idles unstably, does not develop full power, the engine sneezes when trying to start, but does not start, or starts for a couple of seconds, but immediately stalls when you press the gas. In general, there is a shortage of fuel. If the fuel pump fails, then the car will not be able to start.
To do this, we put an oil and petrol resistant hose (internal diameter 12 mm) onto the threaded fitting of the pressure gauge and secure it with a clamp. Unscrew the fitting plug on the ramp. Using the wheel valve cap, unscrew the spool valve from the ramp fitting, gradually releasing the fuel pressure.
We take out the spool. We put the pressure gauge hose on the ramp fitting and secure it with a clamp.
Let's start the engine. When idling, the fuel pressure should be 2.8 - 3.2 bar. Remove the vacuum hose from the fuel pressure regulator. The pressure should increase by 0.2 - 0.7 bar. If it does not increase, then the pressure regulator must be replaced.
VAZ fuel injection vehicles use submersible electric fuel pumps. The replacement method is practically the same for all injection VAZ cars. Therefore, the replacement will be considered using the example of the VAZ Kalina.
Remove the rear seat cushion. Under it, in the central part, there is an access hatch to the fuel module (the fuel pump is part of this module). Unscrew the screws securing the cover and remove it.
Disconnect the wiring harness from the fuel module. Next, let's relieve the pressure in the power system. To do this, start the car and let it run until the fuel is completely exhausted from the line (the car should stall). Then use the starter to crank the engine for three seconds. The pressure has been released and disassembly can continue.
Disconnect the tips of the fuel pipes. To do this, you need to press the spring clamps. In earlier models, it is necessary to unscrew the fitting (key 17).
We press the screwdriver against the protrusion of the pressure ring, so that the slot of the screwdriver simultaneously fits into the recess of the fuel tank flange. We turn the ring counterclockwise, moving the screwdriver to other protrusions. And remove the pressure ring. In earlier models, the clamping ring is secured with nuts. And to remove it you need to unscrew eight nuts (spanner 7).
Remove the fuel module from the tank. Remove the rubber gasket. We close the hole in the fuel tank to prevent foreign objects from getting into the tank.
To do this, disconnect the wiring block from the connector of the cover and the fuel pump (you need to press the latch).
For ease of disassembly, remove the fuel level indicator sensor. To do this, release the two latches of the fuel level indicator and move the sensor along the grooves of the housing towards the cover. We remove the sensor.
Use a screwdriver to pry up the drain tube and separate it from the body.
We press out the four housing latches one by one and remove the module cover along with the fuel pump.
Use a screwdriver to pry it off and remove the strainer. Remove the lock washer from the strainer mounting hole.
Using a screwdriver, press the plastic latch and use your finger to push the fuel pump out of the holder.
We remove the plastic corrugated tube from the pump nozzle; it can be heated over a container of boiling water to make removal easier.
When installing the strainer, pay attention to the condition of the lock washer. If it is dented, it needs to be straightened or replaced.
When installing the fuel module into the tank, the arrow on the module should point towards the trunk.
Before installing the hatch, start the engine and make sure that the connection of the fuel pipes is tight.
Tools required to replace the fuel pump: Phillips and slotted screwdrivers, for early models - 17, 7 keys.
how to replace it yourself
Fuel pump "nine"
Probably all owners of domestic cars have encountered a situation where the car cannot be started after some inactivity. The battery is working properly, the starter vigorously cranks the crankshaft, but the engine does not want to start.
This can happen for 2 main reasons: either there is no spark, which means that the ignition system does not work, or the combustible mixture is not supplied and, accordingly, the engine power system does not work.
We will talk about malfunctions of the fuel supply system. Let's consider a situation when the engine does not start because the VAZ 2108-15 fuel pump does not work. We will also learn how to replace the fuel pump of a VAZ 21099 car with your own hands.
Malfunctions, removal and repair of a mechanical fuel pump
On VAZ 21099 cars, the carburetor was equipped with mechanical diaphragm-type fuel pumps by the manufacturer. The main malfunctions of this type of pump are associated with rupture of diaphragms, breakage of the rod, spring and depressurization of valves.
The main advantage of mechanical fuel pumps is that they are easy to repair. If any element fails, you can buy a domestic repair kit at the nearest spare parts store and replace all faulty parts within an hour. The fuel pump on VAZ 2108-99 cars with a carburetor fuel supply system is located in the engine compartment, in the same place where the ignition distributor is located.
Removing the mechanical fuel pump.
First, open the hood and remove the negative terminal from the battery.
Then loosen the clamps and disconnect the fuel hoses from the pump connections. After this, unscrew the 2 nuts securing the fuel pump and, carefully, so as not to damage the gaskets, remove it.
Pump device
Now it needs to be disassembled.
Unscrew the bolt on the top of the pump cover and remove it along with the strainer. Unscrew the 6 screws and separate the upper and lower parts of the case. Carefully remove the diaphragms along with the spring and rod, turning them 90°.
After disassembly, it is necessary to carefully inspect all parts and replace damaged ones. Reassemble and install the pump in reverse order.
Electrical faults and replacement
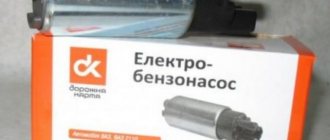
Submersible electric fuel pumps were installed by the manufacturer on VAZ 21099 injector cars. Unlike their mechanical counterparts, these units are not dismountable, so they cannot be repaired. Mostly, such fuel pumps break down due to overheating and the use of low-quality fuel. In addition, very often faults arise not in the unit itself, but in its wiring.
If the electric fuel pump on your car hums and stops pumping fuel, you first need to check the serviceability of the electrics. Perhaps the wiring has shorted, the fuel pump relay has broken, or the fuse has simply blown. If the electrical is OK, the fuel filter needs to be replaced. If this does not help, then you need to change the pump itself. Please note that the VAZ 2108-15 electric fuel pump is located in the fuel tank, so to replace it you will have to crawl under the car.
The procedure is as follows.
- First, drive the car onto a pit or lift.
- Then remove the negative terminal from the battery.
- Then remove the back seat and find the place where the inspection hatch is located. Unscrew the screws securing its cover and move it to the side.
- Disconnect all wiring terminals from the fuel pump and fuel sensor.
- Unscrew the nut securing the fuel supply pipe and move the pipe itself to the side.
- Find the drain pipe fitting under the bottom and unscrew it.
- Next, remove the gas tank.
- Unscrew the fuel line tip nut and disconnect it from the fuel pump.
- Unscrew all fastening nuts, remove the sealing ring and remove the electric fuel pump together with the storage cup from the fuel tank.
Reassembly must be done in reverse order.
Note: to prevent gasoline from spilling out of the fuel lines, after the 4th operation you can connect the battery and start the engine. After 4-5 minutes, the engine will exhaust all the gasoline remaining in the system.
Checking the serviceability of the fuel pump on the injector
When, when you turn the ignition key, you hear a slight buzzing, a slight hum, this is how the fuel pump works, pumping gasoline creates pressure in the system. If, when you try to start, there are no such signs of the fuel pump working, then you can assume a malfunction of the electrics, the pump itself or its individual parts. Therefore, let’s look at how you can check the operation of a gas pump using a step-by-step logical chain. Starting from whether power is supplied to the fuel pump and ending with whether the fuel pump pumps at all, and if so, what pressure is created in the fuel rail.
Step 1: Checking the fuse
Checking the fuel pump fuse involves inspecting the integrity of the conductive plate and, if broken, replacing it. But if there is no new fuse, then wind one strand of copper wire around the fuse contacts. If it burns out again, it means the problem may be in the wiring.
Stage 2: Checking the relay
To check the fuel pump relay, remove it from the socket and connect a 12 volt light bulb according to the diagram. If the light bulb works, the relay itself is also working properly. An alternative is to use a multimeter in ohmmeter mode to measure the resistance of the relay coil winding. One probe is connected to terminal 85, and the other to 86. The device will show a break if the relay has failed.
Make sure that the terminals are not oxidized - this will negatively affect the power supply to the fuel pump engine!
Stage 3. Checking the power supply to the BN
Checking the fuel pump voltage is done using a multimeter . The probes of the measuring device in voltmeter (from 0-20 volts) must be connected to the power terminals of the fuel pump. Turn on the ignition and take readings on the device. 12-12.5 volts is normal operating voltage. If there is voltage, but the pump does not work, check the electric motor.
Stage 4. Checking the fuel pump motor
To prevent damage to the electric motor, we supply 12 volts directly from the battery to the fuel pump terminals. It works - we check its performance, check valve, measure the pressure with a pressure gauge. If it doesn’t work, check the coil for a break.
When voltage is applied to the terminals of the gasoline pump, does it not work? Let's check the stator winding: take a tester (multimeter) and switch it to ohmmeter mode, it should show resistance, otherwise there is a problem with the winding and it needs to be replaced. If there is a resistance reading, the problem may be that there is a short winding on the fuel pump body. The tester probe goes to the positive terminal, the second one goes to the body. If it shorts, there will be no break.
Read more: Toyota Estima owner reviews cons
Step 5. Checking the coarse filter
By removing the coarse filter (see vehicle technical documentation) from the fuel pump, you can even visually determine how dirty it is. If there is a large amount of deposits, it is recommended to replace the filters; if the problem occurs on the road, use a brush and gasoline to clean it.
Step 6: Check the check valve
The check valve must constantly prevent the movement of liquid in the opposite direction. During operation, its performance decreases, which reduces its technical characteristics.
1 way . Checking the check valve involves measuring the pressure with a pressure gauge. It needs to be connected to that part of the system that is directly involved in supplying fuel to the internal combustion engine. Pressure readings should not exceed 3 kg/sq.m. see (true for passenger cars). And when the engine is stopped, the pressure should not drop sharply.
Checking and cleaning the check valve
Method 2 . To check the operation of the fuel pump check valve without a pressure gauge, you need to clamp the return line and watch how the engine operates. If the check valve is faulty, the internal combustion engine will operate at higher speeds (provided there are no other problems).
3 way . Combines diagnostics and cleaning of the check valve at the same time. Remove and inspect it—clogging that requires cleaning can be seen with the naked eye. You can blow out the valve with a dense stream of air, but it is better to pass water through it under pressure. This way you combine checking the valve with cleaning it. If after this the valve does not work, it needs to be replaced.
Step 7. Pressure check
In order for diagnostics to correctly determine pressure readings, you need to reset the initial fuel pressure by turning off the fuel pump fuse.
Checking with a pressure gauge how the fuel pump pumps
How to check a fuel pump with a pressure gauge
You can check the fuel pump with a pressure gauge for serviceability as follows: connect the device to the fuel rail. The output is through the edge of the hood onto the windshield, where we install the device securely.
We record measurements in:
Static position . Turn the ignition key and look at the pressure gauge readings, they should not exceed 3.7 atm .
Dynamics . We turn on third gear (speed about 50 km/h), observing the pressure gauge data. When driving, if the problem is pressure, the readings will be either below 3 atm. , or above 3.7 atm .
Low pressure in the fuel system may be due to a fuel leak. The passage of fuel will show a decrease in pressure below 1.6 atm. Fault location: injector or fuel regulator.
It should be noted that, despite all the similarities (principle of operation, purpose), the methods for diagnosing a mechanical fuel pump differ, and in what way we will consider in more detail below.
