Preparation
Many craftsmen advise removing the dashboard before painting. When dismantling, disconnect the negative terminal of the battery, put the car on the handbrake, and remove the screws. Then comes the disconnection of the wires, removal of decorative parts and the steering wheel. The panel is carefully processed; the design must match the material of the torpedo. Wash it with soapy water. Then degrease with acetone or another substance. Then the plastic is sanded with fine sandpaper and treated with a special primer for plastic. Then they degrease again.
https://youtu.be/-pxoXOWbi9Q
How to profitably exchange a used car
To guarantee the legality of the used car exchange service and its objective cost, the purchase and sale process should be carried out at a trusted auto center. Here the client will be offered:
- Diagnostics of the old model, on the basis of which its cost will be determined;
- Selection of cars for exchange, completely new or with a clean mileage history: all cars undergo forensic examination, therefore the car dealership will never sell a car with a “dark past”;
- Legal support of the transaction: the client enters into a notarized agreement and, if necessary, can use the credit services of the car dealership’s partner bank;
- Efficiency of the service: the client does not need to look for buyers for his vehicle; he does not need to settle issues with the traffic police or the bank. The listed functions are the task of the auto center.
Read here! Bumper painting
Thus, with minimal documents, it is possible to buy an improved car within one to three days. The used car exchange service makes it possible to regularly change the owner’s vehicle fleet by purchasing its best models.
Painting with liquid rubber
Before starting work, it is necessary to either dismantle the front panel or seal the non-paintable areas with tape. The method of painting with liquid rubber has not been thoroughly studied, and reviews from drivers are contradictory. Some complain that the gloss goes away quickly, others say that this coating is not reliable, it is easy to scratch and tear off. Still others complain that when they try to paint again, it is impossible to remove this rubber in some places. Liquid rubber is sold in aerosol cans, usually 400 milliliters each. The price ranges from 600 to 800 rubles. The application of a layer of rubber is carried out in 3 - 4 passes, allowing each layer to harden first.
Rubber paint has a number of advantages and disadvantages:
- The surface is pleasant to the touch. Slightly rough - the rubber surface has a positive effect on a person when touched.
- There are no sun glares.
- The paint dries quickly.
- Moisture resistant.
- No smell.
- No seams or bubbles.
- There is no cracking from panel bending.
Liquid vinyl treatment
Liquid vinyl is a modern product that is successfully used for painting car parts. A thin layer of this coating decorates and protects many suitable surfaces well. This is a high-tech product of excellent quality. Treatment with liquid vinyl will increase the resistance of the panel to the influence of bright rays of the Sun, ice, frost or other harmful compounds. The beauty of this substance is that after prolonged use it comes off easily. And this fact does not reduce its strength qualities.
Painting with liquid vinyl is a simple and understandable procedure for everyone. The processed part will become matte and clean. Liquid vinyl is usually sold in cans. Before use, you need to shake it, it is advisable to do this for at least a minute. The paint and solvent must mix well. Do not touch liquid vinyl until it is completely dry. Otherwise there will be stains.
The process takes place in several stages. The initial level is connecting. They try to make it translucent. This makes it possible to bond the paint to subsequent levels. The first layer will dry for about 30 minutes, this time must be maintained. The number of layers applied depends on you. The more there are, the more durable the coating will be. The recommended quantity is five. Distance from the can to the torpedo: 7 - 9 centimeters. If you did not dismantle the torpedo and sealed parts that were not to be painted, remove the tape and protective material immediately after painting, before the vinyl hardens. The complete drying time for vinyl is 3.5 hours. All this time it is necessary to protect the drying surface from dust and other bodies.
Preparing plastic for painting
Painting the plastic interior of a car yourself requires a number of manipulations. This is interesting: how to paint a torpedo. To perform the work you need tools and materials:
- pliers, tweezers for removing plastic coating;
- protective paper, tape if parts cannot be removed;
- degreaser;
- sandpaper, scotch-brite;
- putty, primer, paint;
- spray gun, if necessary;
- antistatic, urethane varnish;
- gloves, respirator.
Comprehensive preliminary activities:
- Cleaning. Removing the lubricant used in separating the finished plastic part from the mold. Wash with car shampoo in hot water with a brush (sponge).
- Degreasing. It is better to use branded anti-silicone products, since classic solvents (white alcohol, solvent) can damage the plastic part.
- Grinding. It is carried out in any convenient way (dry, wet) using red Scotch-Brite for soft material, gray for hard plastic, or P300-P400 sandpaper. Finally, degrease the surface.
- Padding. First of all, we inspect the surface for cracks and scratches. If they are not there, then you don’t have to prime them. Otherwise, the damaged coatings are puttied (putties for plastic are used), sanded again, and then primed. It is better to use an aerosol can and apply a thin layer. In rare cases where the base is severely damaged, a second primer coat may be applied.
Remember! After applying the composition, professionals advise starting painting within 10-20 minutes, as during this period good adhesion is maintained.
For painting, all plastic elements are removed from the car.
Carefully sanded and primed Please note: How to paint stamped wheels
Painting of domestic models
The technique for painting the dashboard of a VAZ car is no different from other cars. The surface is first cleaned of dust and dirt, then treated with soft sandpaper. Primer treatment is required before degreasing. The main thing when spraying is to avoid smudges. This is controlled and achieved by maintaining the correct distance. Before starting the process, shake the can. Plastic is painted in three or four layers. The intervals between visits are from 12 to 25 minutes. Then the panel must dry for more than 10 hours. Then varnish is applied. The number of layers is at your discretion (3 or 4). Downtime between visits is no more than 15 minutes. After complete drying, the panel is put back.
Instructions for painting plastic in a car
The plastic element of the car that requires painting can be new or dismantled old. We recommend an article about painting a car dashboard. Moreover, the painting procedure will be different depending on whether this element is primed. First, it’s worth presenting the stages of painting a part without a primer layer.
Pay attention to: How long before you can wash your car after painting, and how to do it correctly to avoid damage to the paint layer
Working with plastic without primer
Before you begin painting, the surface must be prepared. The stages will be as follows:
- Washing. For work you will need: a container of hot water, car shampoo and a brush (an alternative is a sponge, rag). Washing is necessary in order to get rid of the lubricant that is used to separate the finished part from the mold.
- Evaporation. It involves heating the part in a chamber for half an hour at a temperature of 60 °C, followed by degreasing the surface. It is difficult to carry out such a procedure in a garage, so it is better to immediately purchase primed plastic elements of the car. You can skip the evaporation procedure.
- Degreasing. Involves the use of branded products that also provide an antistatic effect. The part with the static charge removed is less likely to adhere to adhesion-reducing dust. White spirit is also used for degreasing.
- Grinding. The abrasive materials used are P300-P400 sandpaper, red or gray Scotch-Brite (for hard and soft plastic, respectively). Plastic can be sanded dry or using water (“wet” sanding). After treatment, the surface must be degreased again.
- Padding. A responsible procedure that solves the adhesion problem. Plastic primer (primer) is used for initial processing of the material. It should be applied in a thin layer, for which it is better to use an aerosol can. An important nuance is that the treated surface retains good adhesion for 15-20 minutes. Therefore, painting should begin without delay.
Primer for plastic
Technology when working with a primed part
Before painting, it is necessary to evaluate the quality of the primer applied to the plastic. To do this, apply a cloth soaked in solvent to the surface for two minutes. A softened coating is a sign of a poor primer, which must be removed with fine-grained sandpaper or Scotch-Brite before painting. If the coating remains unchanged, then the process looks like this: degreasing, matting, re-degreasing, painting. Damaged primed surfaces are sanded, puttied (putties for plastic are used), sanded again, then primed. The roughness of the abrasive for processing should not exceed P180.
Surface cleaning
Staining procedure
When the surface is completely prepared for painting, the most critical stage begins. Mistakes will negate all previous steps (paint drips, for example, will not make the part aesthetically pleasing). At home, using a spray gun is not always convenient, so it is better to use spray cans or an ordinary brush. The room in which work is carried out must be ventilated. Paint for plastic is applied in an even, thin layer so that no drips form. The surface needs to be treated with 2-3 layers. The interval does not exceed 25 minutes. When spraying paintwork from a can, the distance to the part should be 20-30 cm. The varnish gives the surface a glossy tint and enhances protection from subsequent exposure. Upon completion of the work, the part is left to dry naturally. When using acrylic paints on plastic for cars, it is important to add a plasticizer to the composition. Without it, the coating will not cope with the bending load and will become covered with cracks. Add a plasticizer in accordance with the manufacturer's instructions. The drying time of paint with additives increases. Adhesion reaches normal levels after a few days. It is better not to pressure wash painted plastic for a month.
Parts dry after painting
Adviсe
You should think carefully when choosing paint. Then changing the tone will be problematic. Matte black paint is often used. A light-colored car can be updated by painting the dashboard white with a light green, purple or blue tint. These are the most popular options. It is not advisable to experiment with flashy colors. It will look provocative and interfere with driving. The dye has a description that must be strictly followed.
It is advisable to start work with small, ordinary parts. This way you can practice. It is advisable to paint the less visible parts first. And then move on to the center console and climate control panel. For sanding, sandpaper sizes No. 60 and No. 80 are useful. And after the primer has dried, use sandpaper No. 80 and No. 90. The process can be repeated until the perfect surface is achieved.
Priming the torpedo
Primer on plastic.
The application of paintwork begins with priming. This improves paint adhesion and smoothes the surface. To treat torpedoes, they use compounds supplied in cans. A standard bottle is enough to apply 2-3 layers of primer. The product is applied taking into account the recommendations presented in the instructions.
Pay attention to: Painting car wheels: selection of composition and processing nuances
Spray the composition from a distance of 20-25 cm. A new layer of primer is applied only after the previous one has dried. After completion of the work, the surface is inspected for smudges. Defects are removed with a napkin.
Price
The pricing policy for car panel painting is determined based on a number of indicators. The cost of paint, the complexity of the work, possible repairs during painting work, and the responsibility when painting luxury cars are taken into account. In monetary terms, everything starts from 1500 rubles and above. If there is competition, there is not much difference - a provincial town or a metropolitan car service center.
Hello everyone dear friends and readers
I haven’t written anything for a long time, I didn’t have time, but I finally got around to doing what I’ve been wanting to do for a long time, namely, paint the torpedo in “Ultramarine” color. I took the paint and primer at work)))) as usual, I take everything. Well, what can I tell you about painting: we disassemble the panel, first clean all the parts that need to be painted, then degrease, prime and apply the paint layer by layer, I didn’t need varnish since this paint is not covered with varnish. The painting did not take place in one day. I painted my beard on the balcony because the weather initially did not allow me to do this due to the cold weather, a week later, that is, today I painted everything else - the upper and lower glove box, plus the soap dishes for the door handles. I am very pleased with the result, the paint applied perfectly, when you open the door and the sun enters the interior, everything glitters and shimmers, it’s a pity that it’s hard to see on the camera. Now the next thing is to improve the acoustics, but that's a completely different story)))))
Good luck to everyone))) and the implementation of your plans))))) don’t forget to evaluate)))
Car interior painting technology. Step-by-step instruction.
To paraphrase the classic, everything in a car should be perfect - the body, the chassis, the engine, and the interior. And this is correct, because when, in pursuit of external gloss, we miss the inner content, we lose harmony. And driving in an inharmonious car is somehow not so pleasant. We took the first step towards this harmony by considering options for restoring the paintwork of the body, protecting it and, let’s say, increasing the level of its exclusivity.
When it comes to painting the car interior with your own hands, there are some nuances here. This requires significantly more preparation than painting the exterior of a car. The ideal option is when this work is performed in a specially equipped paint booth, where there is no access to dust and dirt, but in reality, most often you have to do this in your garage. And if when painting the outside of a car the geometry of the space is not very different from the case when the car is simply stored in this garage, then when painting the interior this is very different.
Firstly, all the parts that need to be painted will have to be removed, since they often overlap each other, making it impossible to reach with a brush. There is nowhere to put them inside the machine for painting and drying, and they take up a significant amount of space.
This means that we need to provide a place for this somewhere outside the car.
Secondly, painting the plastic interior of a car is not everything. Plastic parts are attached to metal parts, and by removing the plastic, you can discover pockets of metal corrosion hidden underneath. Naturally, they must be eliminated before work can continue.
Thirdly, disassembling the interior is quite a long and painstaking work; modern cars are distinguished by an abundance of a wide variety of ways to attach trim elements to the body, and this is often done in a non-obvious way; the attachment points (both plastic and metal) may be damaged during previous disassemblies, and, accordingly, require replacement, and it would also be very good not to lose or mix up all these fasteners during the time that the painted parts will dry...
If you don’t feel enthusiastic enough to do it from start to finish, it’s better not to start, entrust this work to professionals. Although, of course, you will have to pay a lot of money for this.
Tools and materials
If you decide, you will need to prepare everything you need in advance:
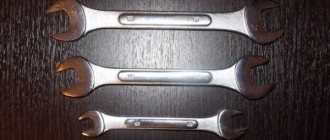
- Tools for disassembling the interior - screwdrivers, wrenches, pullers, etc. All this should be at hand; there is nothing worse than looking for the right screwdriver when the interior is already half disassembled.
- Sander. You can, of course, sand the parts by hand, but this is time-consuming, tedious and can give an uneven result.
- Spray gun. The main tool for painting, it requires a compressor.
- Primer. The quality of adhesion of paint to the base depends on the primer, so there is no single primer suitable for all cases. Different base plastics, different composition and quality of paints - choose a primer based on your realities and the manufacturer’s recommendations. As a universal piece of advice, we can consider the recommendation to choose primer and paint from the same manufacturer - they are tested for compatibility, so the paint will not come off from such a primer at the most inopportune moment.
- Paint for painting car interiors. You can take paints of the same colors that have already been used to paint the interior parts, but if you are not happy with a certain color, nothing prevents you from replacing it, and now is the time to think about what exactly. It is desirable that this color is not only pleasant to you in itself, but also goes well with the colors of the other elements of the interior. In addition, take into account the psychological impact of color: red, of course, is a beautiful color, but on a long trip it greatly tires your eyesight. Dark colors have a somewhat depressing effect, too bright colors are irritating; it is not without reason that manufacturers decorate car interiors in soothing colors en masse.
- Varnish. It is needed to cover the most “loaded” parts - especially those that constantly come into contact with fingers, elbows, etc. It is better to choose a two-component urethane-based varnish; it is biologically neutral and quite durable, which is important for the interior.
- Solvent. It will be needed to degrease surfaces, and here it is important to choose an option that will not damage these same surfaces. Acetone dissolves some plastics, and, say, white spirit is less aggressive. Of course, when finishing the interior, manufacturers try to use durable materials, but it doesn’t hurt to be on the safe side. As a last resort, you can try the solvent on a small area - if anything, you can sand it and putty it, but you will know what to use to wipe this plastic.
- Gel plasticizer. It is difficult to choose it on your own; it is better to consult a professional. In general, the grain size should match the external texture of the plastic.
Related article: Car transition painting technology
Preparing for painting
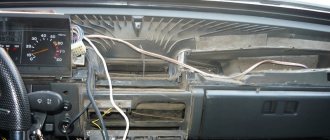
As already noted, painting car interior elements begins with their dismantling. It is necessary to remove the rubber seals where they are, disconnect the connectors of the interior electrical equipment (and somehow mark which one connects where), and remove the debris that inevitably accumulates under the parts during operation. Then we examine the metal parts hidden by the plastic for rust, and if there is any, we remove it.
To do this, the corrosion areas must be sanded down to metal, treated with a rust converter and covered with at least primer, or better yet, painted for greater corrosion resistance in the future.
Now we carefully degrease the surfaces intended for painting, for which we take a lint-free cloth, moisten it with a solvent, and carefully wipe it.
The next operation is to putty the uneven surfaces. Some defects may need to be puttied in several layers, with the next layer applied only after the previous one has dried. If after this the surface still remains uneven, sand it with fine (P1500-2000) sandpaper.
We paint
And now the actual painting of the car interior parts begins.
Parts that are not subject to constant contact with fingers or other objects that damage the surface are painted quite simply. The first layer of paint is made a little more liquid (the paint is diluted with a solvent 1:4, and not 1:3, as for the next layer). After the first layer dries, unrepaired defects become visible. We apply the final putty to the surface and cover it with a second layer of paint. Naturally, each time observing the temperature regime recommended by the manufacturer of paints and varnishes and the drying time of each layer (it may differ not only for different materials, but also, for example, for the same paint diluted in different proportions).
For parts that are in constant contact, the technology will be a little more complicated. Here we just need a gel plasticizer, which must be applied to the surface in two or three layers, depending on its condition. We wait until the plasticizer dries and apply the first layer of paint. Let it sit for about 15 minutes, and then apply the second layer. After this, we apply a layer of varnish, again focusing on the time indicated on the packaging of the materials used. The fact is that you cannot apply varnish to completely wet paint - the coating will be damaged and will have to be redone. It is also almost useless to apply varnish to completely dry paint - it will adhere less well and will quickly peel off. Therefore, the manufacturer’s recommendations must be followed here as well. By the way, if they do not seem very clear to you (and this sometimes happens when translating instructions from other languages), do not hesitate to ask specialists whom you trust. It won’t be worse for sure, and it will help save energy and time.
Related article: How to remove old paint from a car. Three options for solving the problem.
Well, all the plastic parts are painted, varnished and dried. All that remains is to install them in place - and off you go!
Comprehensive modernization of the VAZ-2114 instrument panel: first steps
Most often, a set of works to improve the dashboard of a VAZ 2114 is important and necessary, but at the same time, an interesting and serious task. The main task is to choose the right details and decorate them beautifully. It is always better to think through all actions related to various updates in advance, in advance.
Subsequently, this will avoid unnecessary mistakes and disturbing fuss. The right decision would be to draw up a work plan that you will follow and thanks to which you will not make mistakes, and the whole process will be a complete pleasure for you.
Preparation for restoration work
Before starting work, you need to prepare the tools and materials that may be required to repair the torpedo.
Preparatory stage of work.
These include:
- degreasing composition used to prepare the surface for painting;
- detergent to remove dirt;
- a set of screwdrivers with different attachments;
- several types of sandpaper;
- coloring composition;
- primer for plastic surfaces;
- varnish;
- abrasive paste for polishing varnish.
You also need to prepare the room in which the dashboard repair will be carried out. The box must be free of debris and dirt.
It is necessary to maintain a uniform temperature specified in the instructions for use of the paint product. To obtain good lighting, install additional lamps. This will allow you to detect and eliminate minor defects in time.
Pay attention to: How to prepare your car for painting yourself
Tuning the dashboard can be performed in the following sequence:
- First you need to disassemble the car “device”. Every car enthusiast should know how to remove the instrument panel of a VAZ 2114. There is nothing complicated here, everything is quite clear, and the process itself does not require special skills or knowledge.
- Then it is necessary to refine the elements and parts. There can always be many nuances here. They depend on what you want to change and improve in your car. Everything should be thought through very carefully.
- At the end, you need to install the remade, updated “socket” into place.
How to easily update the “tidy” of a VAZ 2114
Upgrading the 2114's dashboard is actually not as complicated as it might seem at first. Buying such a “device” is quite simple. You should consider what options owners can use to update their VAZ 2114 wardrobe (examples in photos and videos).
1. AMS. This model has several features.
- To begin with, it is worth noting that you can order its design yourself;
- This panel is equipped with an integrated oil indicator, which is missing in the classic version. Its appearance is associated with the very persistent requests of many car enthusiasts to install this “component” as standard.
- This instrument panel looks more interesting due to the colored scales with chrome trim.
2. PRO-SPORT. This “tidy” is designed as an overlay for the instrument panel on the presented model. The updated design of this device gives them an impressive, completely new look. There are two options for its execution: with a light and dark backing. The backlight of the VAZ 2114 panel has a special brightness adjustment, but there is only one color - blue. The scales are glued after installing the insert. This is to give this element of the car an original look.
3. AMS-2. The central instrument was the tachometer, which was moved from left to center. The white scales create an overall sporty look for the entire panel. This allows you to quickly read the necessary information from it. The backlight has been redesigned and LEDs are used, with the help of which it is not difficult to read information at night. Installation is recommended to be carried out by qualified specialists, since its installation involves significant “redevelopment” of the classic model.
4. STREET STORM. The main feature of this model is its color design. Nothing was changed in the classic arrangement of instruments,
the emphasis was on the color scheme. The “appearance” of the dashboard has undergone certain changes, however, at the same time, its style fits harmoniously into the existing interior. Another feature of this model should be noted – its backlight. During the day it is light with red symbols. In the dark, you can easily change not only the brightness, but also the color.
Tuning for your pleasure
The main thing in the process of modernizing any car is efficiency. Every owner would like his car to look original and, at the same time, to feel comfortable in it. Oddly enough, the instrument panel is considered one of the favorite parts for tuning enthusiasts. It can be modified in different ways and, thus, distinguish your own car from a huge number of similar machines.
At the starting stage, it is necessary to prepare the material for work. Replacing a VAZ 2114 panel or its original update requires dismantling the standard panel. It will only be necessary to remove the speedometer protective glass. It is important not to break it. After removing the protective glass, you need to “uninstall” the arrows and indicators.
It is important to be careful as the arrows are very fragile. After that, pull out the standard tab. Then you need to change the backlight bulbs. The standard ones were green, but the purchased ones will be blue. We replace standard light bulbs with purchased ones, then check how they work. After that, install a new tab.
All this will look very impressive. At the end we install directional arrows and protective glass. If you modify your car in this way, it will look very beautiful.
419c7cu-960.jpg
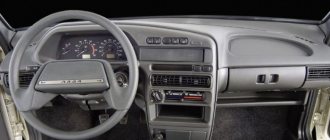
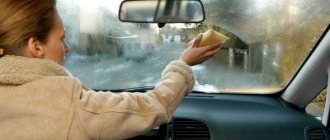
To begin with, the question arises: what is it good for? The old panel was made, to put it mildly, quickly: the steering wheel covers part of the instruments, the “tidy” itself is reflected on the windshield at night, thus turning the road into a computer quest.
Plastic, or rather its quality, does not stand up to criticism. After traveling several hundred kilometers, the entire cabin is filled with an obsessive creaking and terrible roar. Later the glove compartment begins to open. Ventilation is poor and it is cold inside the car in winter. However, all these problems can be solved. However, is it worth buying a car and immediately thinking about repairing it?
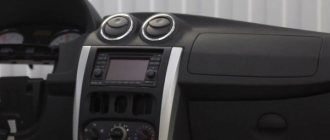
Another thing is the Europanel. She looks modern and fashionable. The material is softer and richer. It is certainly less noisy. Ventilation is also good.
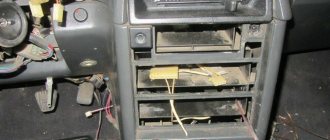
Domestic assembly can be felt everywhere. The air flow control levers move slowly and do not reach the edges of the slots. There are also other little things: there is a big gap somewhere, something else falls off, the glove compartment sometimes opens by itself. But in terms of quantity and frequency, this is completely incomparable with the old version.
In addition, several drawers for small items warm the soul. Europanel is a modern and original solution to many problems associated with the “tidy” of domestic cars.