Brake pads are the most important operating component of the braking system, operating under constant extreme loads. When braking a car, the front brake pads experience a large load because they take on the impulse of the car's movement. Therefore, the front pads have to be changed more often than the rear ones, about 3 times. Anyone can replace brake pads themselves at home, be it front disc or rear drum brakes, and will also save money.
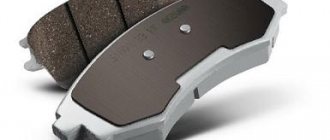
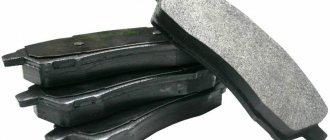
The technology for replacing pads in disc brakes on all models is almost identical, however, on some cars it has its own nuances and depends on the device and type of brake mechanism. Structurally, a brake pad is a metal plate with a friction lining that comes into contact with the brake disc. During operation, the piston of the brake cylinder presses against the pad, causing friction between the friction lining and the brake disc, causing the car to slow down.
Changing the front brake pads will not be difficult and even a novice car enthusiast who does not have such experience can do it. The main thing is to follow the safety rules and recommendations given below, as well as have a minimum set of tools.
When to change brake pads
There is no need to delay servicing the brake system. Brake pads gradually and inevitably wear out, and failure to replace them on time can cost you and those around you your life. There are several ways to know when it's time to change your pads.
Modern disc brakes are equipped with sensors and wear indicators that are attached to the pad. Sensors can be electronic or mechanical. It is essentially a piece of metal that, as the pad wears, will begin to contact the brake rotor and make a loud grinding noise (squeaking sound) or turn on the parking brake light on the dashboard (electronic). Such a grinding noise during braking, and indeed any extraneous strong sound, serves as a signal to inspect the car’s braking system.
On some models, the parking brake light comes on when the level in the brake fluid reservoir drops. This may indicate that the brake pads are worn to a critical level and must be replaced.
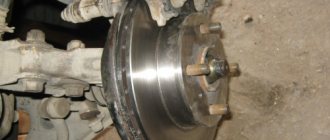
You can also remove the wheel and visually determine the degree of wear of the brake pads. The minimum permissible thickness of the friction lining is 1.5 mm. If there are deep grooves and chips on the surface of the lining, or oiliness, then such pads must be replaced. Sometimes, brake pad manufacturers provide information on the service life of friction linings. Recommendations on the frequency of replacing brake pads can be found in the owner's manual for a particular brand of vehicle.
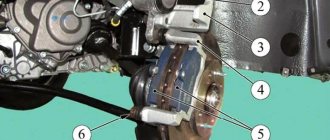
Disc brake system
If the car has a disc brake mechanism (and this is the case in all modern cars), then in this case the brakes are considered fixed; there are two fixed pads and a caliper, which consists of a body and cylinders. When you press the brake pedal, the disc is simultaneously compressed by two pads.
There are also calipers with a floating caliper; when braking, the piston of the caliper cylinder presses on one pad, causing it to move; it, pressing against the disc, moves the floating caliper caliper, ensuring that the second pad is pressed against the disc.
When is it time to replace brake pads?
All parts have their own service life, which can be determined by mileage. It is usually written down in the vehicle's owner's manual.
Recommended article: What is a spoiler and what is its role in a modern car?
On average, brake pads last for 10-15 thousand kilometers for domestic cars, and if we talk about foreign cars, then their brake pads are more durable, they last for 15-20 thousand kilometers. And in sports cars, with serious use, brake pads last for 5000 km.
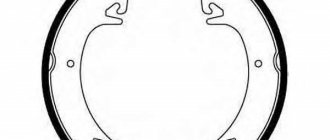
There is another type of braking system - drum brakes, today this is a rarity, but what is good about them is that the pads in them need to be changed much less often - once every 100,000 km. mileage Depending on how the vehicle is used and other factors, the pads may wear out faster or slower.
Brake pad wear sensor
Many modern cars have special sensors that determine the degree of pad wear. Usually this sensor looks like a light; if it lights up, it means it's time to change the pads.
Of course, there are cases when, due to oxidation of the contacts, the light bulb may not warn you that it is time to change the pads, so it is sometimes important to visually determine for yourself the condition of the pads and the brake system as a whole.
It is important to understand that if you do not replace the old pads with new ones in time, the brake disc will begin to actively wear out and then you will have to change the entire brake mechanism. You can determine the degree of wear of the pads by their thickness; if the pads have become thin, then it’s time to change them, this can be understood without a sensor.
The critical thickness of brake pads is considered to be 1.5-2 millimeters. In many cars, you can visually determine how much the pads are worn, that is, you can see the thickness of the pads, and you don’t have to remove the wheels. If the thickness of the pads is less than 5 millimeters, then it is better not to wait for the critical thickness and replace them with new ones. Safety comes first.
Recommended article: Is it possible to buy a new car for up to 300,000 rubles?
Another characteristic of worn pads is that the level of brake fluid is low, and the brake pedal is pressed quite softly. Also, a signal to change the pads is a characteristic squeaking sound when braking, and all because the pads squeak, because their plates are worn out enough and touch the brake discs.
Symptoms of Brake Pad Wear
Signs of worn brake pads include:
- increase in braking distance
- shocks and vibrations when pressing the brake pedal sharply
- squeaks and whistles when braking
- strange and inappropriate behavior of the brake system
- metal dust and shavings on brake pads and other elements.
The average service life of brake pads is: for cars with a manual transmission - 30-50 thousand km, with an automatic transmission - 25-30 thousand km, for electric vehicles and hybrids - up to 100 thousand km. But the actual service life may differ significantly from the standard ones, and depends on: driving style, road conditions, quality of parts, climatic conditions and how well the previous pad replacement was done.
Necessary tool
To replace the front brake pads you will need:
- gloves
- jack (for raising a car)
- wheel wrench (to unscrew the wheel nuts)
- screwdriver (for removing pads)
- wrench (depending on the model, you may need 12,13,14 or 17)
- clamp (for pressing the piston into the brake cylinder)
- anti-roll device (placed under the rear wheel, front and rear, to prevent the car from rolling)
- a lifting support or log (to help the jack, as the car can jump off it)
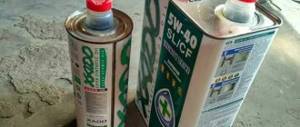
- graphite grease and WD-40
- new brake pads.
Also, depending on the car model, you may need a hammer and pliers.
Replacement procedure
1. Raise the car and remove the wheel, to do this:
- place the car on a flat surface
- turn on the parking brake and put the car in gear
- We place a wheel chock (or bricks) under the opposite rear wheel to prevent the car from rolling
- tear off the nuts (or bolts) securing the wheel
- put a jack on and lift the car until the wheel rotates freely
- place a lifting support or log under the machine. Don't rely on the jack alone!
- unscrew the nuts (or bolts) and remove the wheel.
2. Removing the brake pads:
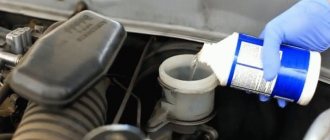
- unscrew the cap of the brake fluid reservoir (to make it easier to press the piston into the brake cylinder)
- unscrew the wheel to the side where the pads are replaced
- Use a screwdriver to slightly move the pads away from the disc, releasing the piston pressure (this will allow you to lift the caliper housing and easily remove the pads)
- If there is a wear sensor, then carefully remove it
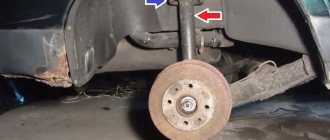
- We determine the bolt that, when unscrewed, will allow the caliper body to be folded back without touching the brake hose (as a rule, this is the lower bolt) and unscrew it. Use WD-40 if the bolt won't come off
- tilt the caliper body to gain access to the pads (if this cannot be done, you will have to unscrew the second bolt)
- carefully remove the brake pads, while remembering how each pad was attached (if you don’t rely on memory, you can take several pictures).
Now you can take a closer look at the level of wear on your brake pads. If the brake pads are worn unevenly, this may indicate that the caliper is sticking when moving along the bushing guides. This is due to the anthers, which need to be replaced and well lubricated with graphite lubricant. Perform a visual inspection of the brake disc and brake hose for damage. Do not press the brake pedal with the caliper removed; this will cause the piston to fall out of the cylinder and cause brake fluid to leak.
3. Installing new brake pads:
- lubricate the piston of the brake cylinder (no grease allowed on the working surface of the brake pads!)
- press the caliper piston inside the drum all the way using a clamp (in some models it is enough to turn the piston so that it enters the drum). At the same time, the brake fluid level will rise, and it is necessary to pump out the excess
- install brake pads, wear sensor (if equipped) and damper linings
- install the caliper in place and tighten the bolts
- put the wheel back in place and lower the car
- If necessary, add brake fluid to the level.
After replacing the pads, press the brake pedal several times so that the pedal depression disappears and the pads move to the brake discs. If the pedal becomes very soft, you need to bleed the brakes. After making sure that everything is fine, you need to check how the car brakes when driving. When braking, the car should not pull to the side. There should be no knocks, vibrations or extraneous noise.
Replacement process
To change the brake pads at the front you will need a jack or any support with a lifting function. You also need a wheel wrench and a set of tools. Next, they hang up the front part of the car, dismantle the wheel on the desired side, and remove the brake hose. Then press out the piston using a wheel wrench. Do not forget that the brake fluid level will increase. It is necessary to monitor the expansion tank.
Next, dismantle the caliper. To do this, you need to unscrew the bolt and mounting bracket. Next, the pads are replaced. The entire mechanism is then assembled in reverse order.
Tips for replacing brake pads
- brake elements heat up during vehicle operation, so before starting work, let the structure cool down or use gloves
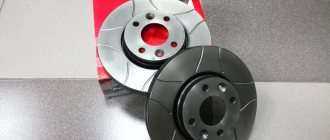
- pay attention to the brake discs, because... If they are deformed, the new brake pads will not work effectively and noise and vibration may appear.
- Pads must be replaced on both wheels of the same axle
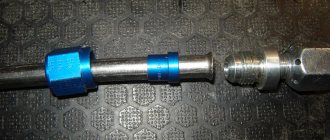
- Do not unscrew the brake hose from the caliper, otherwise air will enter the brake system
- You cannot change the pads between the left and right wheels, as well as the inner and outer ones, because this will result in uneven braking.
The rear brake pads are changed in the same way, but only if they are disc. Replacing rear drum brake pads is done a little differently.
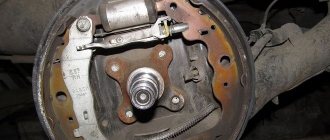
How to replace rear brake pads on disc brakes
Rear brake pad installation is very different. In addition to the standard set of tools, you will need pullers designed for the brake system of your vehicle.
- Loosen the handbrake cable;
- Release the handbrake lever;
- Knock out the adjustable pins and remove the locking spring;
- Remove the brake pads and shims;
- Clean the surface of the caliper that comes into contact with the brake pad;
- Check the condition of the dirt cover; if there is mechanical damage, you will have to go through the entire caliper;
- Be sure to check the friction surface of the brake disc for mechanical damage and measure the thickness of the brake disc. Check in advance the minimum permissible thickness of the brake disc so that after a few days you do not have to replace the disc itself;
- Push the brake cylinder pistons into the cylinder;
- Installation of brake pads. Lubricate the gasket on both sides with a thin layer of silicone grease and install it on the rear plate of the brake pad. Now install the brake pads yourself.
- Don’t forget (!!!) to apply an anti-corrosion compound to the rim of the guide hub before installing the wheel.
Make sure there is no brake fluid leakage (!!!)
Next, adjust the brakes.
And finally, we would like to draw your attention to the fact that if you doubt whether you can do everything correctly, it is better to contact a specialist. Consultations on the Internet are certainly not bad, but no Internet will come running to save you if the brakes don’t work. Everyone wants to save money, but saving on your own safety is the last thing. And if you do, check and double-check that everything is correct.