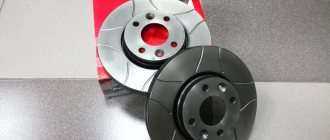
Fluid leakage, as well as depressurization of the brake system, are often caused by old, rotten or damaged brake pipes. These are very important elements. Through these lines, fluid from the reservoir is supplied to the brake mechanisms of all four wheels. If any tube has become unusable, it is better to replace it completely, if possible. Let's take a look at how to replace a brake line on most cars.
FakeHeader
Comments 55
Thank you very much for the post!
Is it permissible to do barrel rolling for GAZ and AZLK parts?
Beautiful photos! Just a sight for sore eyes! Rolling, as on the leftmost tube, is used in aviation.
Maybe I'm asking a stupid question, but were copper brake pipes used on the Volgas? The foreign analogues of those years seemed to have ordinary metal tubes... Or was this all part of a “factory improvement”? Just wondering.
Copper ones lasted until the mid-90s for sure, then I don’t know, even on the UAZ of 97th century there were copper ones. Then the supplies ran out and they switched to metal ones)))
And I filled large diameter tubes (12.16) with sand and bent them with a pipe bender. And small diameter tubes (6,8,10) using a manual pipe bender.
Did you get the fittings from a regular spare parts store? And where are the tubes themselves?
I had fittings, but they are sold in the same place as the tubes (I bought them at the car market)
what kind of roller do you use?
Tool – Jonnesway AN040043
You can't get these everywhere
There is also this device for pipes. I think you will like it
Everything is just great! I didn’t quite understand something about the spring pipe bender? You put the spring on the tube and use your hands, a hammer... to bend it?
What kind of hammer?) They bend easily by hand) The spring is needed so that the radius is even and the tube does not flatten.
Everything is just great! I didn’t quite understand something about the spring pipe bender? You put the spring on the tube and use your hands, a hammer... to bend it?
Copper and aluminum tubes are easy to bend by hand. A spring mandrel is used to create small radius bends. If you try to bend the tube 90 degrees, without a pipe bender it will simply break somewhere in the center.
The leftmost tube, such a cone was observed on GAZ and ZIL in the pumping system, as well as in the fuel line. I repaired it on my own equipment, a similar set.
This is what I use. I don’t know if it’s suitable for restoration, but for repairing regular cars, I heat-shrink the tubes with glue so that the tube doesn’t turn green.
What kind of heat shrink on glue?
electroplast.by/termousad…icientom-usadki-31-ttk-31 is not an advertisement, but of this kind, the glue also additionally seals.
What kind of heat shrink on glue?
The effect is like coloring.
This is what I use. I don’t know if it’s suitable for restoration, but for repairing regular cars, I heat-shrink the tubes with glue so that the tube doesn’t turn green.
Is there a pipe bender in the photo?
Yes, very simple and cheap)))
As I understand it, for one, some specific diameter?
I think up to 8mm (or up to 6mm) I don’t remember now, because... I bend it only 4.2mm
I have never seen a better car restoration! Good luck to you!
I always forget about the second fitting)))
Great, I have a similar thing, recently I broke a pipe near the main one, so I had to pull a new one through the whole car, and remove the fender liners and extensions...
Familiar... (((((Once I completely bent the line, all that was left was to flare the tip of the tube. I removed the rolling and saw that the cone had a crack. I had to order the tube again and bend it, like a damaged tube.
Yes, I also felt offended when I had already changed it and it turned out that it was possible to roll it in our city.
Yes there are companies. But when I went to see them, it turned out their pipe bender was broken and they were rolling it with hammers. That's why I bought myself a set.
Well written, and the photos are absolutely super duper! It is obvious that with love...
Non-ferrous metal tubes in vehicle systems
We won’t touch the radiators for now, this is a separate topic. Let's take an interest in the pipes that are responsible for the operation of the car's brake and fuel systems. Rotten brake pipes are a problem not only of old Soviet cars, but also of newer foreign cars that have been driving on roads generously sprinkled with salt and all sorts of chemicals for several years. Tubes become unusable primarily due to the fact that they are affected by an aggressive chemical environment. In winter, we have plenty of this environment under our wheels. With human-made road surfaces, the salt comes off the roads along with the snow, but with our roads, it can remain there until next winter.
Causes of brake pipe failures
But this is not the only reason for the wear of sealed tubes. From salt they only rot, and from constant strong constrictions of fittings, improper fixation, breaks and bends, they receive severe mechanical damage that is incompatible with life. This is not the fault of the pipes, but of unfortunate craftsmen who do not know how to properly handle soft or brittle metal. One way or another, the time comes to replace the tubes, and if the required configuration is not found, which is almost impossible, then you have to make the tube yourself. Cut off the required piece, put on fittings and flare. And you need to be able to do this. Flaring brake pipes with your own hands is not a difficult task, quick, and inexpensive.
Pros and cons of do-it-yourself tube flaring
There is no doubt that when working for yourself, you will treat all stages of the technological process with the greatest possible responsibility and diligence. Of course, in this case you will not need to go somewhere and pay someone to do such work.
But there are also obvious disadvantages - we have already given approximate deadlines for routine replacement of brake pipes. And since they fail relatively rarely, it is quite possible that you will only have to use the tools you purchased or made yourself once, or at most twice. However, if you own a very worn-out car, it is likely that you will have to replace the tubes much more often.
Flaring brake pipes with your own hands is not a difficult task, but only if you have specialized tools. And what is more profitable - to buy it, make it yourself, or still take the tubes to specialists, you must decide for yourself. The main thing is that the brake system of your car is always in perfect condition.
I recently completed some copper piping in the engine bay.
Brake pipe flaring kit
You cannot prepare copper tubing for use with your bare hands. To do this you need to have at least minimal equipment. Although the metal is soft, the end of the tube must exactly correspond to the landing cone, otherwise we will not achieve a sealed system. Ideally, for flaring tubes, they use a machine that needs to be purchased, but if we have the opportunity, we can use a homemade kit, which, once done, we will use for many years. And it will come in handy more than once, believe me. Here is his drawing.
It is not anything complicated. This is a frame made of two corners 5mm thick and a shelf 32mm. The length of each corner is 100 mm. The drawing shows that the set is suitable for tubes with a diameter of 9 and 12 mm. The bed itself is completed in ten minutes with a sharpening machine, drilling machine and grinder. Both corners are fastened with two M8 bolts; holes and chamfers are drilled in them when assembled. You will either have to order the mandrels from a turner, which is not at all problematic, or grind them yourself. But with the help of such a kit, any tube turns into a perfectly prepared part. The flaring process occurs in exactly the same way as using a machine, which we will discuss later.
Device, principle of operation
So, the driver stops the car by pressing the brake pedal. The latter affects the brake force booster, and the latter acts on the GTZ, which compresses the fluid in the lines.
Under the influence of the GTZ force, the liquid is compressed and passes into a zone with minimal pressure. These are tubes, and then - working mechanisms. The brake fluid presses on the drive and the caliper compresses the pads. When the pedal pressure is released, the pressure in the brake booster decreases. Springs in the mechanism release the pads. The liquid moves back into the expansion tank - into the area where the pressure is minimal.
The movement of brake fluid is carried out through copper tubes. The latter are connected to the main brake cylinder and laid along the bottom of the car to the brake mechanisms. The connections of the tubes to the mechanisms and to the GTZ are made in the form of threads - this ensures maximum reliability. After all, the pressure in the line can be quite high.
To increase the reliability of the systems, the tubes are connected to the GTZ diagonally. This makes it possible to use the brake if the latter fails. For example, from the GTZ one of the tubes connects the front left brake mechanism and the rear right one. Another tube directs fluid to the front right and rear left wheels. To ensure that the pressure in the system does not exceed the permissible value, a pressure regulator is installed at the places where all the tubes are connected. In common parlance he is called a “sorcerer”.
Brake Tube Flaring Machine
the simplest tube flaring machine will cost you 600-700 rubles. But this will not be the highest quality product. We would recommend not going below 1800, otherwise there is a chance of wasting your money. We showed several sets and machines in the photo. One of them is more expensive, the second is cheaper, but they have the same essence.
The machine consists of a bar that holds the cutting. Actually, our homemade set also has the same structure, only the branded sets are required to include:
The use of tubes in the design of vehicles
Modern machines use several hydraulic systems with different main lines. One of them is the braking system. The working fluid moving through it must be isolated from the external environment due to tightness.
You need to know that thanks to good connections at the joints of the pipes, it is possible to achieve a high degree of tightness for the vehicle’s vehicle.
The success of reliable connections depends on the quality of the flaring. This operation uniformly increases the diameter of one tube tip. At the counter tube, the diameter of the tip is reduced to ensure rolling (entering a small diameter into a larger one and holding the pair in this position for a long time).
If the tubes in any of the sections receive mechanical damage, then due to depressurization of the system, part of the main wiring must be replaced. At a car factory, flaring is done using special equipment that contains hydraulic, electrical and mechanical drives. In garage conditions, a device for flaring brake pipes is most often mechanically driven by the muscular strength of the performer.
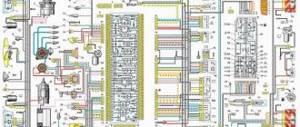
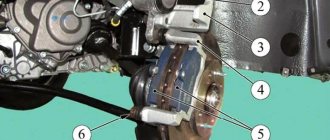
Main elements of the brake system
The brake system of the VAZ 2109 car includes many auxiliary parts, but the main design elements are:
- GTZ. Master brake cylinder. The most important part of the system, which creates pressure in the pipes. This element is made of a piston moving along an ideal, flat surface. Rubber rings are used to seal connections between components.
Please note that these rings must be replaced during repairs, regardless of whether they are intact or not.
- The brake fluid that is poured into the GTZ is quite aggressive. It contains many additives. But they are the ones who guarantee high-quality engine operation. The disadvantage of such a system is that the components of this liquid quickly evaporate. Therefore, it is better to change the brake fluid at least once a year;
- Vacuum booster. It is located between the passenger compartment and the compartment where the engine is located. It is a large container, cylindrical in shape. The booster is connected to the master cylinder and the booster runs a hose to the fuel injection system (carburetor).
- The function of this element is to make driving easier. And this simplification lies in reducing the effort required to press the brake pedal.
On a note. If you think that this element of the brake system is not particularly important, then drive an old-style Zhiguli, which does not have a vacuum booster. The difference is simply huge, both in ease of control and in braking efficiency;
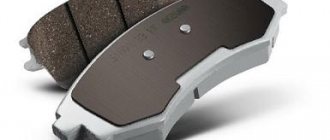
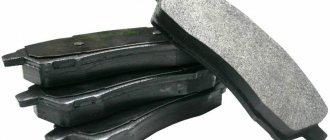
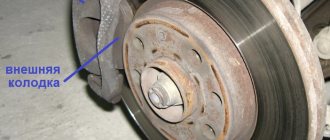
- Brake calipers. The function of these calipers is to press the brake pad against the top of the disc. When repairing a VAZ 2109 model car, calipers are replaced in very rare cases for the reason that their service life is very long. The design consists of a housing made of aluminum, in which there are two holes. A tube is connected to one of the holes using a hose. A fitting is inserted into the other. Inside the device itself there is a piston made of steel that activates the pads;
- Pressure regulator. An element whose purpose is to increase the efficiency of the braking system. The entire braking process is 70-80 percent done by the wheels of the front axle. The remaining percentage of braking is performed by the rear brake system of the VAZ 2109. Of course, this parameter is conditional and depends on many factors such as the load on the car, etc. Therefore, the developers made sure that the brake system of the VAZ 2109 model could, independently of anyone, regulate the forces on the wheel calipers of the front and rear axles.
This simple technology reduces the pressure in the pipe supplying fluid to the rear wheels.
Read all about car tuning here, current news in the world of sedans here.
Tools used
Before flaring a brake pipe at home, some craftsmen order special kits for this operation from online stores. The kit contains the following tools:
- universal pipe cutter;
- grip or clamp;
- dies designed for different pipe diameters.
The flaring dies have markings indicating the type of pipe. They can be metric or inch. The process uses a conical screw.
More experienced craftsmen can save on purchasing a kit by making the necessary tools themselves. To do this, you will need a conical blank, on which there is a cone with the required angle.
Copper tubes easily yield to the pressure of the steel tool used. However, in addition to great effort, a certain precision is required, because distortion during impact can lead to tears in the edge of the workpiece, and this means defects and loss of tightness. You can resort to such methods only in extreme cases.
It is more appropriate to take a special expander, which simplifies the work through the use of a rotating handle. The operation does not last long and is performed in one pass, but, unfortunately, 100% results are not achieved in every case. Much depends on the immediate condition of the tube. Thin worked out walls will give an imperfect result and can lead to jamming of the workpiece.
A classic brake pipe flaring kit should include a set of rollers with carbide surfaces. Due to the cylindrical shape of the tool, rolling along the surface of the tube occurs with increasing force. The operation goes smoothly and troubles are practically excluded.
Rollers are able to cope even with imperfect workpieces . The result is a smooth and even surface, free of any roughness or defects.
Also, a solid cone is an effective tool for flaring brake pipes. It has to be pressed into the free part of the pipe. In this case, the tube is secured in a stationary yew. The result is at a high level, comparable to the work of rollers, but you need to stop in a timely manner so as not to damage the workpiece.
Features of the technology
Car repair, no matter what it involves, rarely evokes pleasant emotions in the car enthusiast. This is also explained by the fact that such an event, as a rule, is associated with certain financial costs. Meanwhile, if we talk about a situation in which it is necessary to flare the brake pipes, the costs of such a procedure can be minimized if you do it yourself.
Read also: How to disassemble a Vitek 2200w iron video
So, in order to flare brake pipes with your own hands, you need not only to study in detail the theoretical information on this issue and watch the corresponding video, but also to purchase a special device. The brake line flaring kit, which can be purchased fairly inexpensively at many automotive stores, includes the following tools and accessories:
- pipe cutter;
- fitting used as a connector;
- ticks.
The flaring kit usually includes a clamp for various tube sizes
Using such a simple set, to which you need to add a drill (to chamfer the ends of the pipes), as well as gasoline needed as a lubricant, you can not only perform high-quality flaring with your own hands, but also save a decent amount of money that would have to be paid to specialists service stations.
When replacing a tube with a new one, first make a copy similar to the old one
Immediately before the flaring procedure with the brake pipe, the following steps must be performed.
- The tube is unscrewed from the brake cylinder or caliper using a tool or manually.
- By visual inspection, the presence of damage on the surface of the tube is determined. If they are close to its edge, then the tube can be restored; if not, then it must be replaced with a new one.
- Using a tool such as a pipe cutter, the damaged area is cut off from the edge of the tube and the cut edge is treated with gasoline.
- The cut end of the tube is clamped with pliers and a chamfer is removed in its inner part using a drill with a drill of the appropriate diameter.
- The area of the inner surface of the tube where the chamfer was removed is cleaned of chips. After this, the end of the tube is inserted into the fitting, which acts as a connector.
Carefully shorten the tube using a special cutter
After all the above steps have been completed, the tube must be flared, for which it is best to use a special machine. Flaring performed using such a machine is carried out according to the following algorithm.
- The end of the tube that needs to be flared is inserted into the clamping hole of the machine. In this case, the part of the tube protruding from the clamping mechanism of the machine should be approximately 5 mm.
- Using a special punch with which such a machine is equipped, the end of the tube is flared.
- If it is necessary to flare the second end of the tube, the entire procedure described above is performed in the same sequence.
We squeeze the die with a press, visually monitoring the formation of fungus, and we get a high-quality compressed tube
As a result of performing flaring using such a device, the rules and subtleties of which are best learned from the video, the end of the brake tube becomes neatly expanded. The use of a special machine allows you to adjust the parameters of such an expansion, because for brake systems used on cars of different brands, they can vary significantly. As a rule, in special kits with which you can flare brake pipes yourself, there is also a pattern that allows you to monitor the result of the technological operation.
Unfolding the end of the tube using a special knife located on the back wall of the cutter
Thus, flaring the tubes used in the brake system of a car is not difficult if you use special tools and devices for this. By performing such flaring yourself, you not only save money, but also fully control the process of performing a technological operation, the results of which determine the performance of your vehicle. In such cases, you should always remember that the car mechanic is not doing the work for himself, and therefore treats it as such. In order not to worry about the results of self-repairing your vehicle, you need to follow a few simple recommendations:
- strict adherence to instructions, which can be videos;
- use only high-quality tools, devices and consumables for flaring;
- strict control at all stages of repair activities.
By following these recommendations, you can not only qualitatively flare the brake pipes, but also perform many other works related to the maintenance and repair of your car, without worrying about the result of these activities.
“>
Performing work on a homemade machine
A self-made machine can be used for a long time in the future. It will be useful for car owners whose cars have high mileage.
The tools you will need are a sharpening machine, a grinder and a drill. The materials will be custom-made mandrels, angles (100x32x5 mm, 2 pcs.) and a pair of M8 bolts. The corners are bolted to each other, and holes are drilled in the base of the frame. Don't forget about the chamfer for the edges of the holes.
The process of working on a homemade machine will be similar to working on factory equipment. The algorithm consists of the following points:
- We fix the workpiece so that the outer edge protrudes 5–6 mm beyond the jaws of the vice;
- select a cone of the required diameter;
- the fittings must be multi-directional;
- slowly screw in the cone, flaring the edges of the tube until it fits in to the extreme mark;
- lift the cone and remove the formed burrs.